When it comes to copycat recipes, these Twix Bites are spot-on! Whether you're satisfying a chocolate craving, searching for homemade Valentine ideas, or looking for an edible gift for any occasion, these treats are a must-try. With minimal ingredients and effort, you don't need to be a professional baker to make them.

Jump to:
The soft and chewy caramel center is the perfect contrast to the crunchy wafer cookie and the layer of chocolate on the outside. Be careful, they're bite-sized and highly addictive!
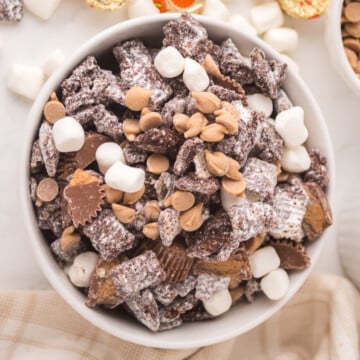
If you like homemade candy recipes, you will love my layered candy bark and these Take 5 candy bites. My chocolate chip cookie dough brownie bites are really good too as are these peanut butter pretzel bites.
Why You'll Love This Twix Bites Recipe
- It's just 3 ingredients: This homemade Twix recipe uses only 3 store-bought items that come together with minimal prep work.
- It's great for beginners: If you are not a seasoned chef or baker, this is the perfect treat for you to make. It's simple and easy to follow, but the flavors still impress!
- It's budget-friendly: With minimal ingredients needed, this is an affordable dessert that I like to make often with this coconut candy.
Ingredients
Below are the only 3 things you'll need to make this Twix cookie recipe: caramel, chocolate, and of course, wafer cookies!

- Caramel squares: You can buy these in the candy or baking aisle at your local grocery store. Kraft or Werther's brands are great choices!
- Vanilla wafer cookies: I recommend the classic Nilla wafers for this because they are the perfect size for the caramel square. Feel free to try another brand of vanilla wafer if you'd like.
- Chocolate chips: I use semi-sweet chocolate chips for this Twix bar recipe to avoid it being overly sweet. You can use milk or dark chocolate chips if you prefer.
See the recipe card below for exact ingredient amounts, nutritional information, and detailed instructions.
Variations
- White chocolate peanut: Try this homemade Twix candy with a melted white chocolate coating and add chopped peanuts to the caramel for a rich and crunchy bite.
- Dark chocolate almond: Add almonds to the caramel and cookie and then coat it in dark chocolate for a new indulgent treat.
- Milk chocolate peanut butter: Replace the caramel squares with a scoop of creamy peanut butter and coat it in milk chocolate for a sweet and salty rendition.
You should try making my crunchy butter toffee if recipes like this speak to your heart, and your stomach.
How to Make Twix Bites
To get started on your Twix dessert, preheat your oven to 250°F. Then, line two pans with parchment, one for the caramels and one for the cookies. These steps will make things much quicker and easier.

Step 1: Arrange the caramels and put them in the oven. Place the caramel squares onto one of the parchment-lined pans. Put them in the oven for only about 5 minutes to soften them. Once soft, set them aside.

Step 2: Arrange the wafer cookies. Place the Nilla wafers onto the second prepared pan.

Step 3: Add the caramels. Flatten your softened caramels and add them to the tops of the cookies. Gently press down and shape them so they fit the cookie.

Step 4: Freeze them. Pop the pan of caramel topped cookies into the freezer for 15 minutes to set the caramel. They don't have to be frozen, just no longer warm or gooey.

Step 5: Melt the chocolate and dip the cookies. Melt your chocolate chips in a microwave-safe bowl in 30-second intervals. Give the chocolate a good stir in between each interval just to ensure they all melt evenly. Use a fork to carefully dip each caramel cookie into the melted chocolate. Gently tap the fork to help the excess drip off before you place them onto the pan (or use a metal rack over a pan if desired).

Step 6: Set and serve. Allow them time to set at room temperature before serving. Once the chocolate is dry, enjoy a scrumptious Twix bite!
Recipe Tips
- Work quickly: Don't let the caramel squares cool completely before pressing them onto the cookies. They cool fast since they only spend a short time in the oven.
- Keep an eye on the caramels: Keep a close eye on the caramel squares in the oven; they only need a few minutes to soften. If they melt, they'll become harder to work with.
- Handle with care: Nilla wafers are delicate and prone to crumbling, so be gentle, especially when coating them in the melted chocolate.
If you love recipes like this copycat candy, you may also enjoy these Almond Joy bites.

Storage Directions
- Storing: Store the Twix Bites in an airtight container at room temperature for up to 2 weeks. You can store them in the refrigerator, but note that the caramel will firm up. To freeze, place them in a Ziploc bag in the freezer for up to 2 months.
- Make Ahead: It's easy to make these ahead for a party or a fun weekend snack. Prepare them at least a few hours in advance so they have plenty of time to set!
Serving Suggestions
- Enjoy this yummy Twix dessert as an ending to a quick and easy meal. Frito pie casserole and chicken and gravy in the crockpot are some of my favorite dinners for this.
- These candies would make the perfect ice cream topping! Try them with monster cookie ice cream or M&M ice cream.
- These tasty bites are great for decorating a simple dessert like chocolate mousse pie. This would elevate the flavor and the presentation!

Recipe FAQs
Sure! Place the chocolate chips into a heatproof bowl and set it over a simmering pot of water to melt them.
As the chocolate begins to cool, it thickens. To make dipping easier, you can add a small amount of coconut oil to keep it thin and glossy.
If you add the caramels to the cookies while they are hot, they have the potential to slide out of place. Leave them in the oven just long enough to warm and soften them.

More Delicious Caramel Recipes


If you try this recipe and love it please leave a star rating in the recipe card below or even better, drop a review in the comment section. I always appreciate your feedback. Be sure to follow along with me on Facebook, Pinterest, and YouTube for more easy recipes!

Homemade Twix Candy
Ingredients
- 24 caramel squares
- 24 round vanilla wafer cookies (I use Nilla Wafers)
- 2 cups semi-sweet chocolate chips
Instructions
- Preheat the oven to 250°F. Unwrap and place the caramels a few inches apart on a parchment-lined baking sheet. Place the baking sheet on the middle rack of the preheated oven for 5 minutes to soften the caramels. They should not melt. They should just soften so that you can reshape them.
- Meanwhile, arrange the vanilla wafer cookies, bottom sides up, on a small parchment-lined sheet pan that will fit in your freezer.
- Remove the caramels from the oven and while they're still warm slightly flatten each caramel into a circle shape that will fit the size of the wafer cookies. Place each flattened caramel on top of each cookie on the sheet pan.
- Place the sheet pan of bites in the freezer for 15 minutes to flash freeze them.
- When you're ready to coat the bites in chocolate, place 1 cup of the chocolate chips in a microwave-safe bowl and microwave in 30 seconds intervals until melted and smooth, stirring between each interval.
- Remove half of the flash frozen bites from the freezer. Using a fork, dip and coat each bite completely in the melted chocolate, letting any excess chocolate drip back into the bowl before transferring the coated bite to a parchment-lined sheet pan.
- Repeat with the remaining 1 cup of chocolate chips and remaining bites that are in the freezer.
- Let the bites set at room temperature until the chocolate is completely set.
Notes
- Only soften the caramels enough so you can shape them to fit the Nilla wafers. You don't want them to melt!
- Store the bites in an airtight container on your kitchen counter for up to 2 weeks.
- Nilla wafers are fragile and crumbly, so be gentle when dipping them in the melted chocolate to prevent them from falling apart.
Kayla says
I dare say I think these are better than the original. So hard to stop eating and totally yummy. I am going to make more tomorrow. I wish I made a double batch today THANK YOU for sharing this recipe ❤️
Karin and Ken says
They are definitely addictive. I can’t get enough of them myself. I’m glad I’m not the only one who loves them. All the best. Karin
Tammy says
WOW. These are my new favorite snack. They’re addictive and so delicious. Almost too good for words. I’m so grateful to find your recipe. I’ll be making these again soon. Thank you!!!
Karin and Ken says
You’re most welcome. They’re definitely delicious. Thank you for letting me know. All the best. Karin