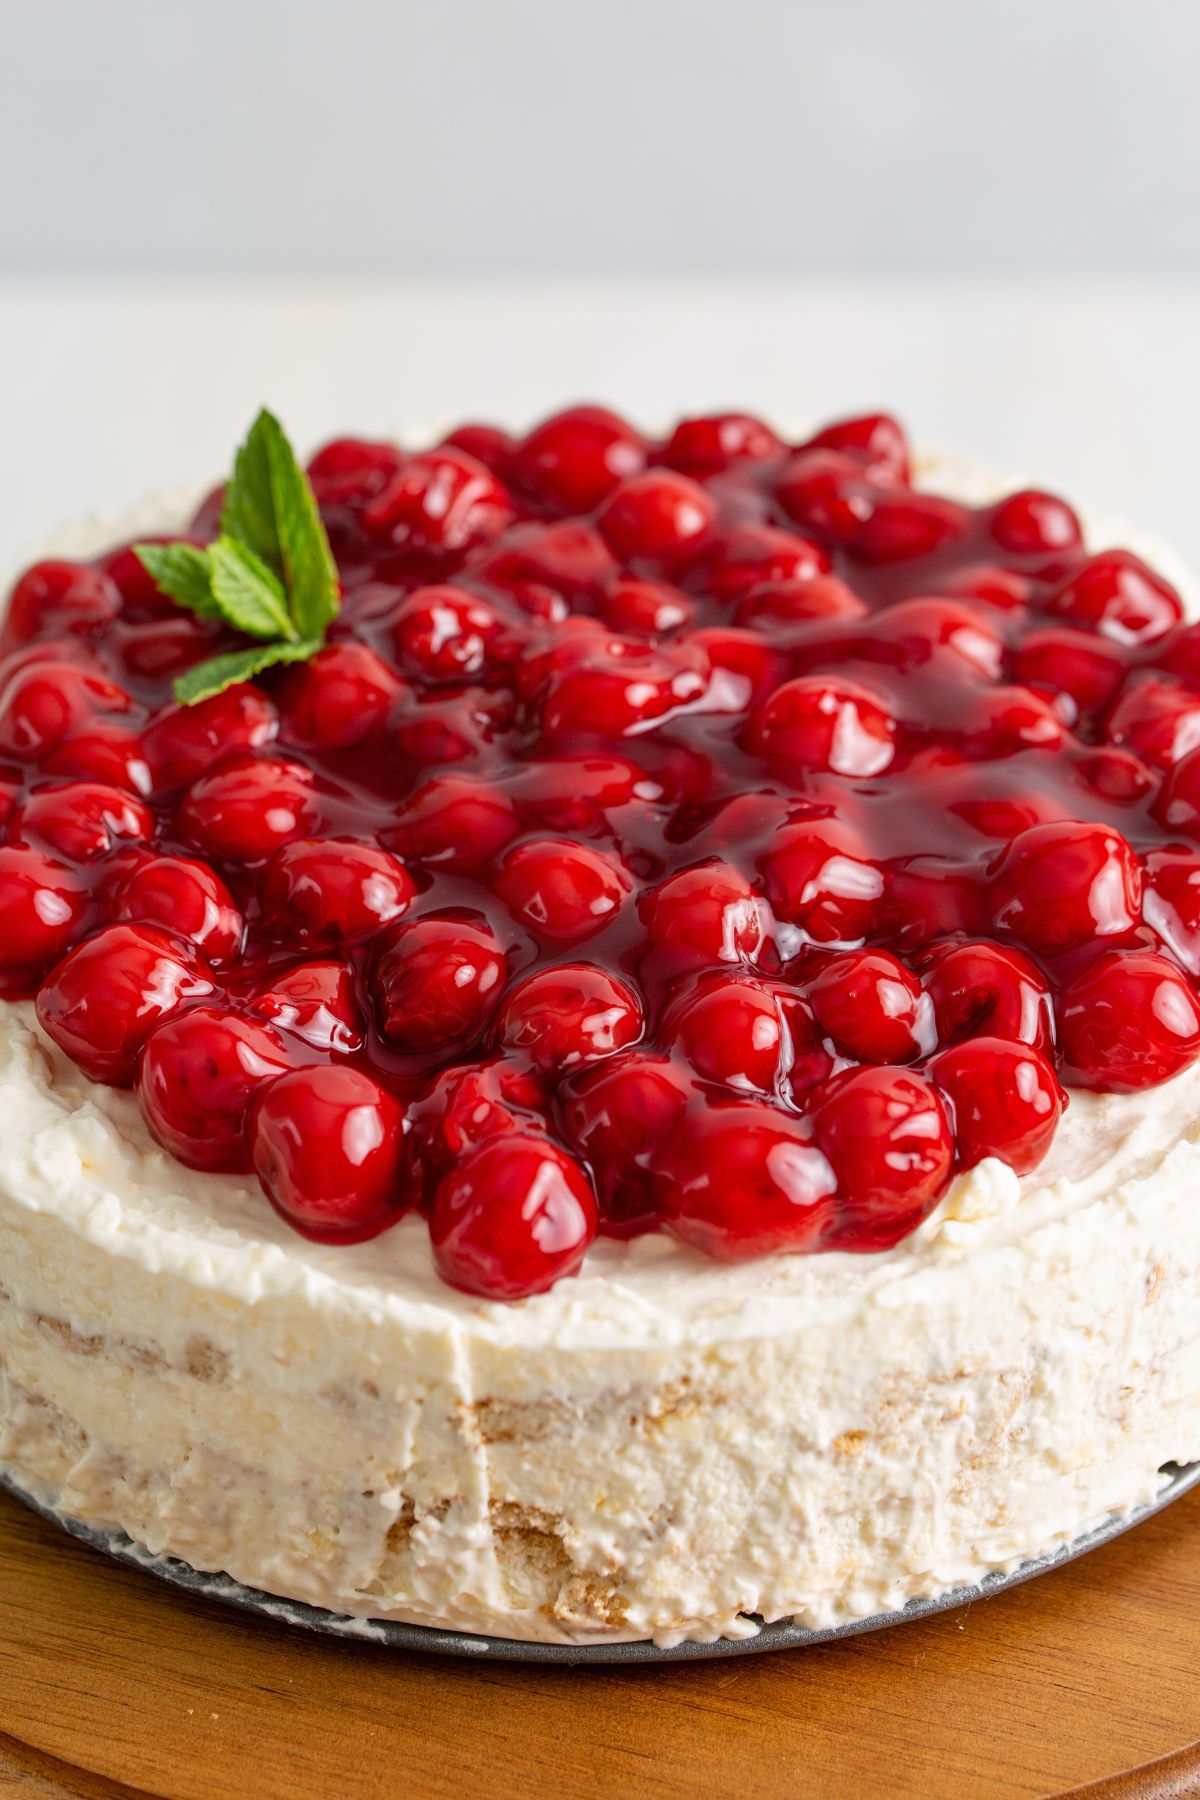
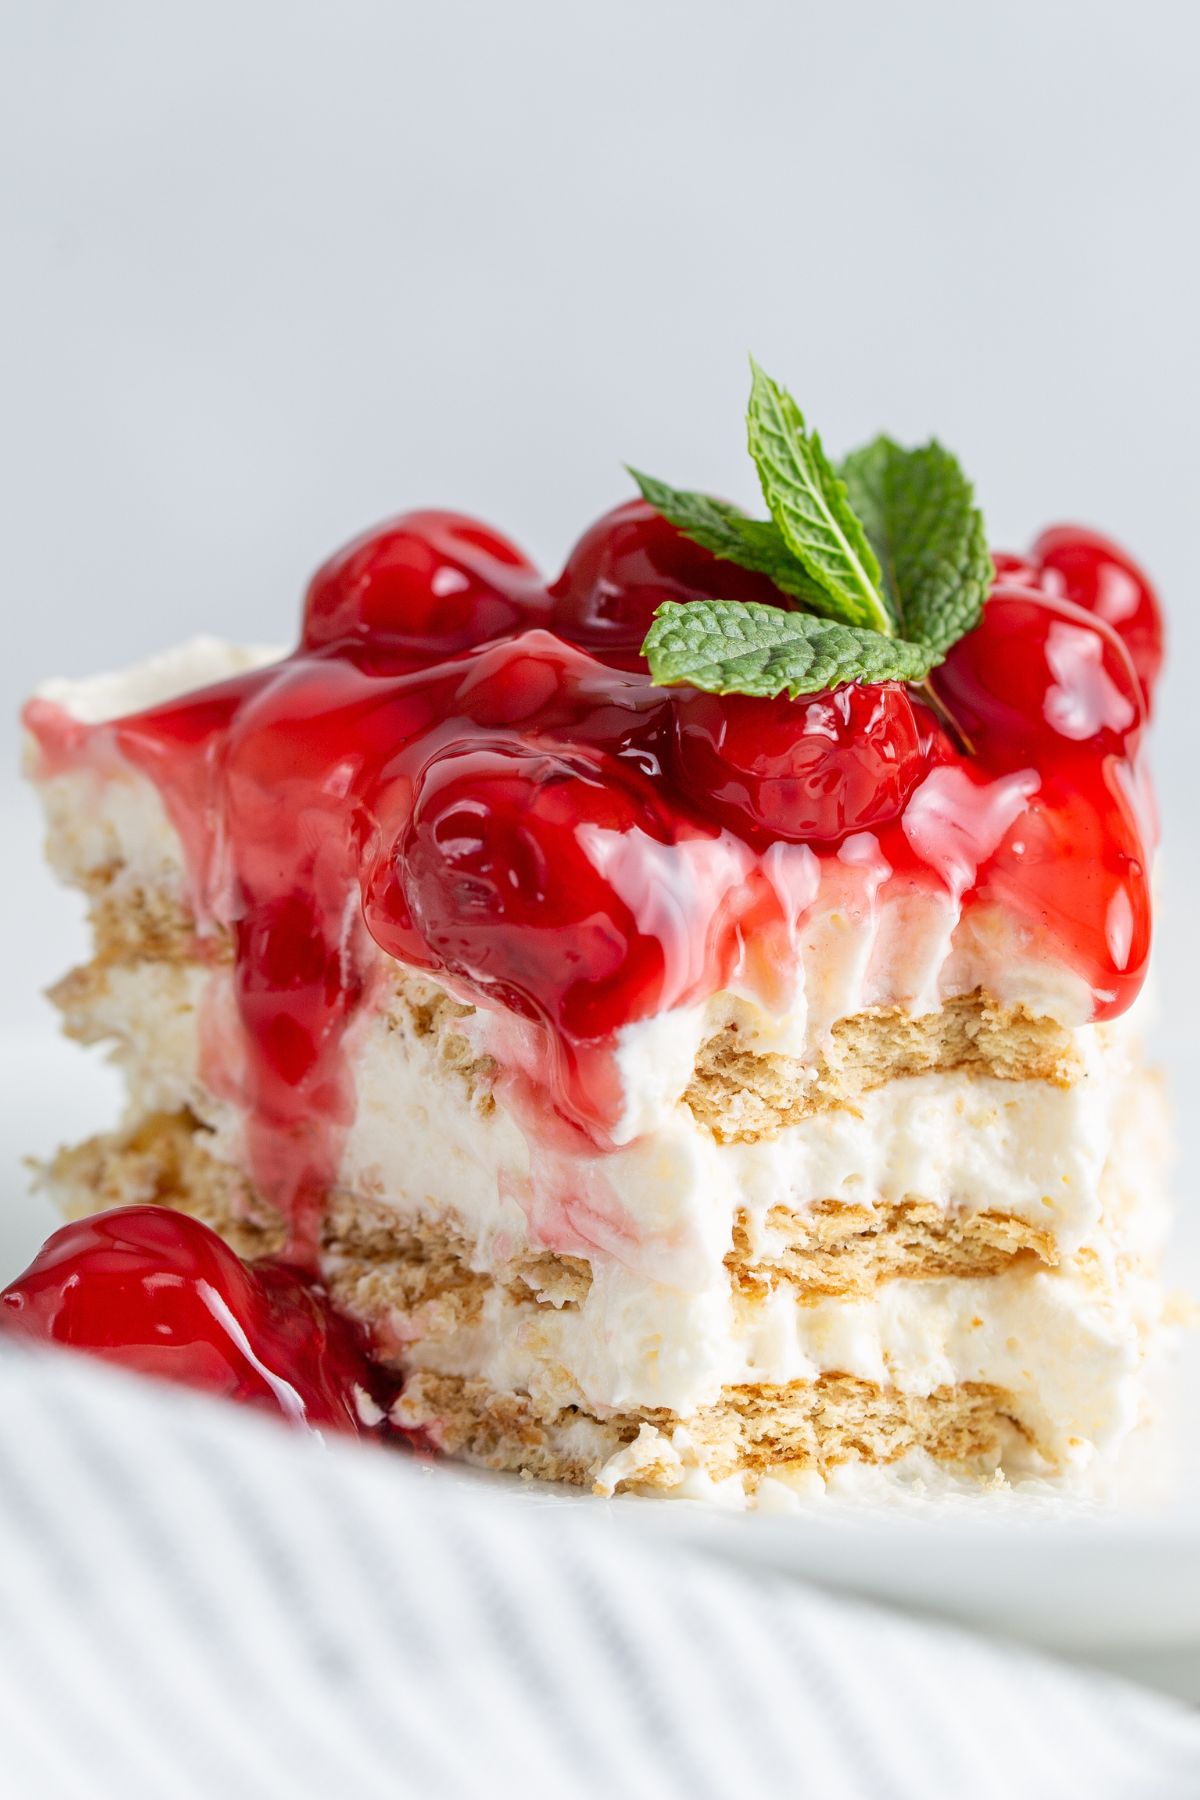
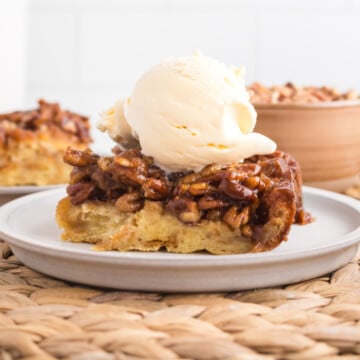
This Icebox Cake brings you all your favorite cheesecake flavors but without any of the work! With just six ingredients and zero baking required, you'll enjoy layers of tasty graham crackers, sweet, whipped cream cheese and pudding, and juicy pie filling. The easiest dessert you didn't know you needed.
With this easy icebox cake, you can expect all the delicious flavors of a classic cheesecake but without the effort. It's a no-bake recipe that requires no major kitchen skills. Instead, your time is spent layering and freezing.
The combination of pudding, Cool Whip, and cream cheese yields a light, pudding-like texture that's then frozen into the perfect summer treat, just like this Drumstick cake. Layer it with crunchy graham crackers and top it with a fruity pie filling, and you'll be whipping up this refrigerator cake, along with this ice cream sandwich cake, all summer long.
Jump to:
Why You'll Love This Recipe
- Minimal ingredients: You only need 6 ingredients for the graham cracker icebox cake to come together.
- It's a no-bake dessert: Skip the technique involved in making a classic cheesecake; this no-bake version is an easy and delicious alternative that's just as enjoyable.
- Rich flavor: Not only is it easy to adapt the flavors of the icebox cake, but thanks to the multiple layers, it's a rich dessert that everyone wants seconds of.
Ingredients
The biggest perk of this fridge cake is its simplicity. You only need a handful of ingredients for it to come together. The ones you don't have on hand, you can easily find at the store.
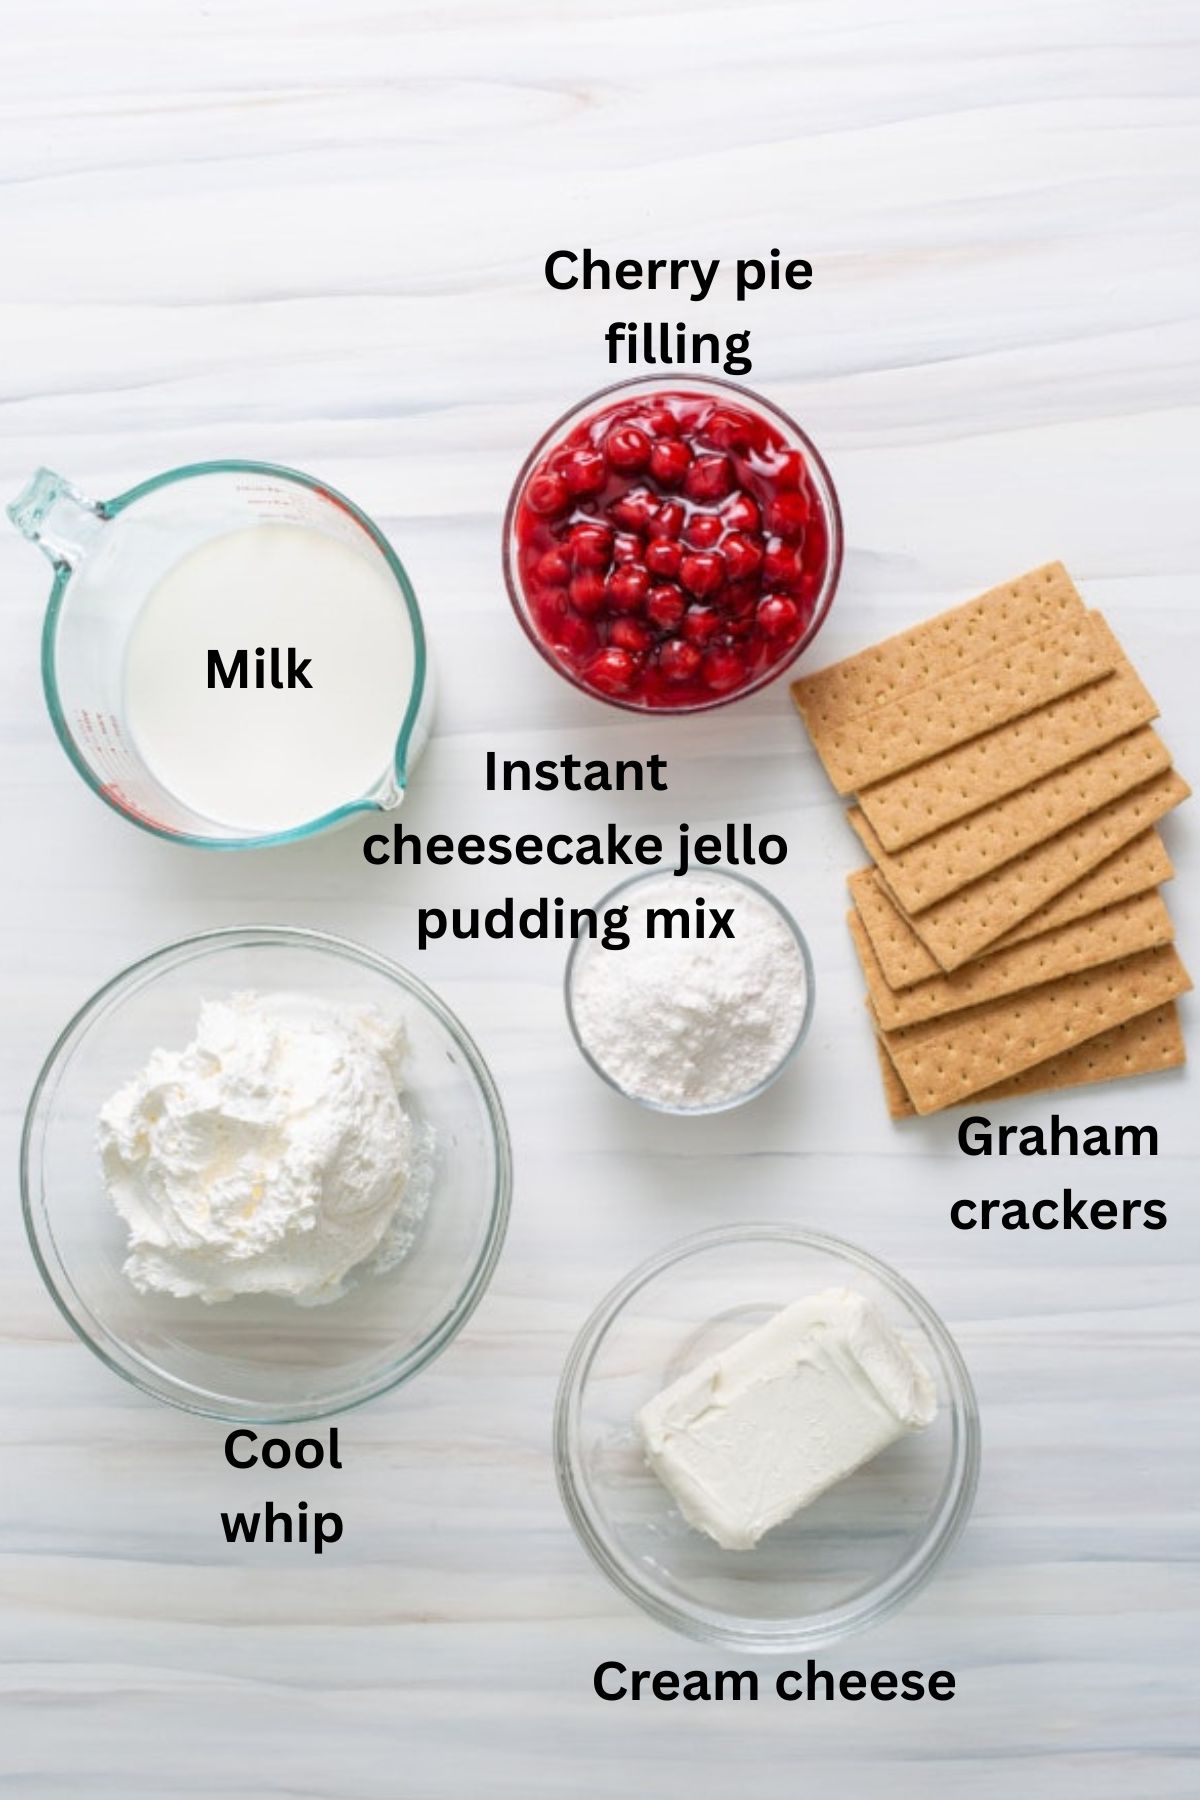
- Cream cheese: Full-fat cream cheese works best and gives the cake a richer taste. Let the cream cheese come to room temperature before you need it, so it's easier to mix in.
- Instant cheesecake jello pudding mix: The cheesecake flavor is going to pair best with the icebox fruit cake. However, another flavor, like white chocolate or vanilla, will also work well.
- Cool whip: You need your Cool Whip chilled but not frozen for it to mix with the other ingredients.
- Graham crackers: Both regular and honey graham crackers are delicious in the cake.
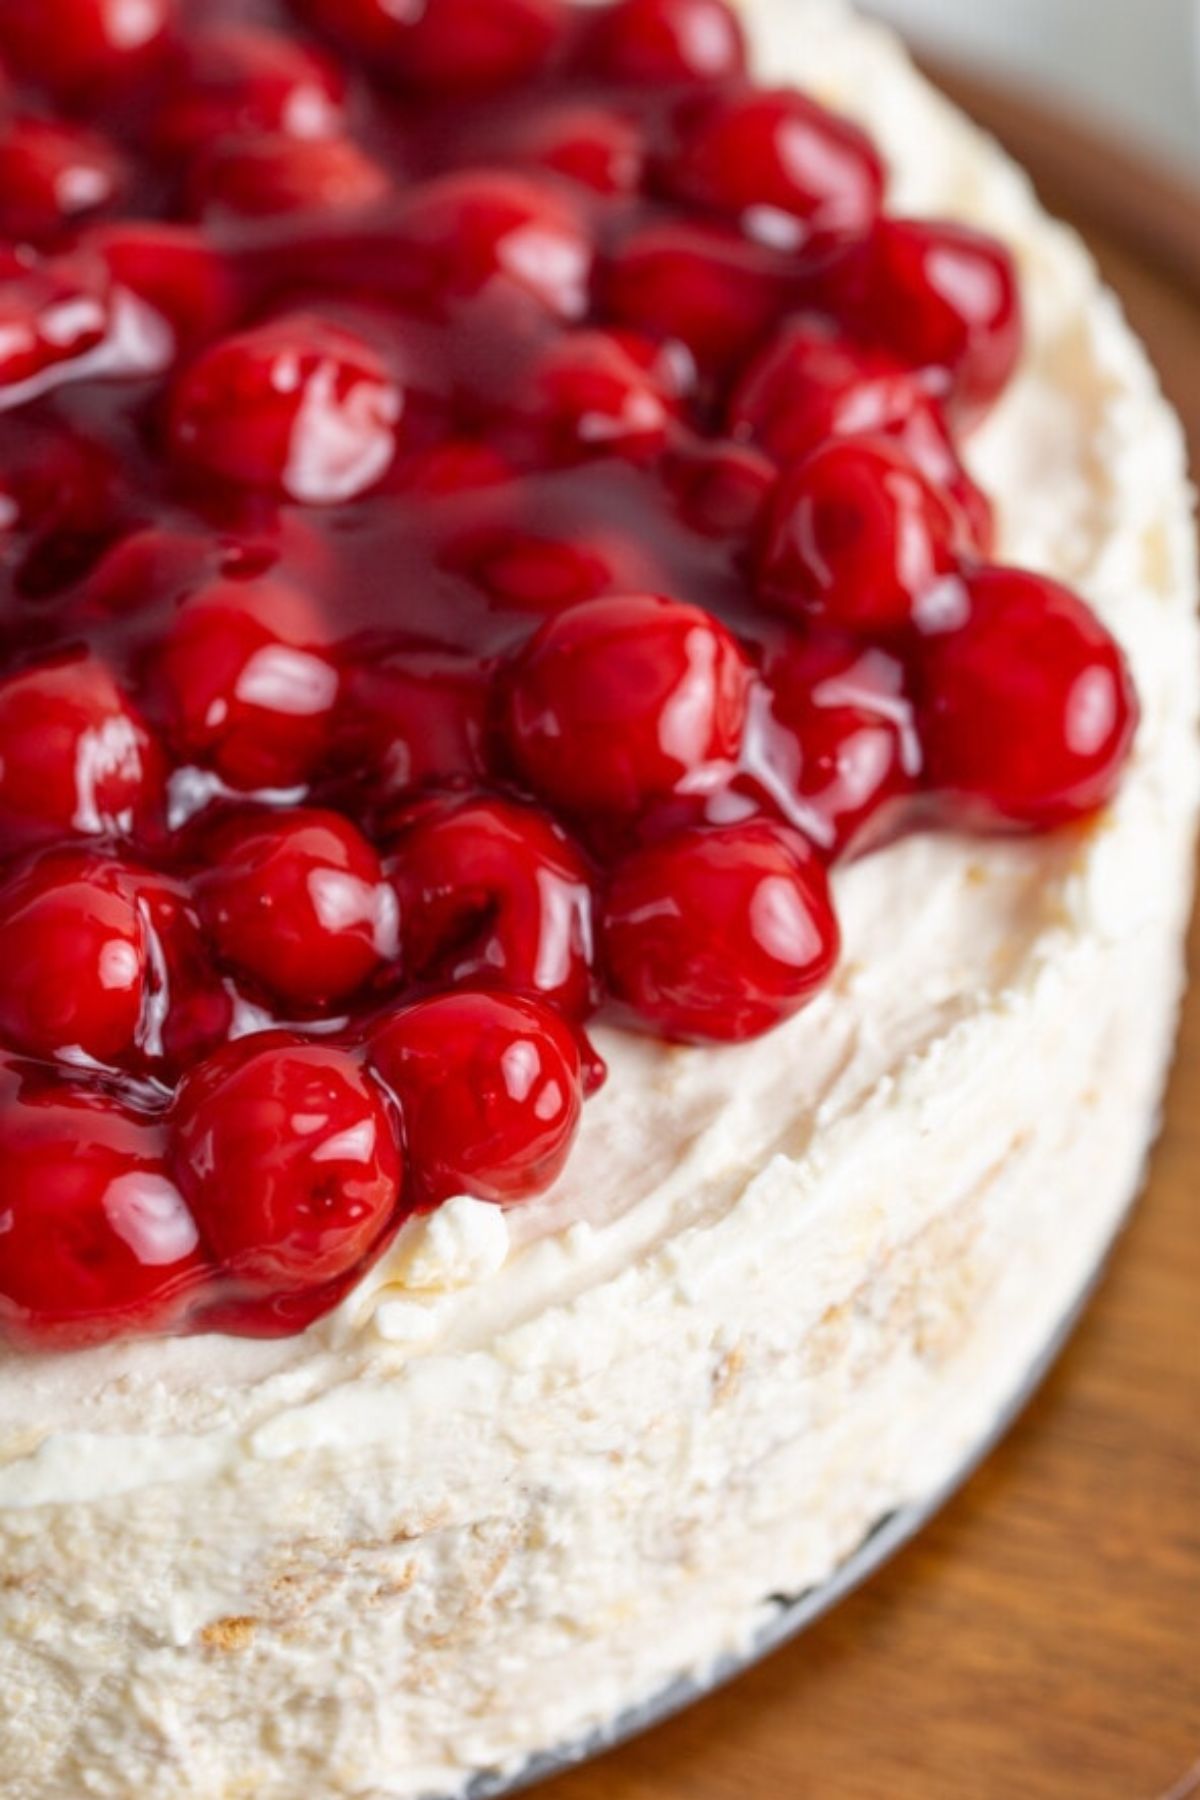
- Pie filling: Though the images are of a cherry icebox cake, any other fruit flavors can be used to switch up the taste.
See the recipe card below for exact ingredient amounts, nutritional information, and detailed instructions.
Variations
- Make it gluten-free: To make the cheesecake icebox cake allergy-friendly, use gluten-free graham crackers in place of regular ones.
- Delicious drizzles: On top of the pie filling, drizzle caramel or chocolate sauce for a bit of extra aesthetics and taste.
- Double chocolate cheesecake: If you're making this for chocolate lovers, try using chocolate graham crackers, as well as chocolate pudding mix, or add a bit of cocoa powder to the pudding mix for a rich Black Forest flavor. You can also use a chocolate-flavored Cool Whip.
How to Make Icebox Cake
The amazing part about this icebox cake recipe is its simplicity, just like many other refrigerator dessert recipes. You can skip the effort of complex cakes and instead just layer everything together. The hardest part is waiting for everything to set in the freezer!
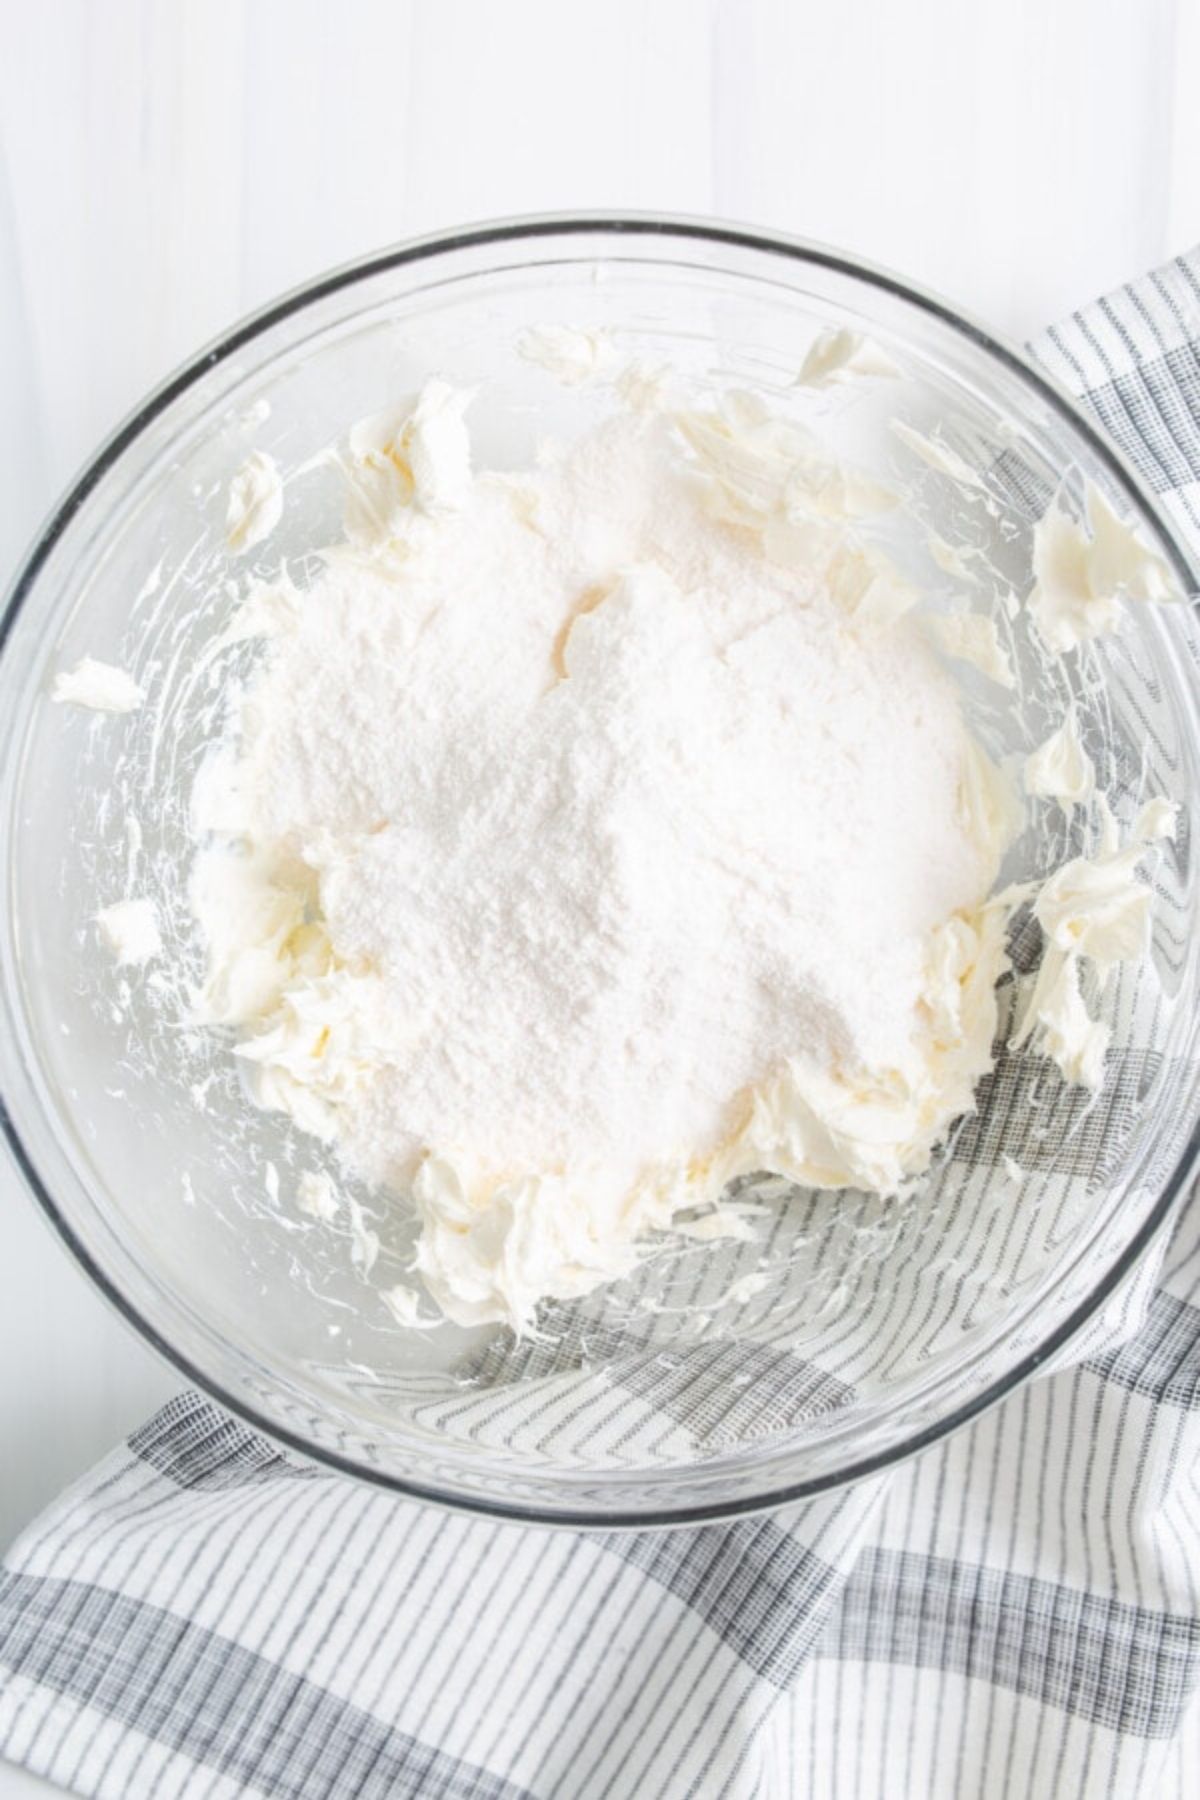
Step 1: Prep the cream cheese. Use a handheld mixer to whip the cream cheese for 1-2 minutes until it has fluffed up. Then, continue whipping it as you add in the pudding mix.
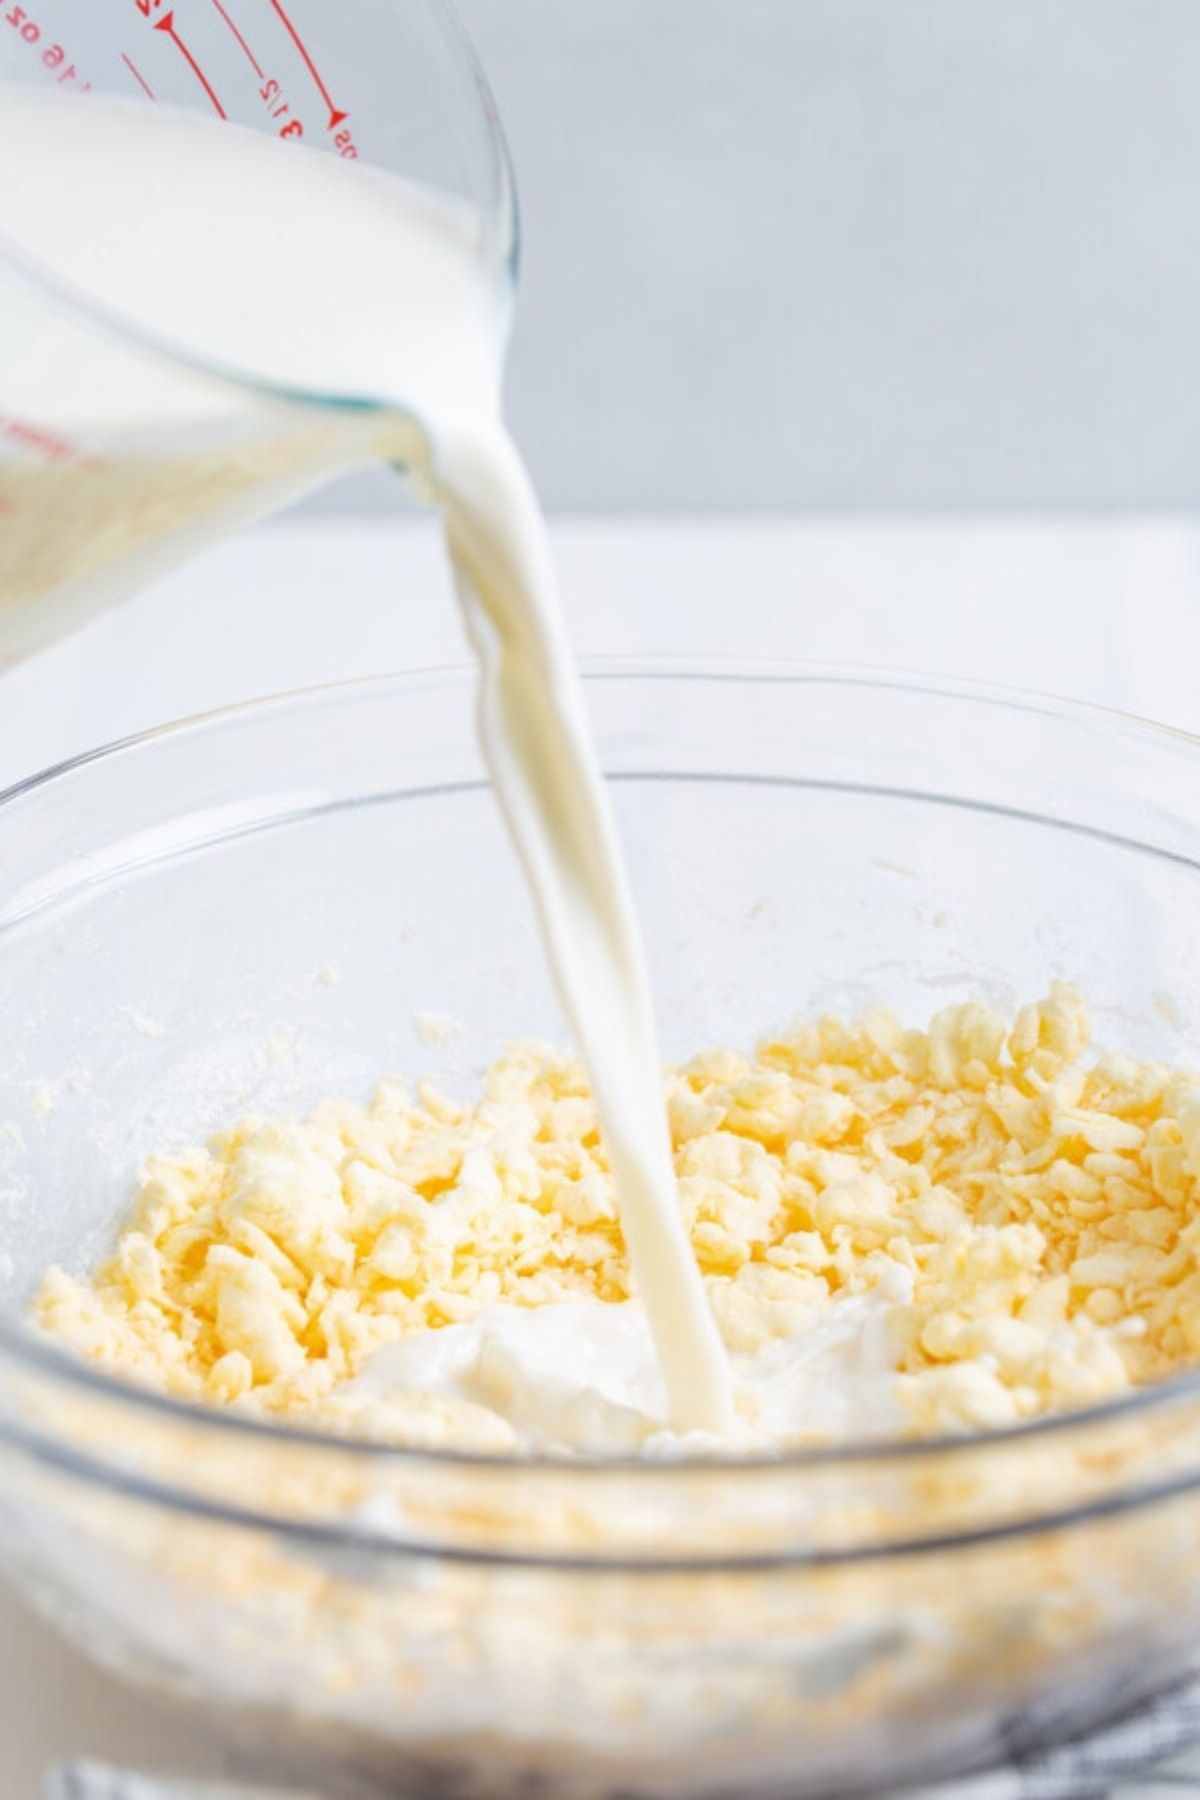
Step 2: Make the base. Slowly pour the milk into the cream cheese mixture and continue beating until it thickens. Then, fold in the Cool Whip with a spatula.
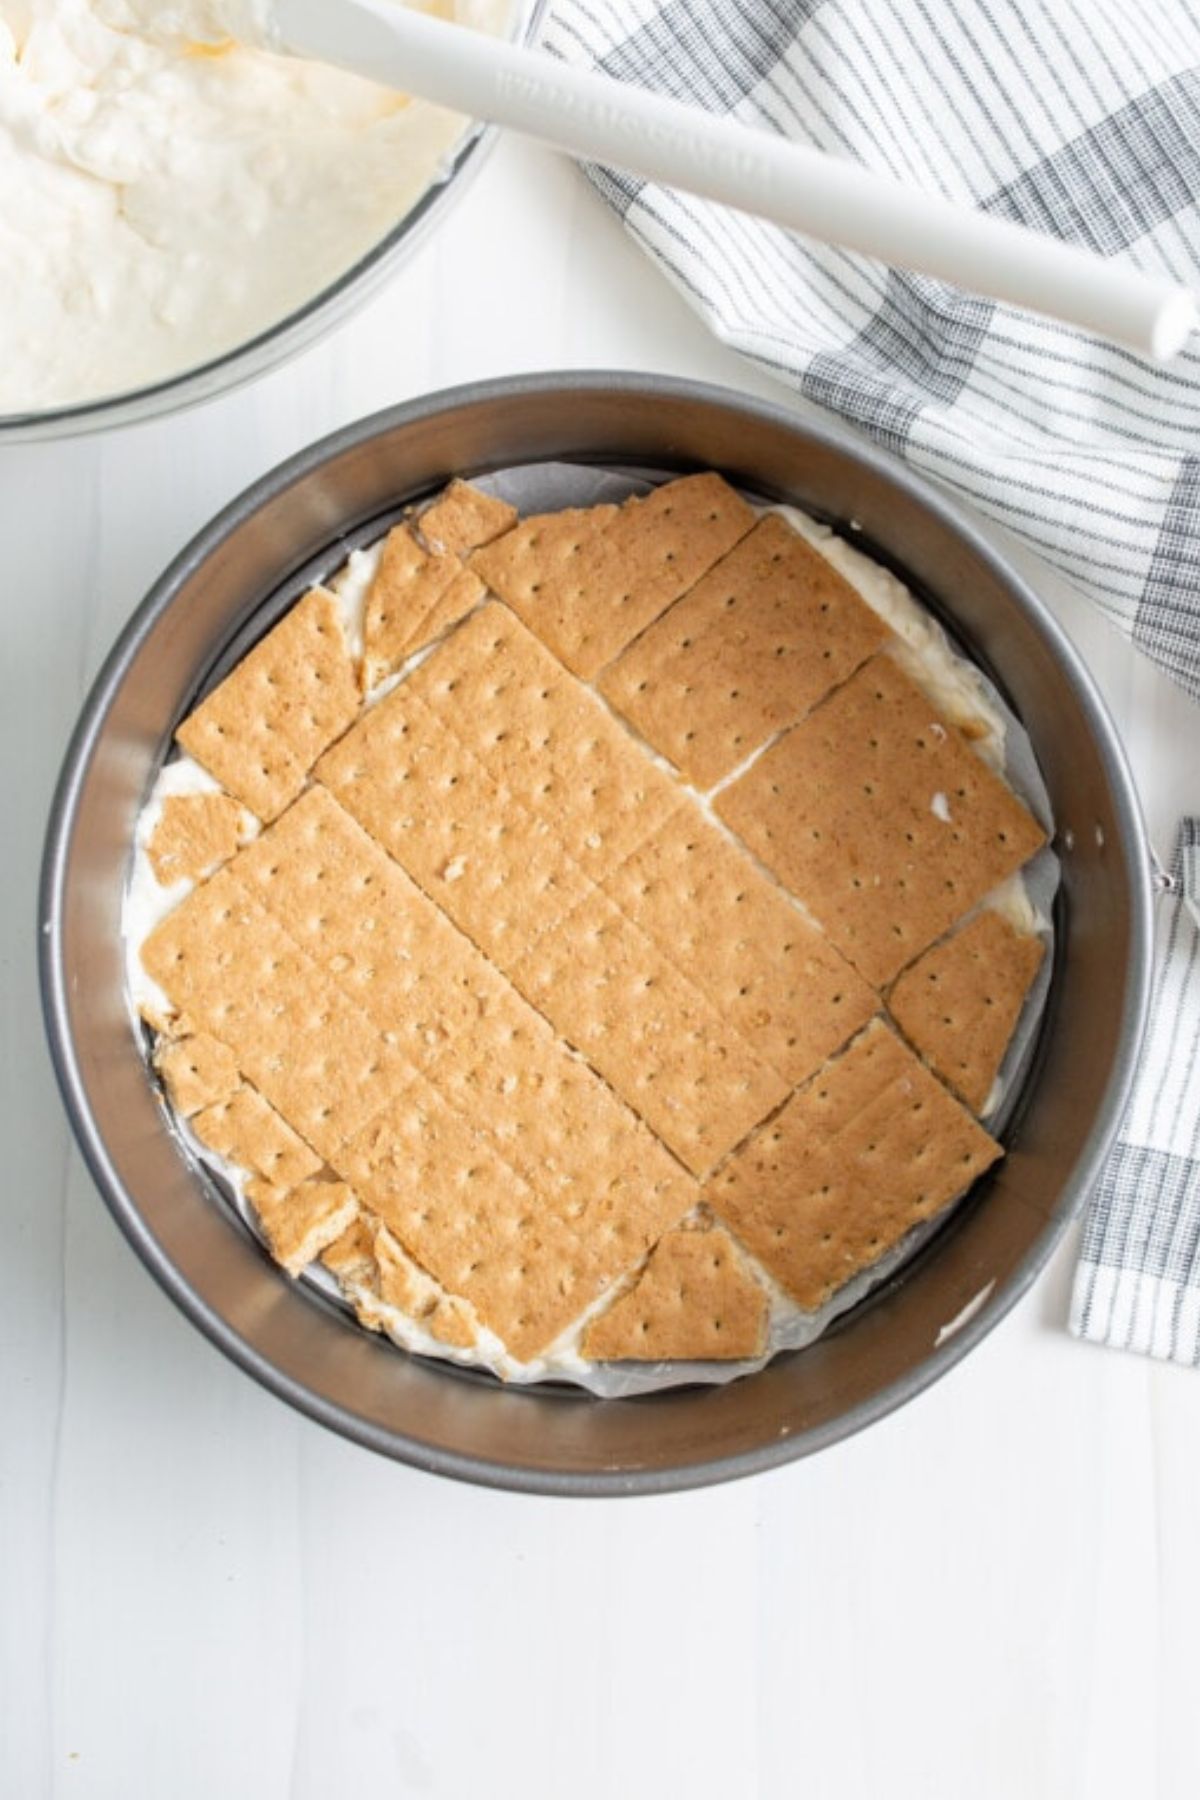
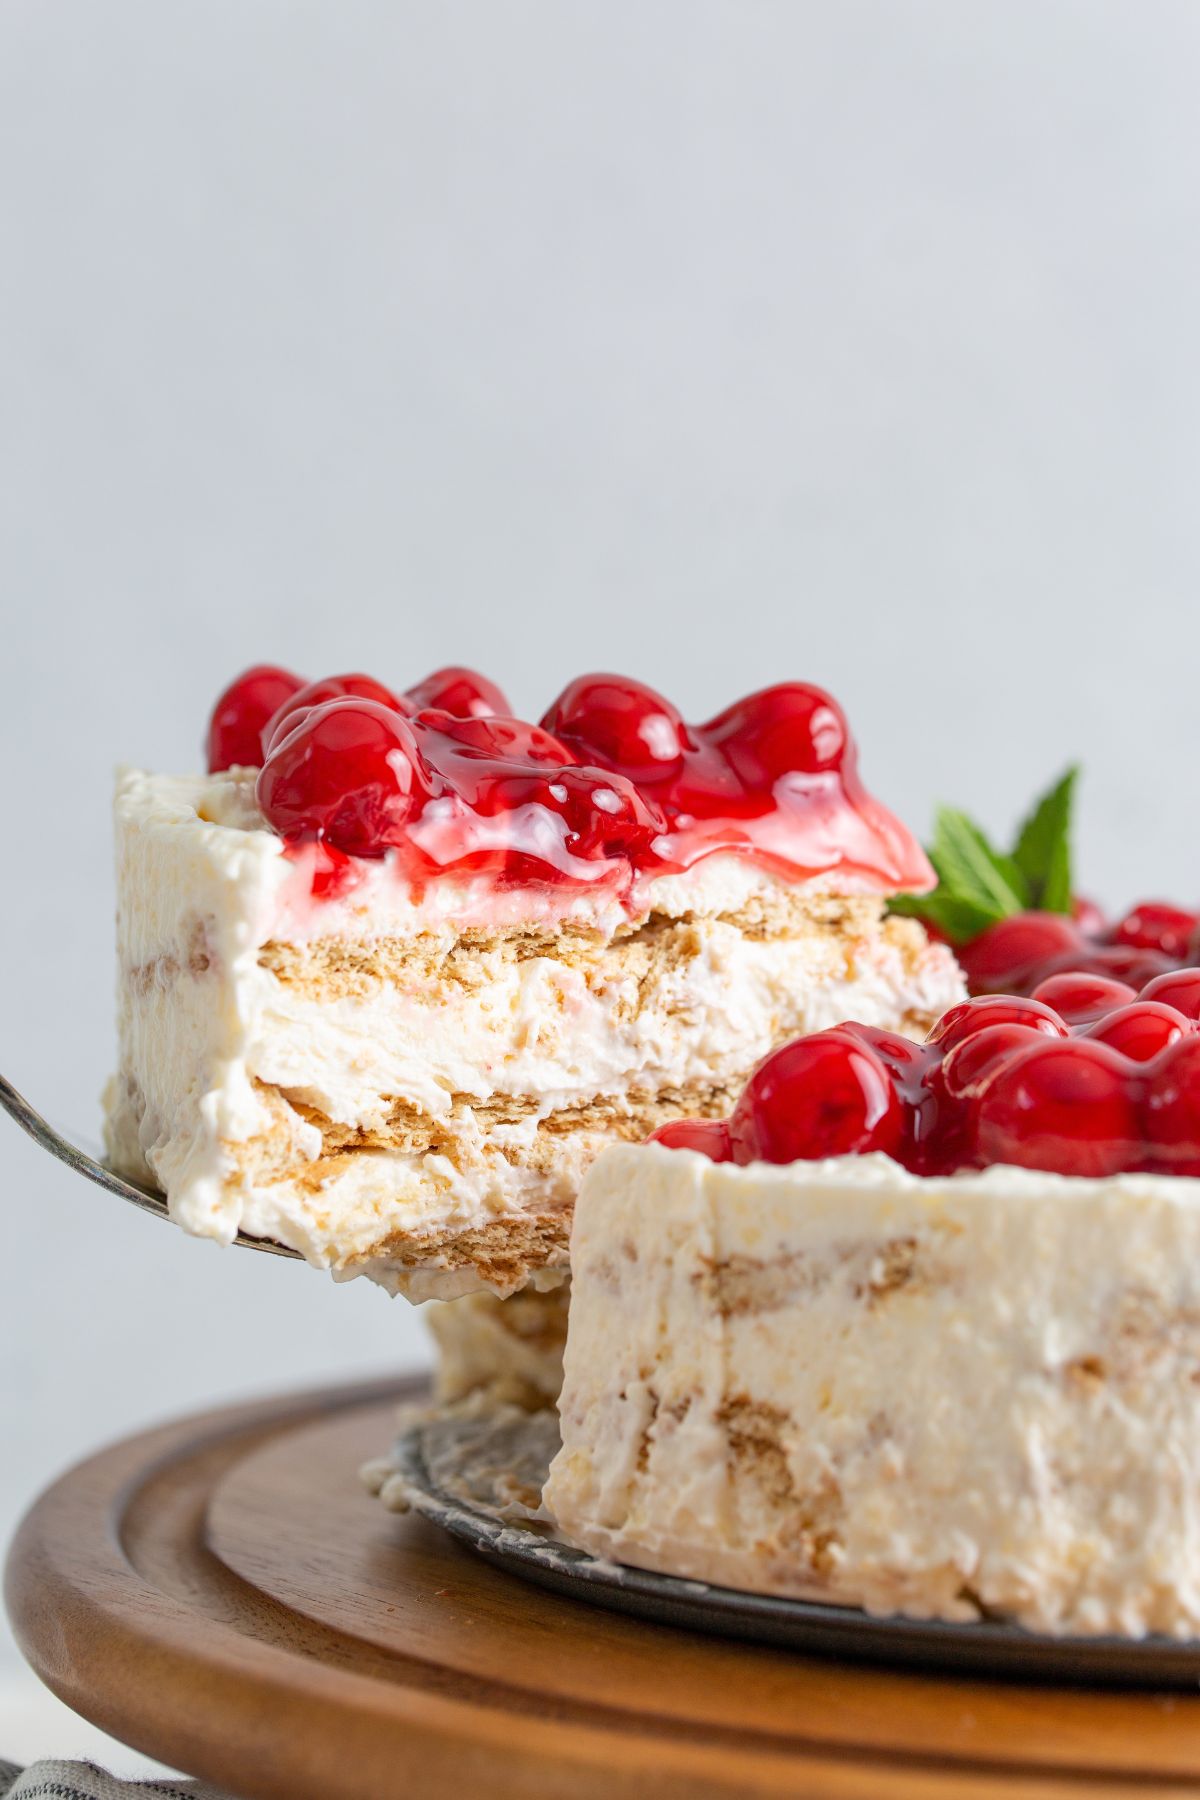
Step 3: Complete the first layer. Spread ½ a cup of the cream cheese mixture into a lined springform pan and spread it evenly to the edges. Then, layer full but broken pieces of graham crackers until the mixture is covered.
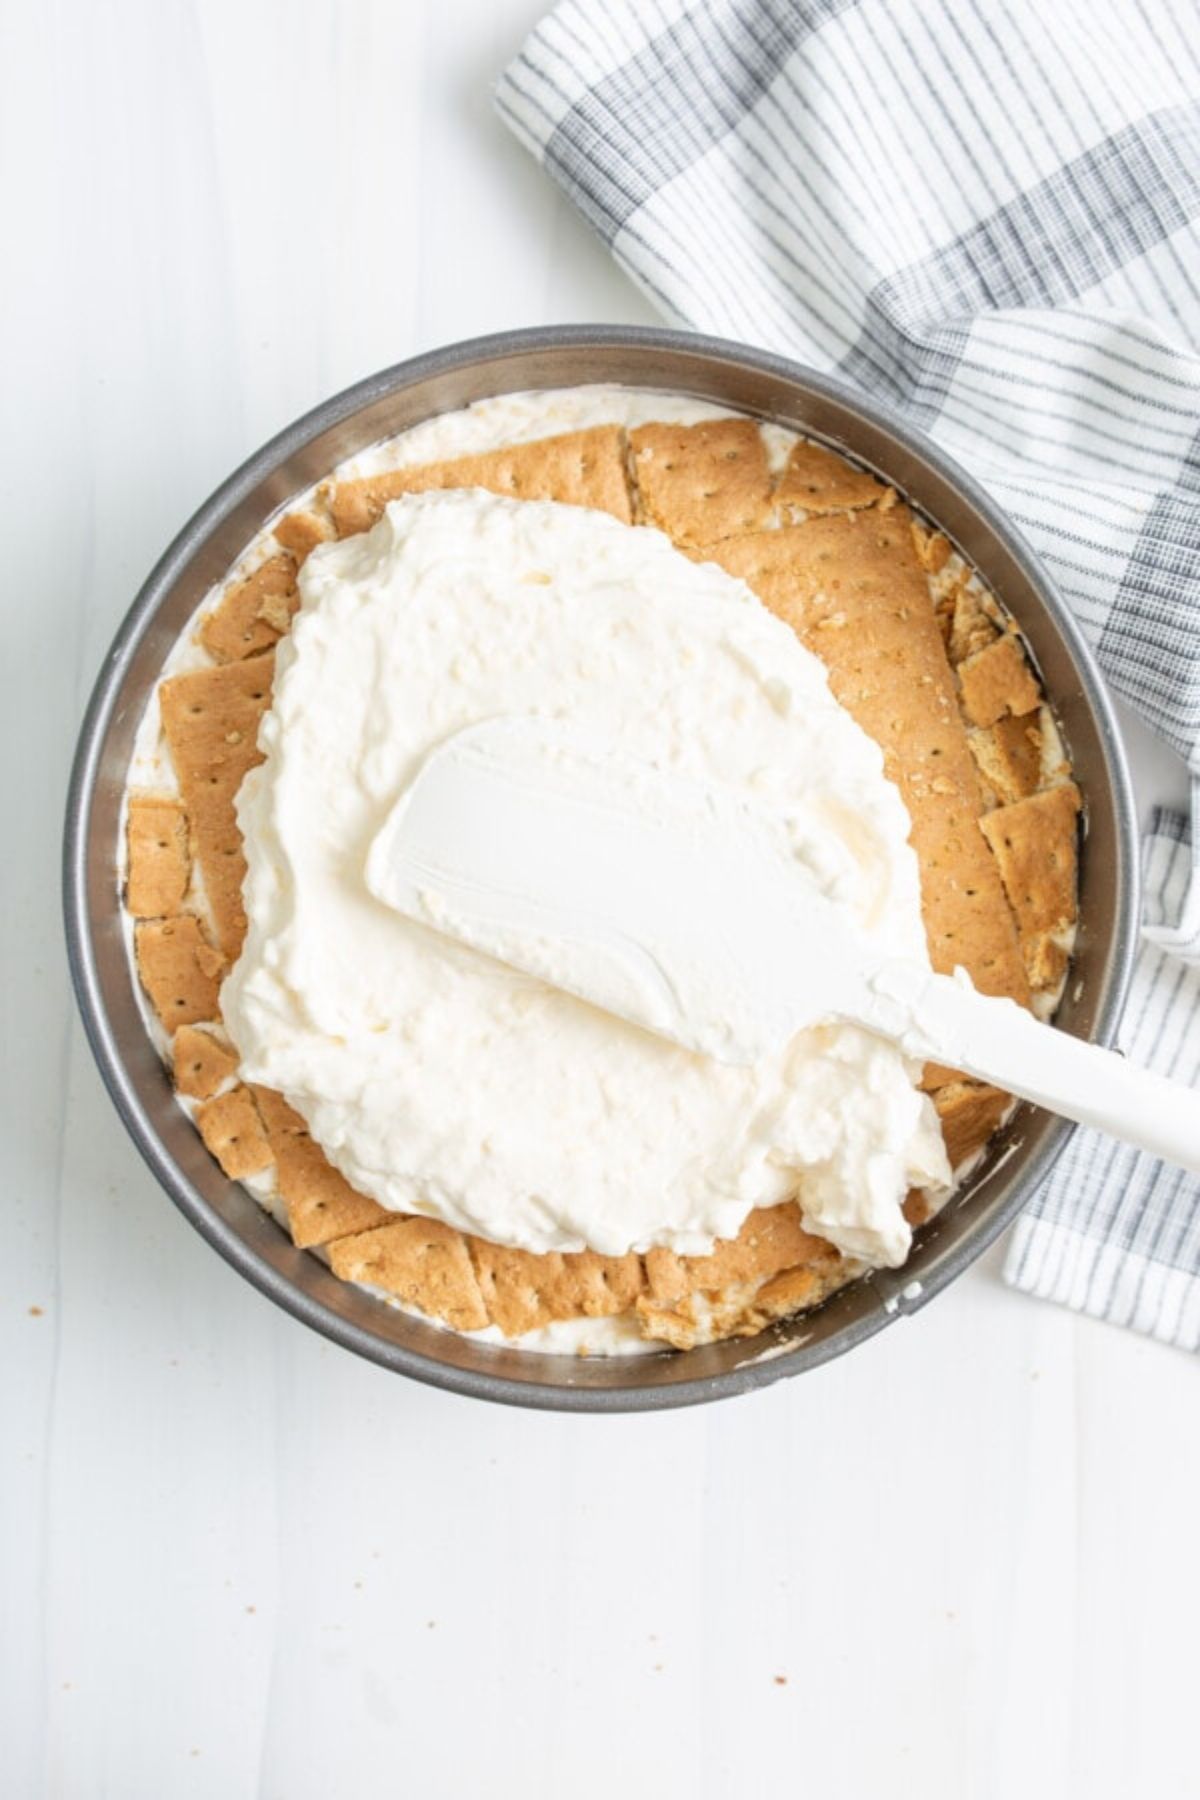
Step 4: Divide the Cool Whip mixture. Portion the cream cheese filling into thirds and spread ⅓ on top of the graham cracker crust, spreading it out evenly.
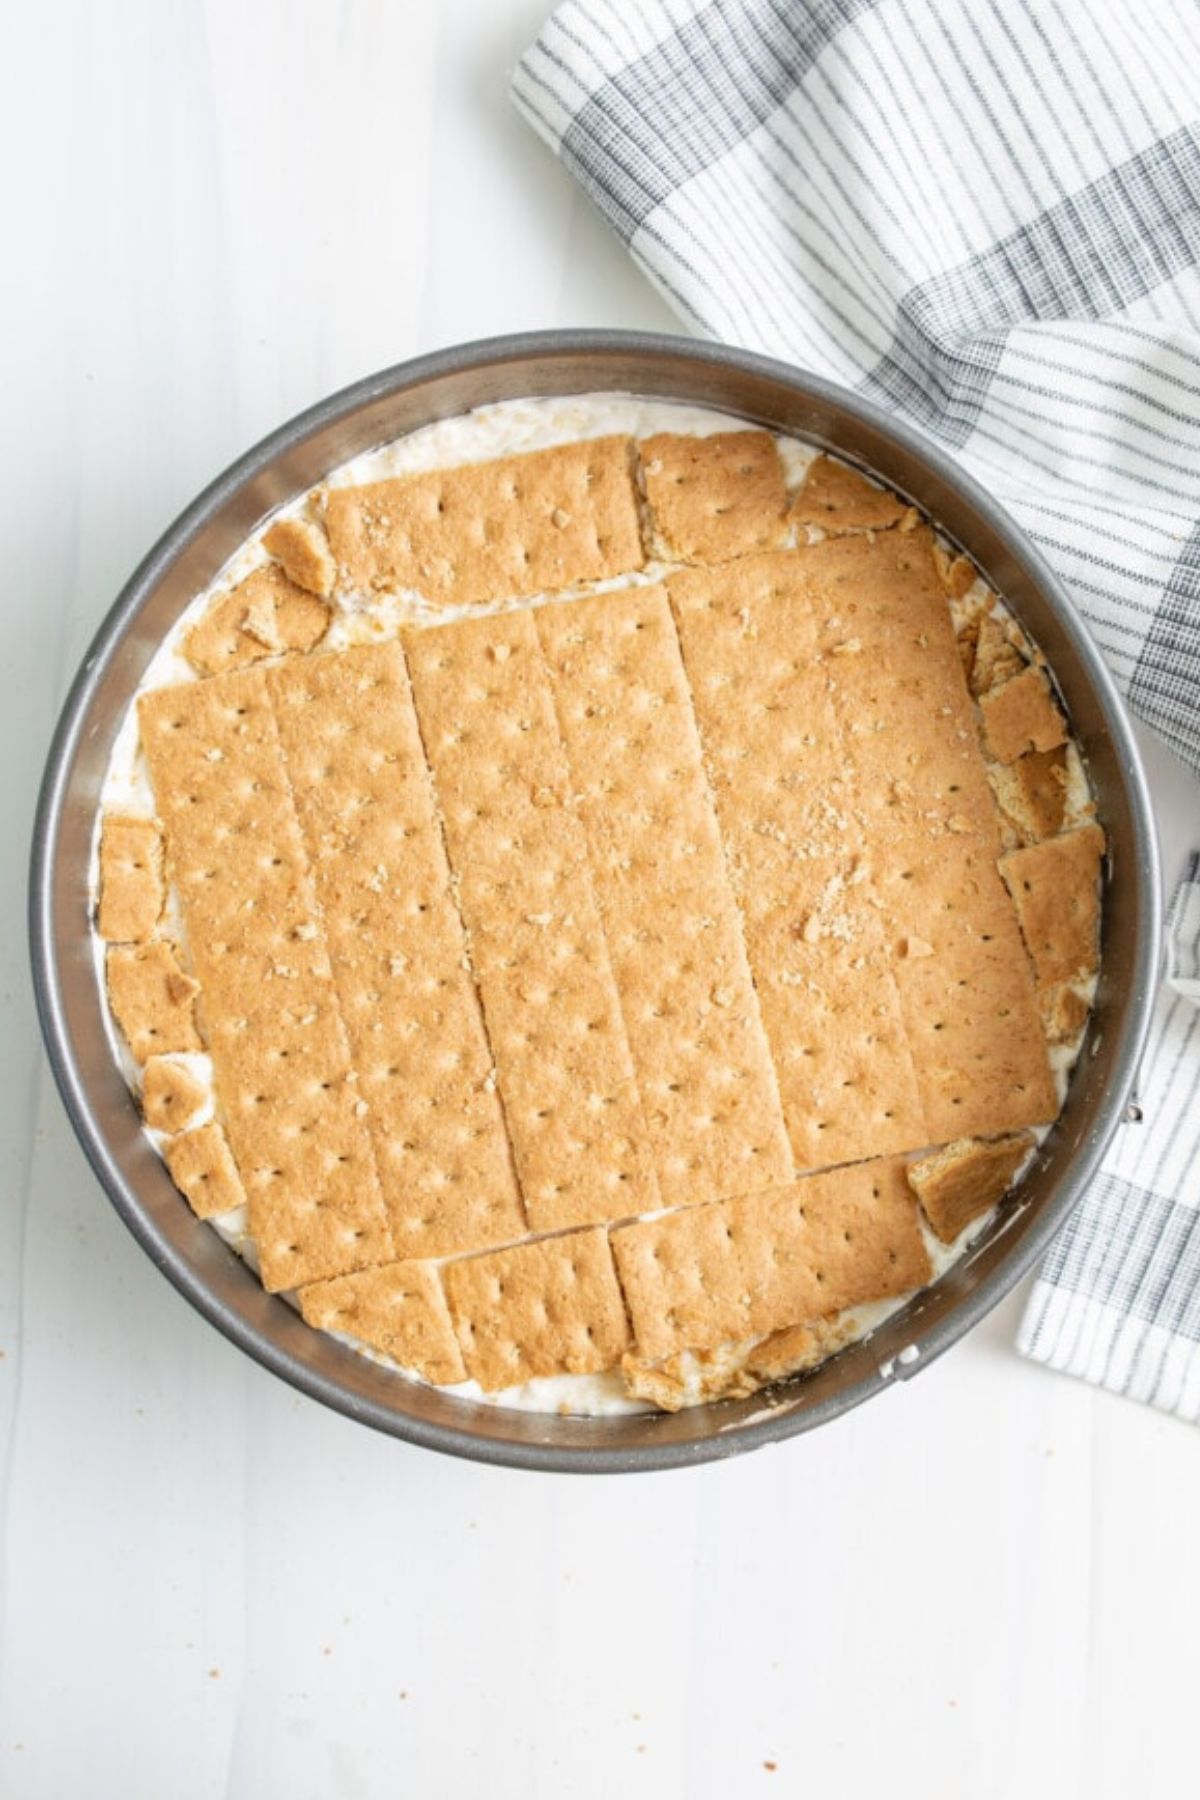
Step 5: Continue layering. Place another layer of graham crackers around the pan and top it with another third of the Cool Whip filling. Place it in the freezer overnight.
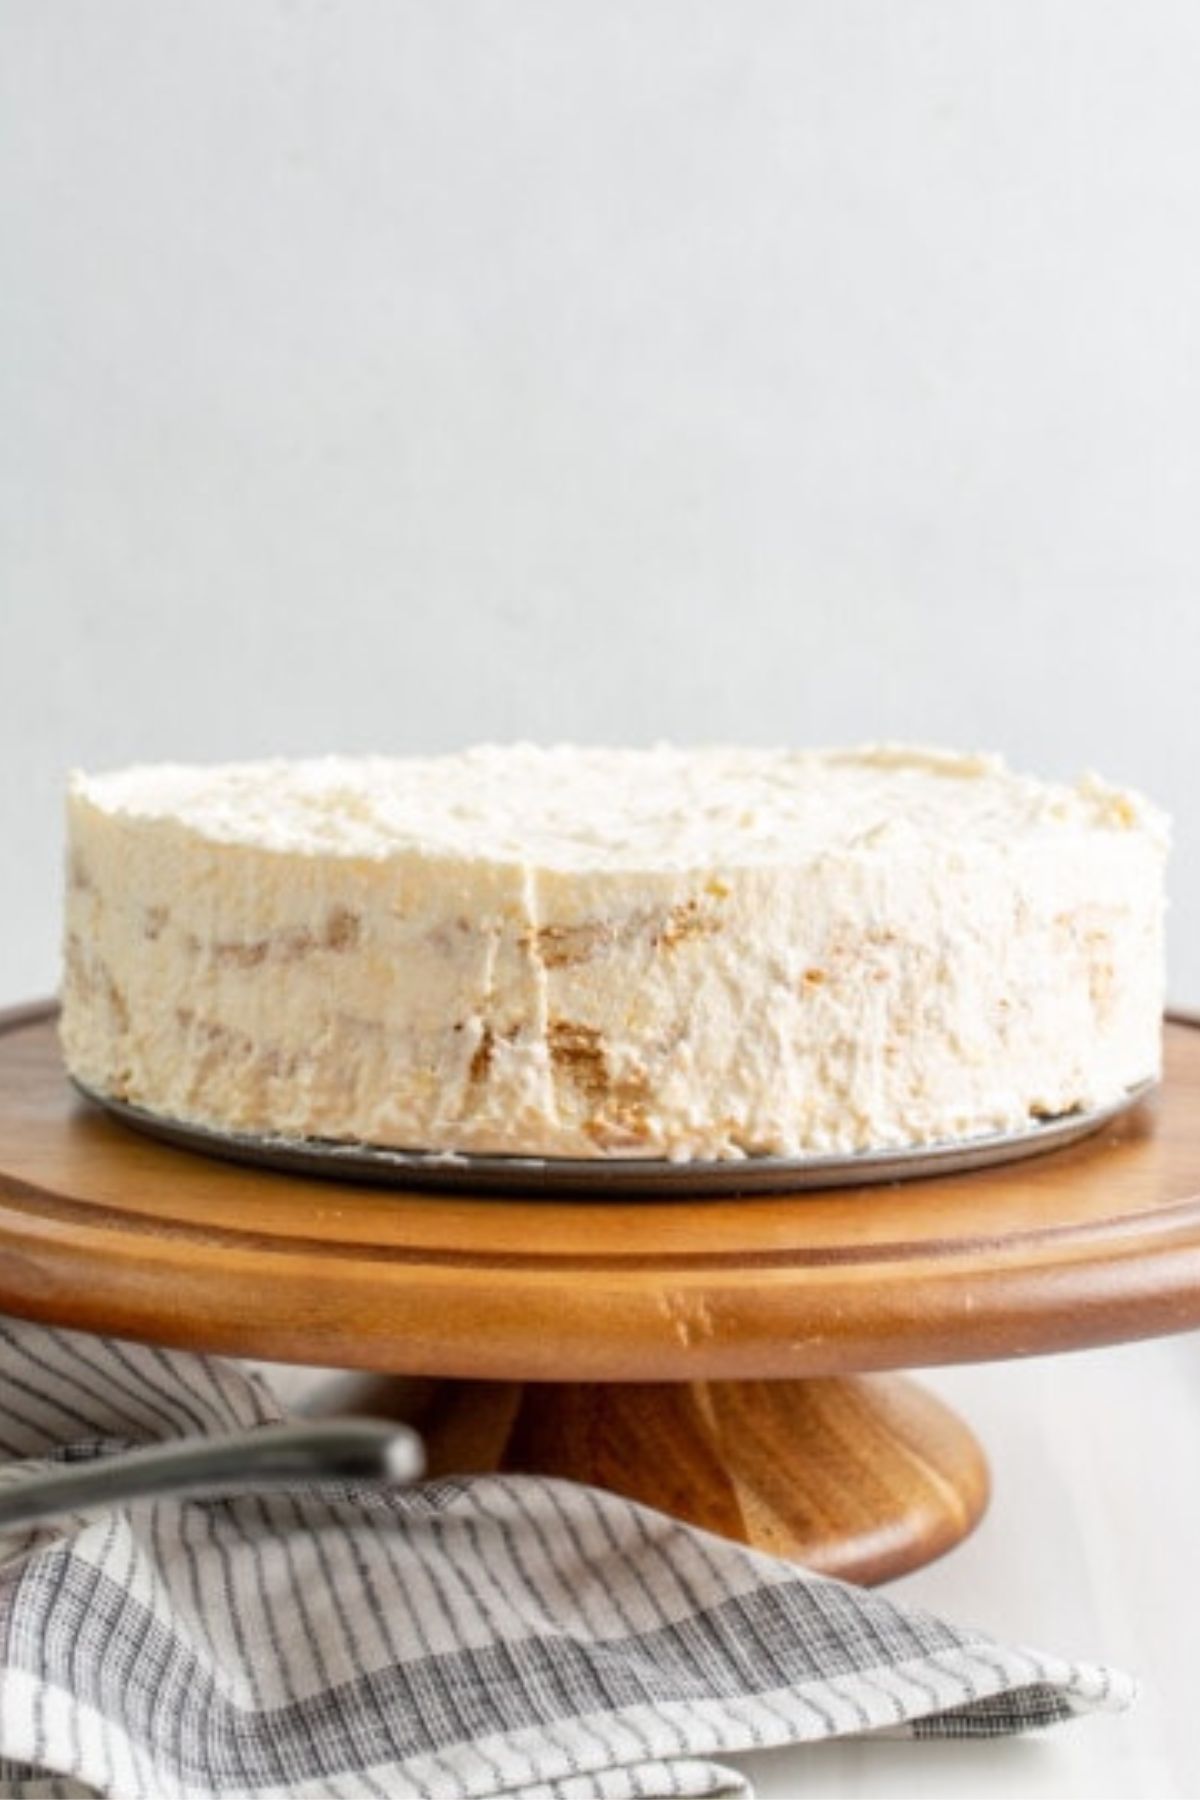
Step 6: Remove it from the pan. Bring the cake out of the freezer and let it sit at room temperature for a few minutes before using a knife to gently loosen the edges, helping it release smoothly from the pan.
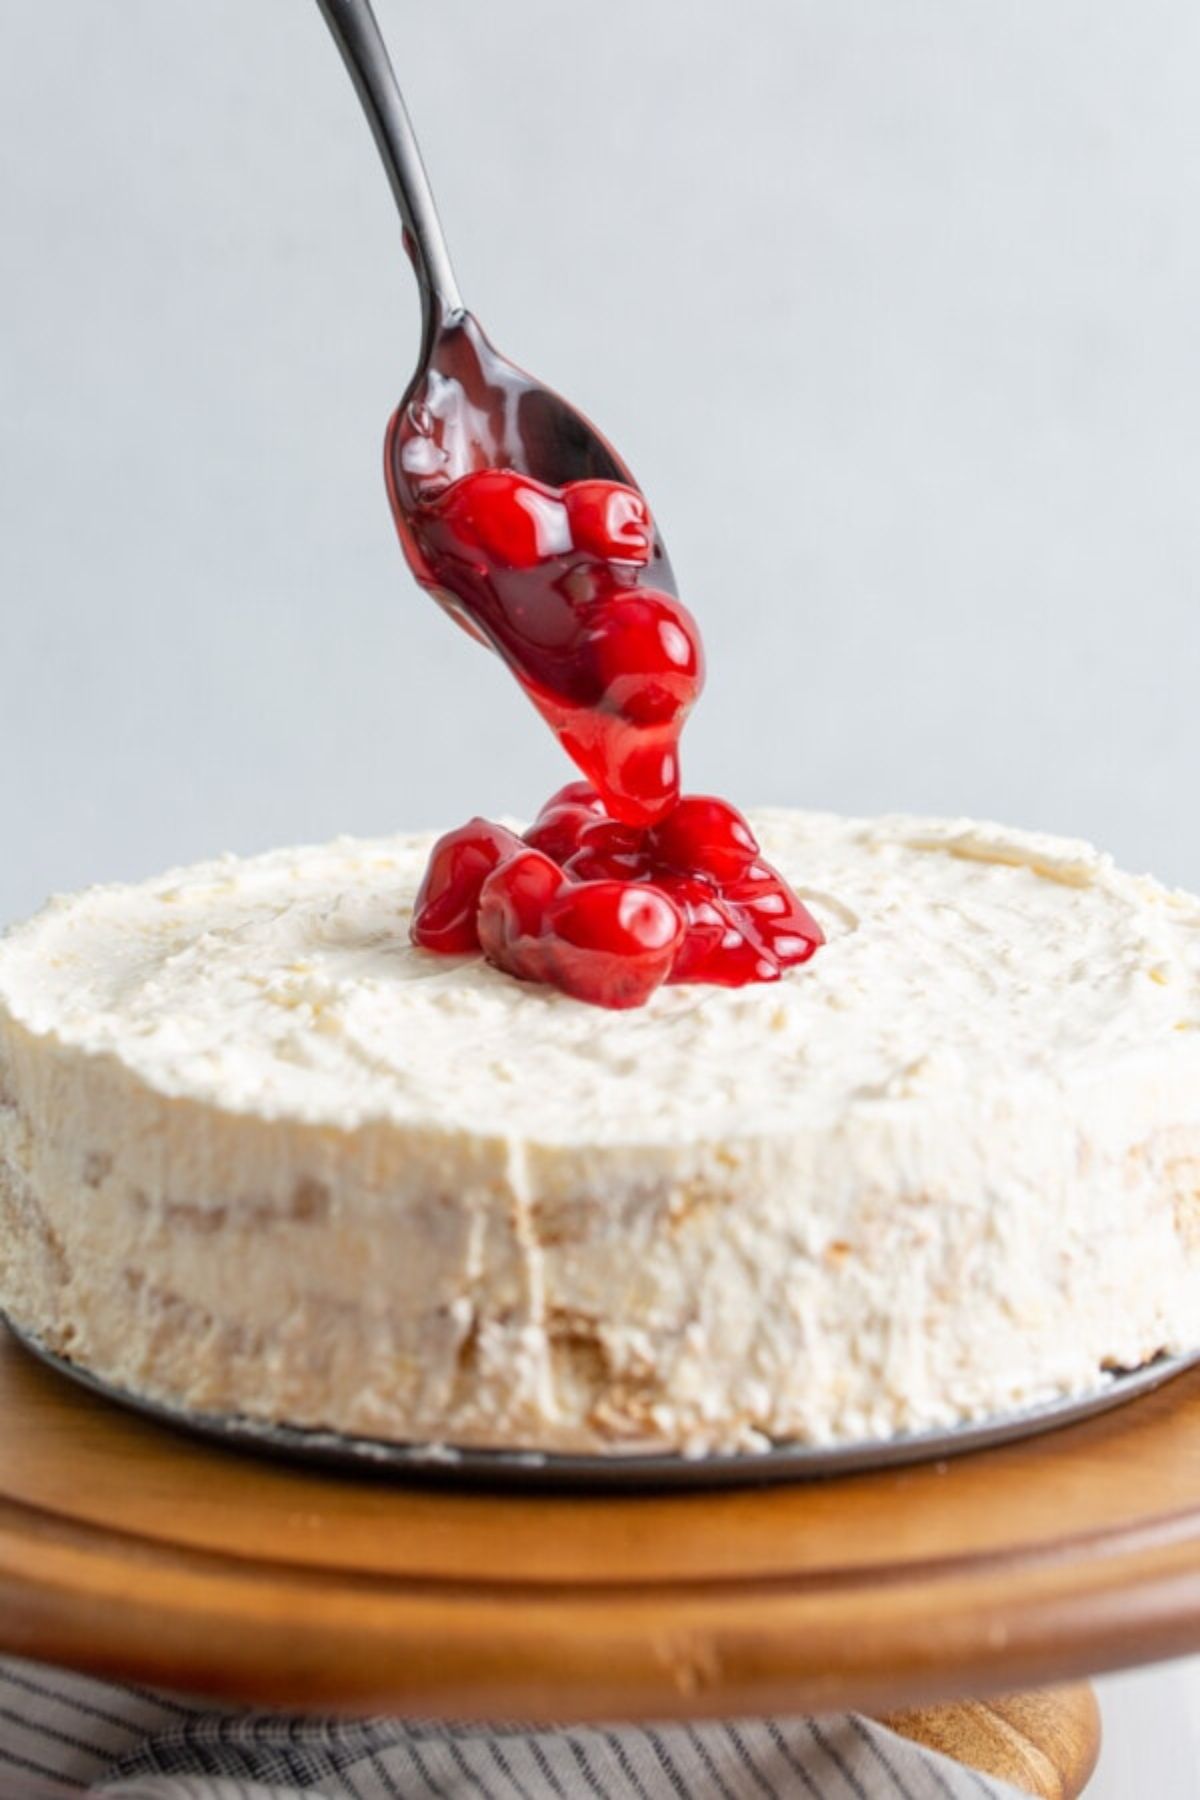
Step 7: Top the cake. Spoon the pie filling on top of the cheesecake icebox cake carefully until it's completely covered.
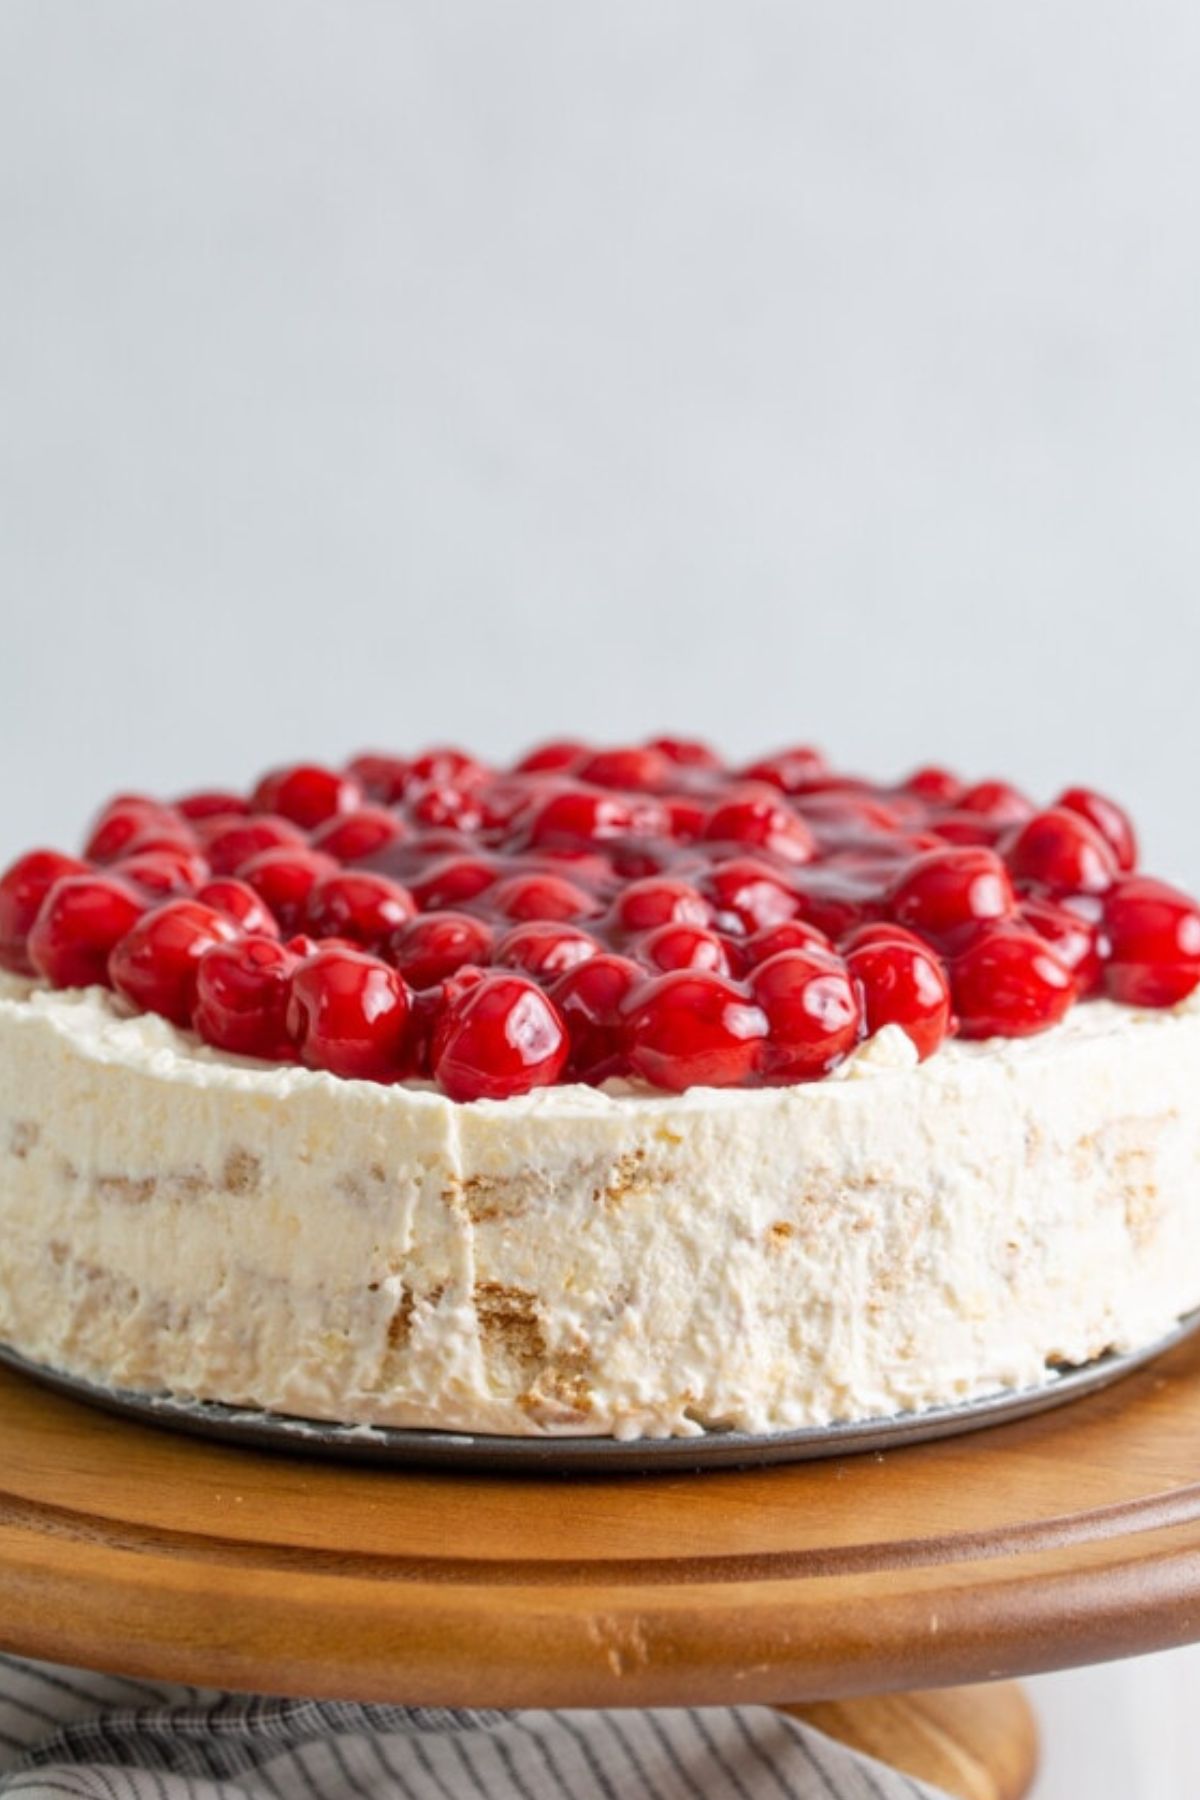
Step 8: Serve and enjoy. Garnish with any other toppings and then use a warm knife to slice and serve the cake. This cake is perfect paired with appetizers like these cheesy mushroom bites for girls' night.
Recipe Tips
- Folding in the Cool Whip: Use a spatula to fold in the Cool Whip, being careful not to overmix. Otherwise, you'll lose the fluffy texture of it.
- Preparing your pan: Line the springform pan with parchment paper to make it easier to remove. Take a few minutes to trim it to the size of the pan.
- Layering: Once you're done layering, you should have 4 layers of Cool Whip (including the small base layer) and 3 layers of graham crackers.
If you love recipes like this icebox cake, you may also enjoy these Cool Whip cake mix cookies!
Storage Directions
- Storing: Leftovers keep well in the fridge for up to 3 days when stored in an airtight container. However, the longer the cake sits, the softer the graham cracker layers will become.
- Freezing: The cake can be frozen easily by wrapping it in plastic wrap and storing it in a freezer-safe container. It will stay fresh for up to 2 months. When you want to enjoy it, let it thaw overnight in the fridge. The texture might not be the exact same, but it will be close.
- Make Ahead: If you need to prepare this cake in advance, follow the directions, but don't add the pie filling on top. Instead, wrap the cake in plastic wrap and store it in a container in the freezer until you need it. When you're ready, add the pie filling on top just before you're ready to serve.
Serving Suggestions
- Enjoy this graham cracker icebox cake as a dessert with your favorite summer recipes like hamburger pinwheels or jalapeno cheeseburger sliders.
- Serve it alongside your favorite Dalgona coffee with alcohol.
- Add it to a dessert table with pineapple cream cheese pie and chocolate mousse pie.
Recipe FAQs
Of course. In place of pie filling, mix and match your favorite fruits, slice them into bite-sized pieces, and sprinkle them on top of the cake. To make it look even more indulgent, you could melt white chocolate chips and drizzle them on top of the fruit as well.
Yes, the longer the cake sits, the more the crackers will soften. That's why the cake can't be stored for too long in the fridge.
You want the cream cheese to become light and ensure there are no clumps. The smoother the cream cheese is, the better the cake.
More Summer Cake Recipes
Do you like summer cakes? Here are some recipes you may also like to try.


If you try this recipe and love it please leave a star rating in the recipe card below or even better, drop a review in the comment section. I always appreciate your feedback. Be sure to follow along with me on Facebook, Pinterest, and YouTube for more easy recipes!
How to Make Video


Easy Cherry Icebox Cake
Equipment
- 8" spring form pan
Ingredients
- 1 brick (8 oz) cream cheese room temperature
- 2 boxes (3.4 oz) instant cheesecake Jello pudding mix white chocolate, vanilla or your favorite flavor
- 2 cups milk
- 1 carton (8 oz) cool whip refrigerated not frozen
- 16 graham crackers 2 sleeves
- 1 can (21 oz) cherry pie filling or your favorite
Instructions
- In a large bowl, use an electric hand mixer to beat the cream cheese for about 1-2 minutes, enough to whip the cream cheese so that it combines well with the next ingredients. Add in the dry pudding mix.
- Beat into cream cheese until mostly combined, about 3 - 5 minutes. As the mixture is about fully combined, slowly pour in the milk.
- Beat it until you reach a thick, pudding like consistency, about 3 - 5 minutes. Fold in the cool whip with a rubber spatula. Be careful not to overwork the mixture to maintain the cool whip's fluffy consistency.
- Line the spring form pan with parchment paper, trimming it to size.
- Spread ½ cup of the cool whip mixture evenly around the base of the lined pan.
- Lay full and broken pieces of graham cracker to fit the pan shape until you have a full layer of graham crackers.
- Divide the remaining cool whip mixture into thirds.
- Add ⅓ of the cool whip mixture on top of the graham cracker layer.
- Repeat with a layer of graham cracker, followed by another third of the cool whip mixture.
- Add one last layer of graham cracker, followed by the last third of the cool whip mixture.
- You should have 4 layers of cool whip mixture, including the small base layer, and 3 layers of graham cracker.
- Freeze for at least 3 hours or overnight to chill.
- Before serving remove from freezer and leave it to sit at room temperature for several minutes, allowing the edges to soften slightly. Run a knife around the edge of the pan to help it release.
- Remove the spring form ring.
- Spoon the fruit pie filling on top of the chilled cake
- Serve and enjoy every bite!
Video
Notes
- To make it easier to remove from the pan, let the cake sit at room temperature for a few minutes after it comes out of the freezer, allowing it to soften.
- When you're ready to slice it, run the knife under hot water to make your slices crisp and clean. Wipe the blade between cuts as well.
Nutrition
This post was originally published in June 2021. It's been updated with new content.
Eryn says
I just want to say that is the perfect recipe. This cake is so light and refreshing and the layering is just right! Sometimes I use blueberry topping and it still tastes great. Thanks KD!
Karin and Ken says
I could not agree more! Well said! All the best. Karin
honey says
Wow, this cake looks absolutely delicious! And it also doesn't seem too complicated. I am definitely making this one next weekend!
Karin and Ken says
This cake is AMAZING and definitely worth a try! Hopefully you LOVE it as much as we do! All the best. Karin
ally says
What an absolutely beautiful recipe, luv! I'm drooling now!
Karin and Ken says
Just wait until you try it! You're the best! Take care and be well. Karin