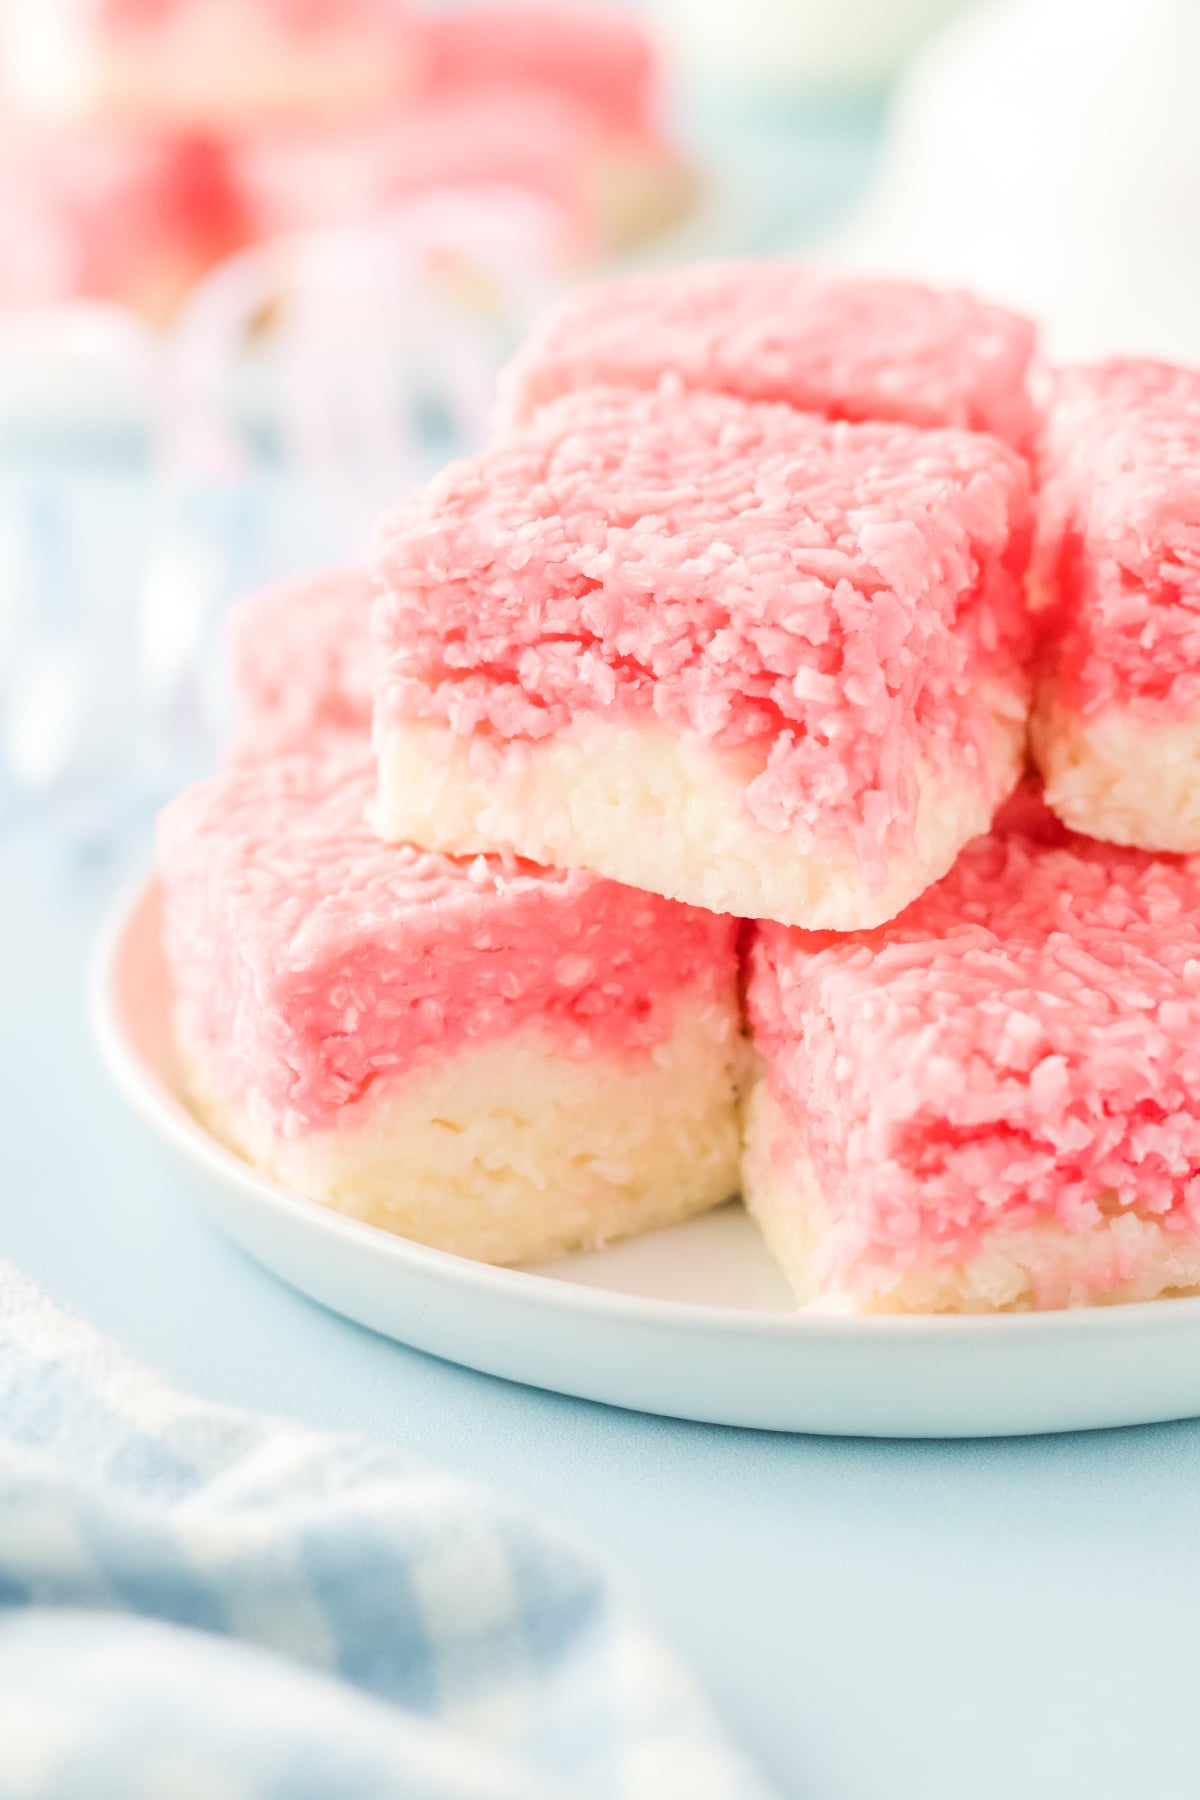
I'm a huge fan of coconut, and this old-fashioned Coconut Candy is incredibly tasty! It's sweet without feeling like it's too much, and the flavor and texture of the coconut take it to the next level. I highly recommend trying this recipe for a potluck or even a bake sale this holiday season.

Recipe Essentials
- 🍽️ Course: Dessert
- ⏱️ Cooking Time: No cook
- 🍴 Servings: 36
- 🧄 Flavor Profile: Sweet, chewy, and nutty with deep caramelized coconut flavor.
- 🍚 Best Served With: Tea, coffee, or as a tropical treat after meals.
- 🧊 Make Ahead?: Yes! Stores well in an airtight container for up to 2 weeks.
Summarize and Save This Content On
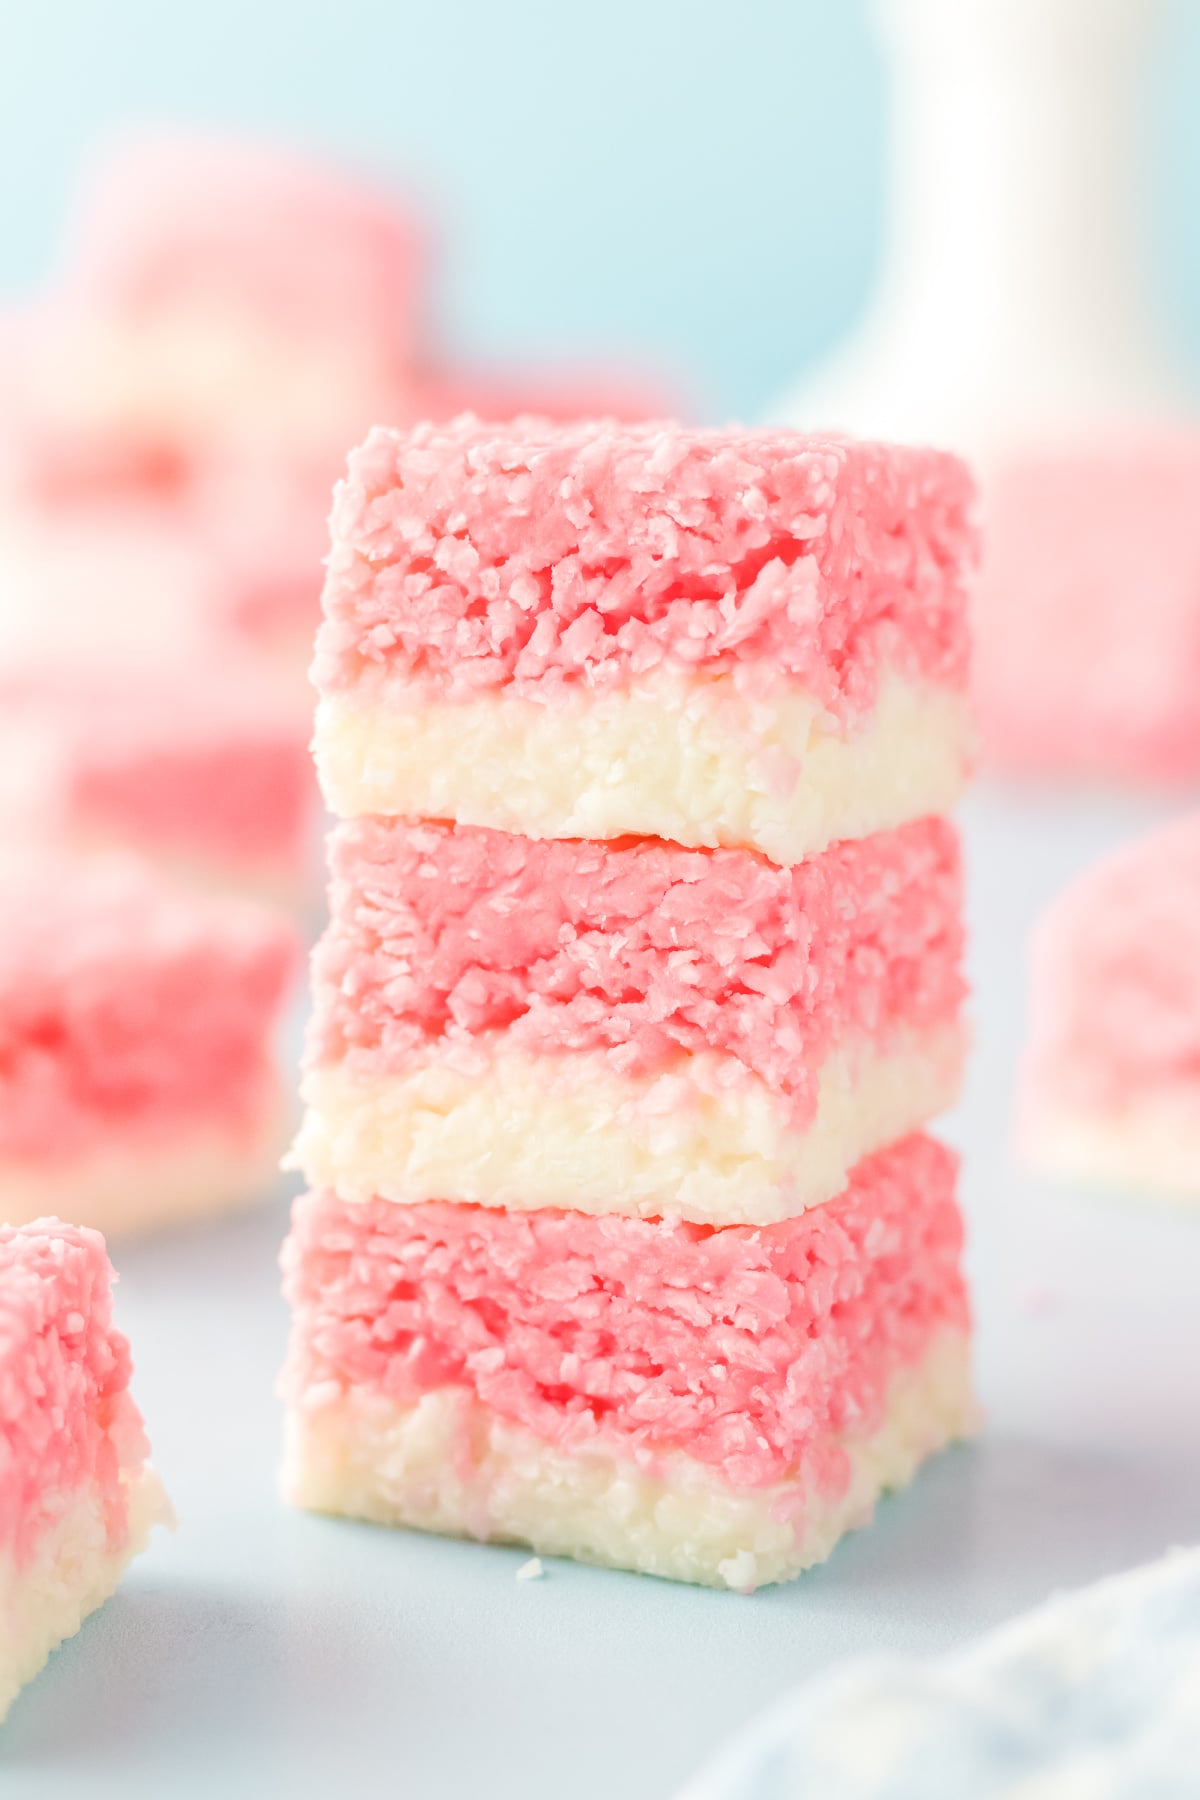
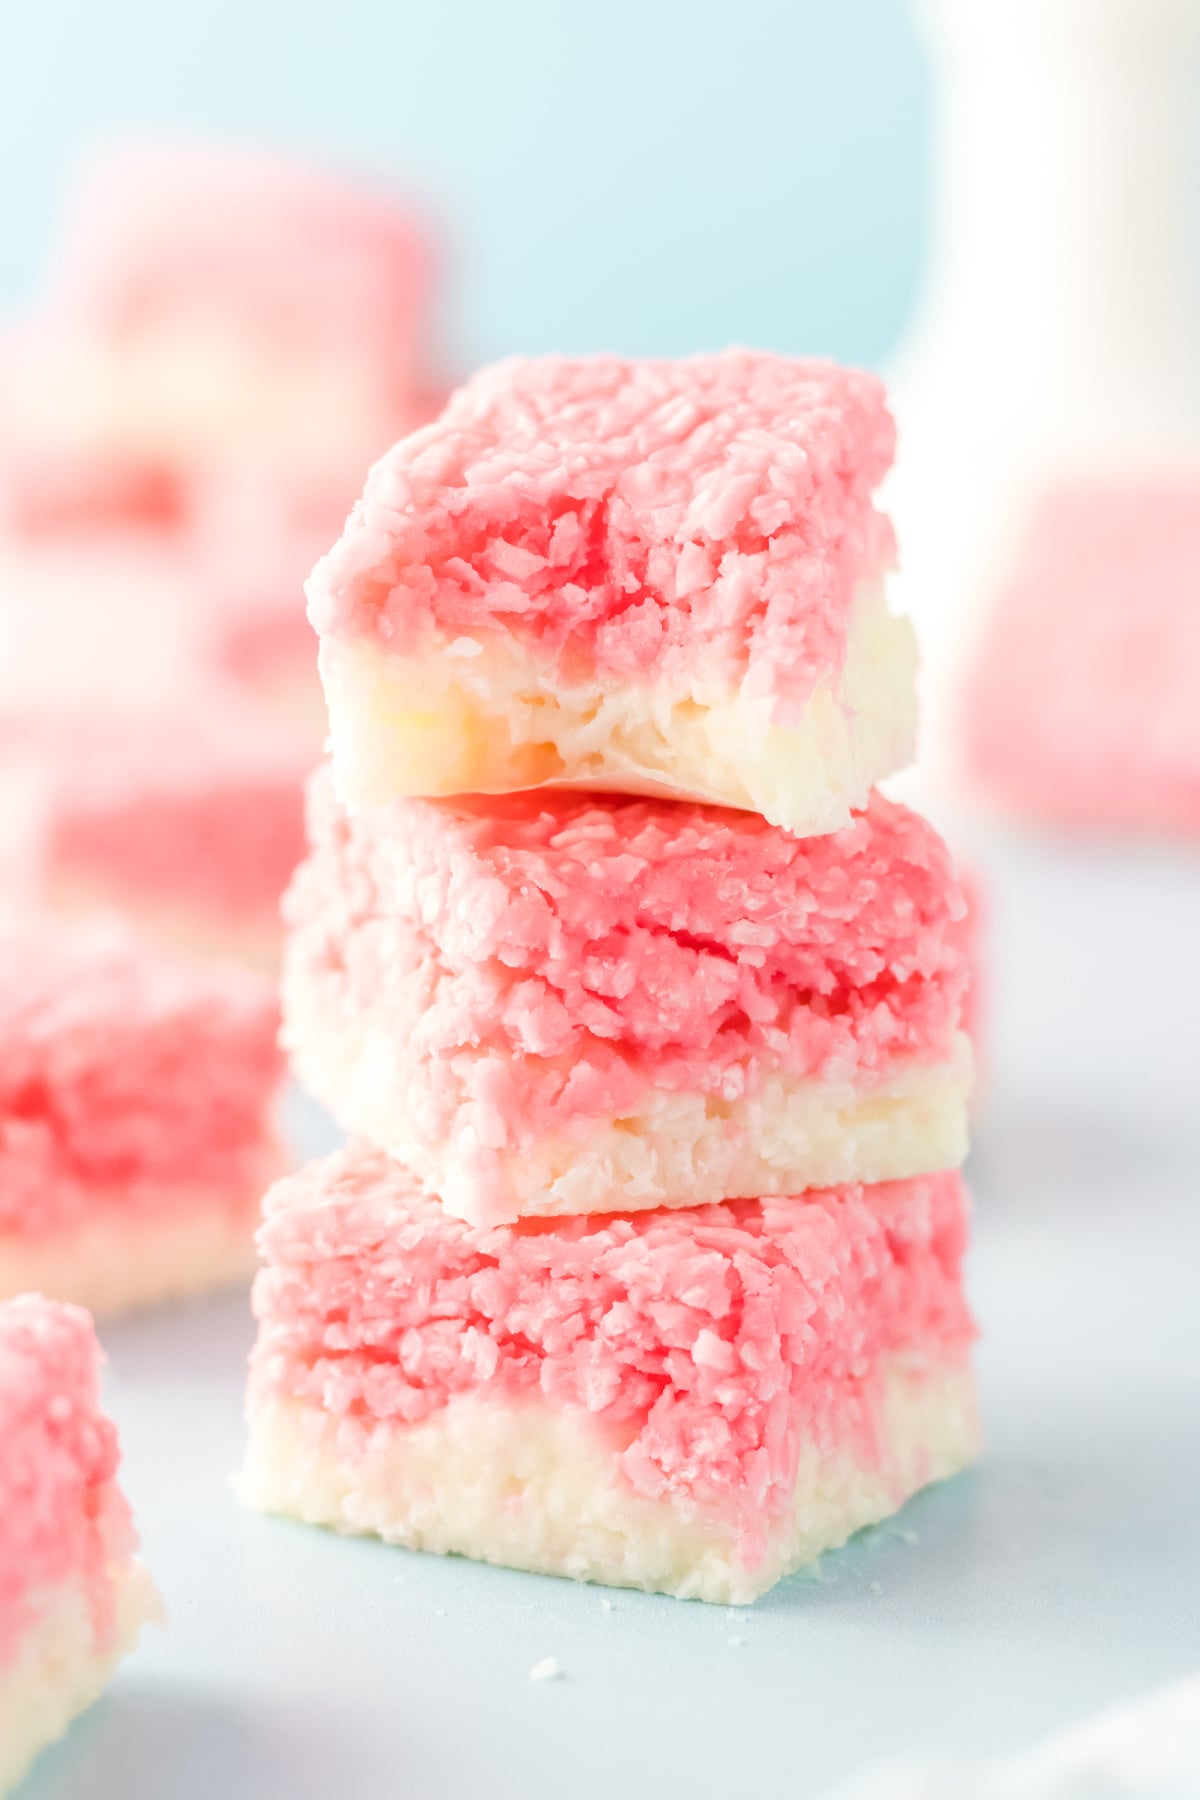
The texture of this candy is unreal! It's so soft but also has a chewiness to it from the coconut pieces. It just works so well! It really is the perfect Christmas dessert, but I have made it at different times of the year, too. There are no rules for when to prepare these delectable coconut candies.
I also enjoy Samoa Rice Krispie treats and pina colada upside-down cake when I want a tasty coconut dessert.
Jump to:
Why You'll Love This Recipe
- It's naturally gluten-free: All of the ingredients used to make this old-fashioned coconut candy are naturally gluten-free, making it a great treat for someone with a gluten allergy.
- It's customizable: You can switch up or add flavors as well as mix-ins/toppings to put your unique spin on this recipe.
- It's budget-friendly: The items in this recipe are affordable even on a tight budget, so you don't have to worry about breaking the bank.
Ingredients
Below are the most important ingredients for this coconut candy. Luckily, they can all be easily found in the baking aisle of your local grocery store.
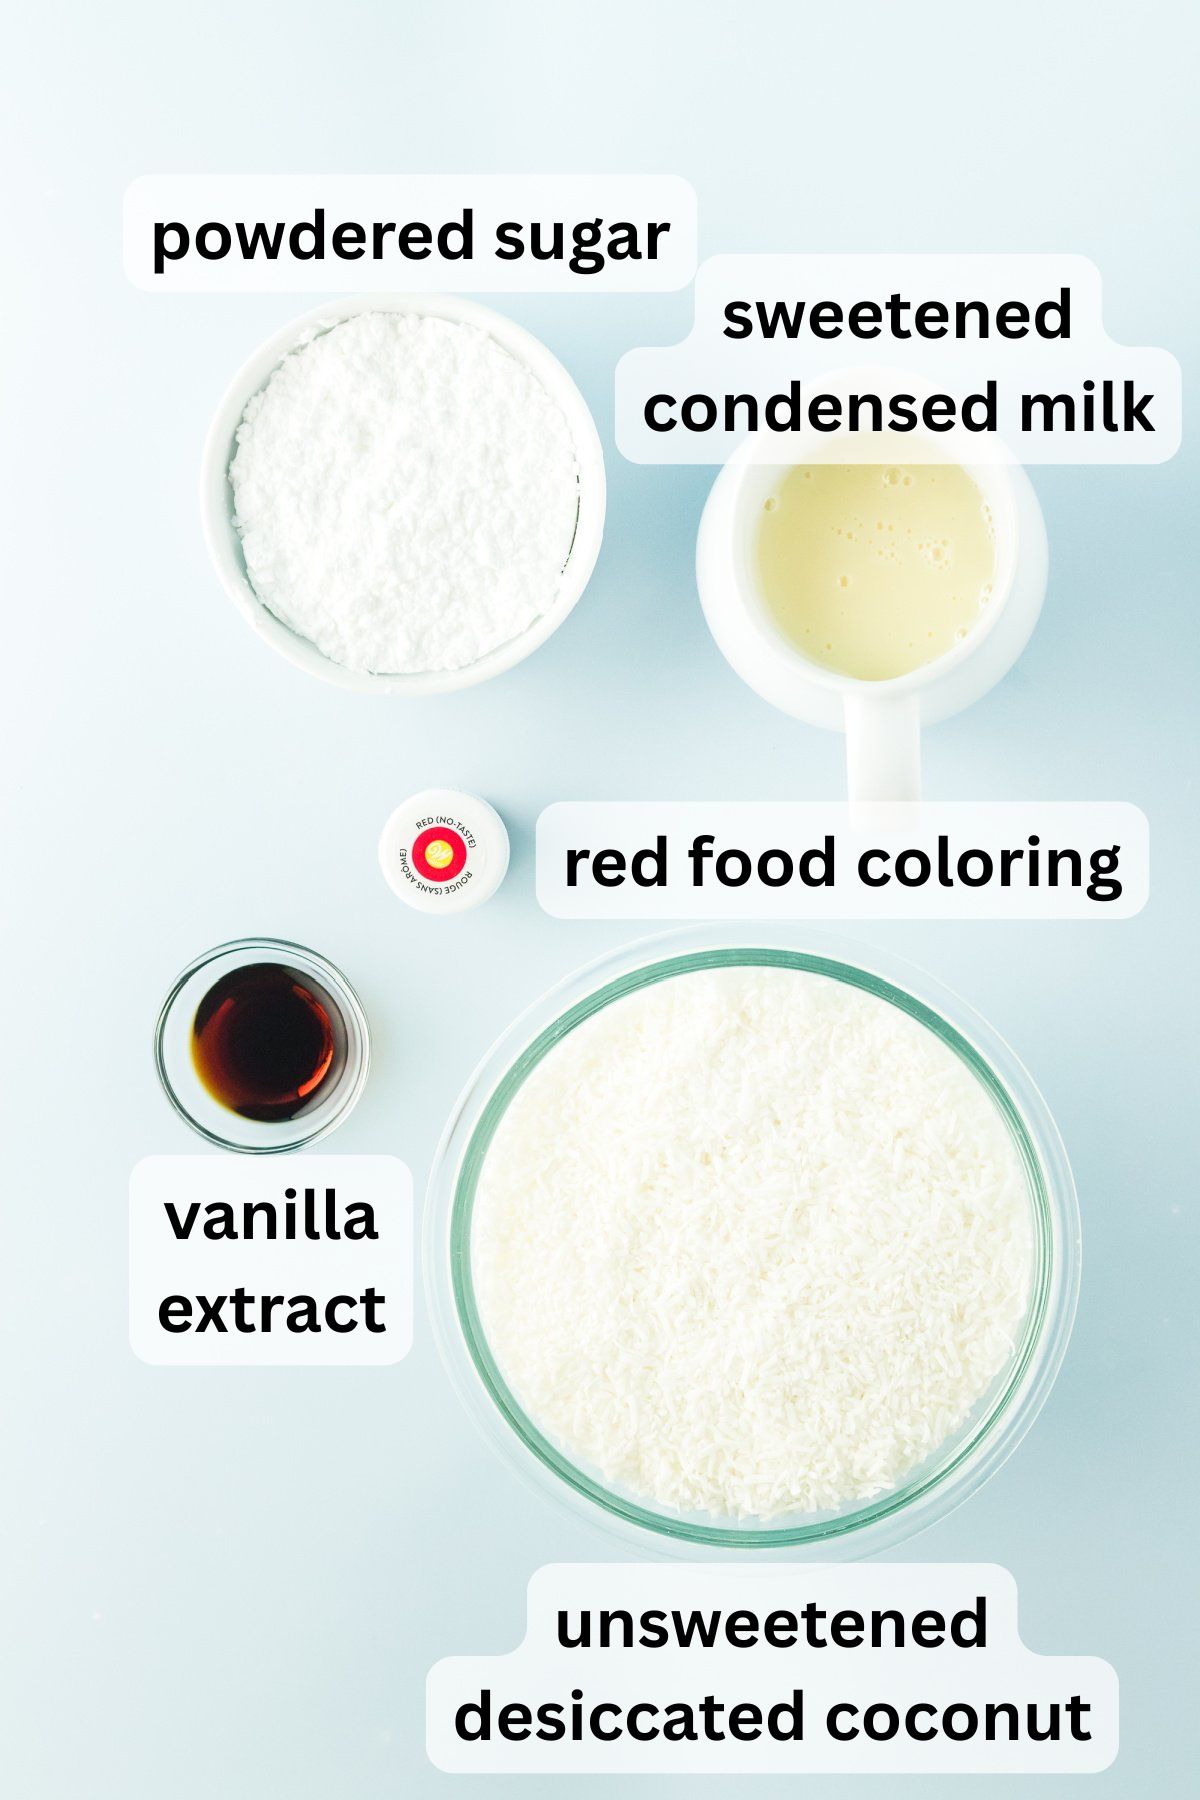
- Sweetened condensed milk: This is key for sweetness and consistency. It keeps your coconut candy perfectly soft.
- Powdered sugar: Combining this with the coconut and condensed milk creates a lovely chewy texture for this candy. Don't substitute granulated sugar, as it will not come out the same.
- Red food coloring: I color one of the layers with red food coloring to add a subtle, festive touch. Feel free to keep it all wet or make it all red!
- Coconut: I use desiccated coconut for this recipe, so you don't have large pieces. It helps with the texture of the candy. If you like, you can finish large pieces to make shredded coconut candy. If you don't have desiccated coconut, pulse shredded in a food processor until it's fine.
See the recipe card below for exact ingredient amounts, nutritional information, and detailed instructions.
Variations
- Dip them in chocolate: Melt your favorite variety of chocolate and dip each square into it for an extra indulgent treat.
- Add pineapple: Stir some dried pineapple into the white layer for extra tropical flair.
- Peppermint: Stir in crushed candy canes for peppermint flavor and a super festive presentation.
Try these white chocolate coconut cookies if recipes like this speak to your heart (and stomach).
How to Make Coconut Candy
Below are the steps needed to prepare this coconut candy. Before you get started, line your 9x9 baking dish with parchment paper.
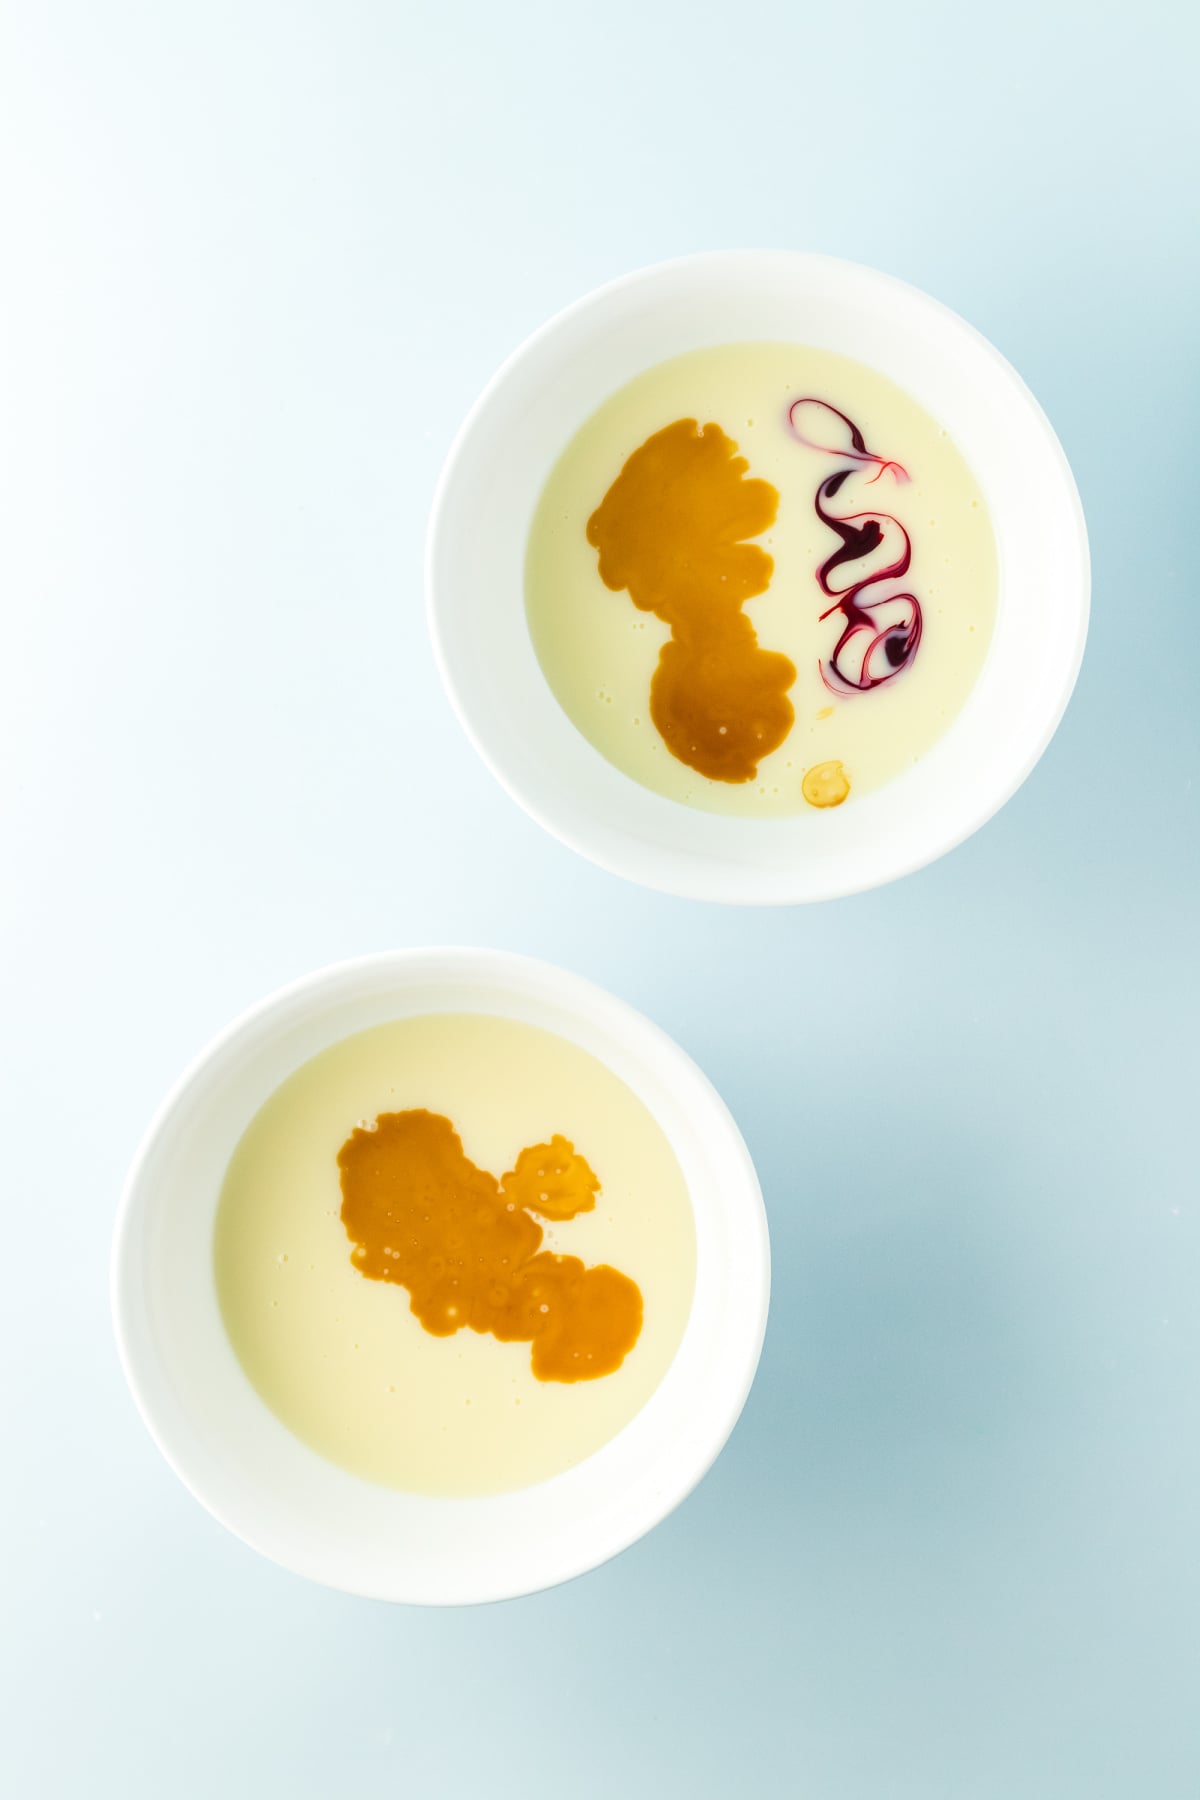
Step 1: Divide and color the condensed milk. Grab two small bowls and divide the sweetened condensed milk between them. Stir in 1 teaspoon of vanilla into each bowl, then add the red food coloring to one of them. Then, stir them well.
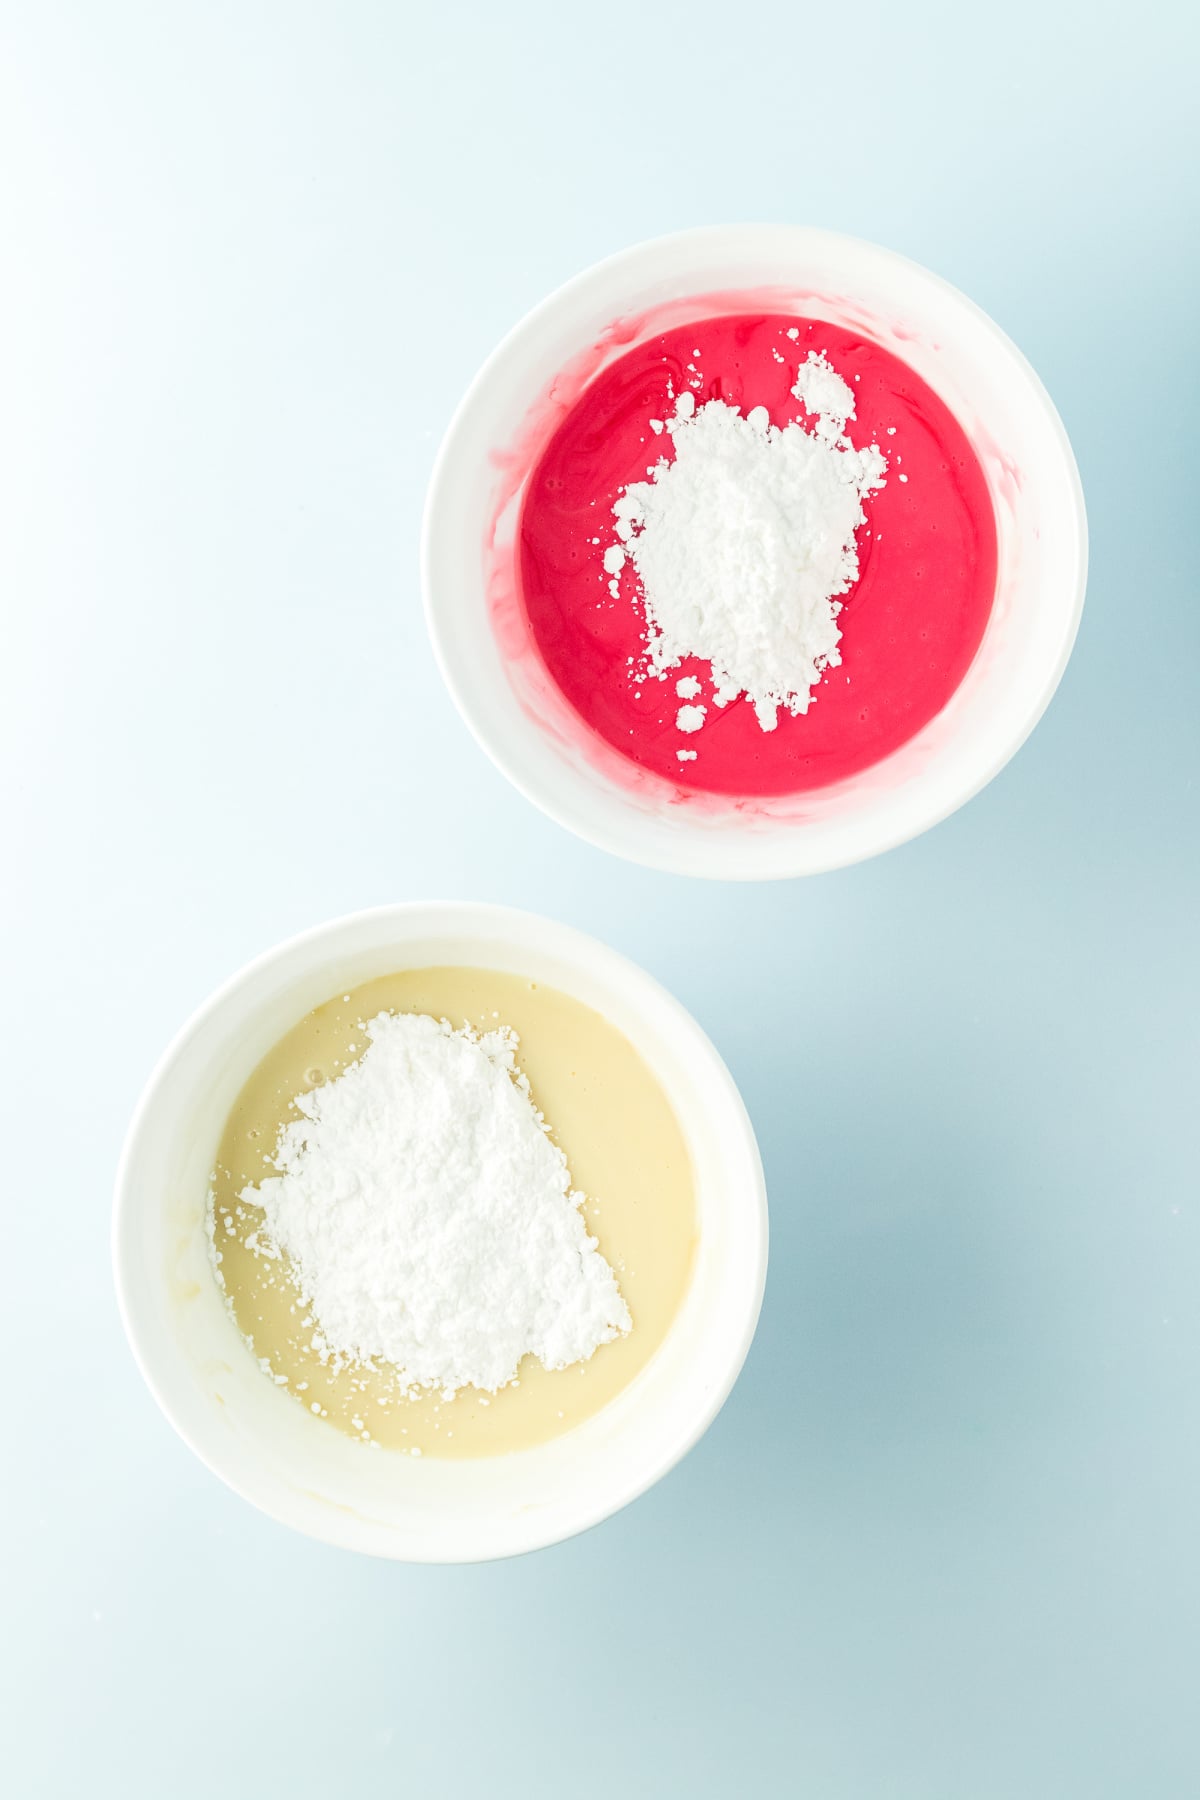
Step 2: Stir in the powdered sugar. Next, sprinkle half the powdered sugar into each bowl. Stir until they are mixed.
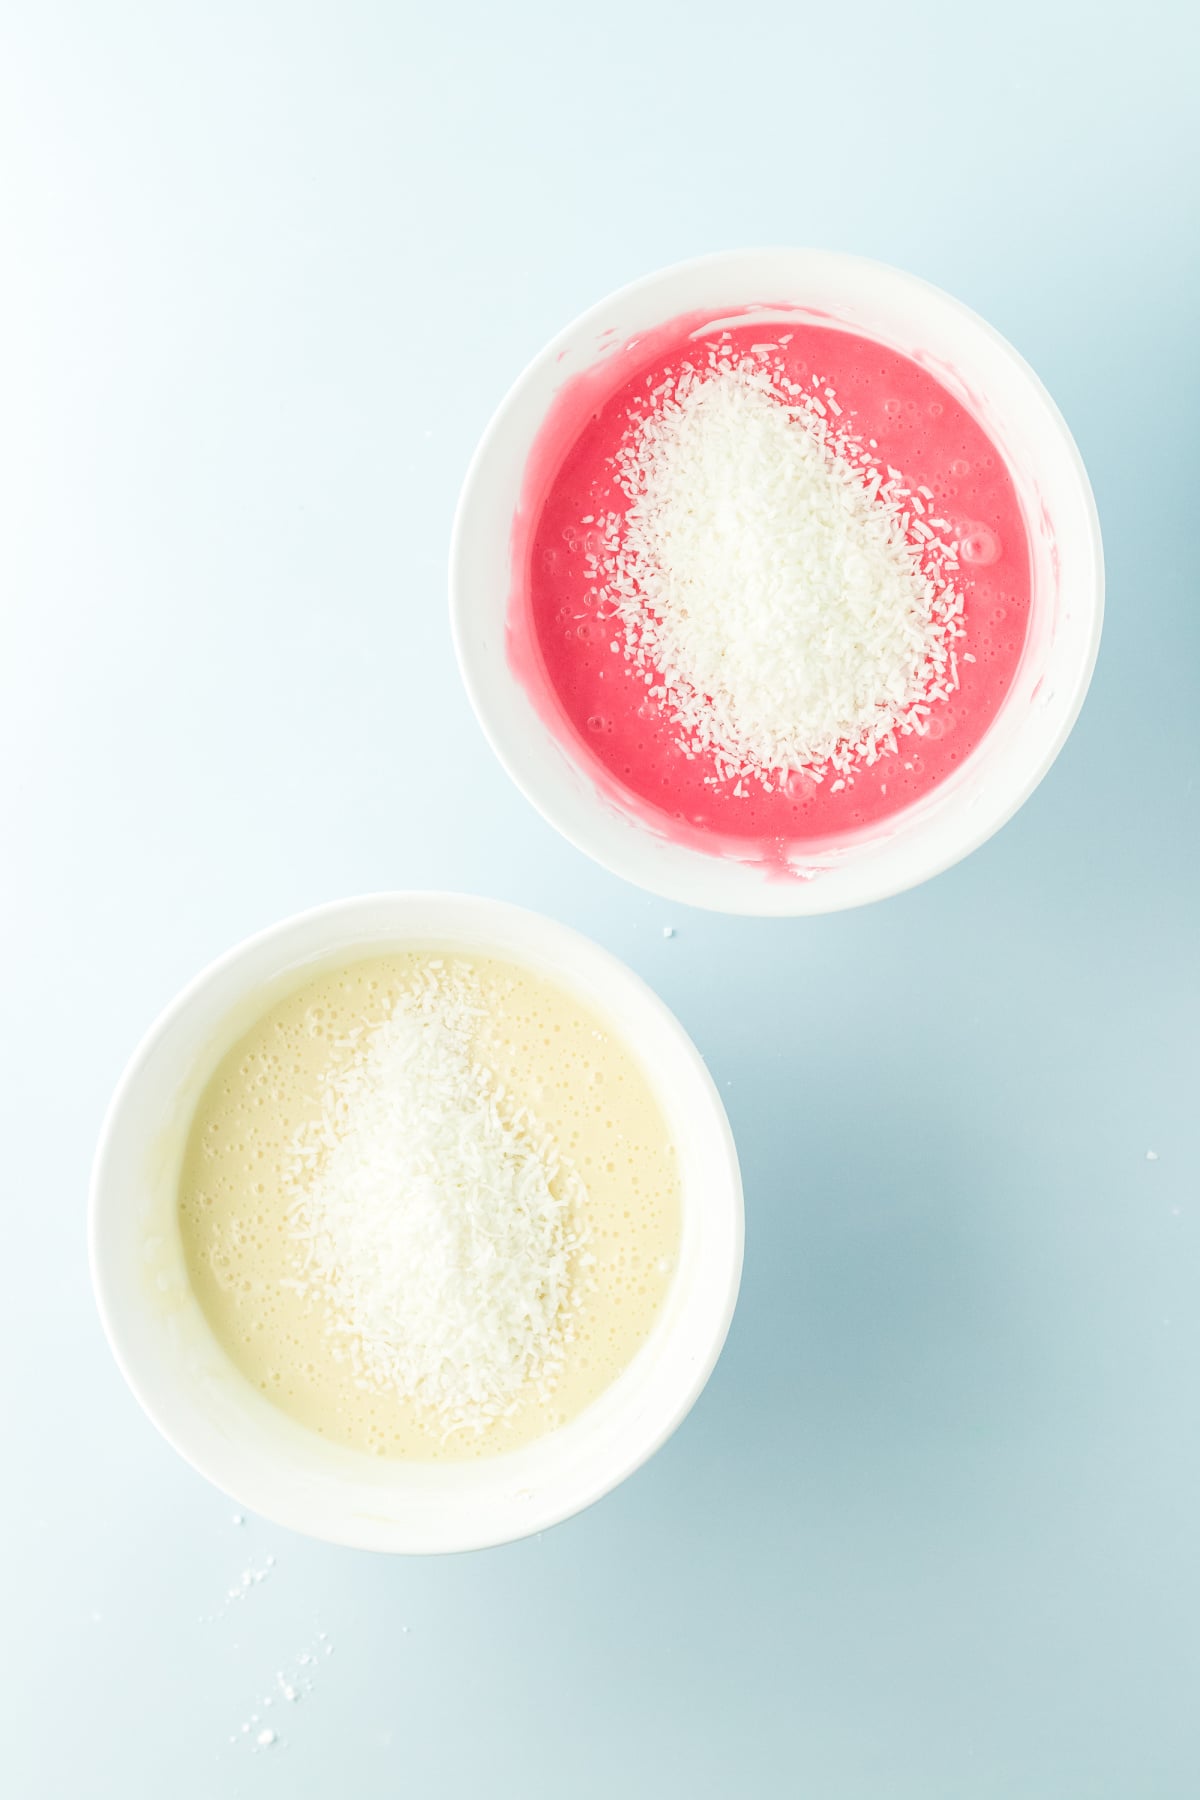
Step 3: Add the desiccated coconut. Now you can divide the coconut between the two mixtures and stir them well. They will be very thick!
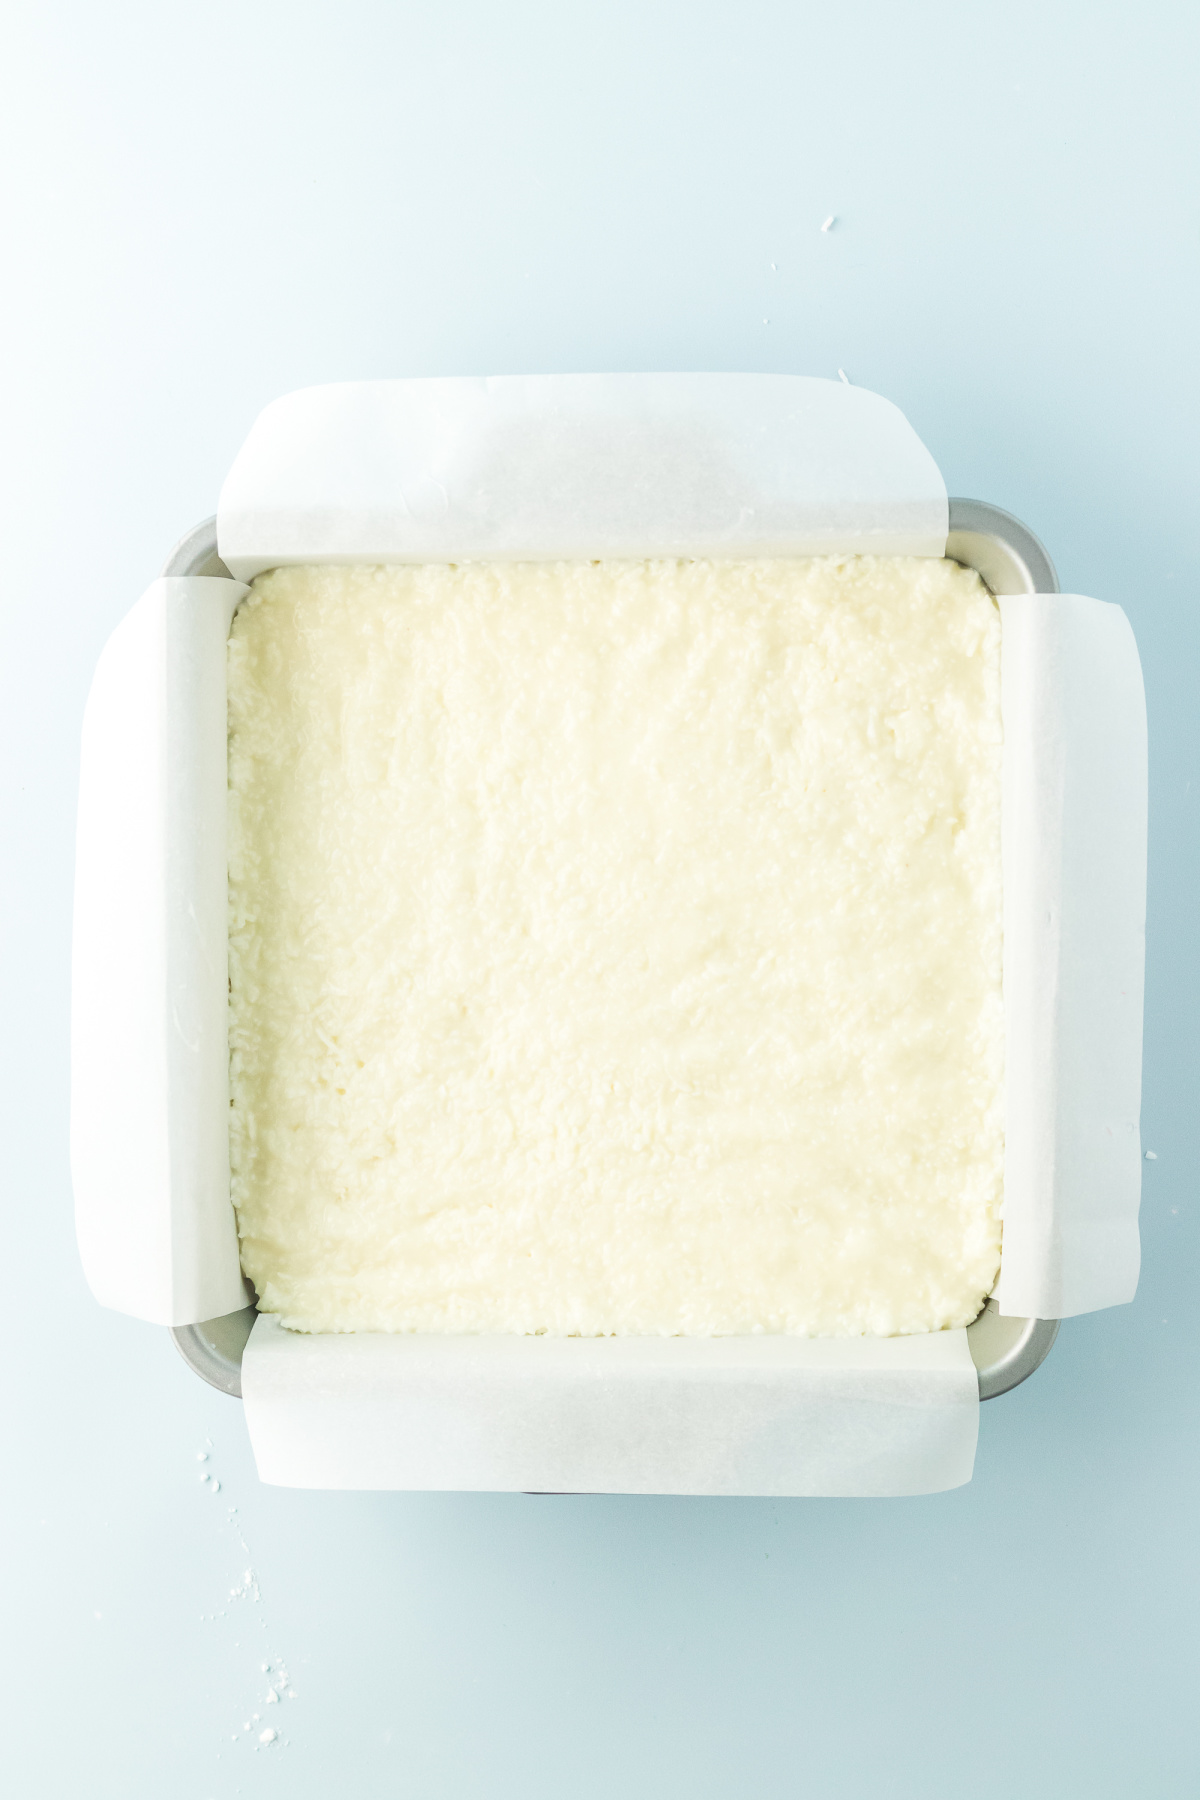
Step 4: Press the white mixture. Pour the white mixture into the prepared pan first and gently press it down with your fingers.
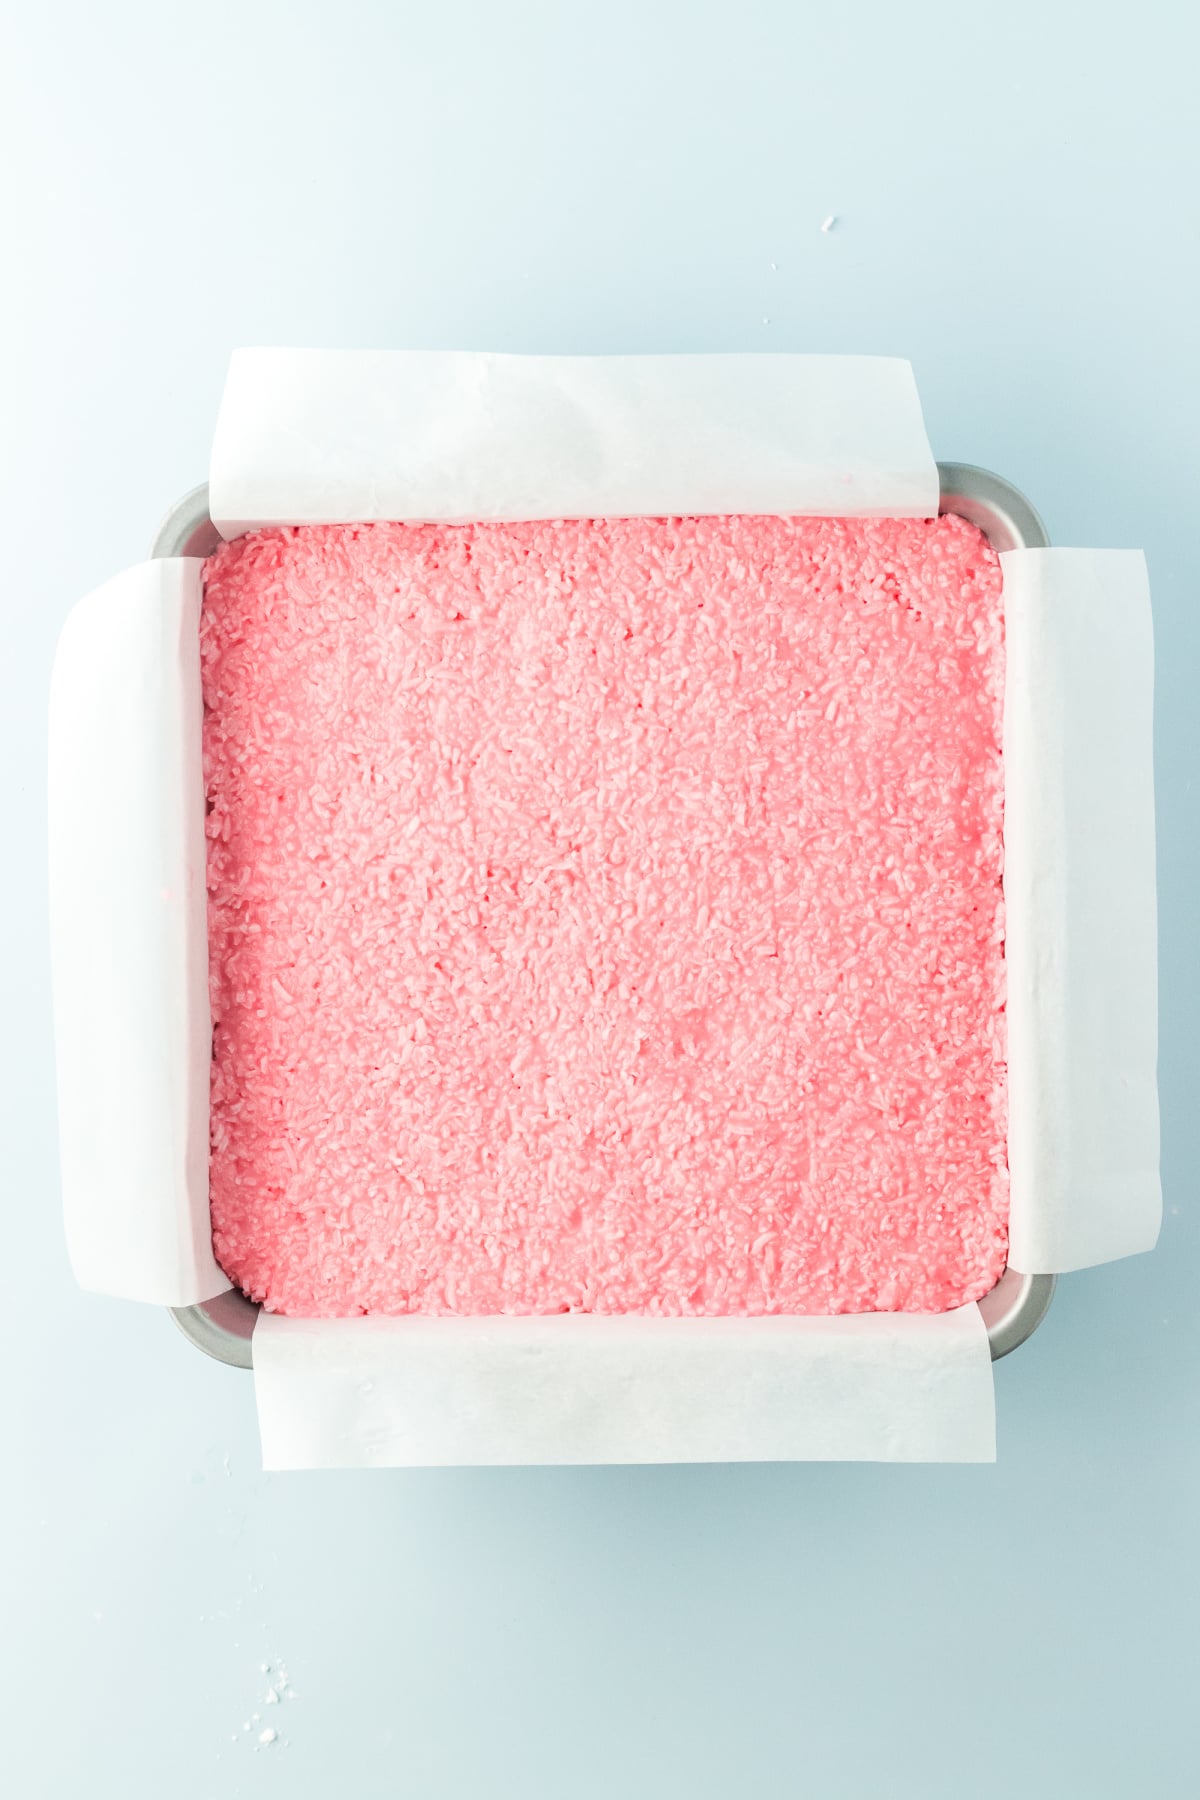
Step 5: Layer the red mixture. Then pour the red layer over the white mixture and gently spread and press it down, leaving the layers distinct.
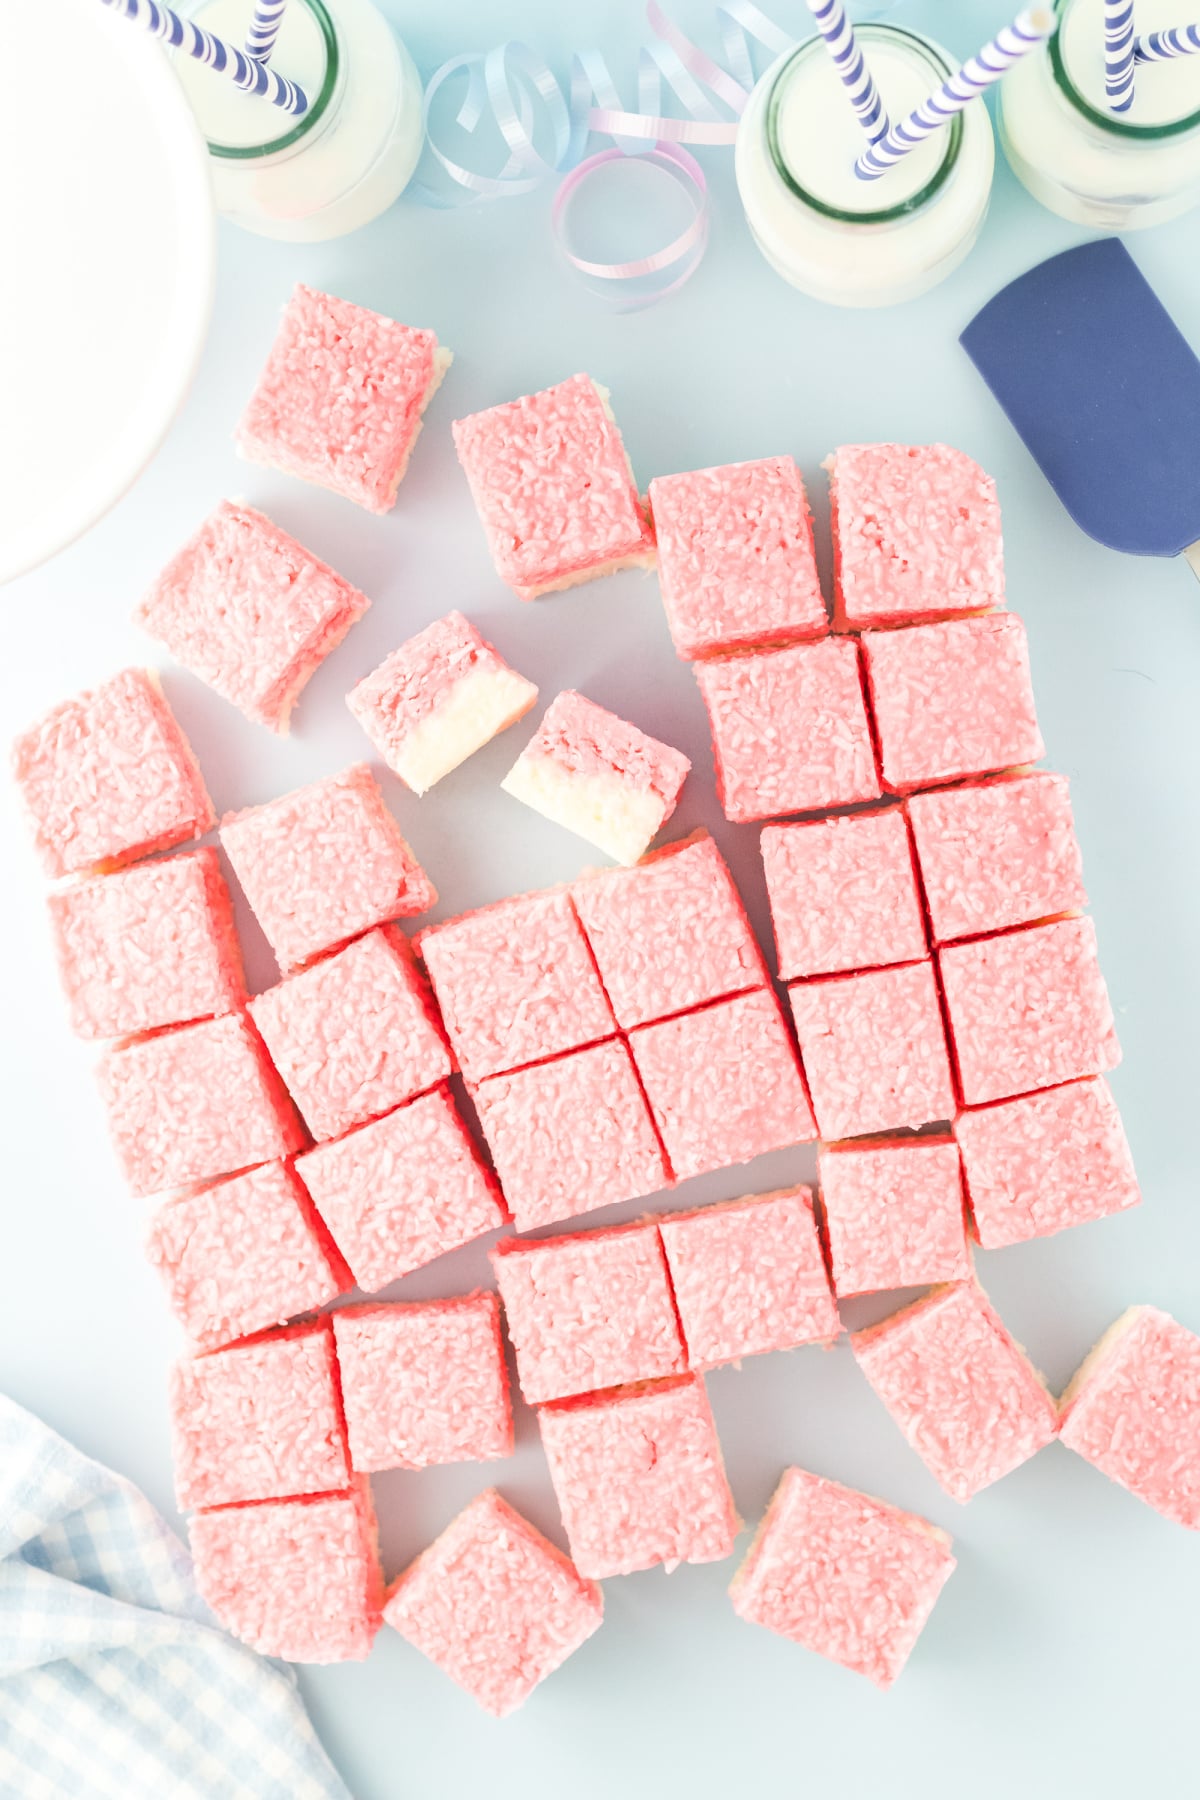
Step 6: Chill and slice. Pop it into the fridge for at least two hours. Once chilled, cut into squares and enjoy!
Recipe Tips
- Don't skip chilling: The coconut candy needs time to set, and the best way to do that is to put it in the fridge. Skipping this stuff can result in a sticky, wet mixture.
- Allow the coconut to hydrate: I like to let the coconut sit in the condensed milk for a few minutes. This helps it to slightly rehydrate and create a chewy texture.
- Sprinkle sugar on parchment: If you notice that the candy is still sticking to the parchment, sprinkle a light dusting of powdered sugar before you pour in the candy mixture.
Almond Joy bites are another delightful coconut candy recipe that also features rich chocolate!
Storage Directions
- Storing: Store your coconut candy in an airtight container in the refrigerator for up to 2 weeks. Freeze the candy for up to 3 months. Place wax paper between the layers so the pieces don't stick together.
- Make ahead: I like to make this candy the day before I plan to serve it. The longer it chills, the more set it will be. It's perfect for party planning!
Serving Suggestions
- Enjoy some tasty ice cream with your candy! A simple vanilla flavor like this sprinkles ice cream or tropical pineapple ice cream complements the flavors well.
- Prepare a tropical beverage like this pineapple rum cocktail to pair with the coconut flavor.
- These spicy candied pecans provide a flavor and textural contrast that works well with this candy recipe.
- Keep it festive with a rich and green Christmas hot chocolate!
If you enjoy homemade candy desserts like this, you may want to check out our Oreo bark. Sweet and delicious, it's a hit with the masses.
Recipe FAQs
Don't add more coconut without adjusting the measurements of the other ingredients. This can make the candy dry and crumbly.
About 2 hours or so is fine, especially if you're serving this candy with coconut to party guests. Otherwise, it can start to get too warm, which will compromise the consistency and texture.
If you don't give it enough time to set, it can be very sticky and hard to pick up or slice. Chilling it overnight is always the best option if you can.

More Delicious Candy Recipes
Do you like candy recipes? Here are some recipes you may also like to try.


If you try this recipe and love it please leave a star rating in the recipe card below or even better, drop a review in the comment section. I always appreciate your feedback. Be sure to follow along with me on Facebook, Pinterest, and YouTube for more easy recipes!

Coconut Candy
Equipment
- 9x9 pan
Ingredients
- 14 oz 396g sweetened condensed milk, divided (see notes)
- 2 cups 9oz, 260g powdered sugar, divided
- 2 teaspoons vanilla extract divided
- ½ teaspoon red food colouring
- 4 cups 14oz, 400g unsweetened, desiccated coconut, divided
Instructions
- Line a 9x9 pan with parchment paper.
- Grab 2 mixing bowls and divide the sweetened condensed milk evenly between the two bowls.
- Add 1 teaspoon of vanilla extract to each bowl and add the food colouring to 1 of the bowls. Stir to combine them.
- Add 1 cup of powdered sugar to each bowl. Stir each bowl thoroughly. You'll end up with one bowl of pinkish glaze and one bowl of white glaze.
- Add 2 cups of desiccated coconut to each bowl. Stir to thoroughly mix together. It will be very, very thick.
- Press the white mixture into the bottom of your prepared pan. If you wet your fingertips with a little bit of water, the mixture should be easy to press down without it sticking to your hands. Try to keep the layer as even as possible.
- Press the pink layer over the white evenly just as you did before.
- Pop the mixture into the fridge for at least 2 hours but up to overnight. Once the pan has chilled, remove the Coconut Candy from the pan and cut into small squares. Enjoy!
Video
Notes
- If the coconut candy is sticking to the parchment paper, sprinkle some powdered sugar on it so the candy releases better.
- When storing the leftovers, place a wax paper layer between the pieces to keep them from sticking together.
- Allow it plenty of time to chill and set in the fridge, or the coconut candy will be very sticky.


Leave a Reply