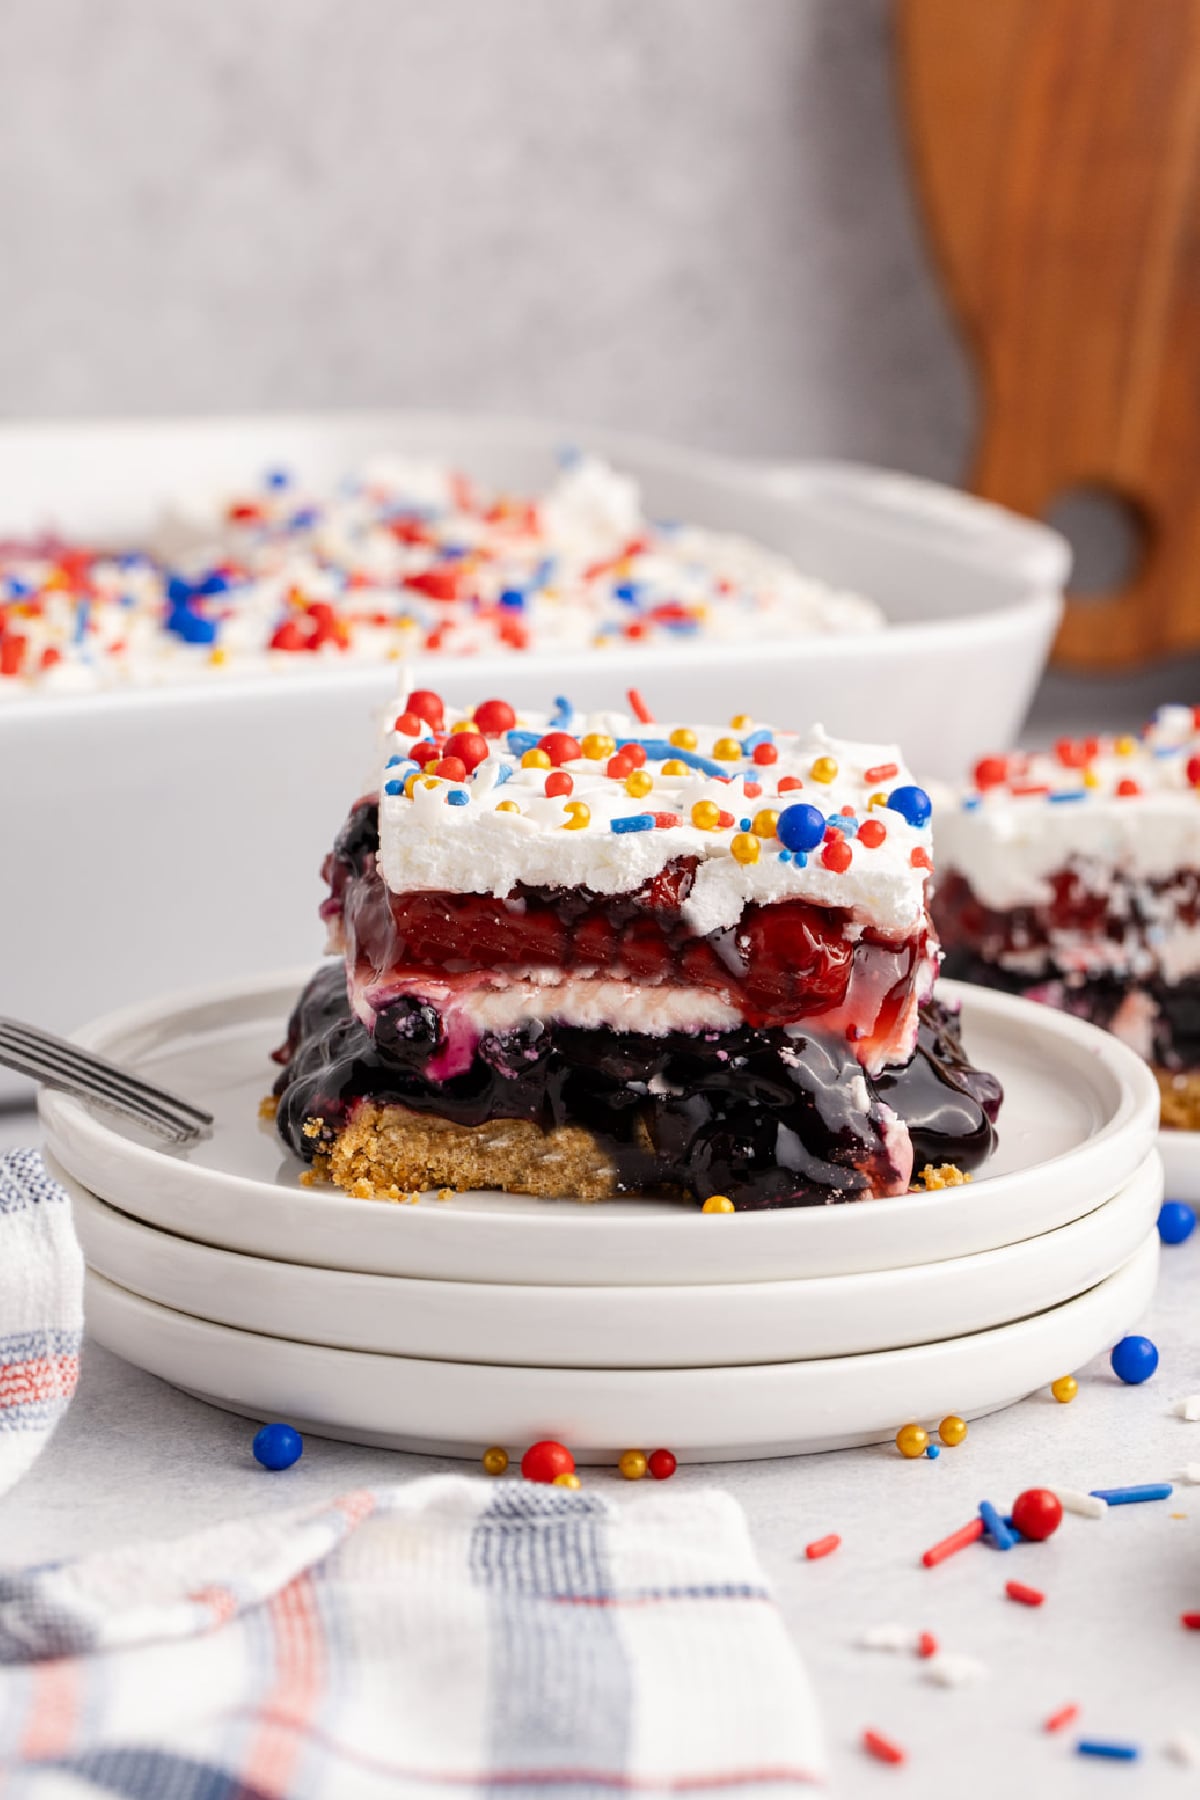
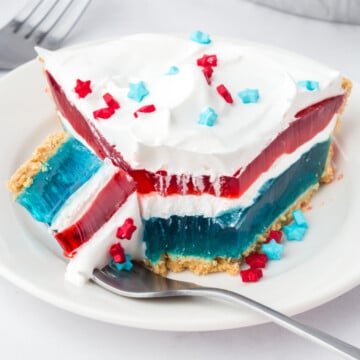
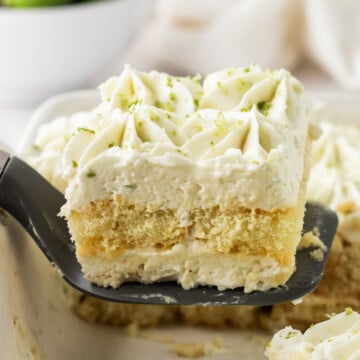
This Red, White and Blue Berry Dessert is the kind of show-stopping treat that looks like it took hours to make but comes together with surprisingly simple ingredients and easy steps. With layers of buttery graham cracker crust, luscious cheesecake filling, and vibrant berry toppings, every bite is creamy, fruity, and completely irresistible. It's the perfect dessert when you want something festive, refreshing, and guaranteed to impress.
Red, White and Blue Berry Dessert Recipe Essentials
- 🍽️ Course: Dessert
- ⏱️ Cooking Time: 20 minutes + chill time
- 🍴 Servings: 12 servings
- 🧄 Flavor Profile: Sweet, creamy, fruity, slightly tangy
- 🍚 Best Served With: Coffee, tea, dessert platters with this red, white and blue cookie cake
- 🧊 Make Ahead?: Yes
Summarize and Save This Content On
Whether you're planning a Fourth of July barbecue, Memorial Day gathering, summer potluck, or just want to serve a colorful make-ahead dessert everyone will rave about, this recipe checks every box. Best of all, you can prepare it ahead of time, making entertaining so much easier. If you love desserts that are equal parts beautiful and delicious, this patriotic berry dessert deserves a spot on your table.
This was inspired by my patriotic sugar cookies and berry cheesecake trifle on this site, and pairs well with our bomb pop cocktail.
Jump to:
- Red, White and Blue Berry Dessert Recipe Essentials
- Why You Will Love This Recipe
- Ingredients
- Variations
- How to Make Red, White and Blue Berry Dessert
- Red, White and Blue Berry Dessert Expert Tips
- Storage Directions
- Serving Suggestions
- Red, White and Blue Berry Dessert Recipe FAQs
- More Red, White and Blue Recipes
- Red, White and Blue Berry Dessert
Why You Will Love This Recipe
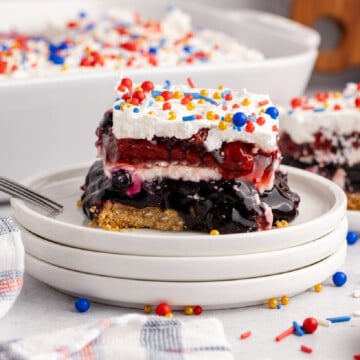
- Perfect for all occasions: The beautiful presentation is always a hit at parties and holidays like our jello poke cake
- Make-ahead friendly: This easy, no-bake dessert tastes even better after chilling
- Customizable: Easy to switch fruit flavors surrounding creamy cheesecake layer
Ingredients
You only need a handful of simple ingredients to create this incredible layered dessert, like our jello pretzel dessert, making it easy to prepare with a quick trip to the store.
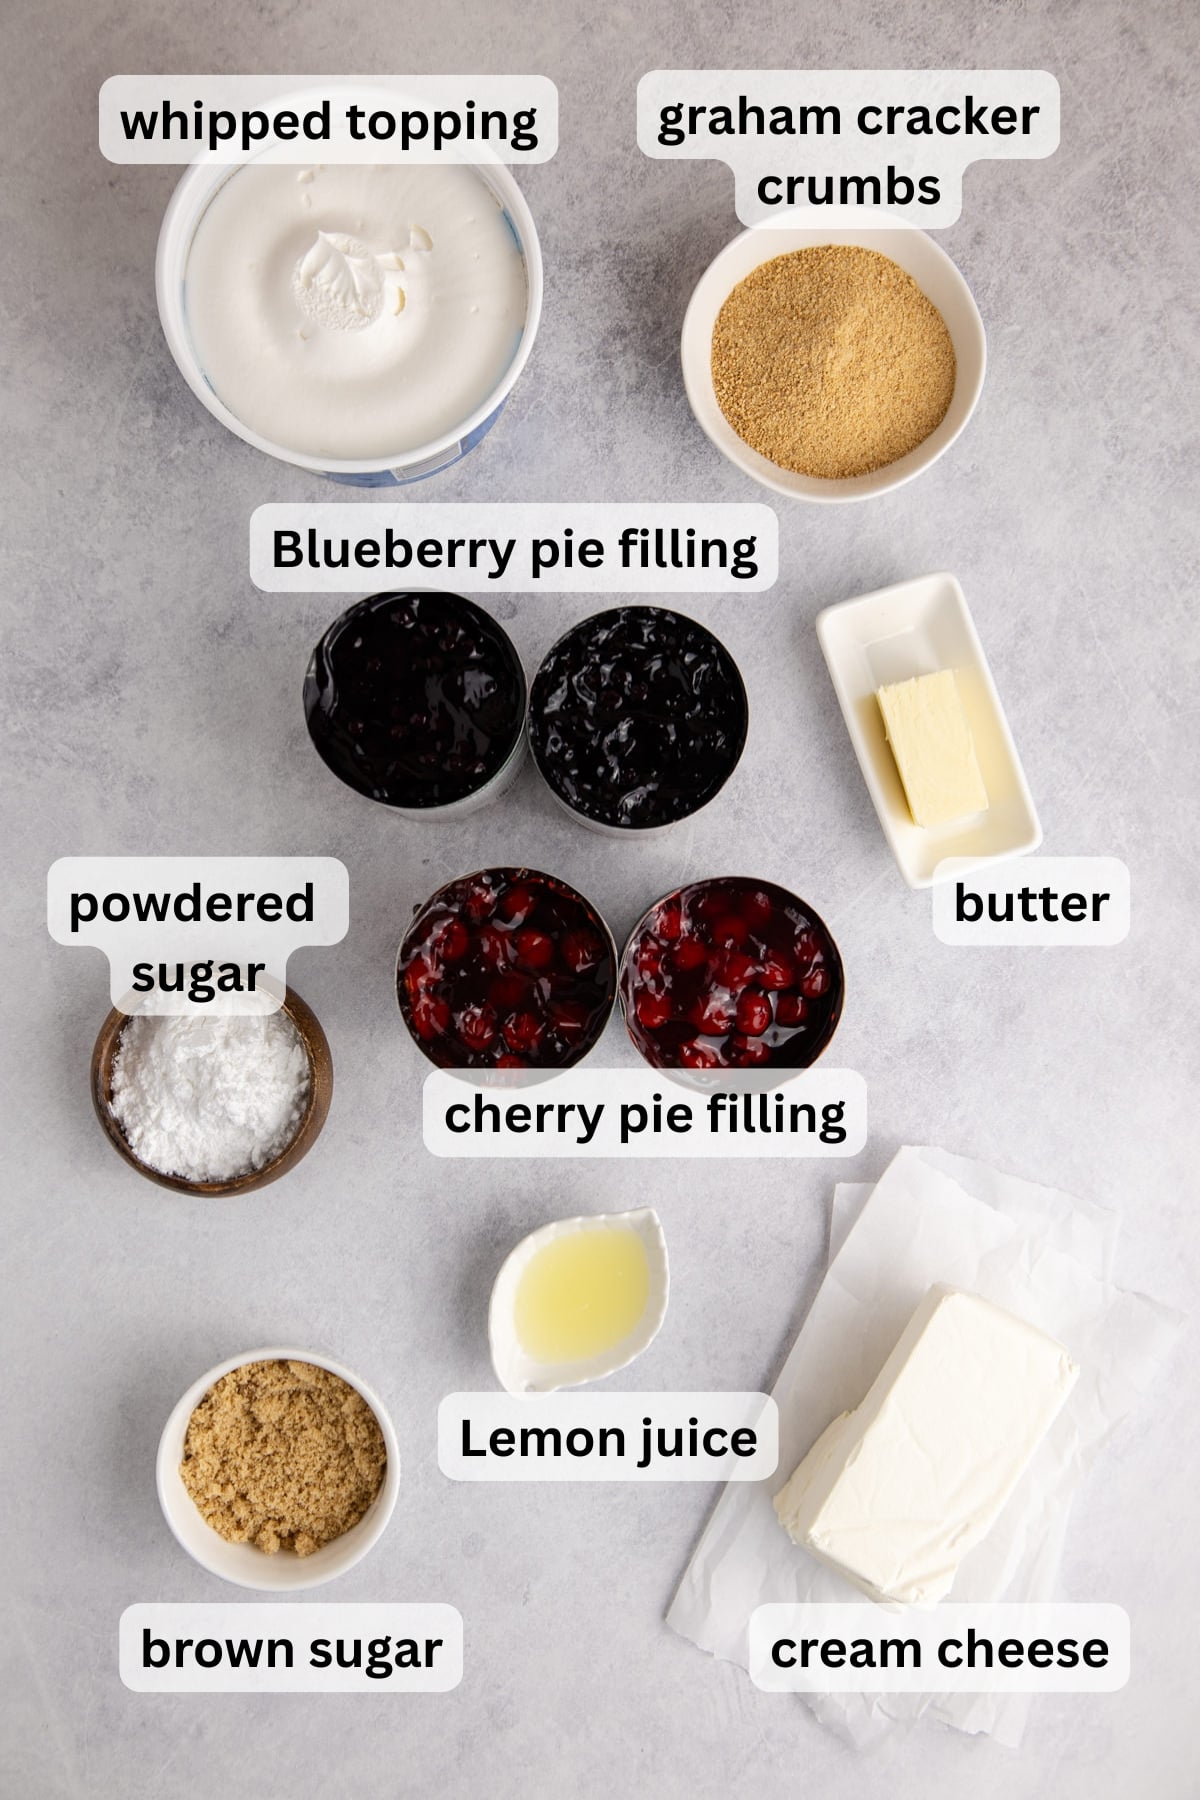
- Graham cracker crumbs, Butter and Brown Sugar: Create a buttery, slightly sweet crust that provides structure and a firm base for the layers
- Cream cheese, Cool Whip, Powdered Sugar and Lemon juice: Forms the creamy, tangy cheesecake layer
- Blueberry and Cherry Pie Filling: Adds the blue and red layer with juicy sweetness and vibrant color
See the recipe card below for the exact quantities of each ingredient.
Variations
- Swap Graham Crackers: Swap graham crumbs for Oreo crumbs, crushed vanilla wafers, or shortbread cookies.
- Strawberry Blueberry Dessert: Replace cherry with fresh strawberries for a lighter flavor
- Mini Dessert Cups: Serve in jars or cups for individual portions
- Red White and Blue Trifle: Layer in a trifle bowl for a show-stopping presentation
How to Make Red, White and Blue Berry Dessert
Preheat oven to 350F and prepare a 9x13 baking dish with nonstick spray and set aside.
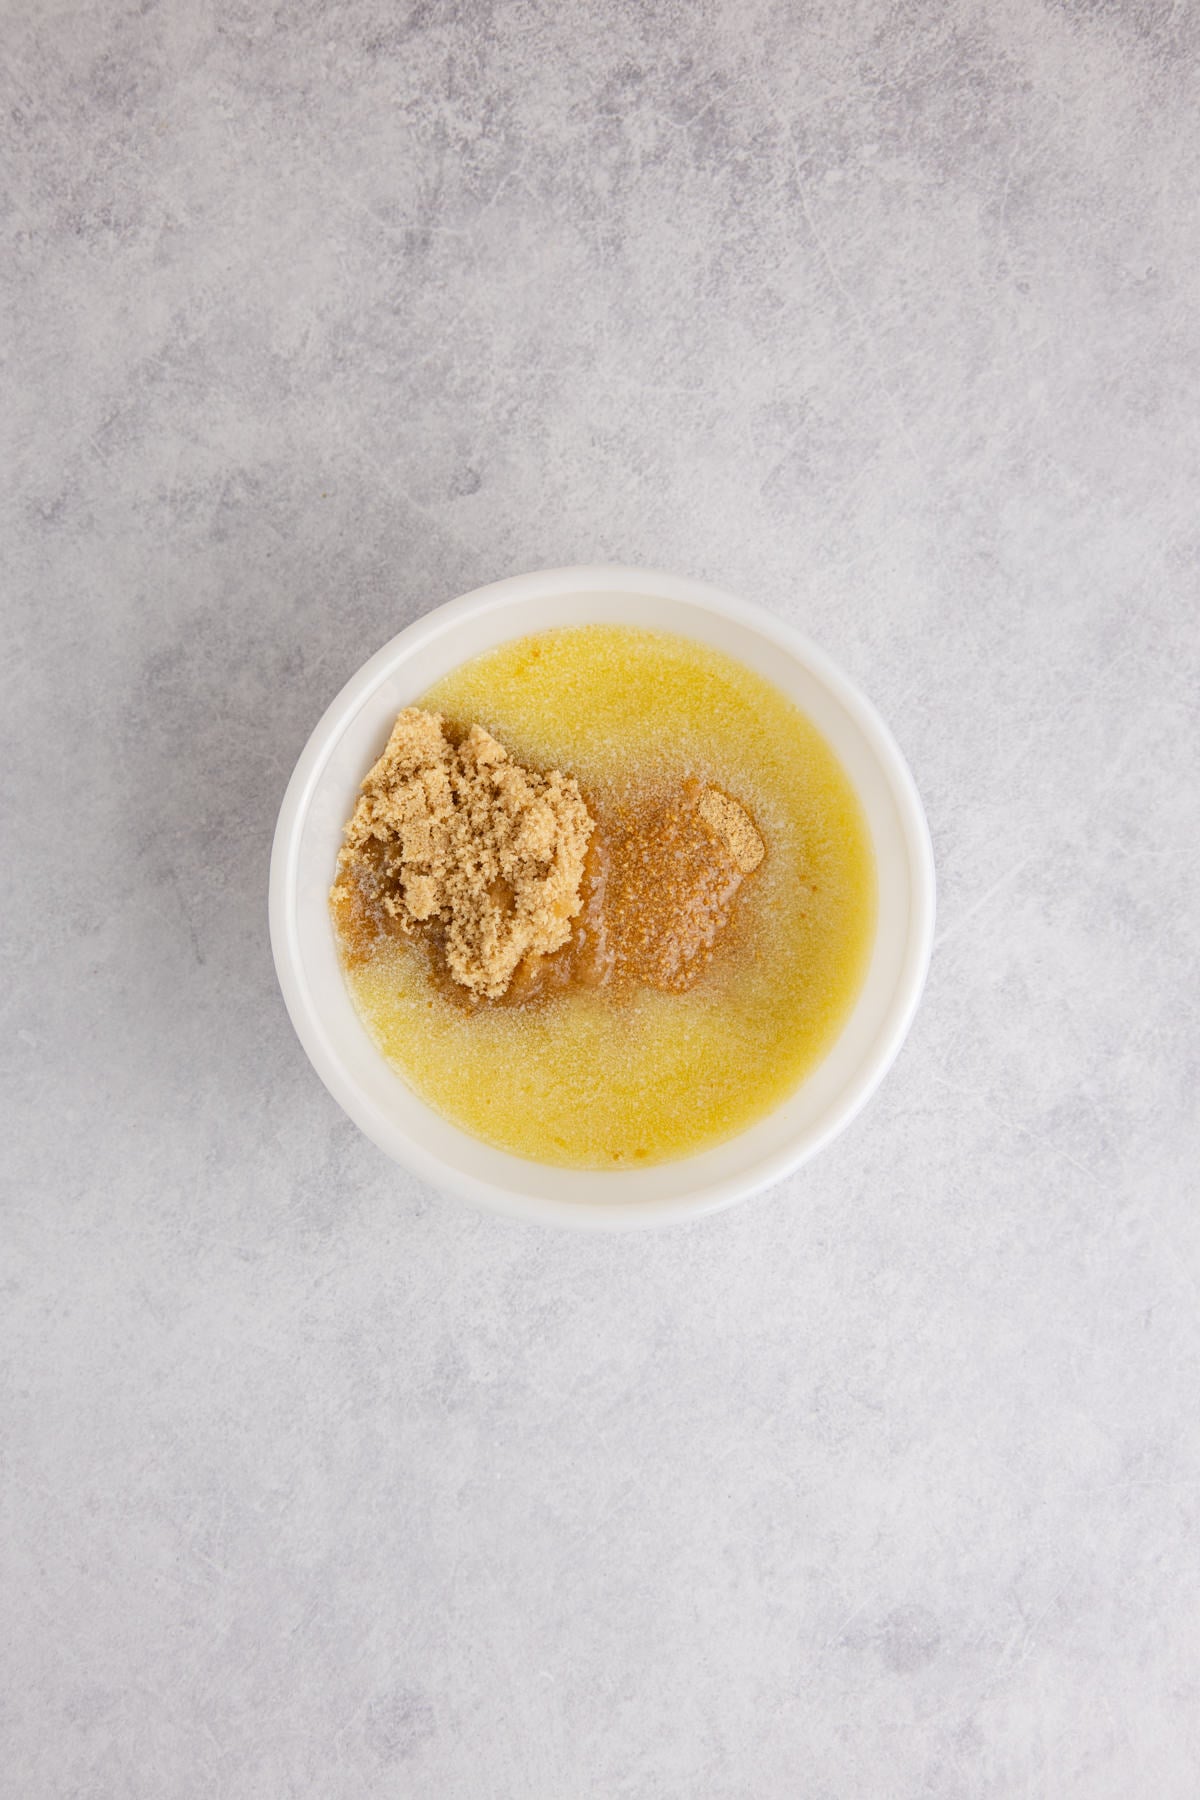
Step 1: Make Base. In a bowl, mix graham cracker crumbs, melted butter and brown sugar until combined.
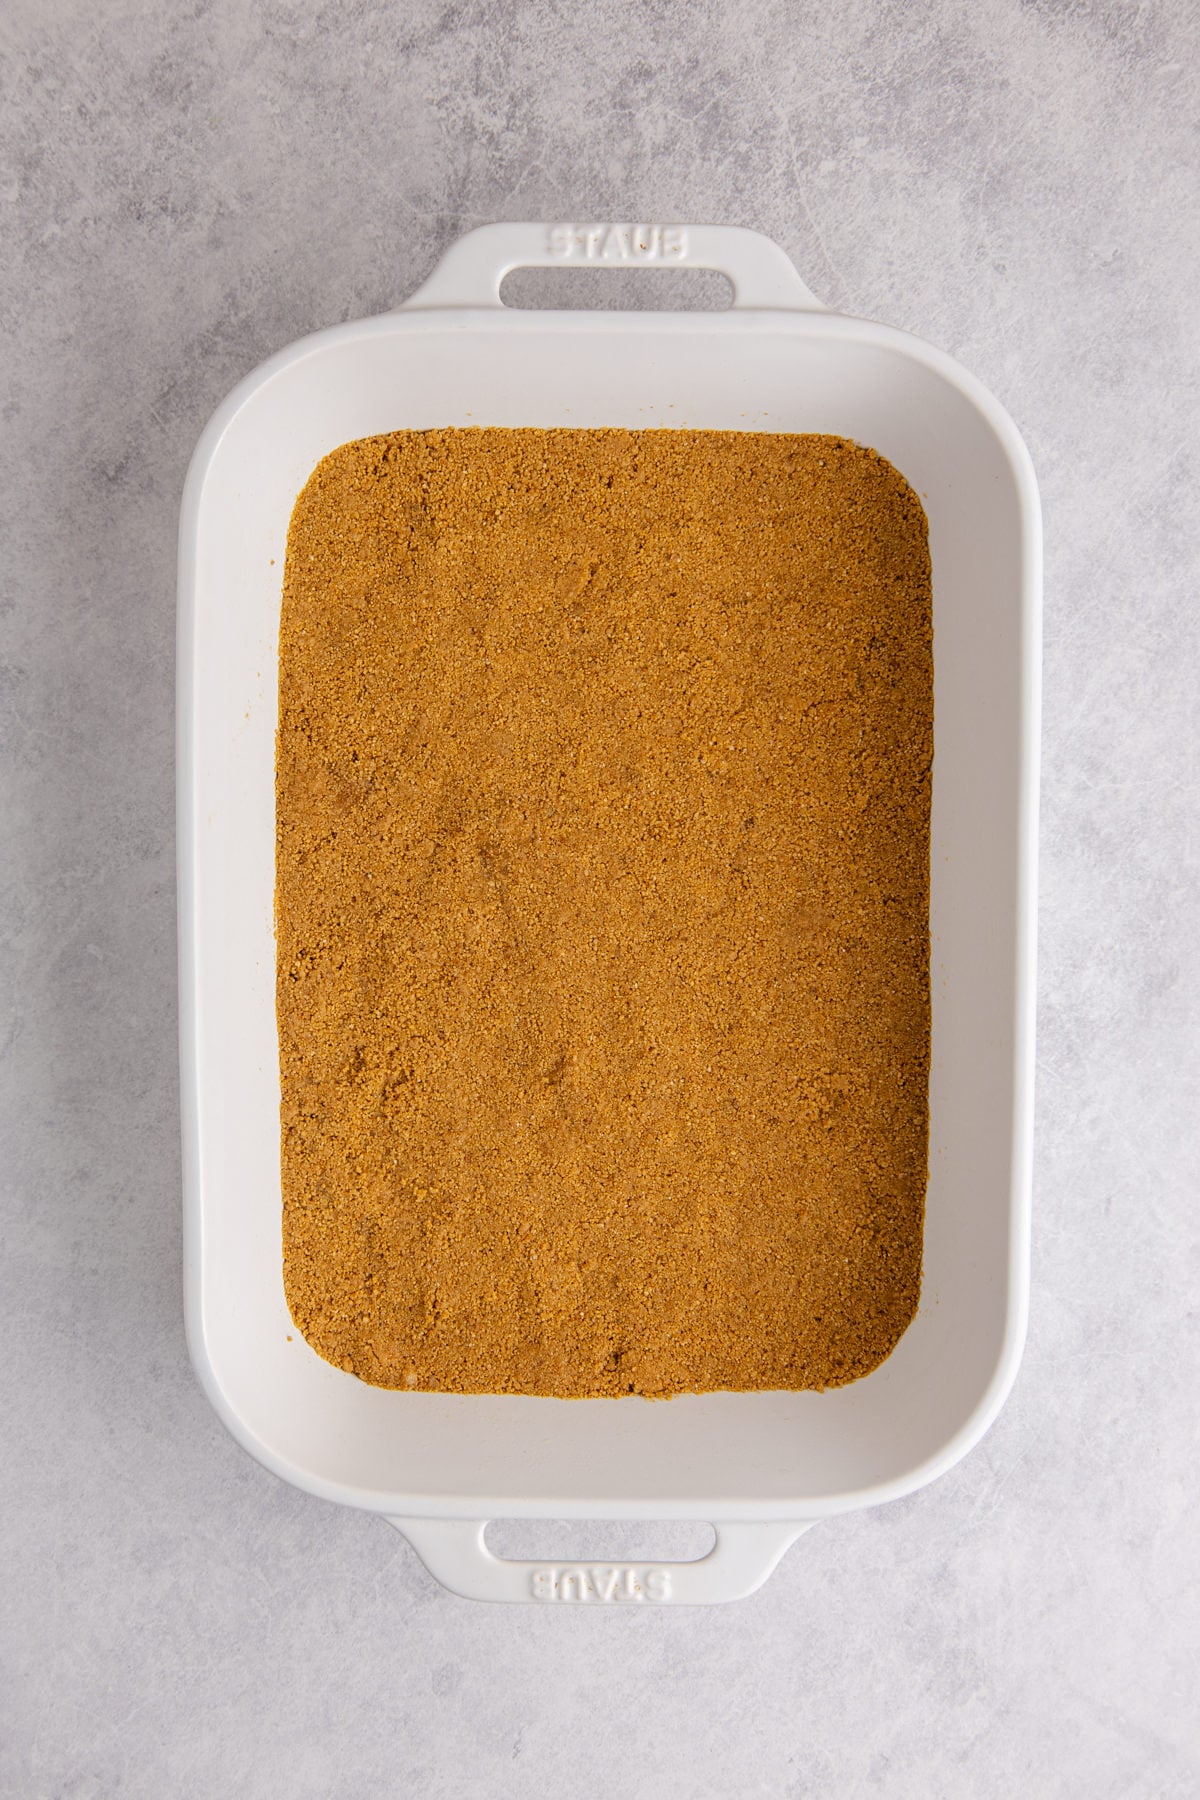
Step 2: Bake. Transfer crumb mixture to prepared dish and pack in until evenly (the bottom of a measuring cup works well), then bake for 12 minutes. Remove and let cool completely before adding the next layer to prevent sogginess.
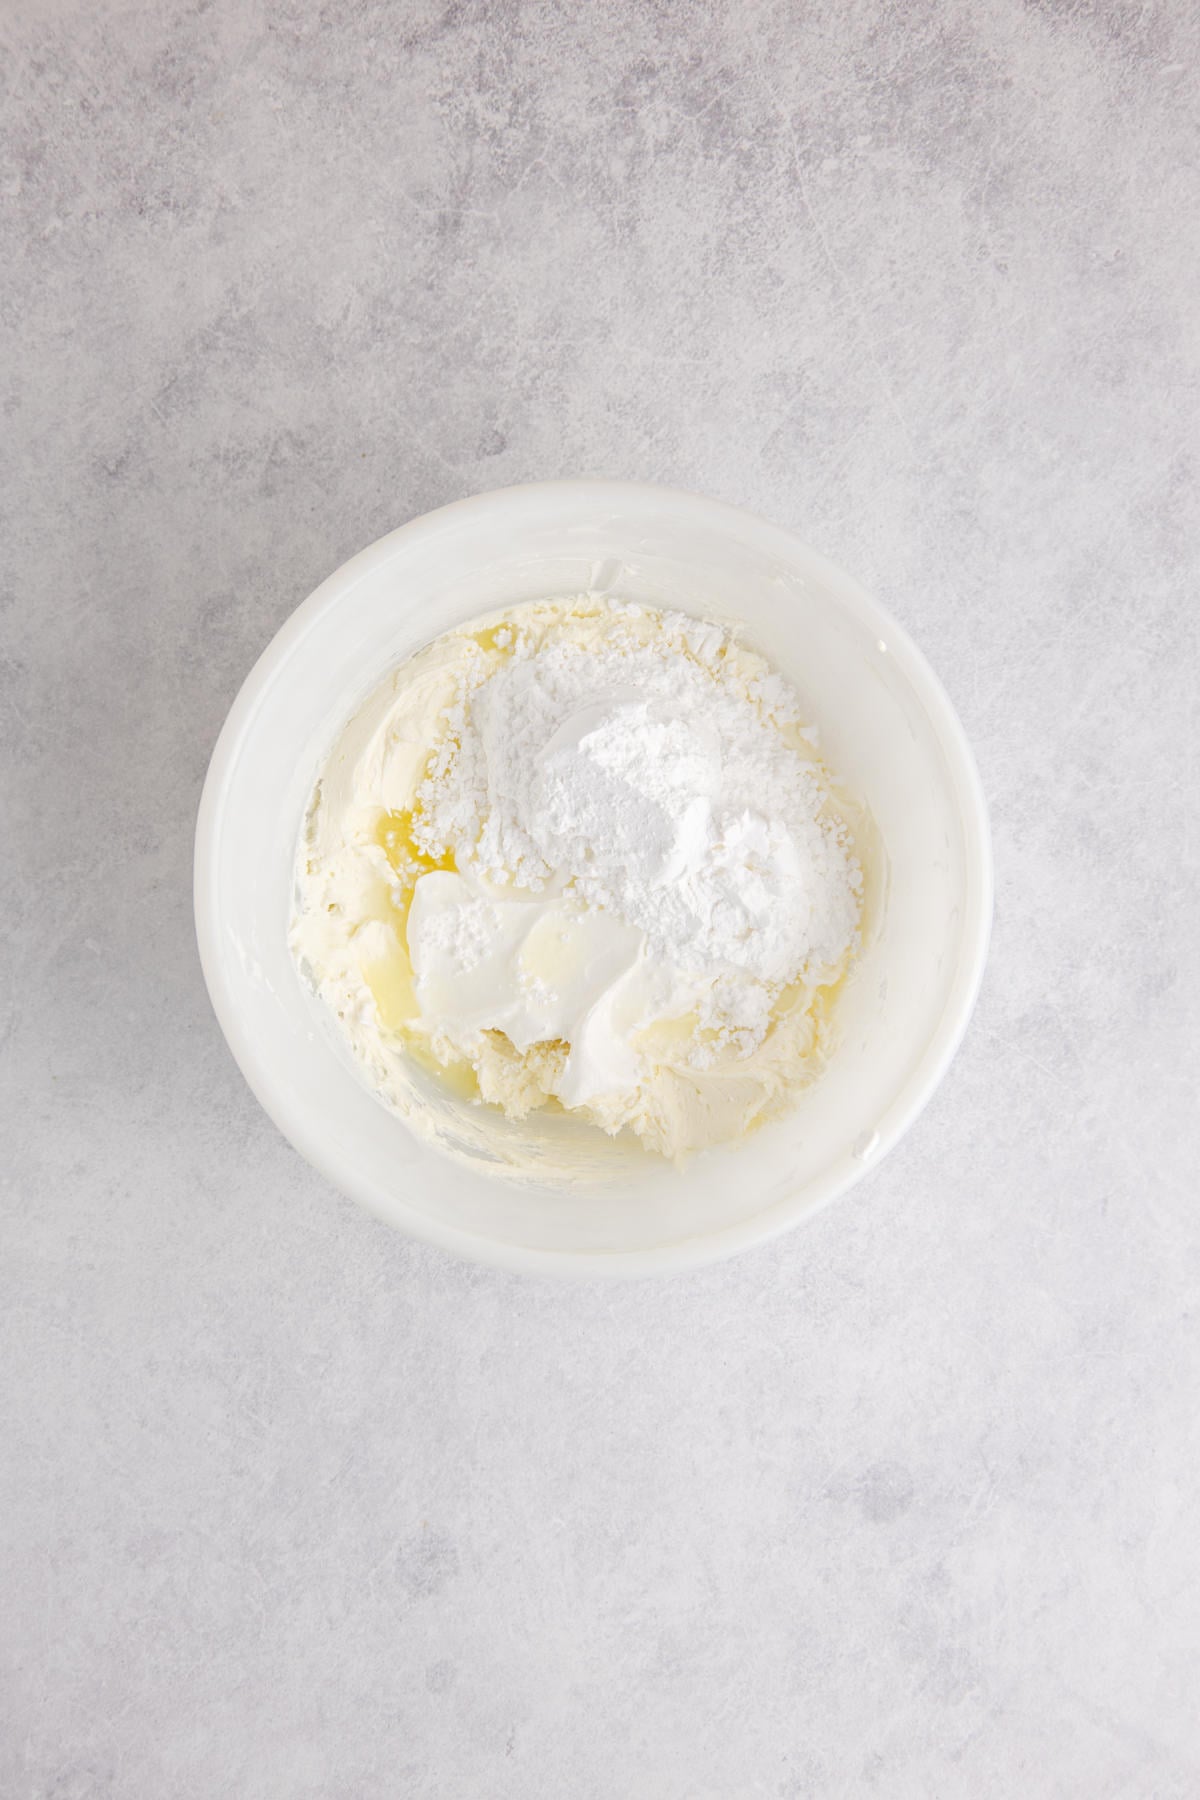
Step 3: Make cheesecake layer. In a large bowl, beat cream cheese with a hand mixer until smooth. Add ¾ the Cool Whip, powdered sugar, and lemon juice and mix again just to combine. Set aside for a moment.
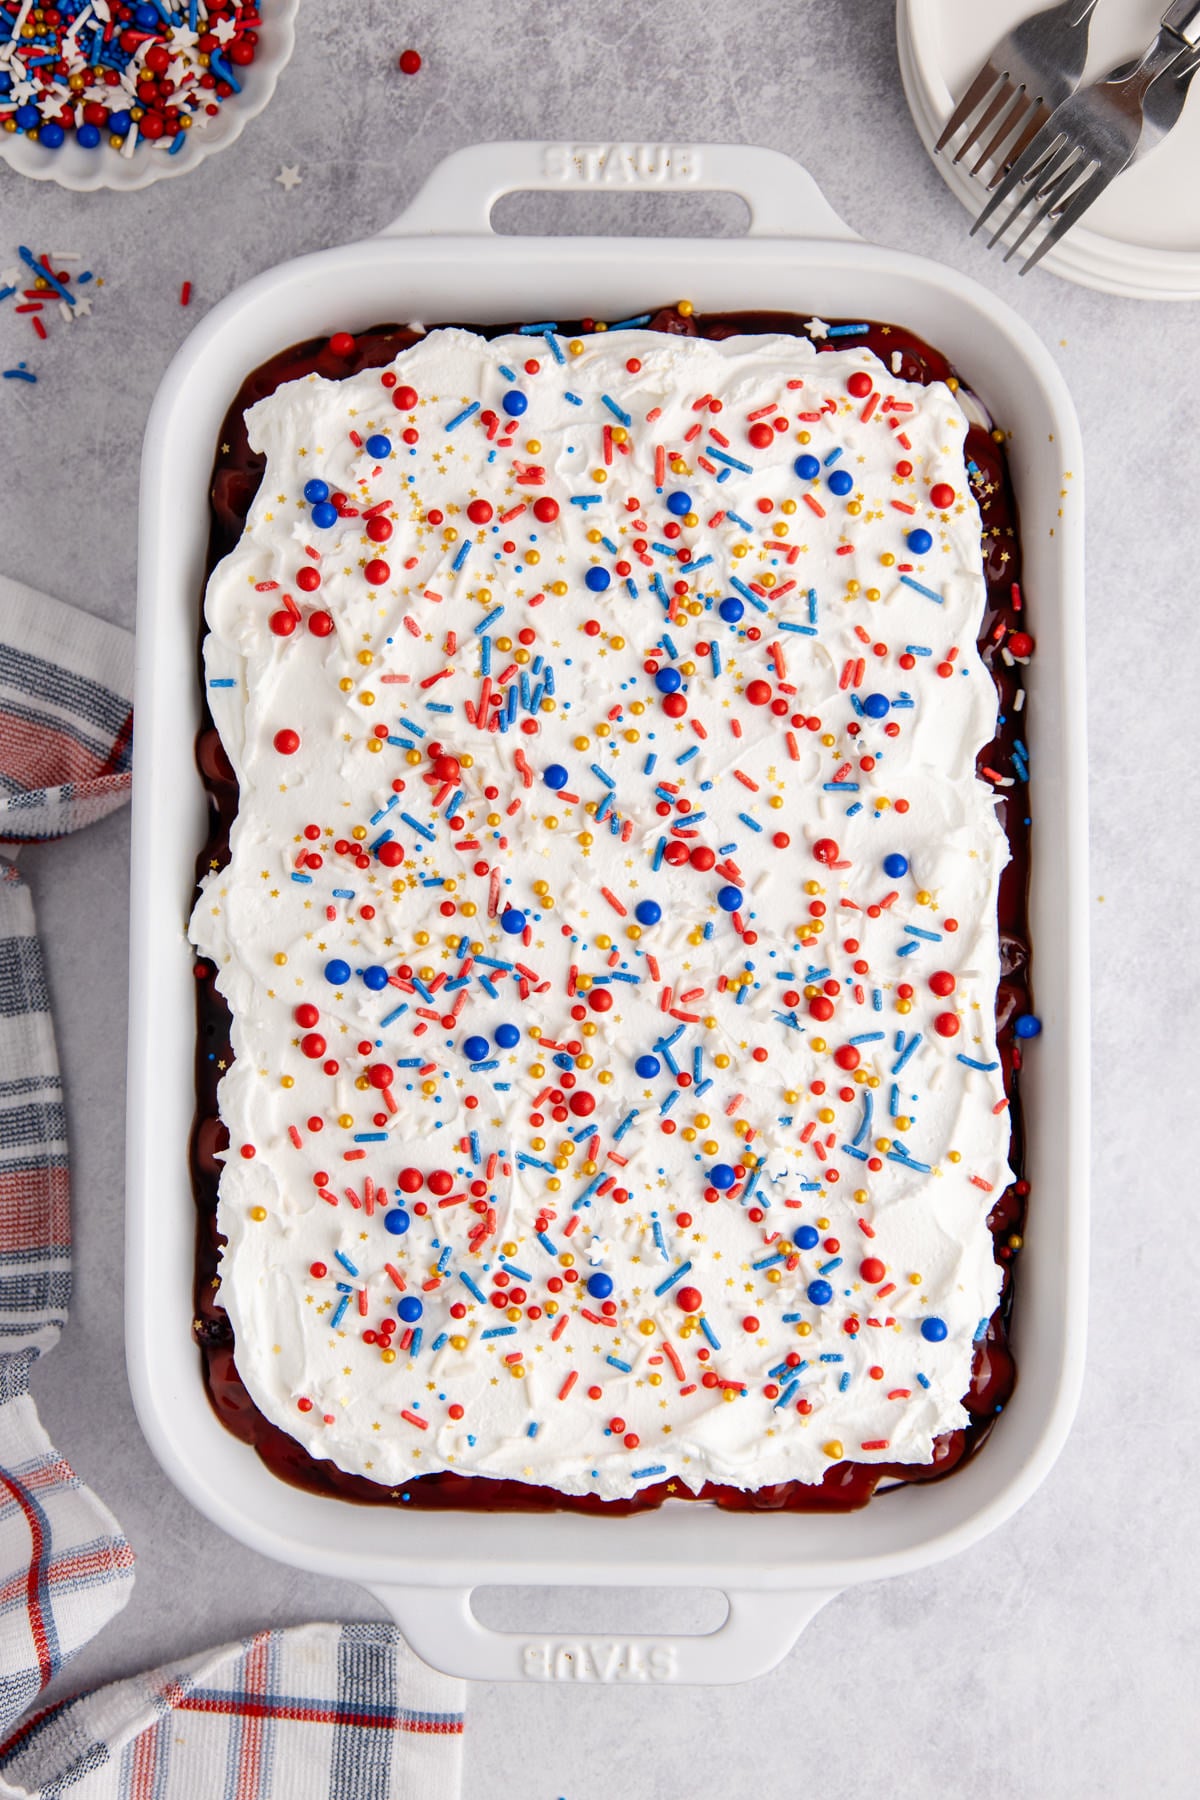
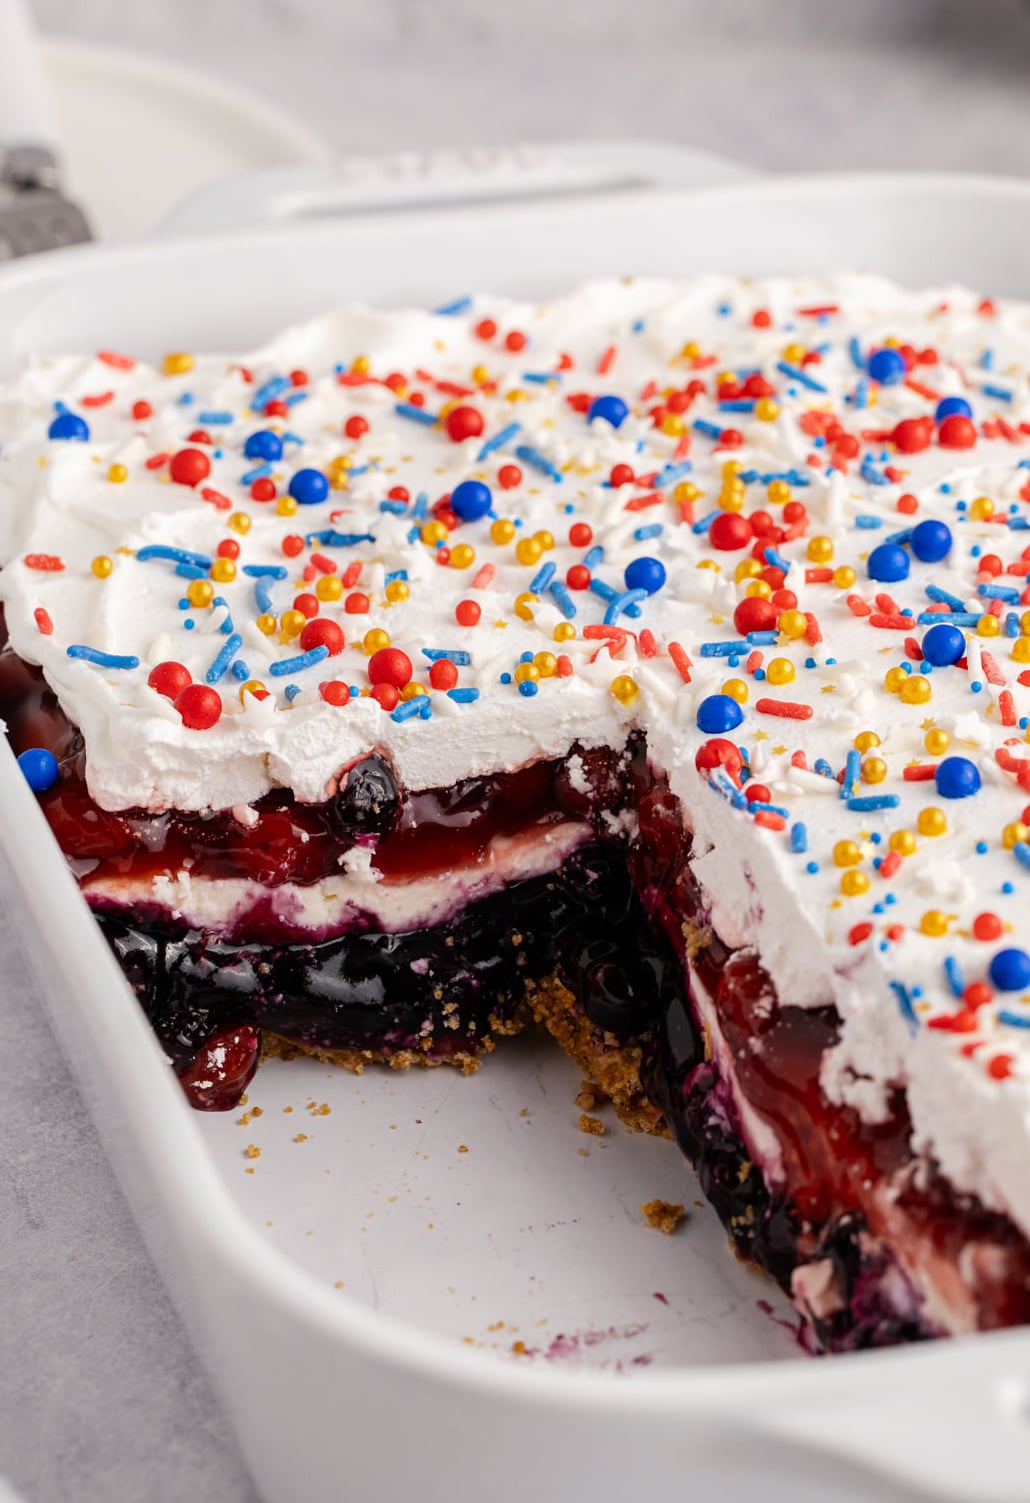
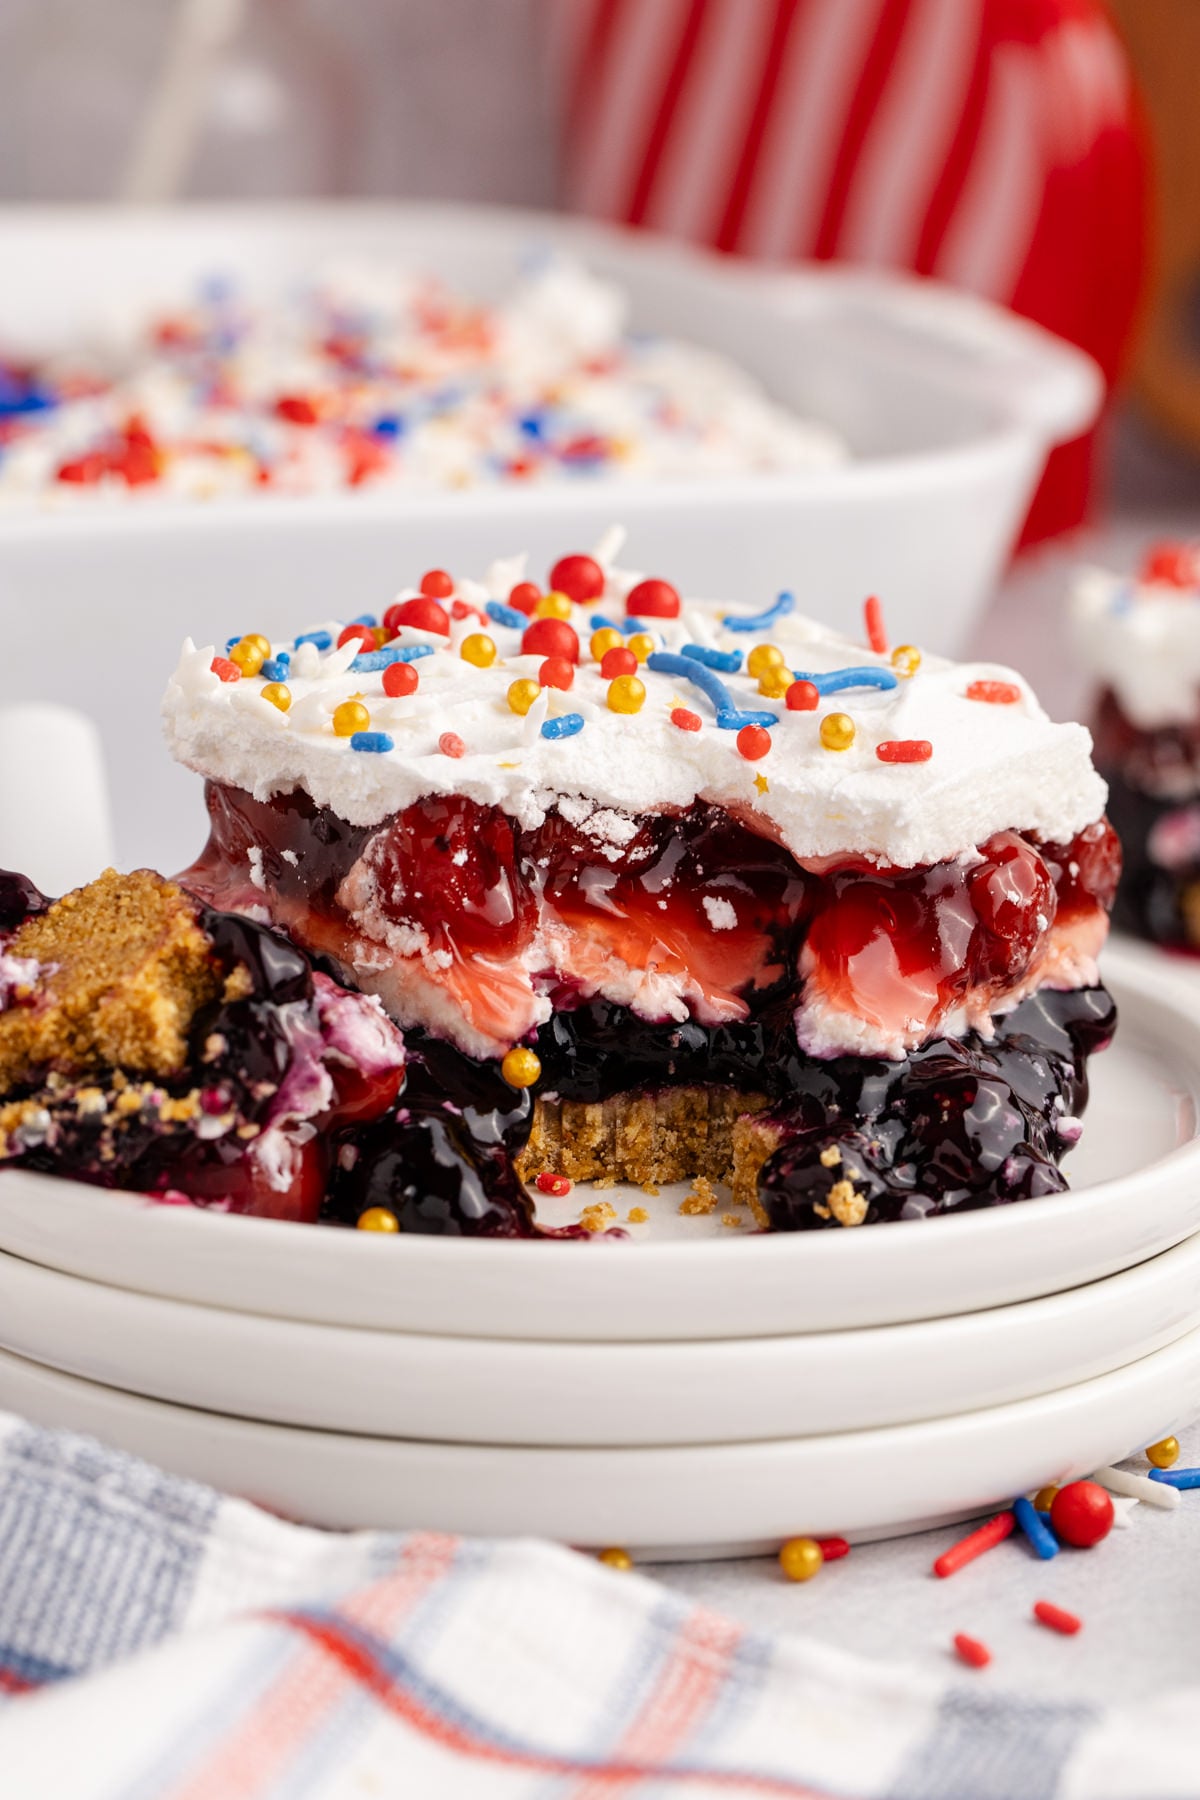
Step 4: Add layers. Spread blueberry pie filling evenly over crust, followed by the cream cheese mixture, cherry pie filling, then with the remaining Cool Whip add the top layer. Add sprinkles, if using.
Refrigerate for about 6 hours or overnight to allow the layers to set a little, and garnish with any sprinkles or fresh fruit once you are serving.
Red, White and Blue Berry Dessert Expert Tips
- Bake crust until lightly golden: Prevents crumbling when slicing
- Cool crust completely before layering: Prevents melting and keeps layers defined
- Beat cream cheese until smooth first: Prevents lumps in your filling
- Fold whipped topping gently: Keeps the mixture light and airy instead of dense
- Layer using small dollops instead of spreading all at once: Prevents mixing colors and layers
- Use a glass dish for presentation: Shows off the red, white, and blue layers beautifully
- Refrigerate at least 6 hours (overnight best): Ensures firm, defined slices and better flavor
- Wipe knife between slices: Keeps presentation clean and sharp
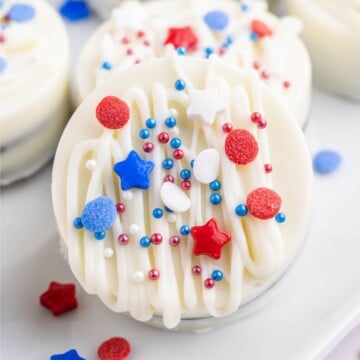
If you love recipes like this, you may also enjoy 4th of July chocolate bark and red white and blue cake.
Storage Directions
Refrigerator: Store covered up to 3 days
Freezer: Freeze up to 1 month in an airtight container (texture will change and soften)
Make Ahead: Prepare up to 24 hours in advance
Serving Suggestions
- Serve at holiday dinners or potlucks after serving a philly cheesesteak casserole as a treat
- Enjoy after eating our smoked hamburgers at a July 4th, Memorial Day or Labor Day celebration with our other Red White and Blue Desserts
- Serve chilled and add fresh berries on top right before serving
- Pair with light desserts like our July 4th fresh fruit platters or fruit kabobs
Red, White and Blue Berry Dessert Recipe FAQs
Absolutely. You can double the ingredients and use a larger pan or make two 9x13 dishes for larger gatherings. Doubling layers is not recommended for best results.
Yes, you can skip baking the crust and instead chill it for 3-4 hours (overnight is best) or until firm. While baking adds a slightly toasted flavor and provides a stronger base, the no-bake version still works well.
More Red, White and Blue Recipes
Do you like red, white and blue desserts? Here some recipes you may also like to try.


If you try this recipe and love it please leave a star rating in the recipe card below or even better, drop a review in the comment section. I always appreciate your feedback. Be sure to follow along with me on Facebook, Pinterest, and YouTube for more easy recipes!
Red, White and Blue Berry Dessert
Ingredients
Crust
- 2 cups graham cracker crumbs or 320 grams
- ½ cup butter unsalted and melted or 1 stick
- ¼ cup light brown sugar packed or 50 grams
Filling
- 2 bricks (8 oz) cream cheese full fat and room temperature
- 1 tub (8 oz) Cool Whip thawed and divided
- 1 cup powdered sugar
- 2 tablespoon lemon juice freshly squeezed
- 2 cans (21 oz) blueberry pie filling
- 2 cans (21 oz) cherry pie filling
Instructions
- Preheat oven to 350F and prepare a 9x13 baking dish with nonstick spray and set aside.
- In a bowl, mix graham cracker crumbs, melted butter and brown sugar until combined. Transfer mixture to prepared dish and pack in until evenly (the bottom of a measuring cup works well), then bake for 12 minutes. Remove and let cool completely before adding the next layer to prevent sogginess.
- In a large bowl, beat cream cheese with a hand mixer until smooth. Add ¾ the Cool Whip, powdered sugar, and lemon juice and mix again just to combine. Set aside for a moment.
- Spread blueberry pie filling evenly over crust, followed by the cream cheese mixture, spreading carefully edge to edge (I like to place dollops all around and carefully spread each one outward to not mix the layers).
- Spoon on the cherry pie filling, then with the remaining Cool Whip add the last layer.
- Refrigerate, not freeze, for about 6 hours or overnight to allow the layers to set a little, and garnish with any sprinkles or fresh fruit once you are serving.
Notes
- Bake crust until lightly golden: Prevents crumbling when slicing
- Cool crust completely before layering: Prevents melting and keeps layers defined
- Beat cream cheese until smooth first: Prevents lumps in your filling
- Fold whipped topping gently: Keeps the mixture light and airy instead of dense
- Layer using small dollops instead of spreading all at once: Prevents mixing colors and layers
- Use a glass dish for presentation: Shows off the red, white, and blue layers beautifully
- Refrigerate at least 6 hours (overnight best): Ensures firm, defined slices and better flavor
- Wipe knife between slices: Keeps presentation clean and sharp


Leave a Reply