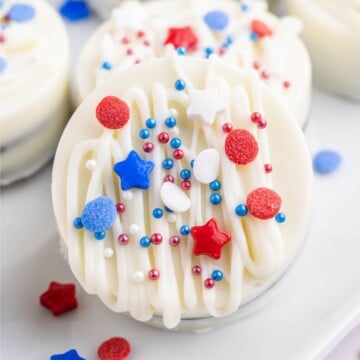
These 4th of July Oreos are an easy no-bake treat that looks impressive but takes less than 30 minutes to make. I coat the cookies in chocolate using a mold so you get clean, neat results every time, then finish them with festive red, white, and blue sprinkles. They're a fun patriotic dessert that's perfect for parties, BBQs, and summer celebrations.
4th of July Oreos Recipe Essentials
- 🍽️ Course: Dessert
- ⏱️ Cooking Time: 2 minutes (about 27 minutes total including prep and chilling)
- 🍴 Servings: 12 servings
- 🍪 Flavor Profile: Sweet, creamy white chocolate with crunchy Oreo cookies and festive sprinkles
- 🍰 Best Served With: Party dessert trays, holiday cookie platters, or as a sweet snack with milk
- 🧊 Make Ahead?: Yes, can be made in advance and stored until ready to serve like our red, white and blue berry dessert.
Summarize and Save This Content On
Every summer, I make these patriotic Oreos for backyard BBQs, and they've become a tradition everyone looks forward to. I use a chocolate mold instead of dipping the Oreos with a fork because it gives much more even results without the messy drips. Then, I top them with red, white, and blue sprinkles for a festive finish. Sometimes I add a drop of peppermint extract to the chocolate, giving the cookies a light minty flavor.
If you enjoy chocolate-dipped or covered treats, you'll love these chocolate-dipped Rice Krispie treats and graham crackers dipped in chocolate.
Why You'll Love This Recipe
- It uses a chocolate mold to coat the cookies cleanly: Instead of the traditional dip method, I use a silicone mold. This keeps the cookies evenly coated, resulting in a perfectly smooth finish.
- These Oreos are gift-ready: These 4th of July chocolate-covered Oreos have an adorable presentation, making them the perfect gift. Send them home as party favors or pass them to your neighbors as a thoughtful treat.
- It's the perfect hot summer treat: You don't need to turn on the oven to make this dessert. It's simple, no-bake, and you only need the microwave for a few seconds. This keeps your kitchen nice and cool in the summertime.
Ingredients
Everything you need to make these red, white, and blue Oreos is listed. With just 3 ingredients, you can make this adorable recipe, too.
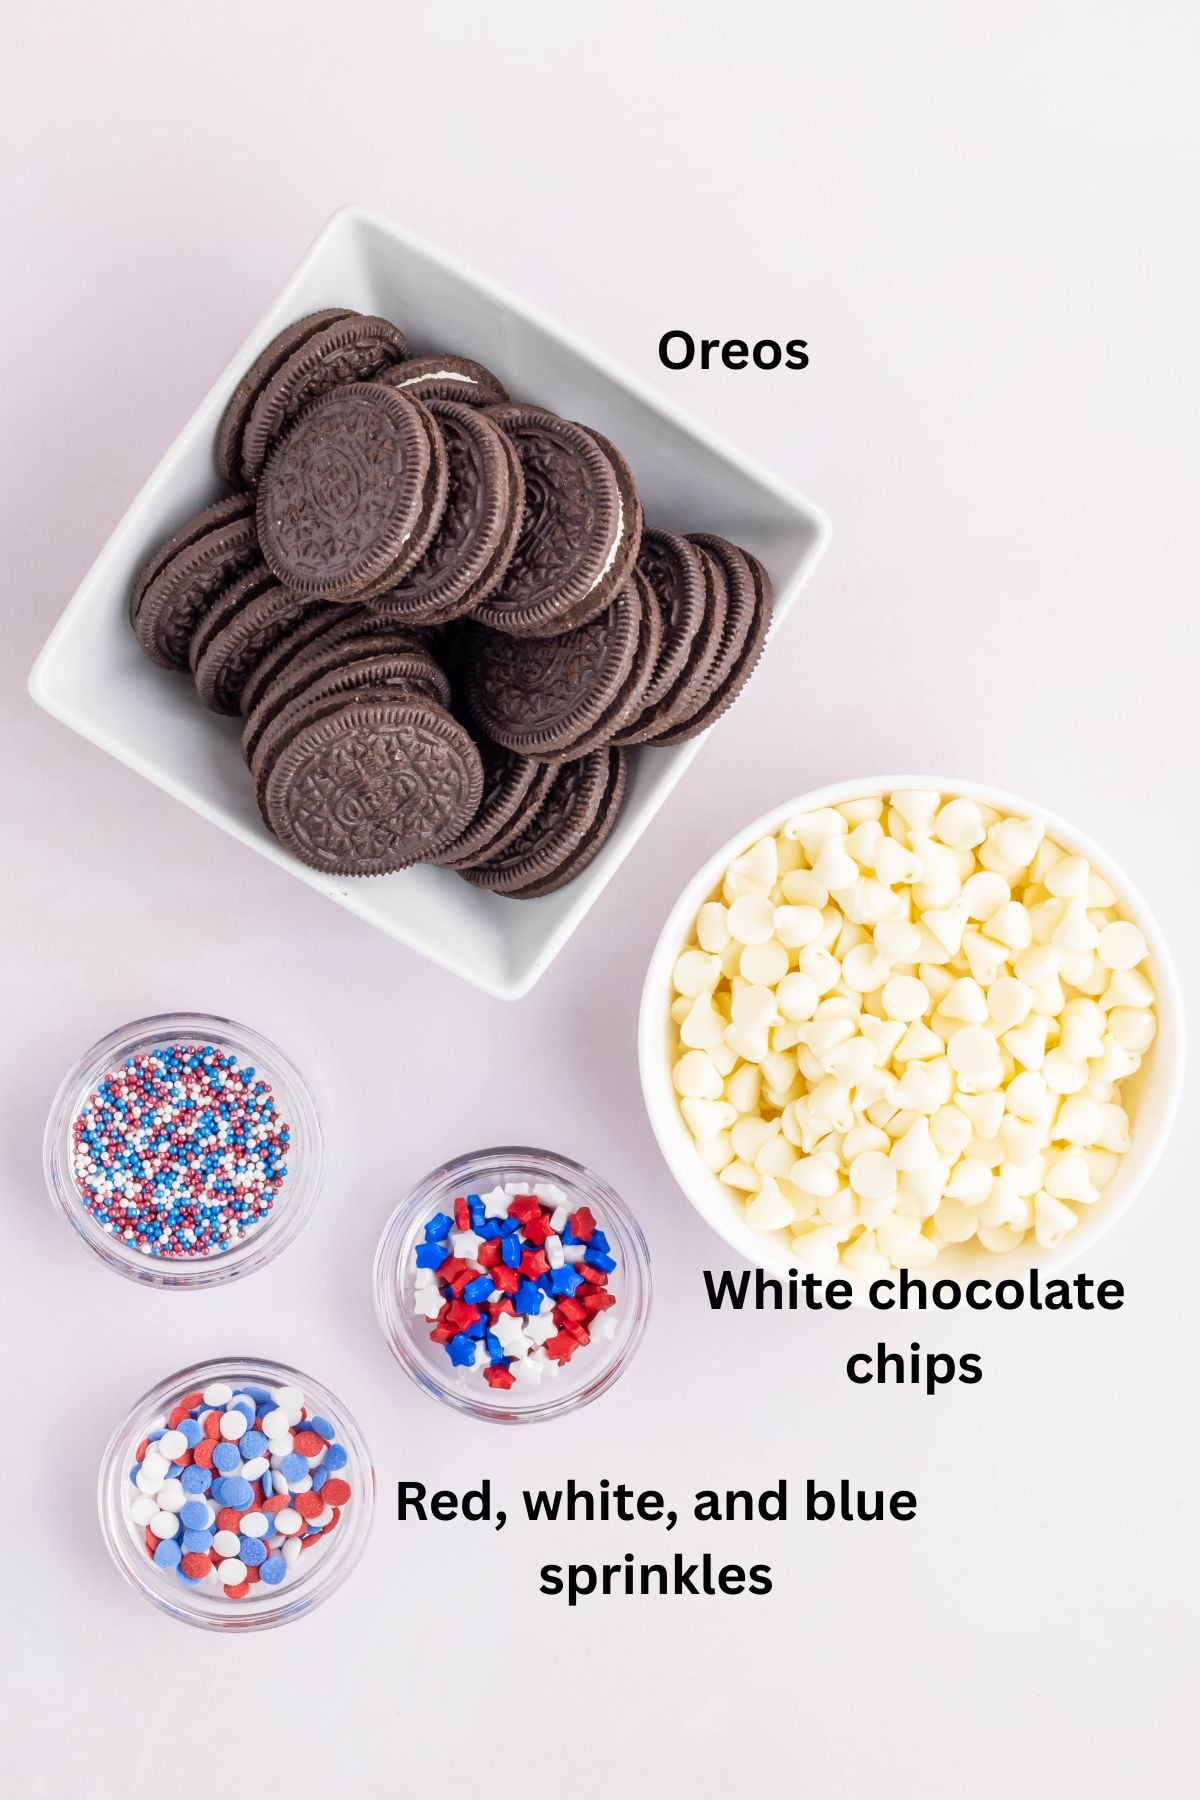
- Oreos: I prefer regular Oreos for this because the Double Stuff don't fit into the molds as well. I also don't recommend the minis or thins either for the same reason. I don't use a mold for these Easter Oreos, but I still recommend the original cookie for them as well.
- White chocolate chips: Use good-quality chocolate like Ghirardelli so it melts smoothly. Avoid baking chips that don't have cocoa butter because they won't have the same sheen when they melt.
- Sprinkles: I love a good patriotic blend of sprinkles that includes star shapes and classic sprinkles. As long as they are red, white, and blue, they will work.
See the recipe card below for exact ingredient amounts, nutritional information, and detailed instructions.
Variations
- Holiday swap: Instead of red, white, and blue sprinkles, choose ones for another holiday, like pink hearts for Valentine's Day or green and gold for St. Patrick's Day.
- White chocolate orange: Add ½ teaspoon of orange extract to the melted white chocolate to add a citrus note that complements the richness.
- Golden Oreos: Swap traditional chocolate Oreos for the golden ones to get a more vanilla-forward dessert.
- Chocolate swap: Use dark or semi-sweet chocolate instead of the white and decorate with red, white, and blue sprinkles.
How to Make 4th of July Oreos
Below are the steps needed to make the best-looking Fourth of July Oreos possible. As long as you follow this method, you'll get the gorgeous, smooth finish.
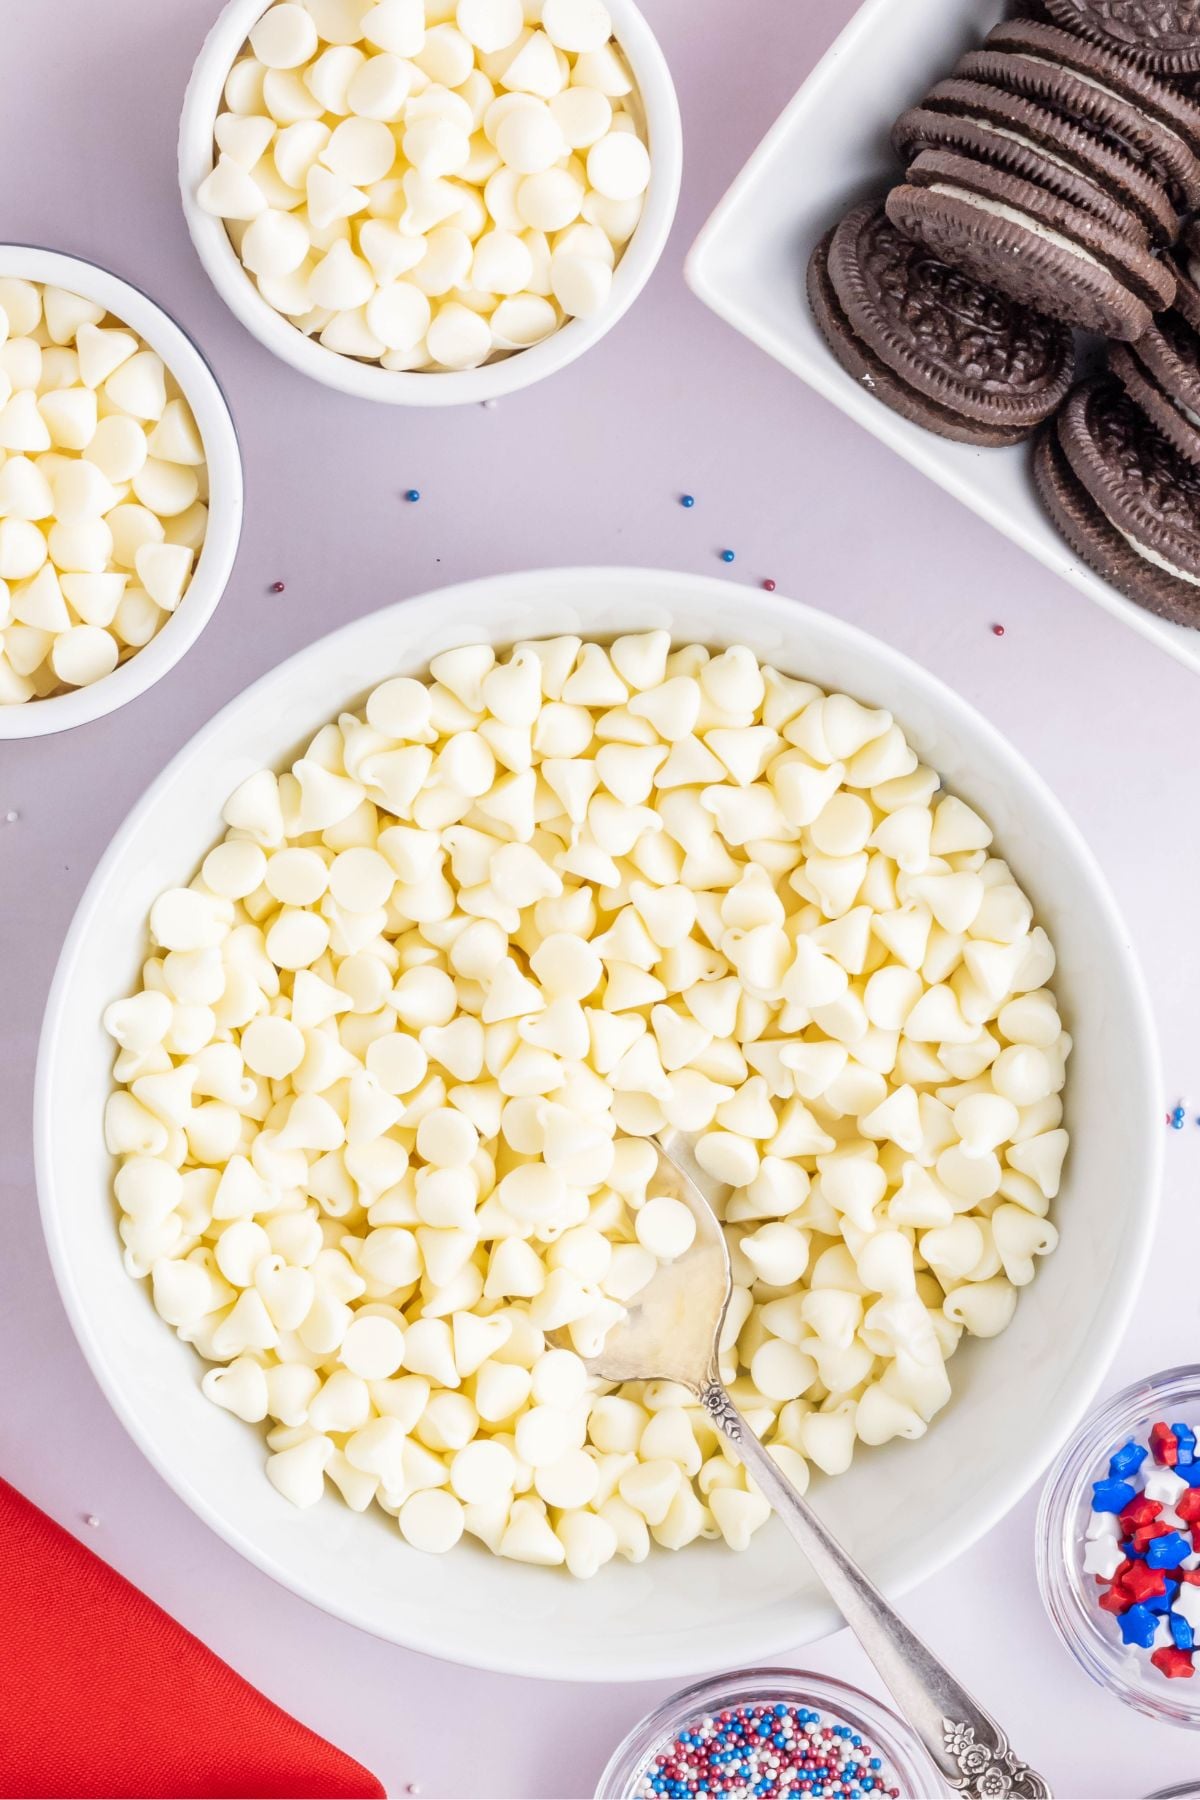
Step 1: Melt the white chocolate. Add the white chocolate chips to a large glass bowl and melt them in the microwave in 20-second intervals, stirring between each one until the chocolate is nice and smooth.
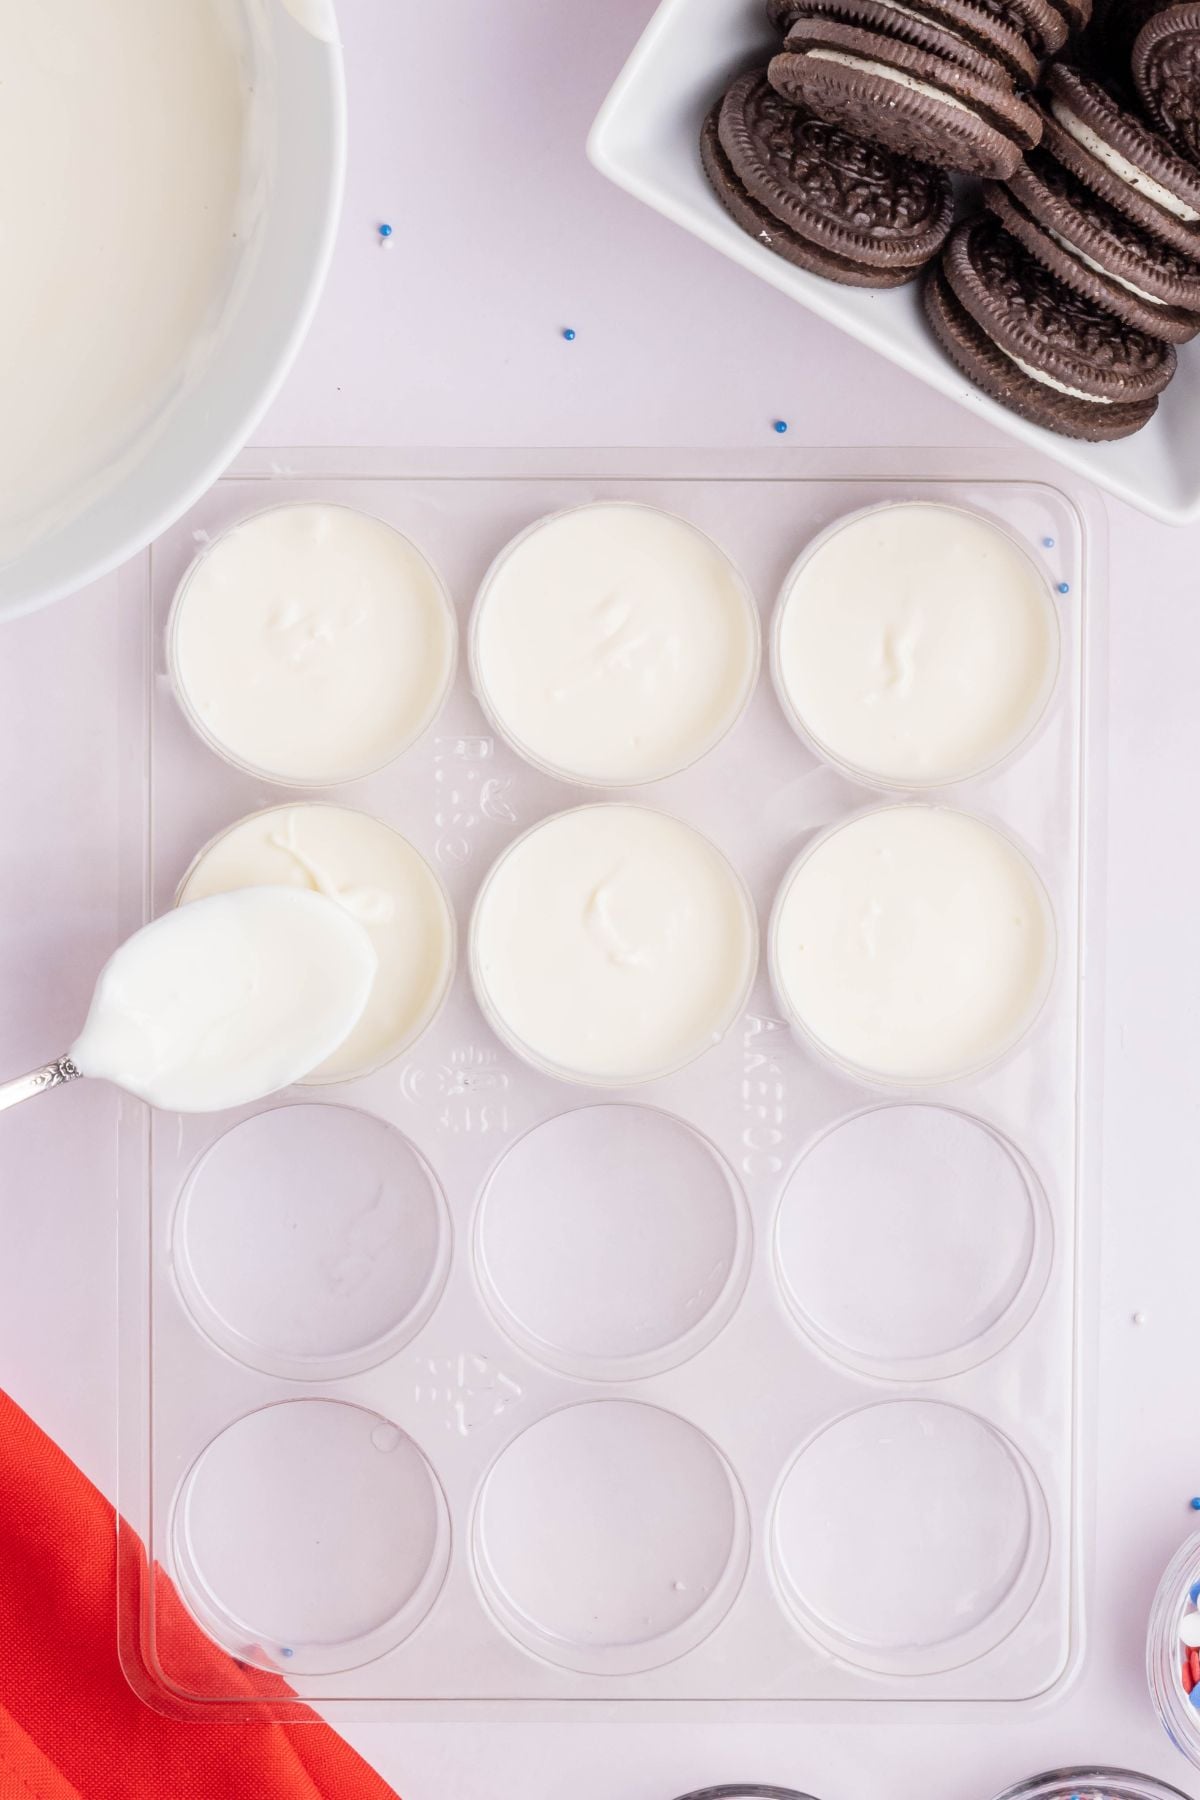
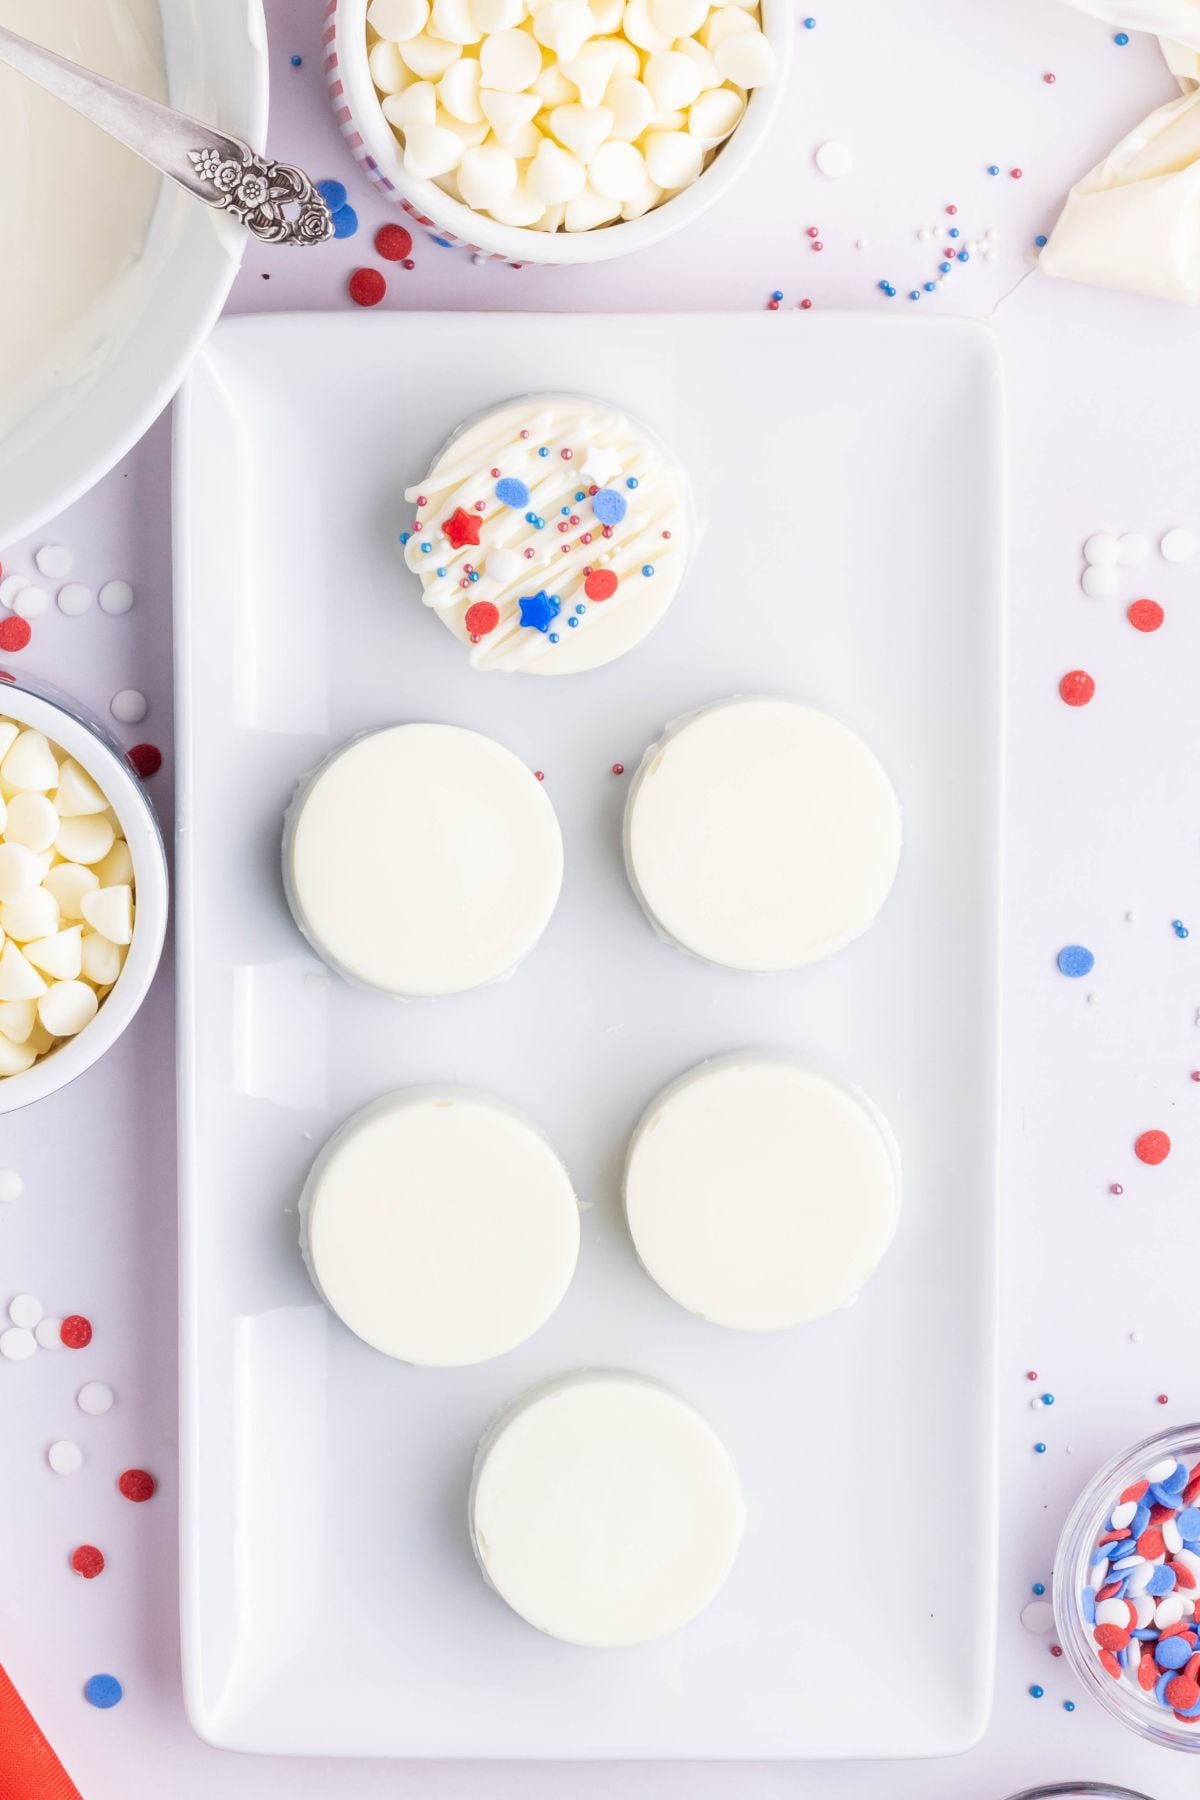
Step 2: Spoon some into the mold. Now you can fill the cavities of your mold ⅓ with the melted white chocolate.
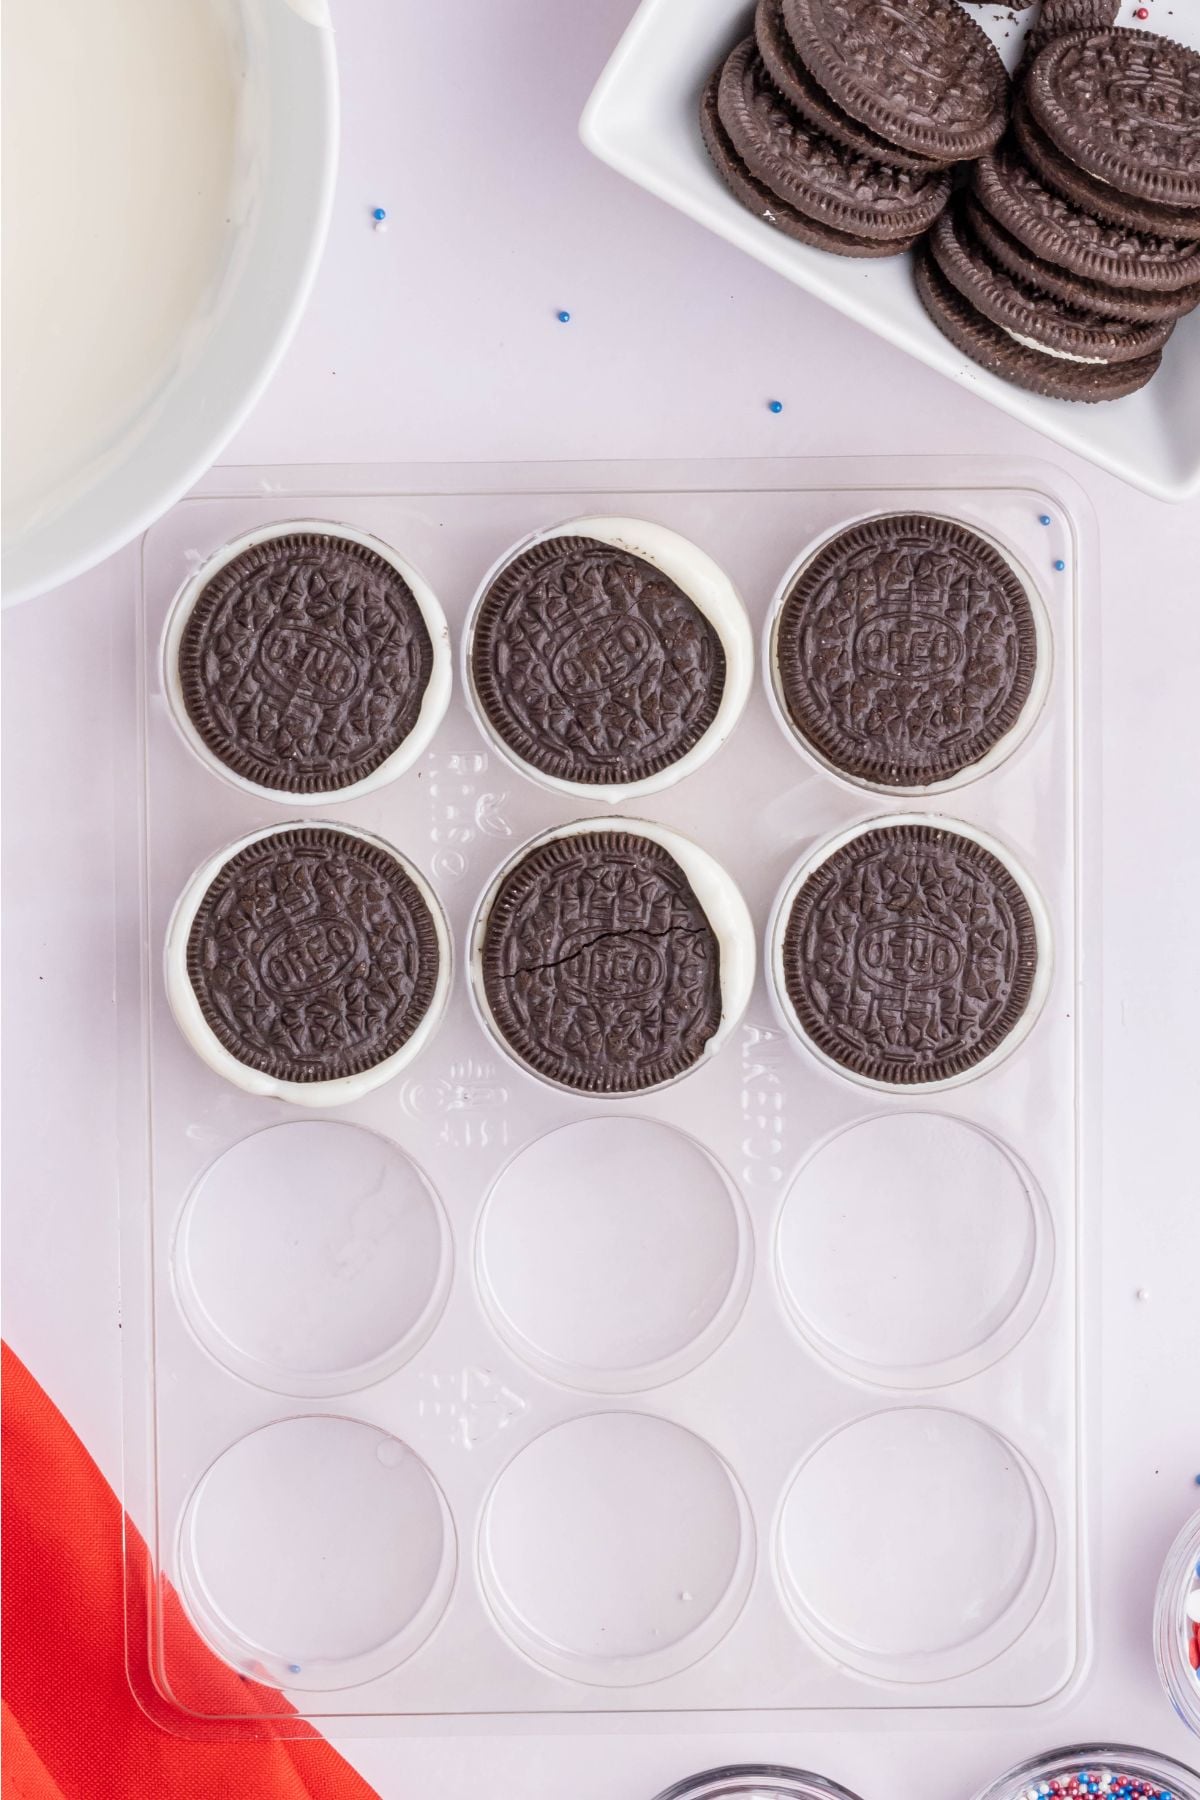
Step 3: Add the Oreos. Gently press an Oreo cookie on top of the melted chocolate.
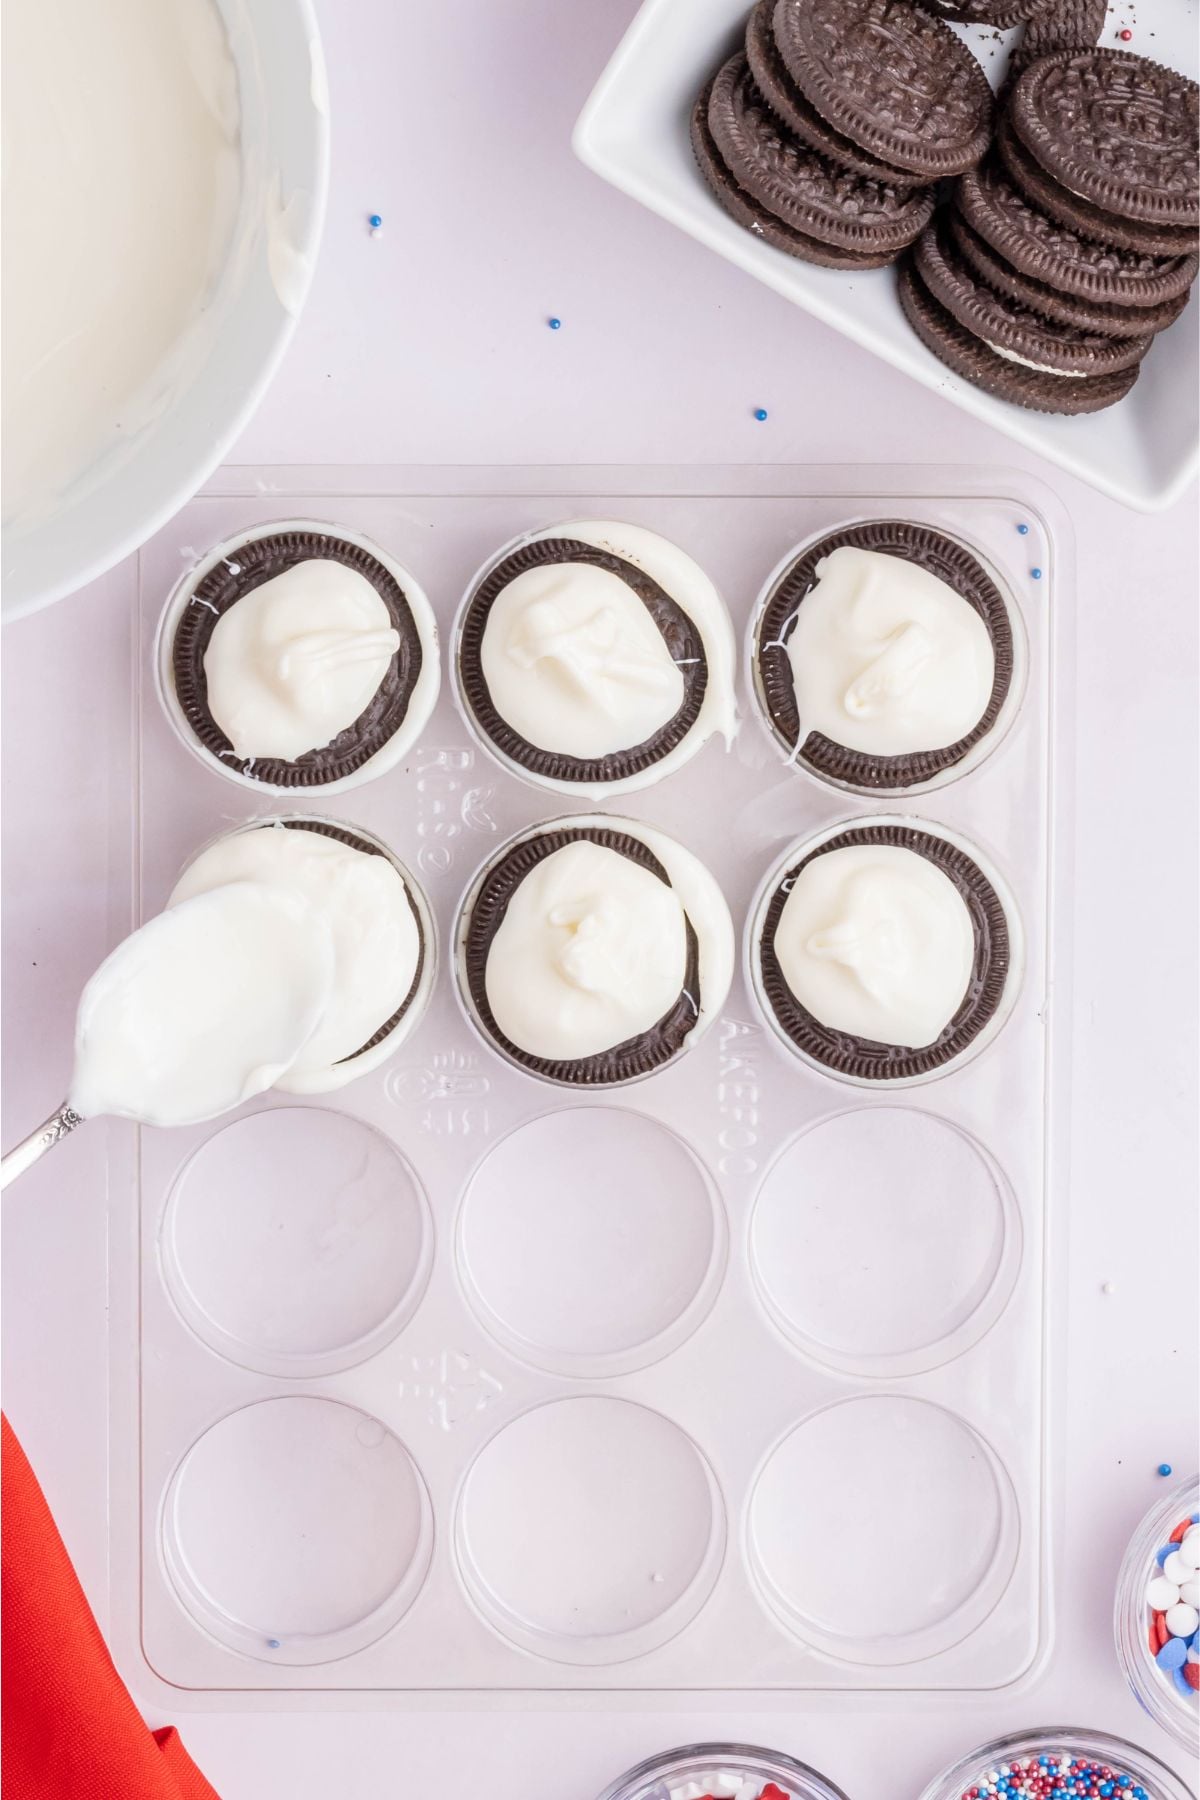
Step 4: Cover in more chocolate. Spoon more white chocolate on top of each cookie.
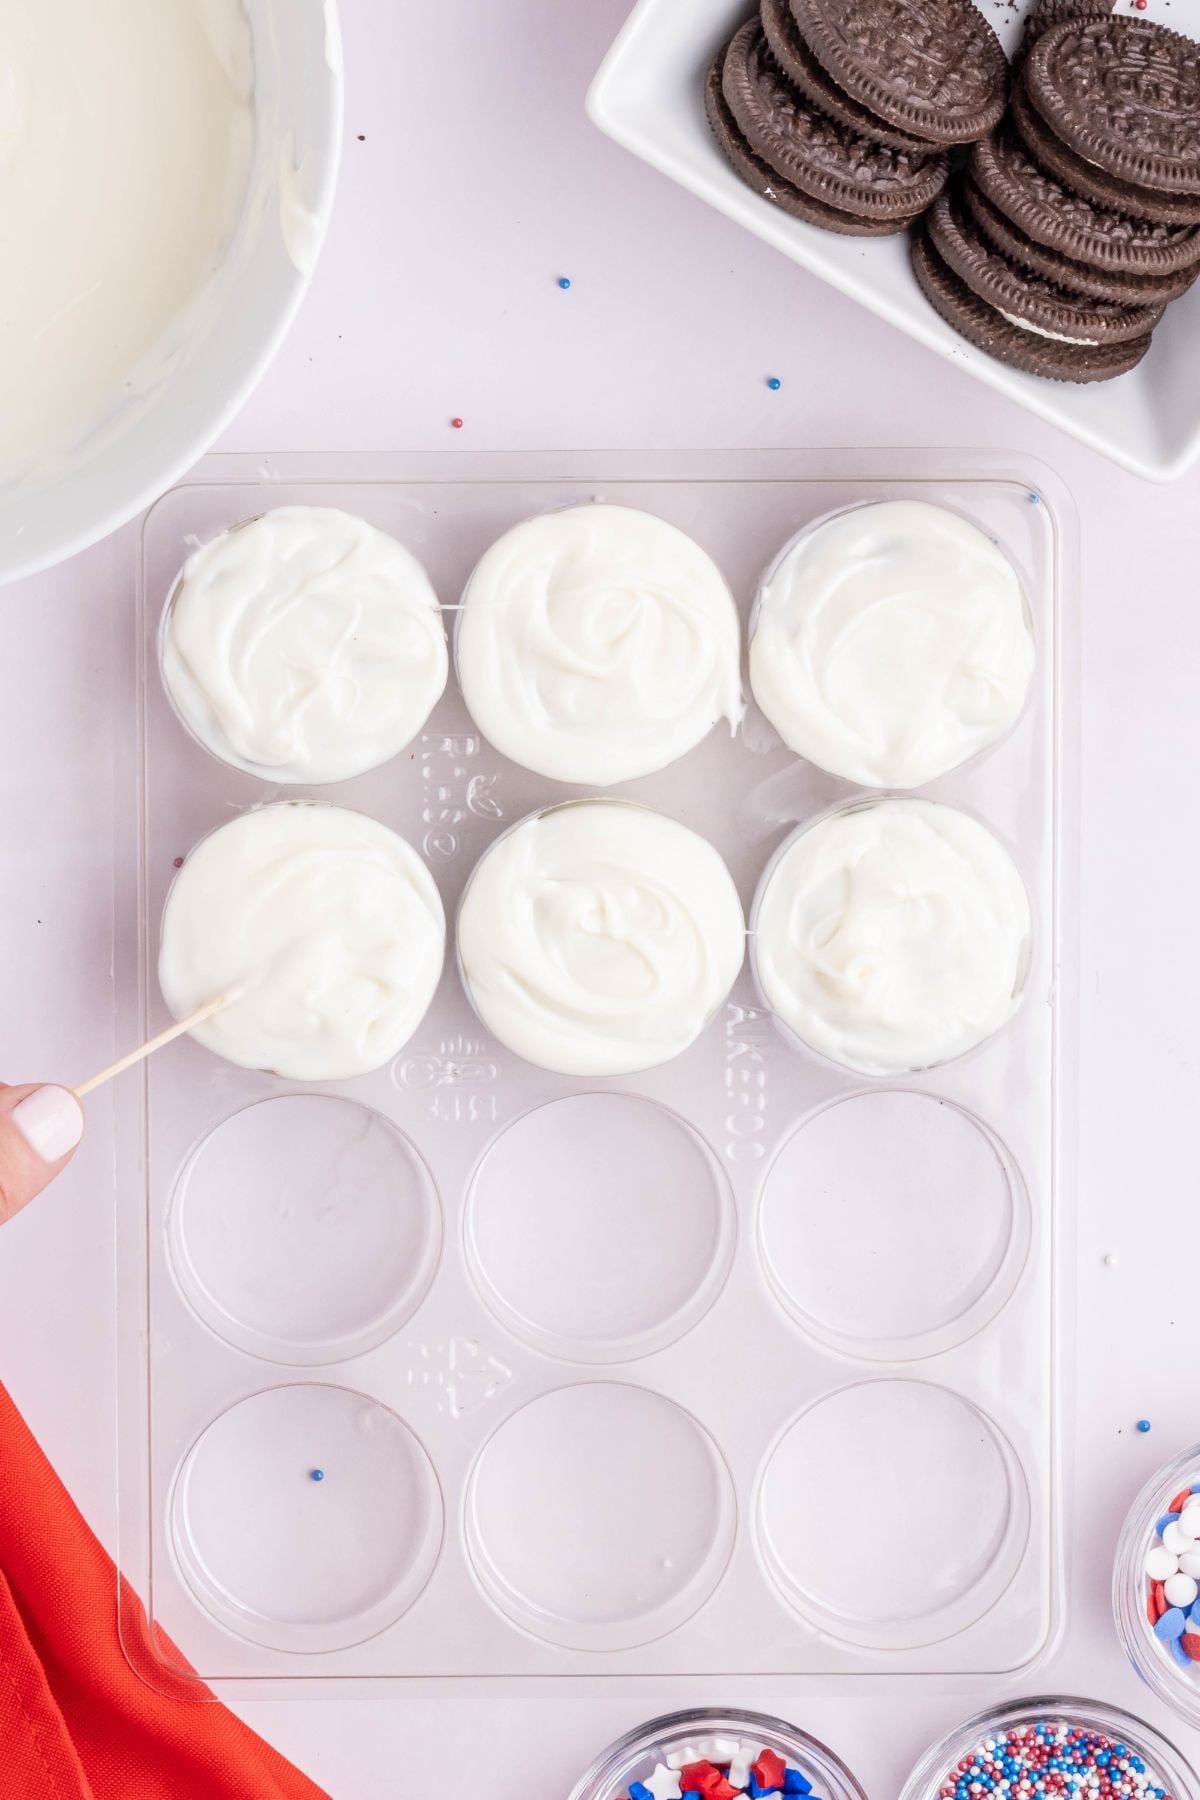
Step 5: Spread and set. Use a toothpick to spread it out to ensure it coats the Oreo completely. Allow them to sit in the fridge for 15 minutes or at room temperature for 30 minutes.
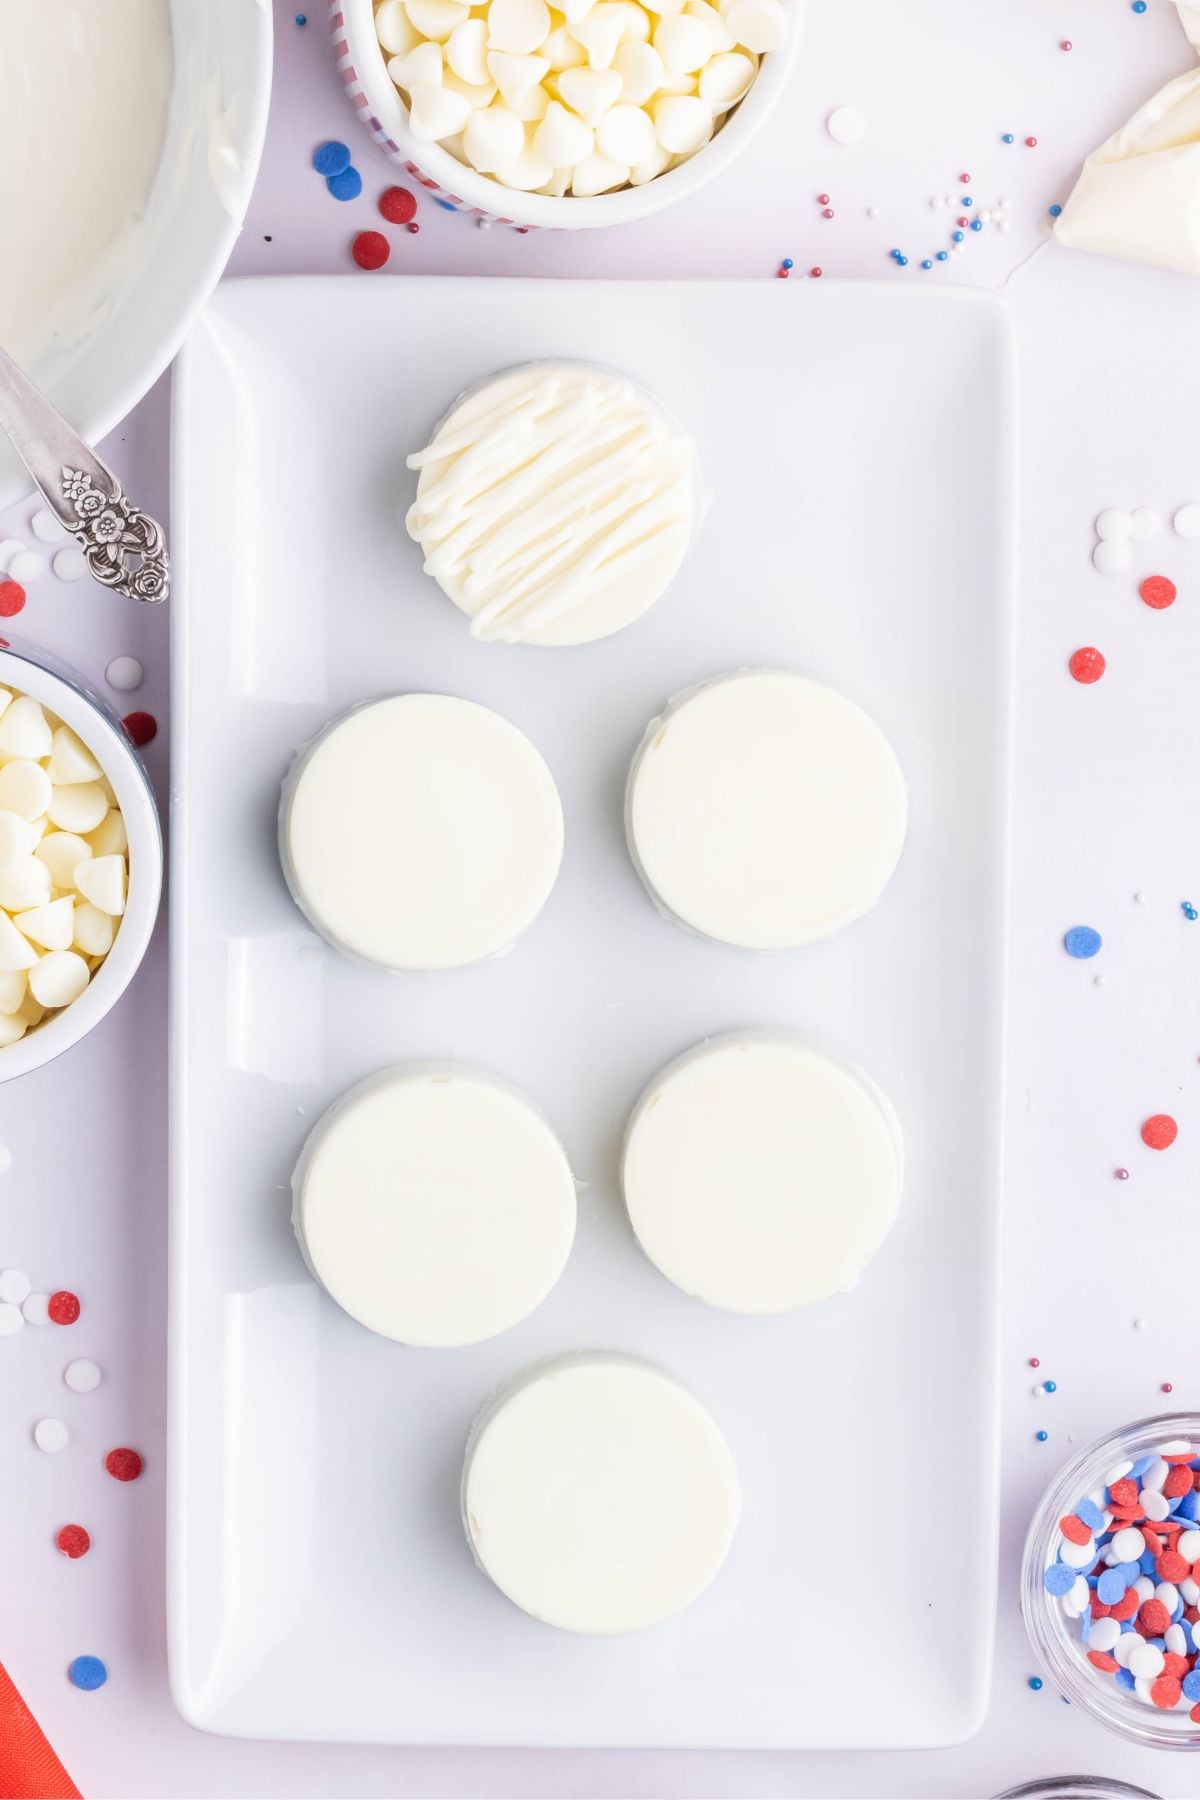
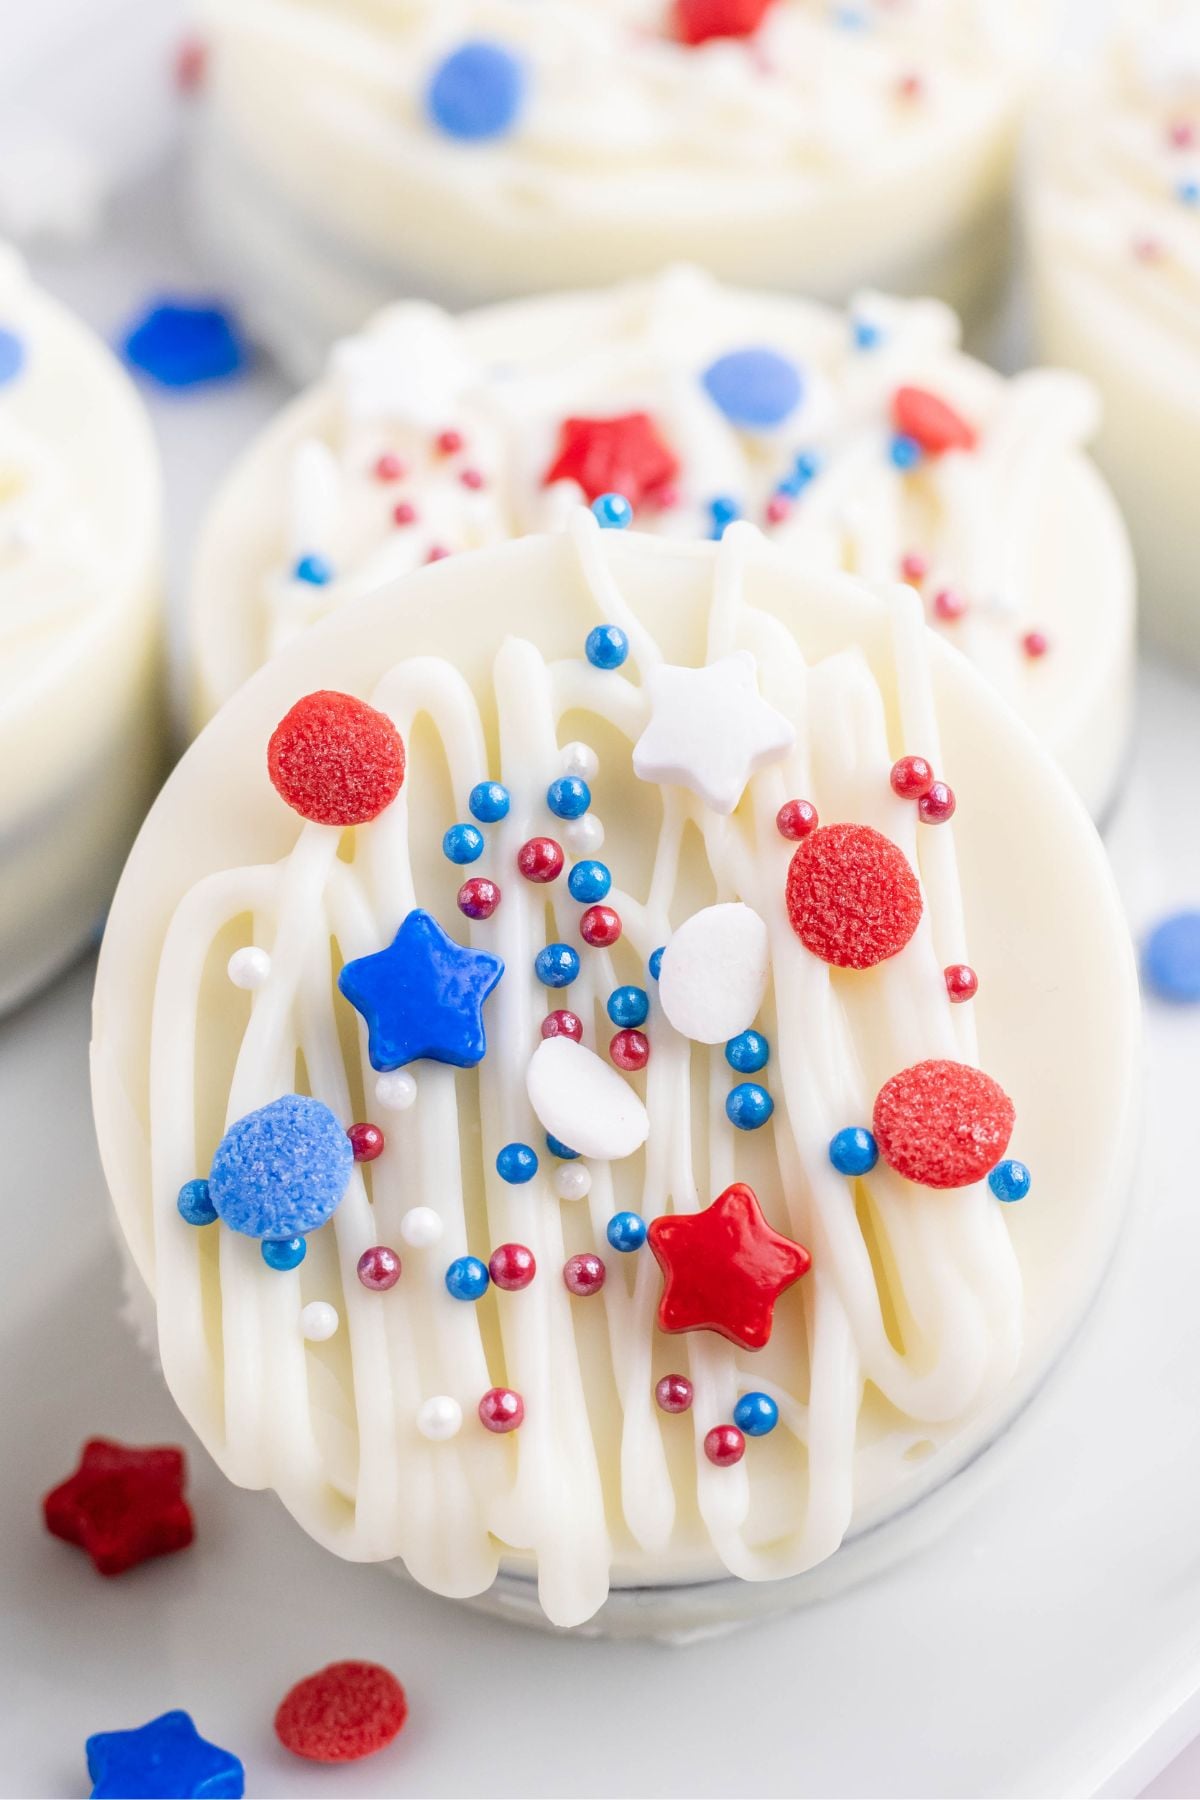
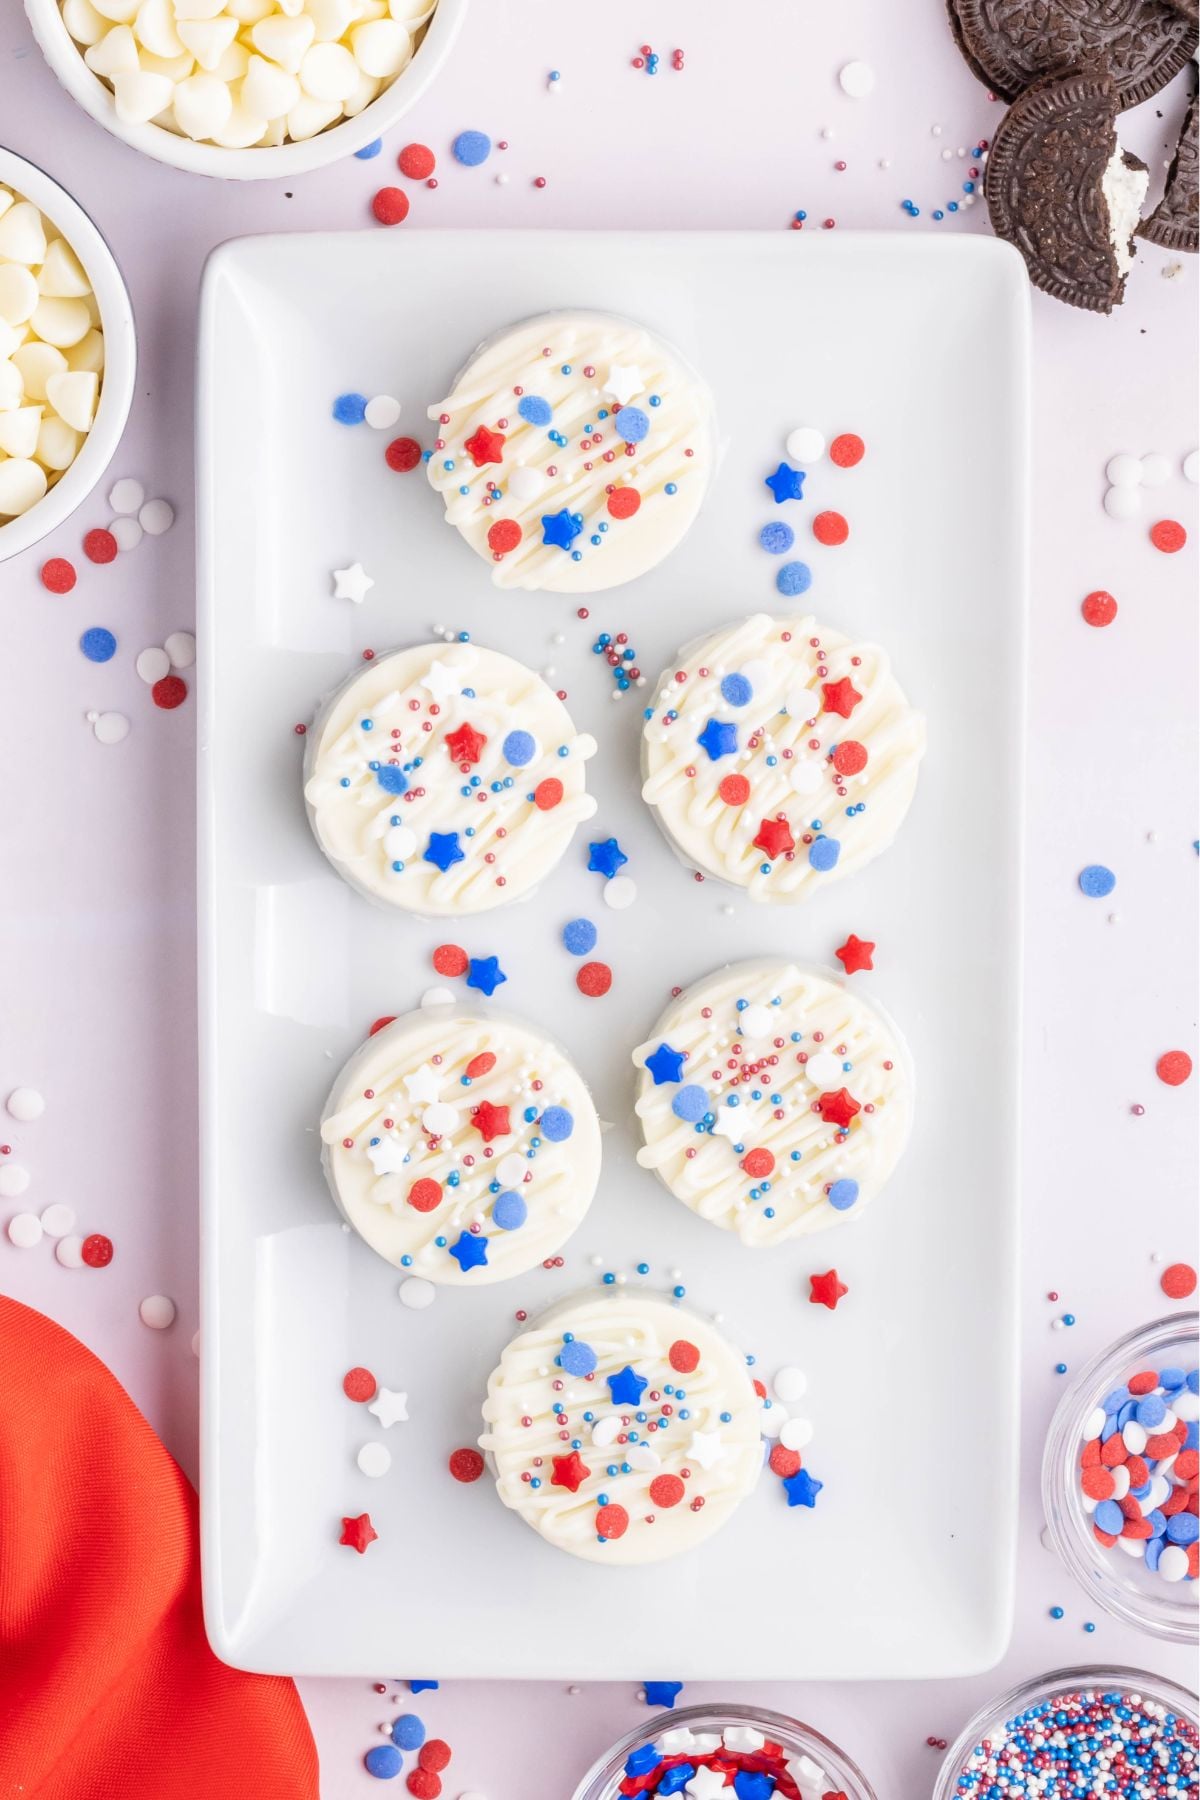
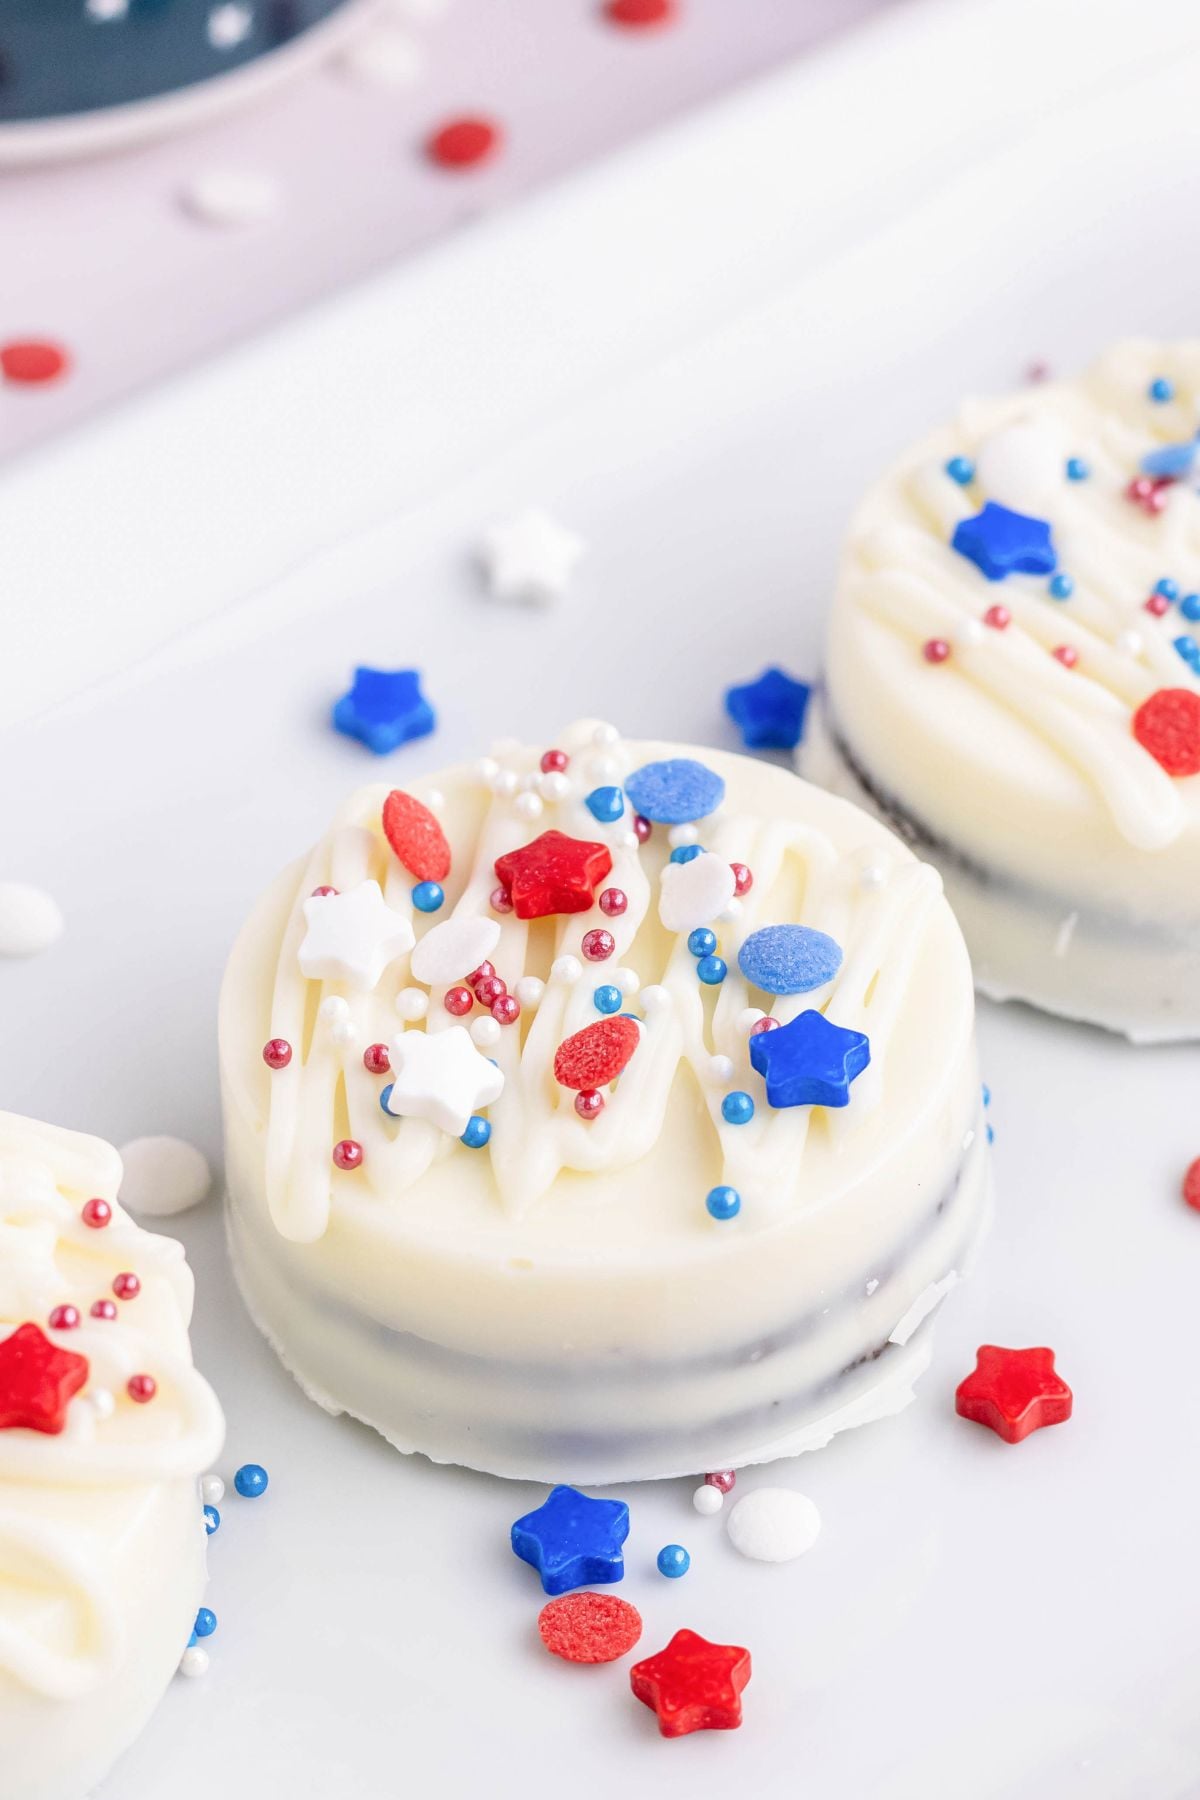
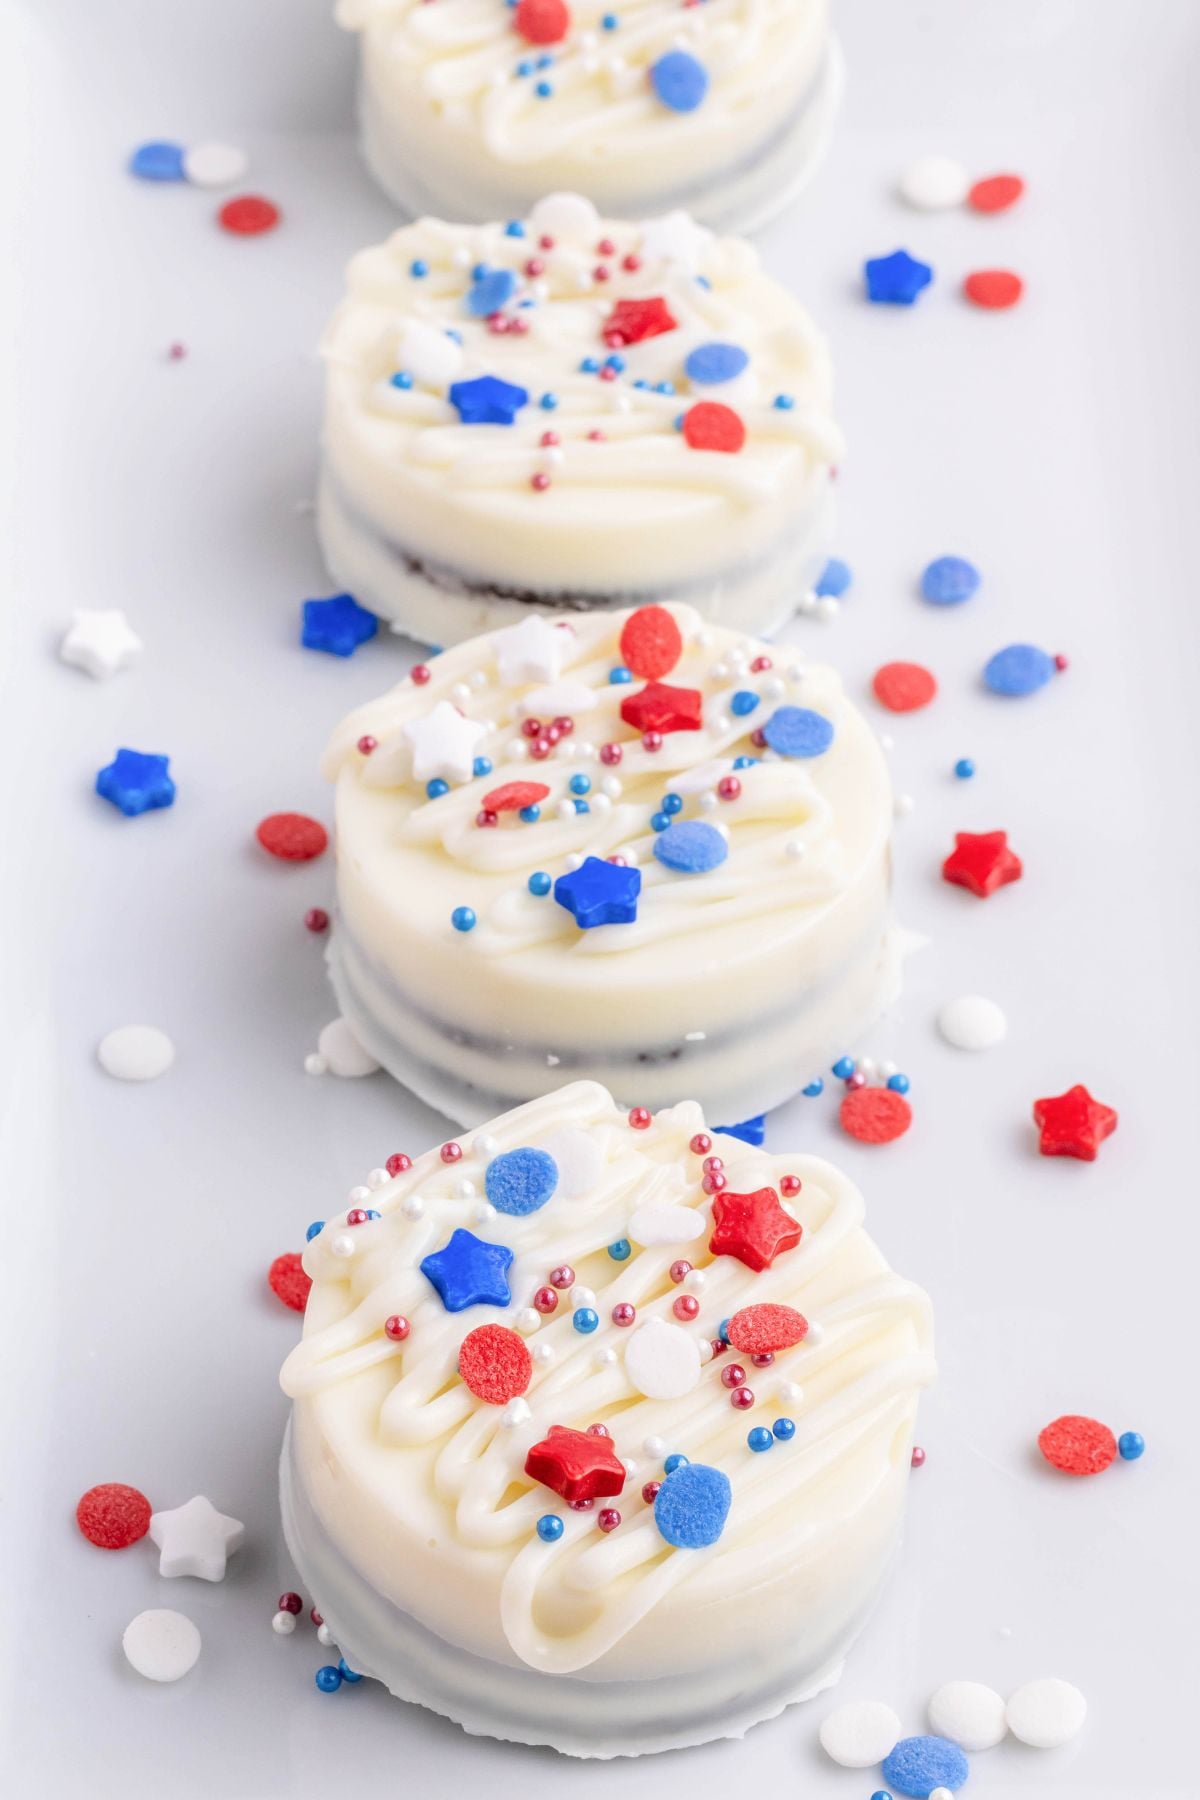
Step 6: Pop them out and drizzle more chocolate. Once they are set, pop them out of the mold and drizzle some of the remaining melted white chocolate on top.
Step 7: Add sprinkles and repeat. As you drizzle some onto each coated Oreo, add some sprinkles. Repeat this until all of the cookies are decorated.
Step 8: Serve. Serve them with a bomb pop cocktail!
Expert Tips
- Don't overheat the chocolate: Avoid overheating the chocolate, because this can make it grainy, losing that smooth texture you're looking for. It may also cause it to clump and seize as well. If this happens, you'll have to start over.
- Make sure all your tools are dry: Even a drop of water will also make the chocolate seize. The bowl, spoon, and mold for the Oreos must be completely dry before you get started.
- Tap the mold to remove bumps: If you want a smooth, professional finish, tap the mold lightly after all of the Oreos are coated. This will remove any bumps or air bubbles.
- Storing your Fourth of July Oreos: Keep them in an airtight container for about a week at room temperature, for up to 2 weeks in the refrigerator. If you keep them on the counter, ensure it is in a cool, dry place.
These Christmas Oreos are another chocolate-dipped Oreo that's made for a holiday.
Serving Suggestions
- Patriotic food platter: Add these Fourth of July Oreos to a patriotic snack platter with other treats that fit the theme, like red, white, and blue trail mix and July 4 fruit kabobs.
- Use it as a dessert topping: These make a great topping for other desserts, too. Place them on top of lemon raspberry cupcakes or a scoop of red velvet ice cream for a festive holiday treat.
- Make it a kid-friendly activity: If you like, you can make these with your kids or grandkids. They would have a blast decorating these chocolate-covered Oreos themselves.
Check out my 4th of July jello pie if you're looking for other delicious recipes that celebrate this patriotic holiday.
4th of July Oreos Recipe FAQs
You can make these up to 5 days ahead. I store them at room temperature in an airtight container, placing parchment paper between the layers so they don't stick. Choose a spot in the kitchen that's cool and dark, like the pantry so they don't heat up. I skip the fridge because humidity makes white chocolate develop a cloudy film.
If you find that the melted chocolate is too thick and doesn't coat the Oreos properly, there's a quick fix. Start by adding ½ teaspoon of coconut or vegetable oil. This should thin the chocolate without changing the consistency. Add a touch more if needed, and that will help a lot.
This recipe works best with a standard chocolate or candy mold with individual oval or circular cavities. You can find these at most craft stores for just a few dollars.
Yes, you can if you're looking for a quick and easy way to use different colors. I prefer the rich flavor of the white chocolate to the sugary candy melts. I recommend adding drops of food coloring to the melted white chocolate instead of going for the candy melts.
More Delicious Oreo Cookie Recipes


If you try this recipe and love it please leave a star rating in the recipe card below or even better, drop a review in the comment section. I always appreciate your feedback. Be sure to follow along with me on Facebook, Pinterest, and YouTube for more easy recipes!
4th of July Oreos
Equipment
- Oreo Cookie Chocolate Silicone Mold
Ingredients
Instructions
- In a medium-sized bowl add the white chocolate chips. Melt in the microwave for 20-second increments and stir in between until fully melted.
- With a spoon fill each mold ⅓ of the way.
- Place an Oreo on top of the white chocolate. Gently press the cookie down until the sides of the cookie get covered.
- With a spoon add a tablespoon or so of the melted chocolate on top of each cookie.
- Use a toothpick and spread the melted chocolate over the cookie until the cookie is fully coated.
- Gently tap the mold so the cookie is fully coated and the top is nice and smooth.
- Place the mold in the fridge for up to 15 minutes or on the counter for 30 minutes until fully solid.
- Heat up the chocolate from the bowl again for 20-second increments or until fully melted. Mix in between each time you heat it up.
- Scoop the white chocolate into a sandwich bag. Cut a very small hole in the tip of the sandwich bag. Drizzle the white chocolate on top of each cookie.
- Sprinkle your red, white, and blue sprinkles on top while the chocolate is still wet. White chocolate hardens quickly so you may need to add the sprinkles after each cookie that gets drizzled with the white chocolate.
Notes
- If the melted chocolate is too thick to coat the Oreos, stir in ½ teaspoon of coconut or vegetable oil. Add a little more if needed to thin it without changing the texture.
- Be careful not to overheat the chocolate-it can turn grainy, lose its smooth texture, or even seize, which means you'd have to start over.
- Even a tiny drop of water can make chocolate seize, so make sure your bowl, spoon, and mold are completely dry before you start.


Leave a Reply