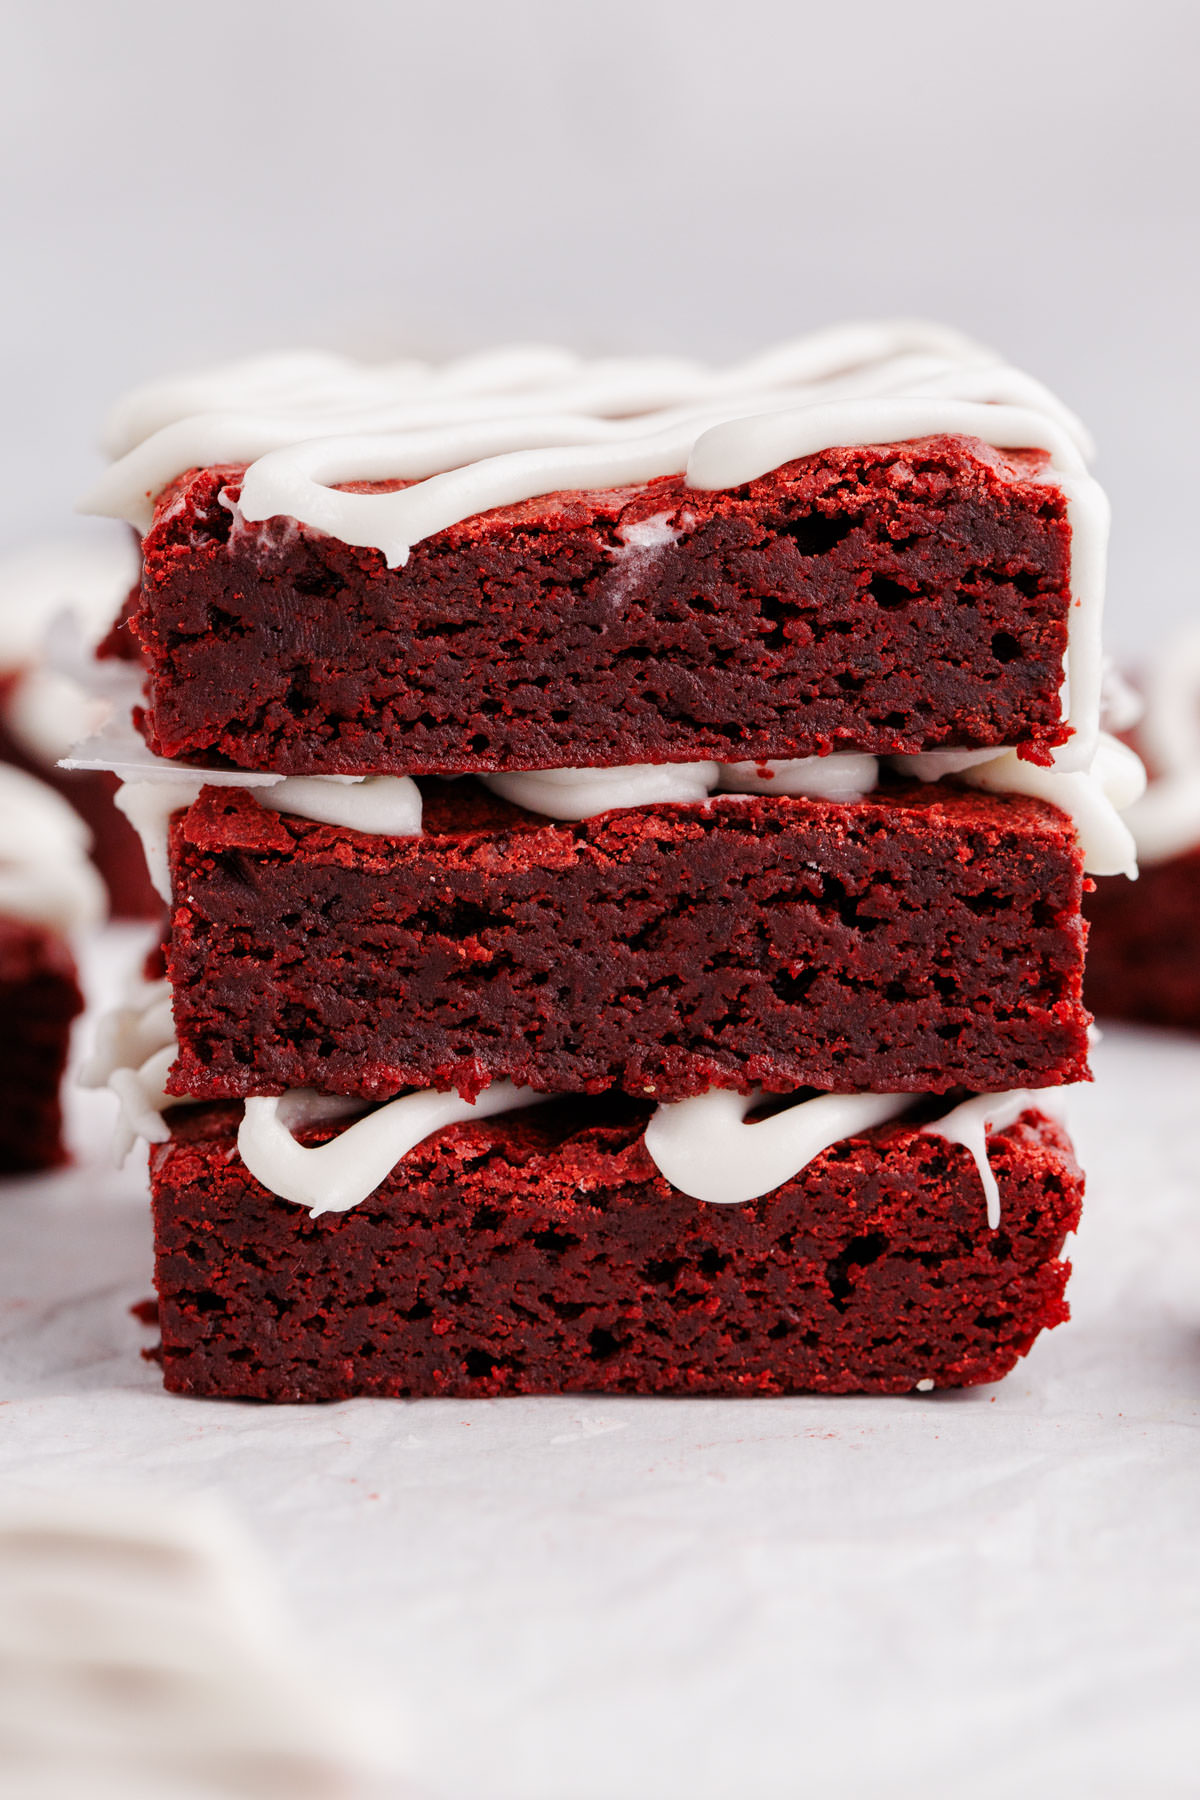
If you're looking for a recipe for Red Velvet Brownies that actually works, you've found it! These brownies have that recognizable bright red hue with all the texture and goodness of a chewy homemade brownie. Combined with a tangy cream cheese frosting, each bite is perfection.

Recipe Essentials
- 🍽️ Course: Dessert
- ⏱️ Cooking Time: 30 minutes
- 🍴 Servings: 24
- 🧄 Flavor Profile: Rich cocoa with a light tang and classic red velvet sweetness.
- 🍚 Best Served With: Vanilla ice cream, berries, or a glass of milk.
- 🧊 Make Ahead?: Yes, stores well for several days and gets fudgier.
Summarize and Save This Content On
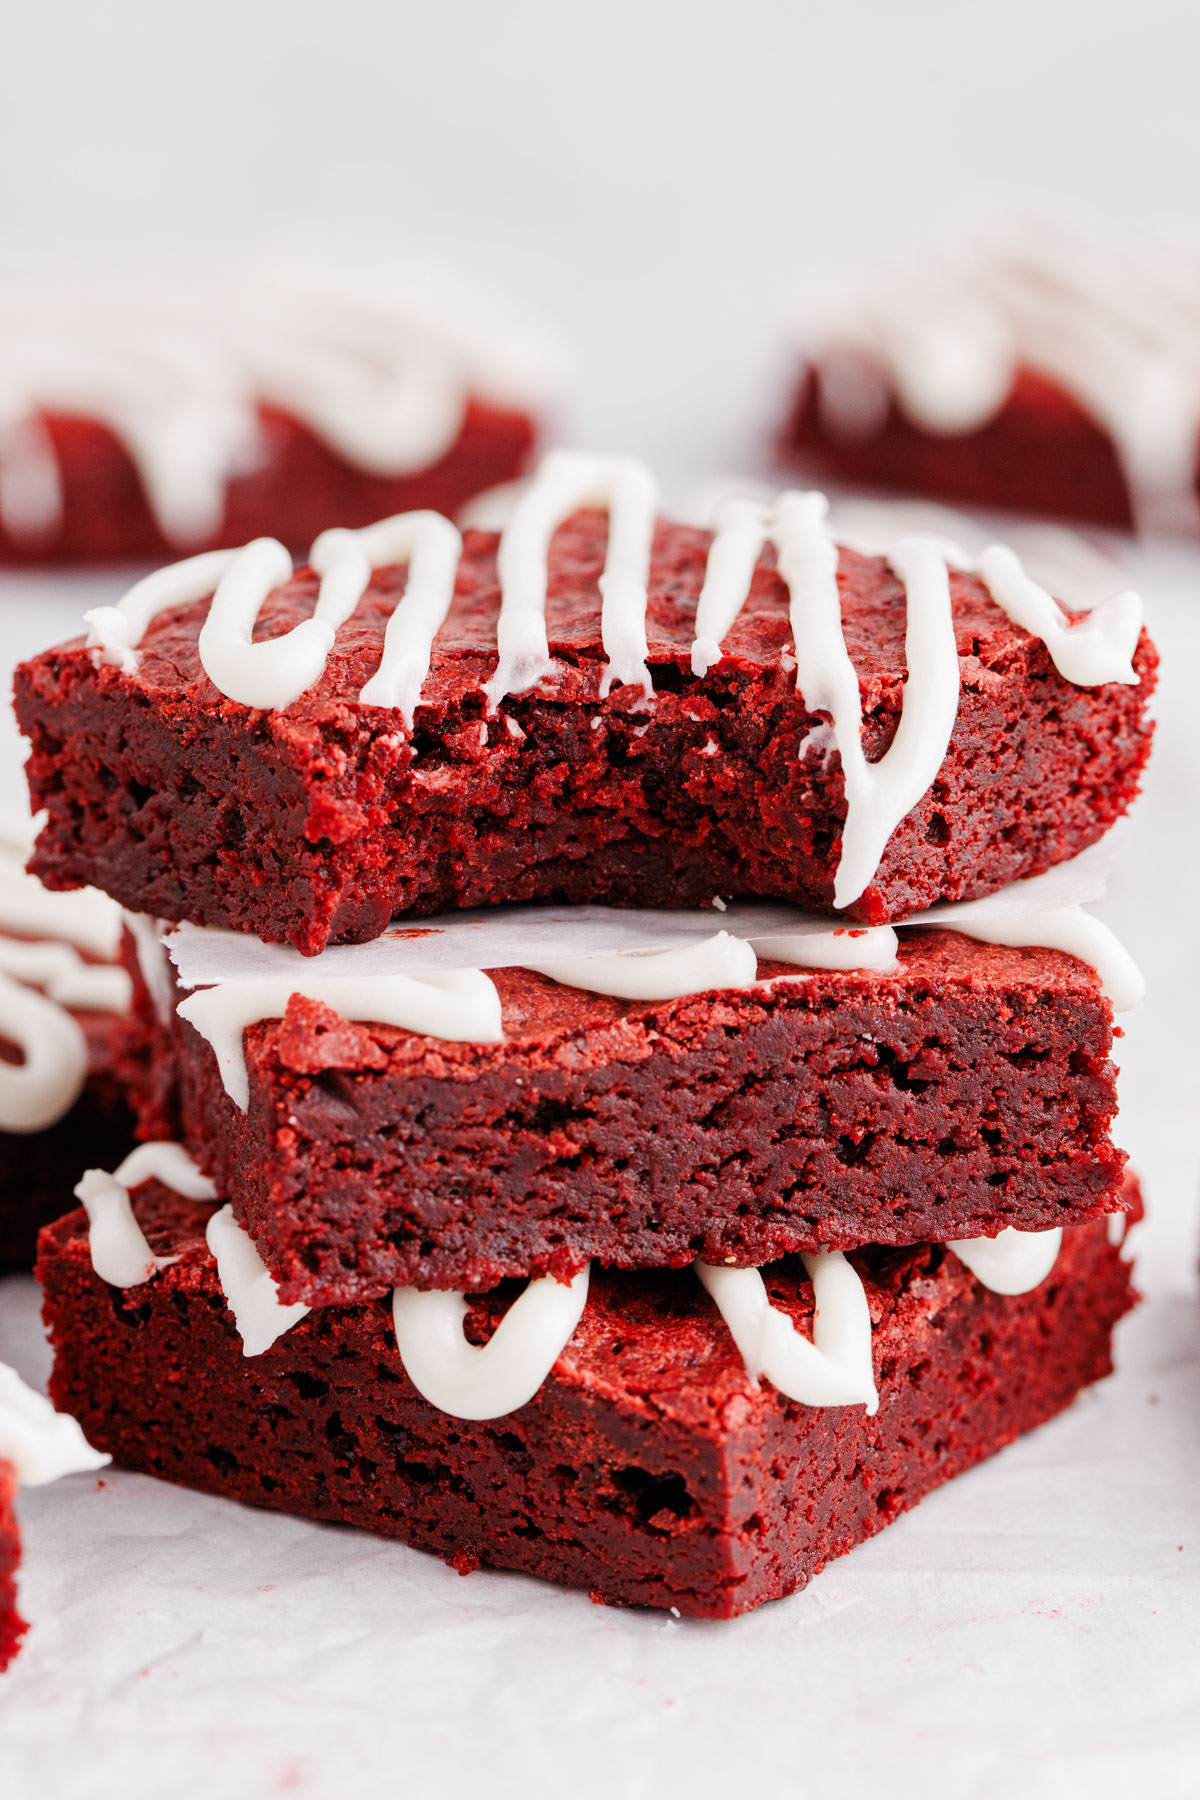
Not only are these red velvet cake brownies foolproof, but they also don't take hours to make. In just 40 minutes, you'll have the batter prepared and the brownies baked. However, my favorite part is the crackly top that you get with homemade brownies. That texture, combined with the red velvet flavor, is dynamite.
Some more recipes that include that classic red velvet flavor and color include red velvet fudge and red velvet cookie bars.
Don't forget to check out our red velvet poke cake. Rich, delicious and oh so good!
Why You'll Love This Recipe
- It's easy and reliable: If you want a simple dessert that you can trust, these brownies are the perfect fit just like our strawberry cake mix cookies. They will be wonderfully rich and fudgy every time.
- It has the right balance of cocoa: In this recipe, you get that rich chocolate flavor, but it's balanced enough not be a full chocolate brownie. The ratios of ingredients are careful to preserve that signature red velvet flavor and color.
- It's make-ahead friendly: These brownies are ideal for preparing in advance, saving you time if you're serving them for a crowd or special occasion. Then, you can finish decorating them right before you serve because they're baked and cooled already!
Variations
- Brownie bites: Slice these red brownies into bite-sized squares for portion control. This is great for larger gatherings!
- Add white chocolate chips: Stir in ½ cup of white chocolate chips into the red velvet batter. They add lovely pops of richness and subtle white color when sliced!
- Decorate with sprinkles: Sprinkle some heart sprinkles for Valentine's Day, or red and white for Christmas! Even rainbow sprinkles if it's just for a special event like a birthday or bridal shower.
Ingredients
The ingredients listed below are most important for these red velvet cream cheese brownies. They help create the best texture and flavor possible!
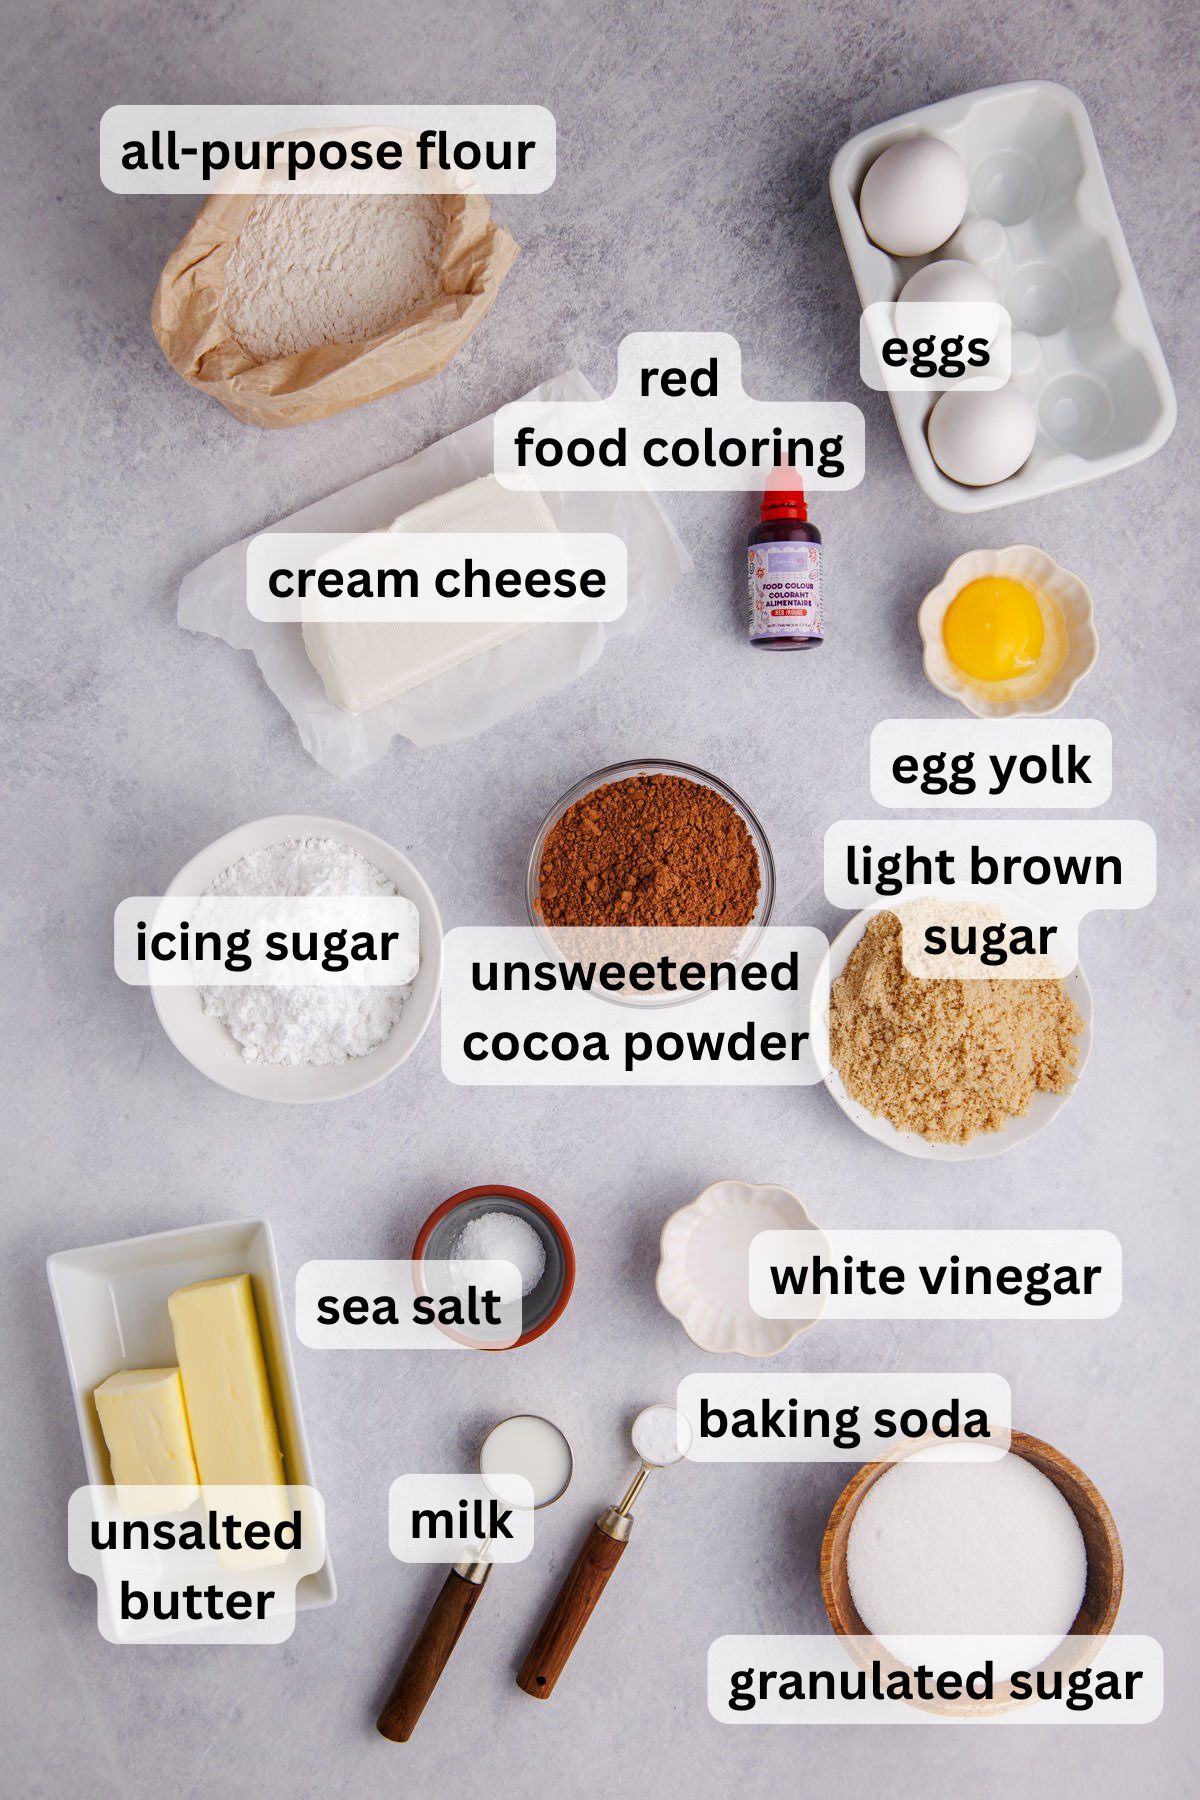
- Brown sugar: I include light brown sugar in these red brownies to add moisture and to give them that lovely chewy texture you find in a good brownie. These brown butter brownies are made with only brown sugar.
- Egg yolk: The extra egg yolk adds richness to keep your brownies delightfully fudgy and delicious!
- Vinegar: This is a key ingredient in these brownies. Not only does it enhance the red color of the food dye, but it also helps activate the baking soda, keeping the brownies chewy but not dense. I use it in this dairy-free chocolate cake, too.
- Cocoa powder: You'll want natural unsweetened cocoa powder because it works best with the vinegar, so you have tender brownies.
- Cream cheese: I recommend taking your cream cheese out of the refrigerator while you work on the brownie batter. Softened cream cheese mixes better and ensures your icing is smooth and easy to drizzle instead of lumpy.
See the recipe card below for exact ingredient amounts, nutritional information, and detailed instructions.
How to Make Red Velvet Brownies
These are the steps you'll need for this red velvet brownie recipe. Start by preheating your oven to 325°F and lining a 9x13 metal baking pan with parchment paper.

Step 1: Prepare the butter and sugar mixture. Add butter to a pot over medium-high heat. Once melted, take it off the heat and stir in the white and brown sugar.
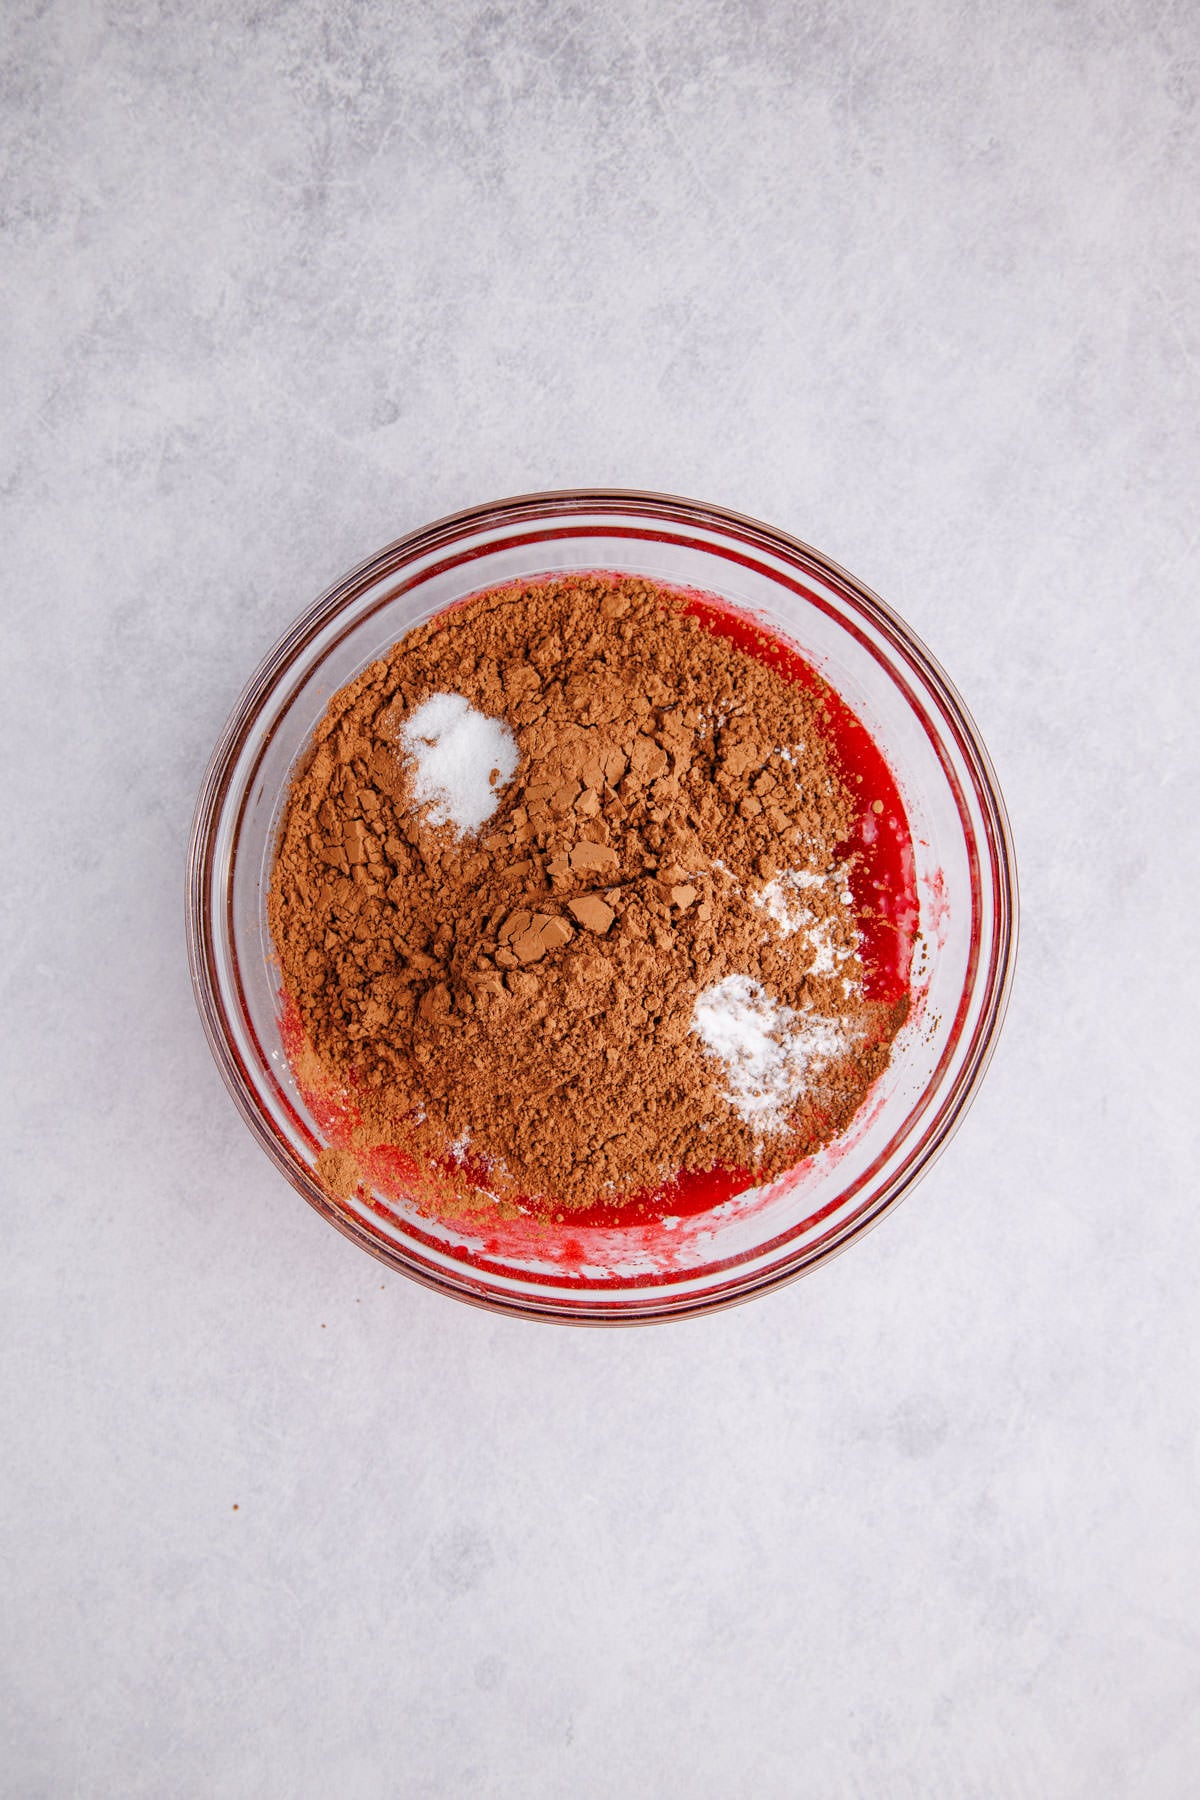
Step 2: Add the remaining ingredients. Next, transfer it to a bowl and stir in the wet ingredients. Then, fold in the dry ingredients until the batter is nice and smooth.
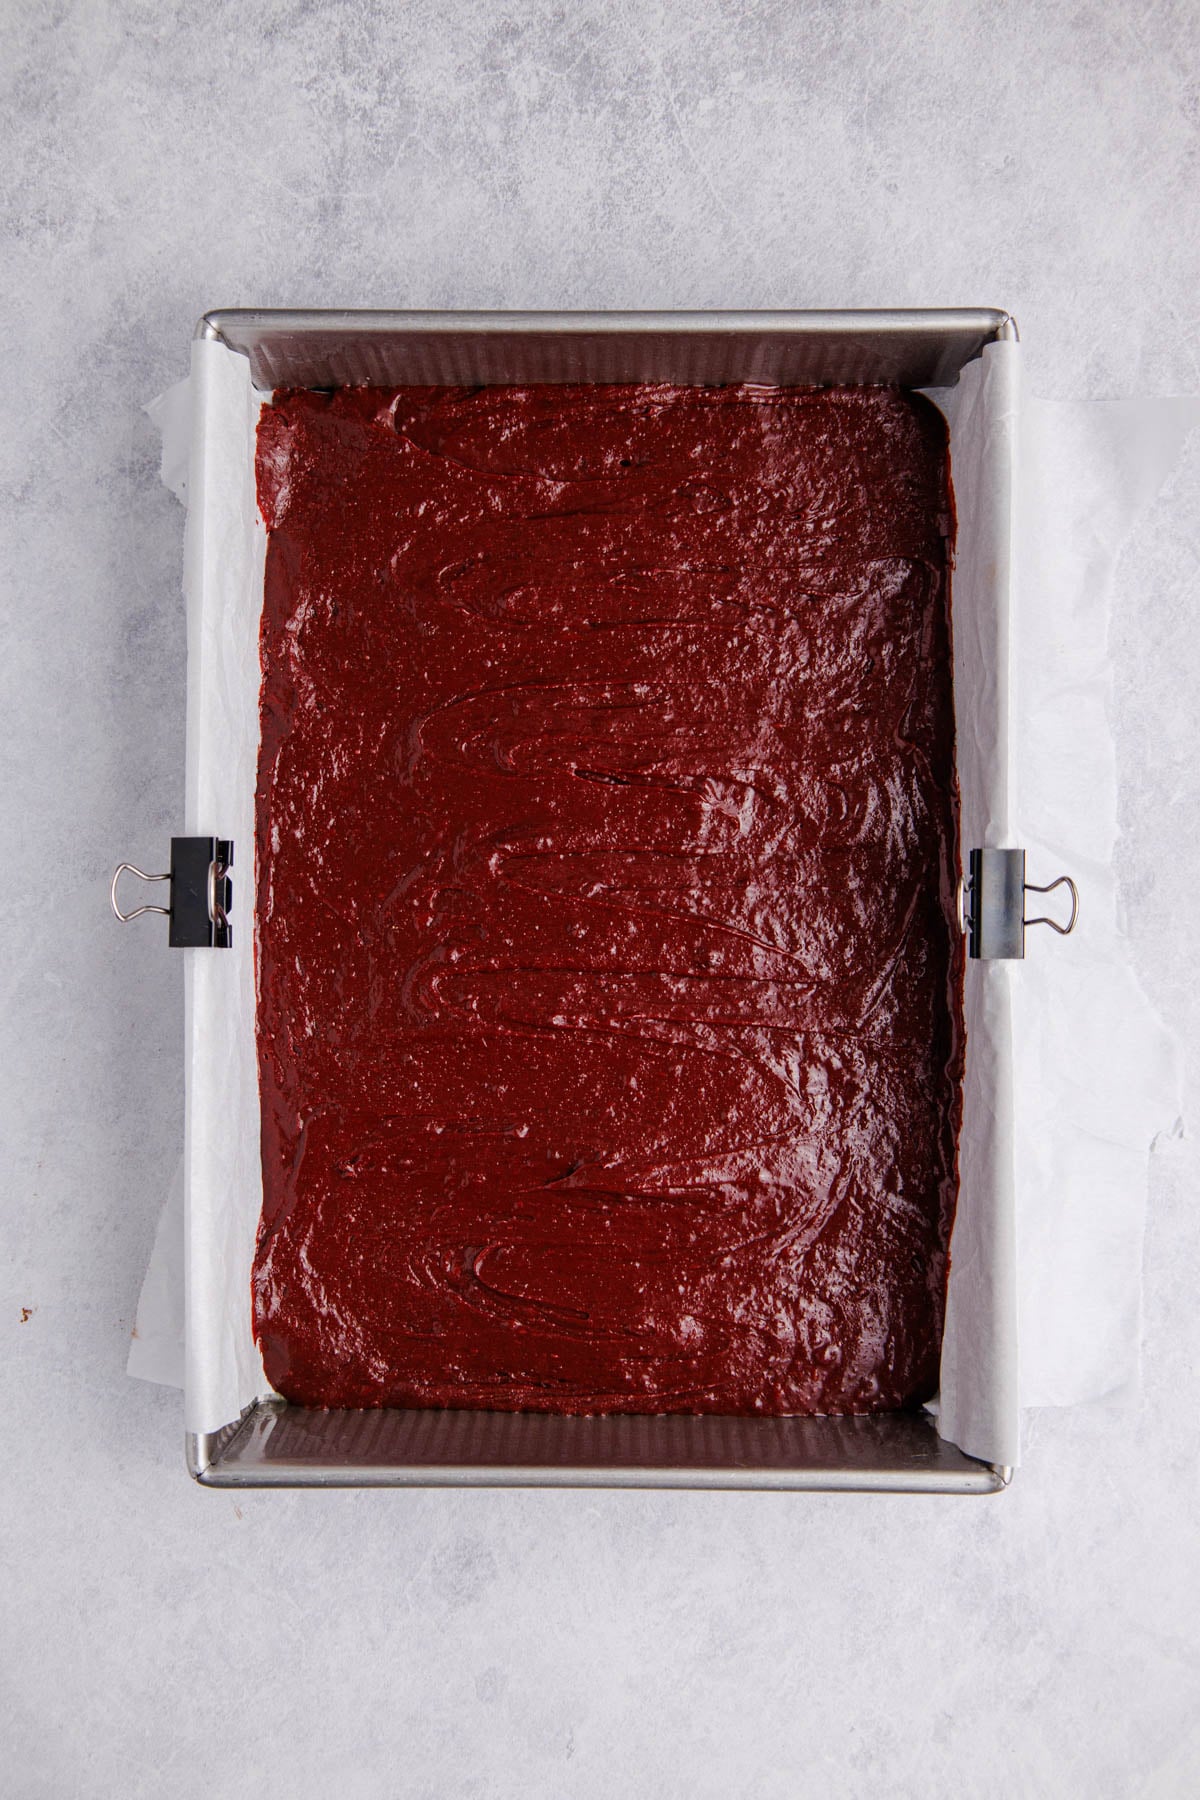
Step 3: Transfer batter to the pan. Now you can pour the brownie batter into the prepared baking pan and spread it evenly.
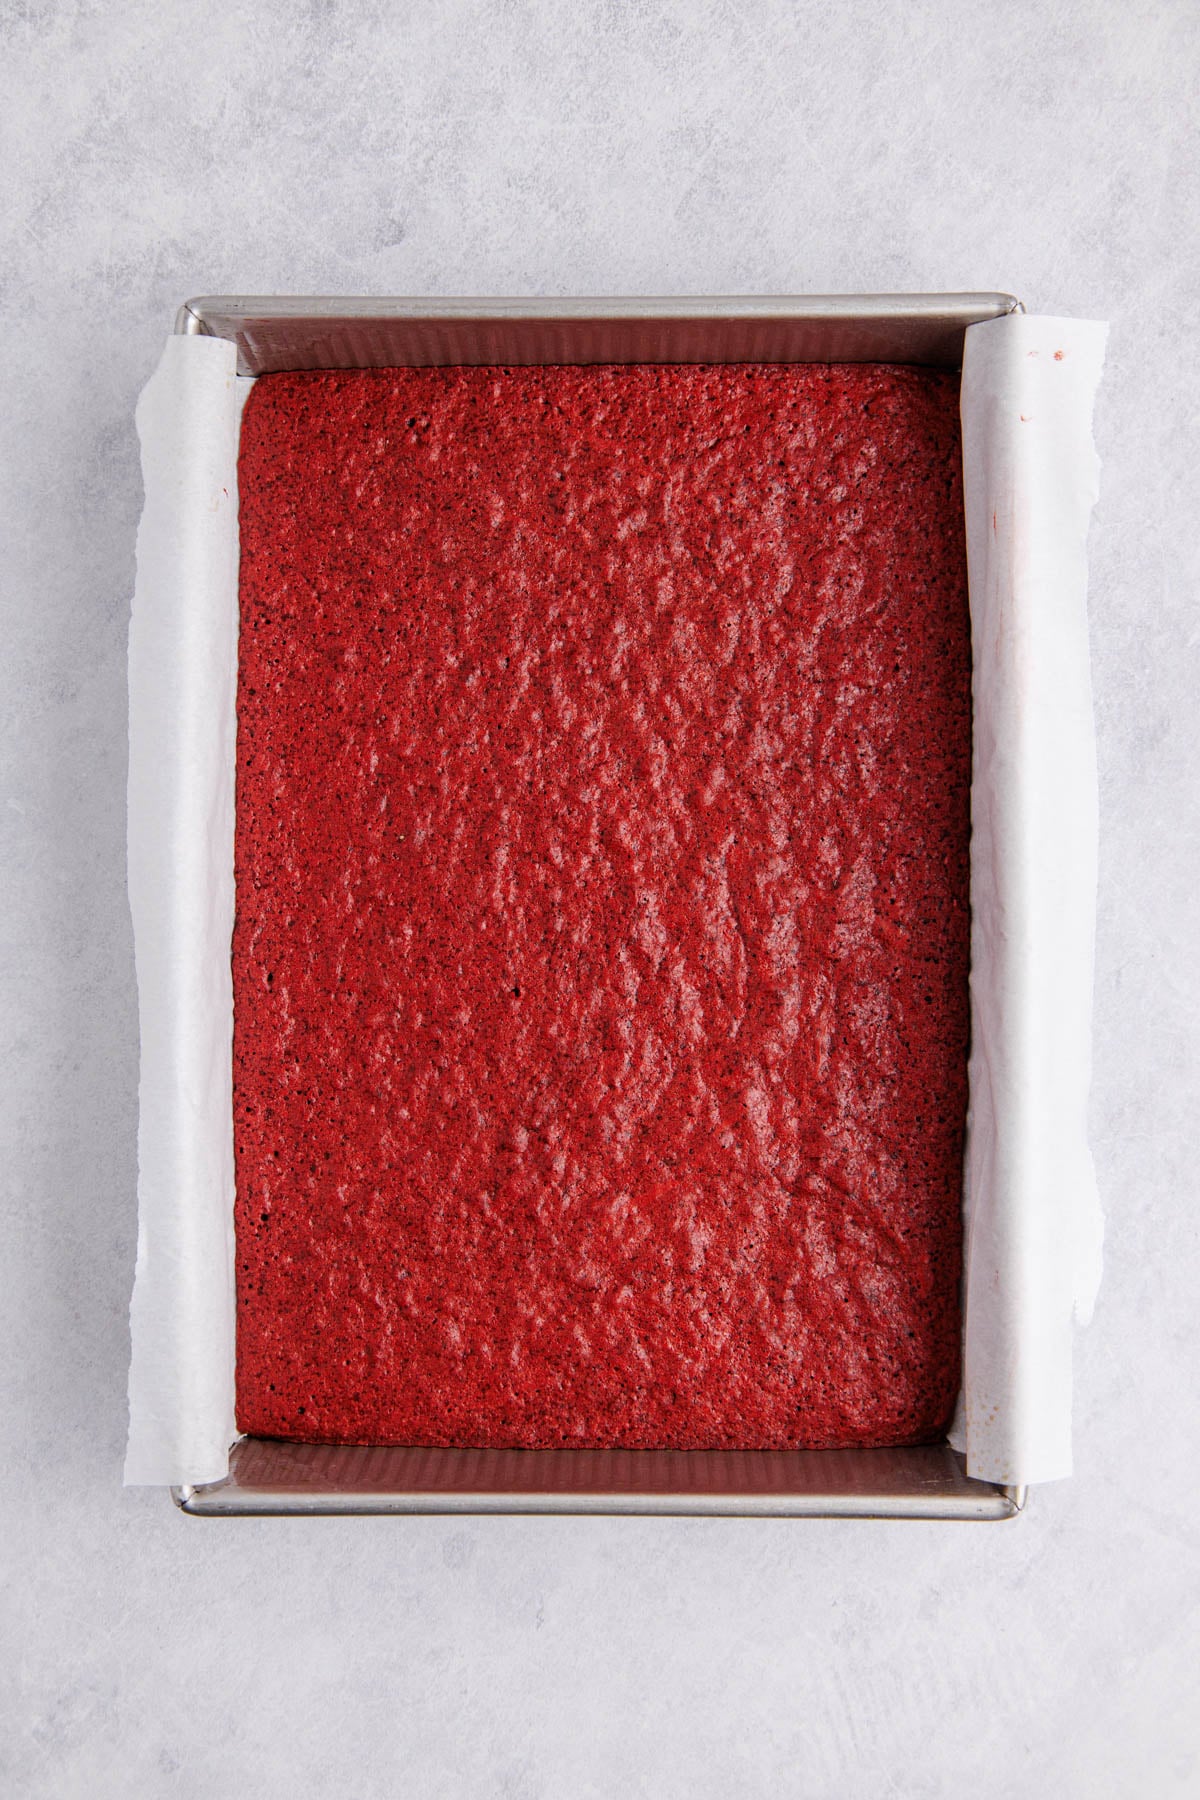
Step 4: Bake and cool. Place the pan into the oven and bake for about 30 minutes. Allow it to cool completely in the pan before taking it out.
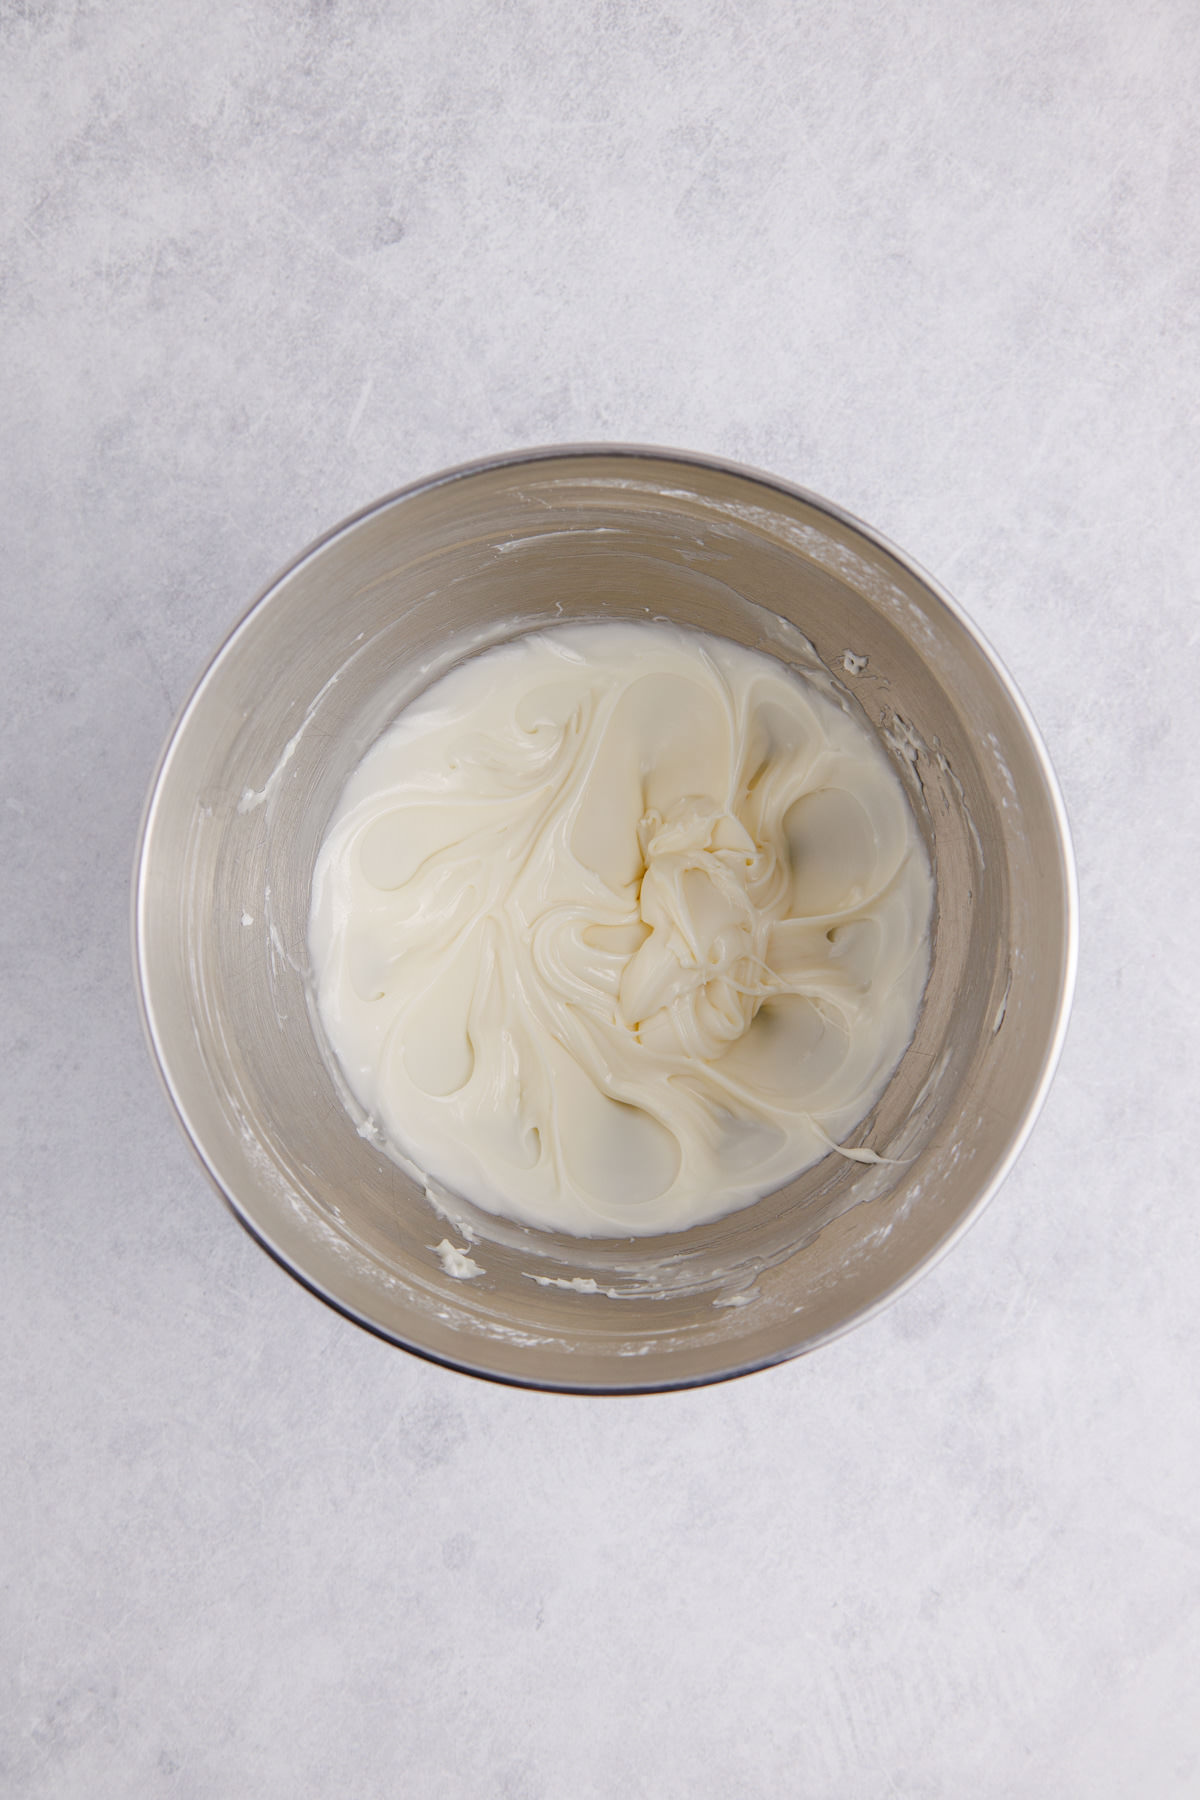
Step 5: Prepare the icing. Combine all the icing ingredients in a bowl and whisk until the mixture is smooth and creamy.
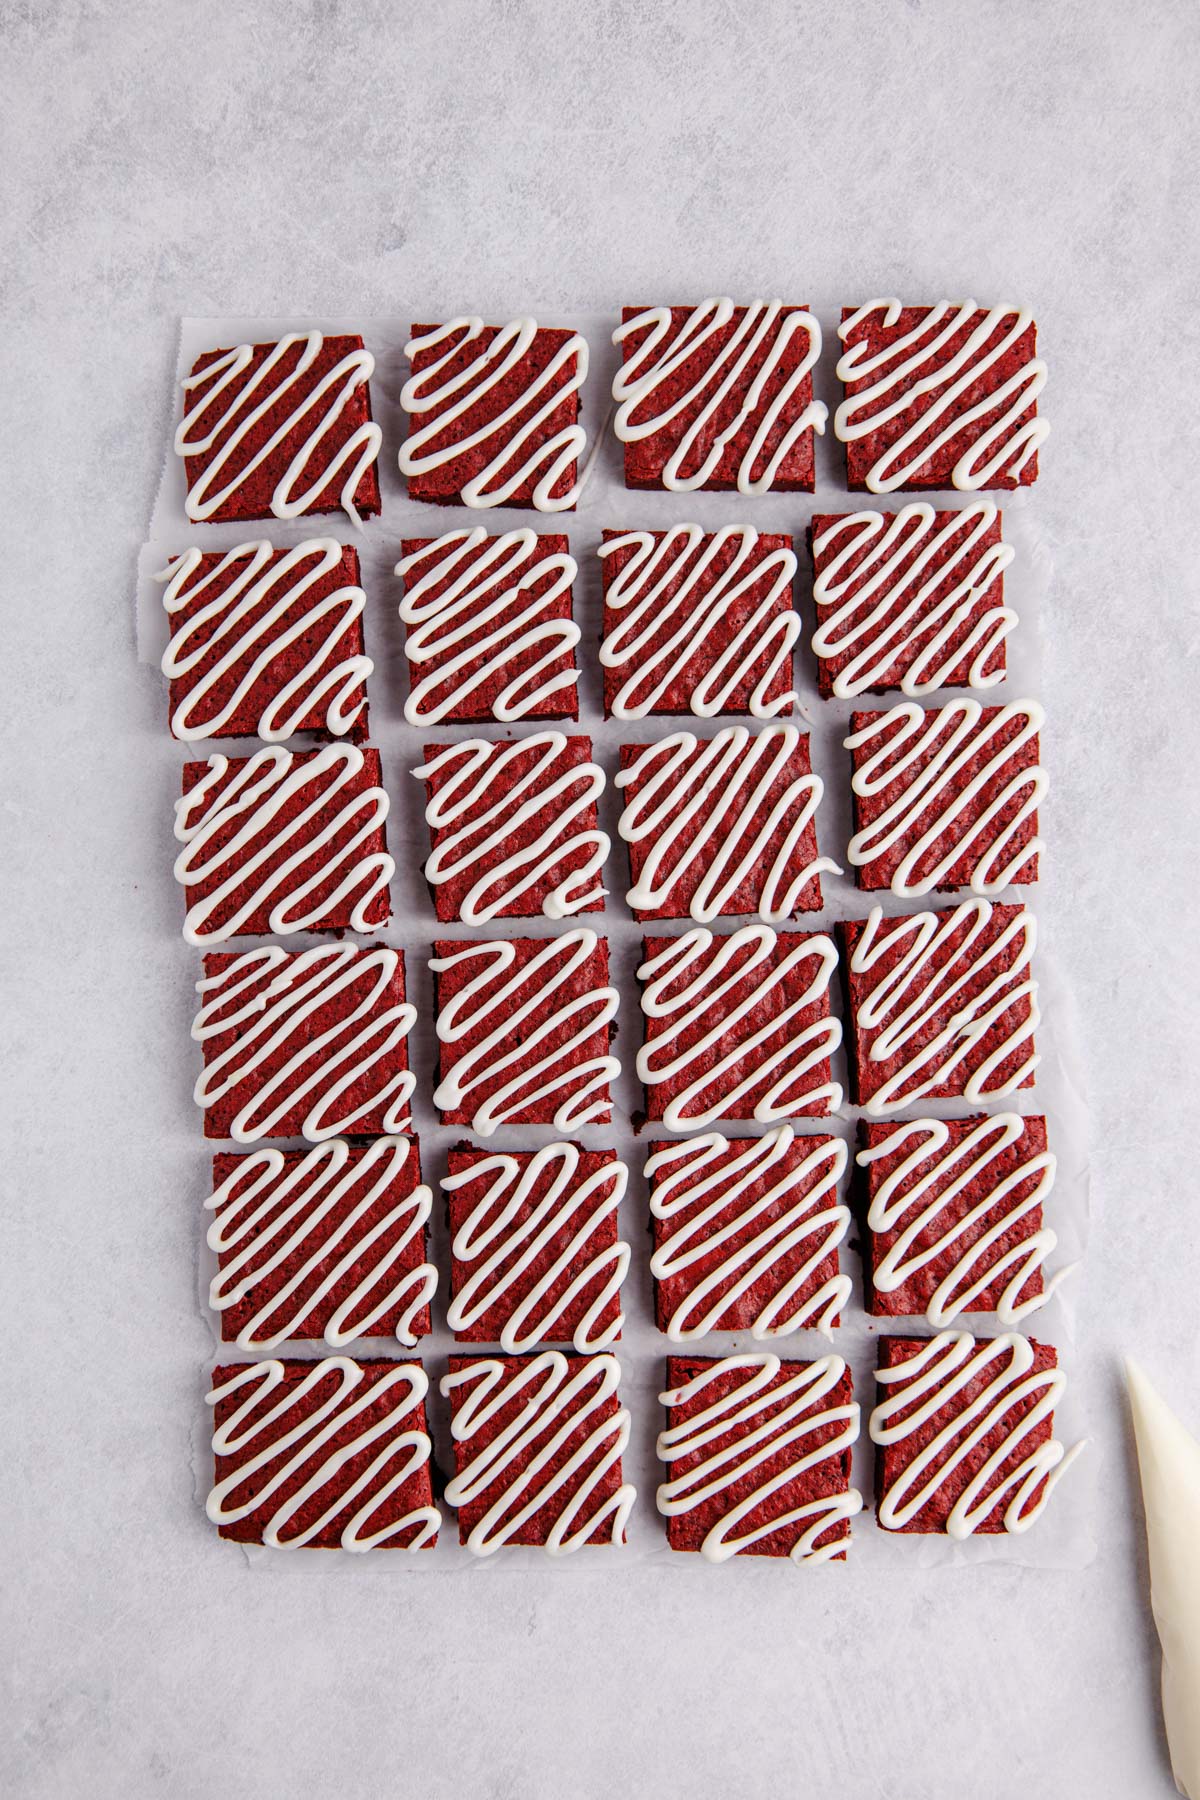
Step 6: Slice and drizzle. Finally, slice the brownie into squares and pipe the frosting on top of each piece. Enjoy your red cocoa brownies with frosting and a scoop of Kit Kat ice cream or homemade dark chocolate ice cream.
Expert Tips
- Storing your brownies: Unfrosted brownies may be stored at room temperature for up to 3 days or in the refrigerator for up to 1 week. Frosted brownies should only be refrigerated to preserve the cream cheese for up to 5 days. Always keep the squares in an airtight container.
- Using parchment paper: I love to use parchment paper because it's infinitely easier to remove the brownies from the pan and slice them. If you try to slice them in the baking pan, they will not be as clean and even.
- Leave out the frosting: Feel free to enjoy these delicious red velvet dessert bars without the icing. They are just as amazing!
- Avoid raising the oven temperature: Baking the red velvet brownies at 325F is most ideal because it helps to bake them more gently, preventing the edges from drying out too quickly before the center is set. This creates a moist, fudgy texture rather than cakey.
If you love mashup dessert recipes like these red velvet brownies, you should try these pecan pie brownies and my pink velvet brownies.
Check out these buckeye brownies and my Dubai chocolate brownies if recipes like this are your thing.
Serving Suggestions
- A cold glass of milk is one of the best pairings for these rich red brownies. Some of my unique suggestions include peppermint hot chocolate and a royal flush shot drink for the adults.
- The red hue of these red velvet brownies would be perfect for Valentine's Day and Christmas! Add festive sprinkles to really highlight the holiday you're celebrating. They're easy dessert bars for a crowd!
- Serve these as part of a party dessert tray! These red brownies bring vibrant color to other treats such as chocolate caramel cupcakes and Rice Krispie chocolate chip cookies.
Recipe FAQs
The best test is the toothpick test! Insert it into the center, and you should see only moist crumbs but not raw batter on the toothpick. The edges should be set as well.
Not at all! The sole purpose of the white vinegar is for texture and color. There's not nearly enough vinegar to be able to taste it in these red brownies.
Sure! You may freeze them unfrosted for up to 3 months or frosted for up to 1 month. Thaw unfrosted brownies overnight in the fridge or for 1-2 hours on the counter. Thaw frosted brownies only in the refrigerator overnight to preserve the cream cheese.
There are a few reasons why this can happen. The first is overbaking the brownies. It's normal for the center of the brownies to be soft, as it will set while it cools. Don't look for a completely clean toothpick; some crumbs are fine! It's also important that you level the dry ingredients when measuring them for accuracy.
I prefer metal pans for brownies because they get hotter faster and tend to cook the brownie more evenly, keeping them chewy and fudgy. Glass baking pans take longer to heat up, running the risk of overbaking the brownies.
Video

More Delicious Brownie Recipes
Do you like brownie recipes? Here are some recipes you may also like to try.


If you try this recipe and love it please leave a star rating in the recipe card below or even better, drop a review in the comment section. I always appreciate your feedback. Be sure to follow along with me on Facebook, Pinterest, and YouTube for more easy recipes!

Red Velvet Brownies
Ingredients
- ¾ cup unsalted butter or 1 ½ sticks
- 1 cup granulated sugar or 200 grams
- 1 cup light brown sugar or 200 grams
- 3 large eggs
- 1 large egg yolk
- 1-1½ teaspoons red food coloring
- ½ tablespoon white vinegar
- 1 ¼ cup all-purpose flour or 156.5 grams
- 8 tablespoons unsweetened cocoa powder or 60 grams
- 1 teaspoon sea salt
- ¼ teaspoon baking soda
ICING:
- 1 ½ cups icing sugar
- 4- ounce cream cheese full fat, softened
- 1 tablespoon milk
Instructions
- Preheat oven to 325F and prepare an 9x13 metal pan with parchment paper leaving the sides high for easily removal.
- Melt butter over medium high heat, once bubbling and melted remove the pot and add in white and brown sugar. Whisk well then wait a few minutes so it isn't too warm before proceeding with the next step.
- Once butter is absorbed, transfer to a large bowl and add eggs, yolk, food coloring and vinegar.
- Fold in flour, cocoa powder, salt and baking soda.
- Transfer to prepared pan (don't worry if it doesn't fully spread into the corners). Bake for 30 minutes or until a toothpick has moist crumbs in the center.
- Cool completely in the pan then remove and slice.
- Make icing by whisking everything together in a bowl or stand mixer base.
- Pipe or frost as desired.
Video
Notes
- A cold glass of milk is one of the best pairings for these rich red brownies. Some of my unique suggestions include peppermint hot chocolate and a royal flush shot drink for the adults.
- The red hue of these red velvet brownies would be perfect for Valentine's Day and Christmas! Add festive sprinkles to really highlight the holiday you're celebrating. They're easy dessert bars for a crowd!
- Serve these as part of a party dessert tray! These red brownies bring vibrant color to other treats such as chocolate caramel cupcakes and Rice Krispie chocolate chip cookies.

Leave a Reply