This recipe for Witch Hat Cookies is one you'll want to hold on to for every October! You get to make a delicious, homemade cookie, but jazz it up with spooky colors and decorations to create cookie witch hats. They're recognizable and perfect for Halloween parties and more.

Jump to:
I have made these cookies a handful of times, and they're always a hit. Plus, they're easy to make. It's a simple peanut butter cookie dough, colored with purple food coloring and then finished however you want! I use Hershey hugs for the pointy tip of the hat and festive sprinkles.
If you love a good homemade peanut butter cookie, you will enjoy peanut butter M&M cookies and peanut butter cookie bars.
Why You'll Love This Recipe
- It's homemade: These cookies are made completely from scratch! I enjoy the texture and flavor of a good homemade peanut butter cookie. They're so soft and chewy.
- You can use different colors: You are not limited to just purple witch hats. Get creative and make this recipe your own.
- It's a party favorite: This recipe was made for Halloween parties. They're so cute and festively decorated, and they will impress all of your guests.
Ingredients
Below are the essential ingredients for these Halloween witch cookies. Most of them are found in the baking aisle at your local grocery store.

- Cornstarch: I use both cornstarch and flour in this recipe. The cornstarch helps break down the proteins in the flour, resulting in a chewy cookie. This is often seen in peanut butter cookies because they are more likely to turn out dry.
- Butter: The butter must be softened at room temperature before you start your cookie dough to ensure there are no lumps. I also use unsalted butter, so if you only have salted, omit the extra salt in this recipe.
- Peanut butter: You may use any brand of peanut butter for these cookies, but it must be creamy. Crunchy doesn't work as well, and natural separates, becoming too oily.
- Gel food coloring: I use Wilton "violet" gel food coloring to get the shade of purple featured. You may use another shade of purple or brand of gel food coloring if you have a favorite.
- Hershey Kisses: I like the striped Hershey Hugs. It adds a lovely contrast to the bright purple color. Original Hershey kisses work fine, too.
See the recipe card below for exact ingredient amounts, nutritional information, and detailed instructions.
Variations
- Add chocolate chips: Fold in semi-sweet or white chocolate chips for texture and extra sweetness.
- Make them a different color: Make your witch hats black, green, or even orange for a fun twist.
- Use colored Kisses: Sometimes you can find other flavors/colors of kisses that would make these cookies even more amazing.
How to Make Witch Hat Cookies
These are the steps needed to make these witch hat cookies with Hershey Kisses. You will want to line a cookie sheet. After the cookie dough has chilled, you can also preheat the oven to 350°F.

Step 1: Combine the dry ingredients. Add the flour, cornstarch, baking powder/soda, and salt to a large mixing bowl and stir them until they are well combined.

Step 2: Beat butter, sugar, and egg. Beat the butter and sugar in a separate bowl, and then beat in the egg until the mixture is nice and smooth.

Step 3: Add peanut butter and vanilla. Now, you can mix in the peanut butter and vanilla extract.

Step 4: Pour in the dry ingredients. Once the wet mixture is well combined, add the dry ingredients and fold them in until a soft dough forms.

Step 5: Color the dough. Squirt a couple of drops of the violet food coloring and mix it into the dough, and add more until you reach the shade of purple you want.

Step 6: Scoop the dough. Scoop 1 tablespoon-sized balls onto the prepared cookie sheet. Then chill in the fridge for at least 2 hours.

Step 7: Roll them in sugar and sprinkles. After the chilling time, roll the balls into either the sanding sugar or sprinkles.

Step 8: Arrange on the pan. Place them back on the pan with some space between each cookie.

Step 9: Bake and add candy. Bake the witch cookies for 9-11 minutes until they begin to puff and crack. Let them cool for 5 minutes before you add the Hershey hugs.

Step 10: Cool and serve. Transfer the cookies to a cooling rack to fully cool and for the candy to set. Then, enjoy!
Recipe Tips
- Try all sanding sugar: I coat some of the cookies in Halloween sprinkles and some in the sugar. If you're struggling to get the sprinkles to stick, use all sanding sugar. Try coating half of the cookies with orange.
- Use room temperature ingredients: Room temperature ingredients mix better. Not only is this true for this butter, but the egg in this case as well.
- Weigh with a scale if possible: I always recommend a scale to measure the dry ingredients, especially flour. If it's not level in the measuring cup, you risk not using the right amount.
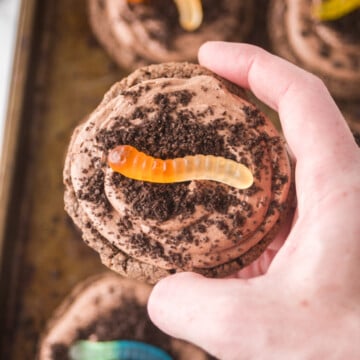
If you love fun Halloween cookie recipes, you should try these Halloween bat cookies for your party this year. You could also try these Pumpkin Dirt Cups or these Jalapeno Popper Mummies!
Oh, and don't forget about the adults. Serve them some Halloween Jello Shots and get the party started!

You may want to check out these Halloween brownies if recipes like this appeal to you.
Storage Directions
- Storing: Store these cookies in an airtight container at room temperature for up to 5 days. You may freeze them for up to 2 months.
- Make Ahead: You can chill the cookie dough overnight and have it ready to bake the next day. I love doing this the night before a party so I can save some steps.
Serving Suggestions
- Start your day off right with some festive Halloween pancakes. They are black and orange, perfect for a spooky breakfast.
- Prepare some other sweet Halloween snacks like these adorable pumpkin pie pops or this Oreo Spiders (With Oreo Cakesters) recipe!
- Enjoy your witch hat cookie with a scoop of ice cream. Try some homemade flavors like banana boat ice cream and dark chocolate ice cream.

Recipe FAQs
I highly advise against it. I like gel food coloring because the liquid food coloring could change the consistency of the cookie dough and make it thinner than it should be.
If you want a shortcut, sure. I like this homemade version better, though. They come out soft and chewy every time.
Allow it at least 2 hours in the refrigerator to chill before baking. This prevents the Halloween witch cookies from spreading too much and results in thicker, chewier cookies with a better shape.

Video

More Delicious Halloween Treat Recipes
Do you like Halloween treats? Here are some recipes you may also like to try.


If you try this recipe and love it please leave a star rating in the recipe card below or even better, drop a review in the comment section. I always appreciate your feedback. Be sure to follow along with me on Facebook, Pinterest, and YouTube for more easy recipes!

Witch Hat Cookies
Ingredients
- 1 ½ Cup all-purpose flour
- 2 teaspoons cornstarch
- ½ teaspoon baking soda
- ¼ teaspoon baking powder
- ⅛ teaspoon fine sea salt
- ½ cup unsalted butter softened
- 1 cup granulated sugar
- 1 large egg
- ¾ cup creamy peanut butter
- 1 teaspoon vanilla extract
- purple gel food coloring
- Halloween sprinkles or purple sanding sugar
- 33 Chocolate kisses or Hugs candies unwrapped
Instructions
- Line a sheet tray with parchment paper, set aside. In a large bowl, stir together the flour, cornstarch, baking soda, baking powder, and salt until combined, set aside.
- In a large bowl with an electric hand mixer or in the body of a stand mixer with the paddle attachment, cream the butter with the sugar for 2 minutes. Add the egg and mix it in until combined. Add the peanut butter and vanilla extract, mix it in until combined, scrape down the sides as needed.
- Add the dry mixture to the wet and stir it in until combined. Add violet-colored gel food coloring until you achieve the color you want. I like to give a few good stirs by hand to make sure the color is evenly distributed.
- Using a 1 tablespoon cookie scoop (or you can eyeball it), place scoops of the dough not touching but closer together on the prepared sheet tray. Cover with plastic wrap and place in the fridge for at least 2 hours to chill, even best overnight if you have the time.
- Preheat the oven to 350°F. Line sheet trays with parchment paper, set aside.
- Place the sprinkles or sanding sugar into a small bowl. Roll the cookie dough into a ball, then roll it in the sprinkles/sugar. Place the cookies 2 inches apart on the sheet trays. Bake for 9-11 minutes until puffed up and start to crack.
- Let the cookies cool for 5 minutes on the sheet tray. Place a hug in the center of the cookies, pressing down until it sticks. Place the try directly into the freezer for 10 minutes to prevent the chocolate from melting. Transfer to a wire rack while you bake the rest of the cookies.
Video
Notes
- Only use gel food coloring for these cookies, as liquid food coloring can add too much moisture to the cookie dough.
- Store leftover witch hat cookies in an airtight container and keep them on the counter for up to 5 days.
- If you want the cookies to properly bake, don't skip the chilling step. The dough should be in the fridge for a minimum of 2 hours or overnight if you choose.
Nutrition
This post was originally published, 10/16/22. It's been updated with new content and images.


Marianne says
Simply fun and delicious! I had no problem with rolling and baking right away😊
Karin and Ken says
I’m so glad you’re enjoying them! We love them around here. Thank you for taking the time to let me know. You made my day! All the best. Karin
Tommy says
I love peanut butter cookies so I tried your recipe for witches hat cookies. Am I ever glad I did. They taste amazing. I love the colouring on them its so bright and beautiful. The Hershey kiss was a perfect touch and the sprinkles stand out We just thought they were great. I’ll be making them again maybe red color for Christmas. They’re so good. Thank you again.
Karin and Ken says
I’m so happy you enjoyed them as much as we do. I love the idea of red cookies for Christmas too. I think I’m going to try that myself. All the best. Karin
Liz says
Love this recipe. Always add chocolate chips to the cookies and everyone loves them We make your easy recipe all year round. ❤️
Karin and Ken says
Glad we’re not the only people that make this recipe throughout the year! We love it too! Thank you for taking the time to comment! You made my day! All the best. Karin
Sam says
Exceptional cookies. Love the color and the taste. We’ve made this recipe several times now in different colors. Cookies always disappear quickly. Thx KD my favorite peanut butter cookies to date.
Karin and Ken says
Glad to hear you enjoy this easy recipe and you’re having fun with it! Hopefully you find some other recipes on this site that you enjoy just as much! All the best. Karin