
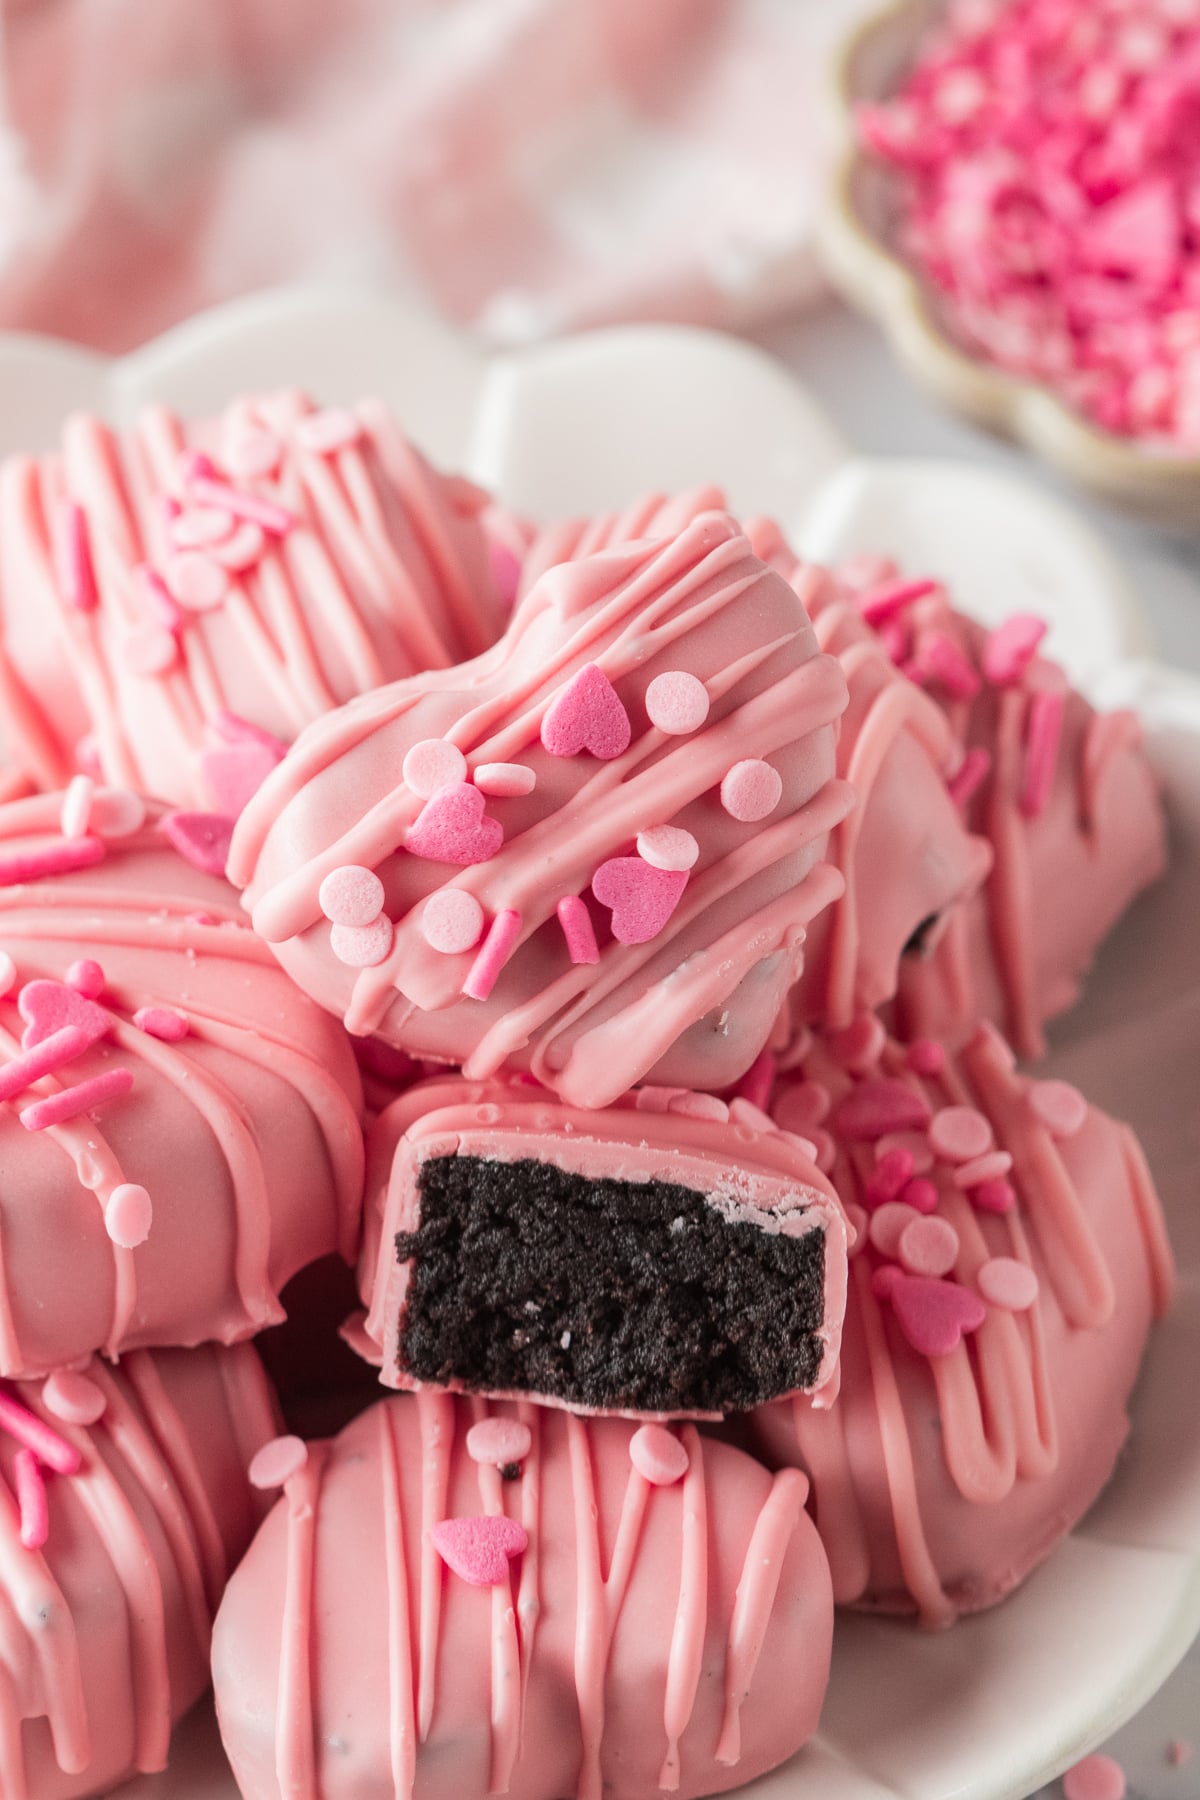
These Oreo Hearts have a soft, creamy Oreo and cream cheese center wrapped in a thin, snappy candy shell. They're an easy no-bake Valentine's Day treat made in a silicone heart mold, so there's no rolling or cutting required.

Oreo Hearts at a Glance
- 🧄 Flavor & Texture: Chocolatey Oreo flavor with a soft, creamy, slightly fudgy center and thin, snappy candy shell.
- 🛒 Main Ingredients: Oreo cookies, cream cheese, vanilla, candy melts, and Valentine's Day sprinkles.
- ⏱️ Total Time: About 1 hour 30 minutes, including chilling and setting.
- 🍴 Servings: About 24 hearts.
- 🥗 Dietary Info: Vegetarian.
- 🍚 Best Served With: A Valentine's dessert platter with pink velvet cookies, hot chocolate, coffee, or a cold glass of milk.
- 🧊 Make Ahead: Yes. They look and taste best when made 1-2 days ahead.
- ❤️ Why You Will Love It: No-bake, kid-friendly, and irresistibly creamy-meets-crisp.
Summarize and Save This Content On
After several batches, we found that freezing the molded centers for 20-30 minutes and giving them just 2-3 minutes at room temperature before dipping produced the cleanest heart shapes with the least cracking.
I made these with my grandson, and it turned into one of those moments I'll never forget. We pressed the Oreo mixture into the little heart molds, dipped them in pink candy coating, and added the sprinkles together. When he handed me a finished heart and told me how much he loves me, I just melted. Now he wants us to make enough for his entire class so he can give one to each of his Valentines.
Jump to:
How We Tested This Recipe
We made multiple batches to determine the best yield, chilling method, flavor, coating thickness, and dipping temperature.
- Mold and Yield: Our heart mold holds 1 tablespoon per cavity. Most batches yielded 22-26 hearts depending on how firmly we packed them, with 24 being our most consistent yield.
- Vanilla Test: Of 11 tasters, 9 preferred the batch with 1 teaspoon vanilla. The other 2 enjoyed both and couldn't detect a meaningful difference, so we kept the vanilla because most tasters preferred the slightly rounder flavor.
- Chilling Test: Freezing for 20-30 minutes produced cleaner releases than refrigeration. Refrigerated centers remained softer and were more likely to bend or break.
- Dipping Test: One coat gave us the best balance of creamy filling to crisp shell. Double-dipping worked, but the shell was thicker and took longer to set.
- Temperature Test: Dipping ice-cold hearts directly from the freezer sometimes caused the coating to crack later. A 2-3 minute rest before dipping reduced cracking while keeping the centers firm.
- Storage and Freezing: The finished hearts held well refrigerated for 4-5 days. Frozen coated hearts were still edible, but about one-third developed condensation or lost some shine after thawing, so we prefer freezing the undipped centers and coating them after thawing.
Ingredients
You only need a handful of ingredients for these no-bake Valentine's treats. The combination of finely crushed Oreos and softened cream cheese creates a dense filling that presses easily into a heart mold.
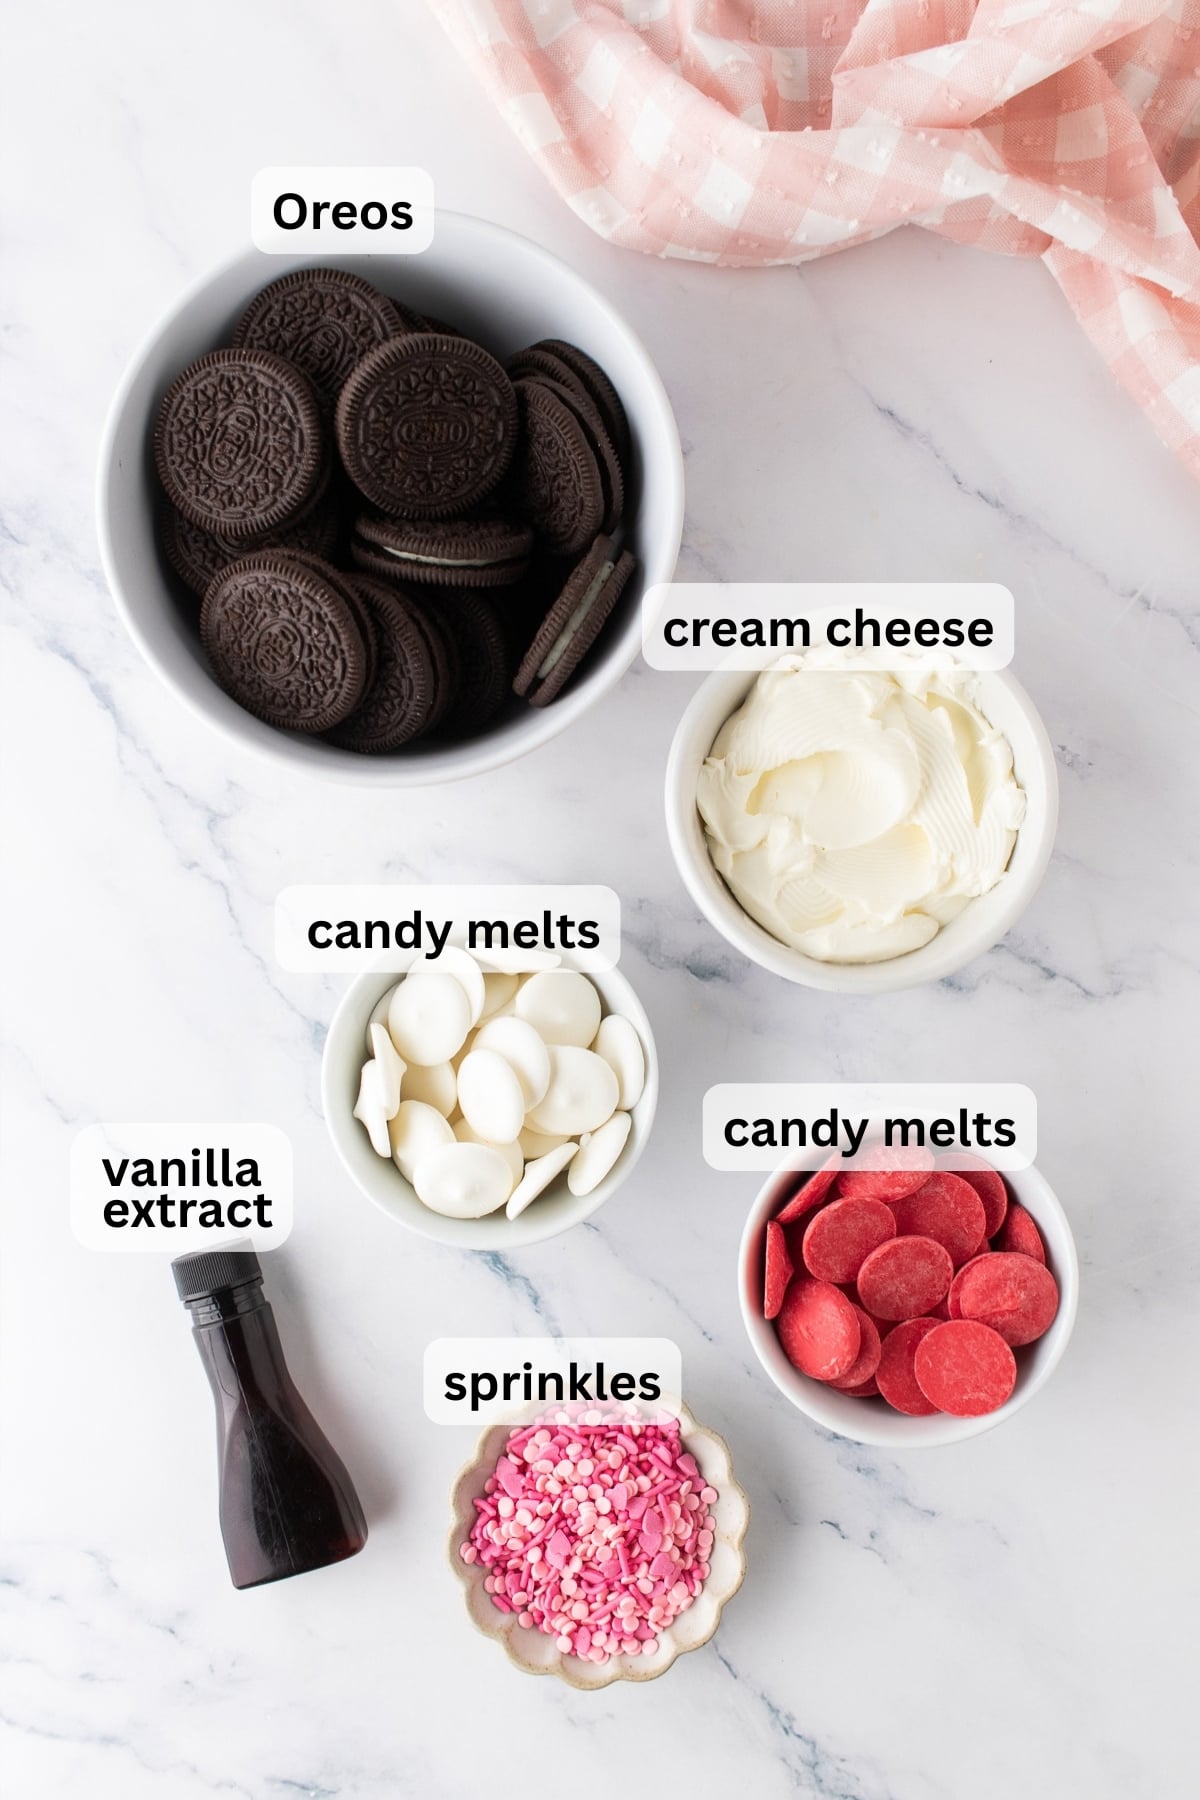
- Oreos: Use the whole cookies, including the creme filling. Processing them into very fine crumbs gives the centers their smooth, cohesive texture.
- Cream Cheese: Softened cream cheese binds the Oreo crumbs and creates the creamy, slightly fudgy center.
- Vanilla Extract: Rounds out the chocolate-and-cream flavor; our taste testing showed it was worth including.
- Candy Melts or Melting Wafers: Create the smooth outer shell. Pink melts are easiest, or combine approximately 1 part red with 3-4 parts white for a soft pink.
- Valentine's Day Sprinkles: Add color and texture to the finished hearts. Add them immediately after drizzling so they stick before the coating sets.
You'll find the exact ingredient amounts and complete instructions in the recipe card below.
Variations
- Change the Colors: Use pink, red, white, or a combination of candy melts to coordinate with your Valentine's Day decorations.
- Change the Decorations: Try heart sprinkles, sanding sugar, contrasting candy-melt drizzle, or crushed Oreos.
- Make Them for Other Holidays: Keep the heart shape but change the coating and sprinkles for bridal showers, anniversaries, birthdays, or other celebrations.
- Try Different Oreos: Use another Oreo flavor for the center, keeping in mind that flavored or specialty cookies may slightly change the texture and sweetness.
If you enjoy turning Oreo truffles into holiday treats, our snowman Oreo balls are another fun no-bake version to make and decorate.
How To Make Oreo Hearts
These no-bake hearts come together in four steps. The most important part is getting the centers cold enough to release cleanly while allowing them to warm for just a couple of minutes before dipping.
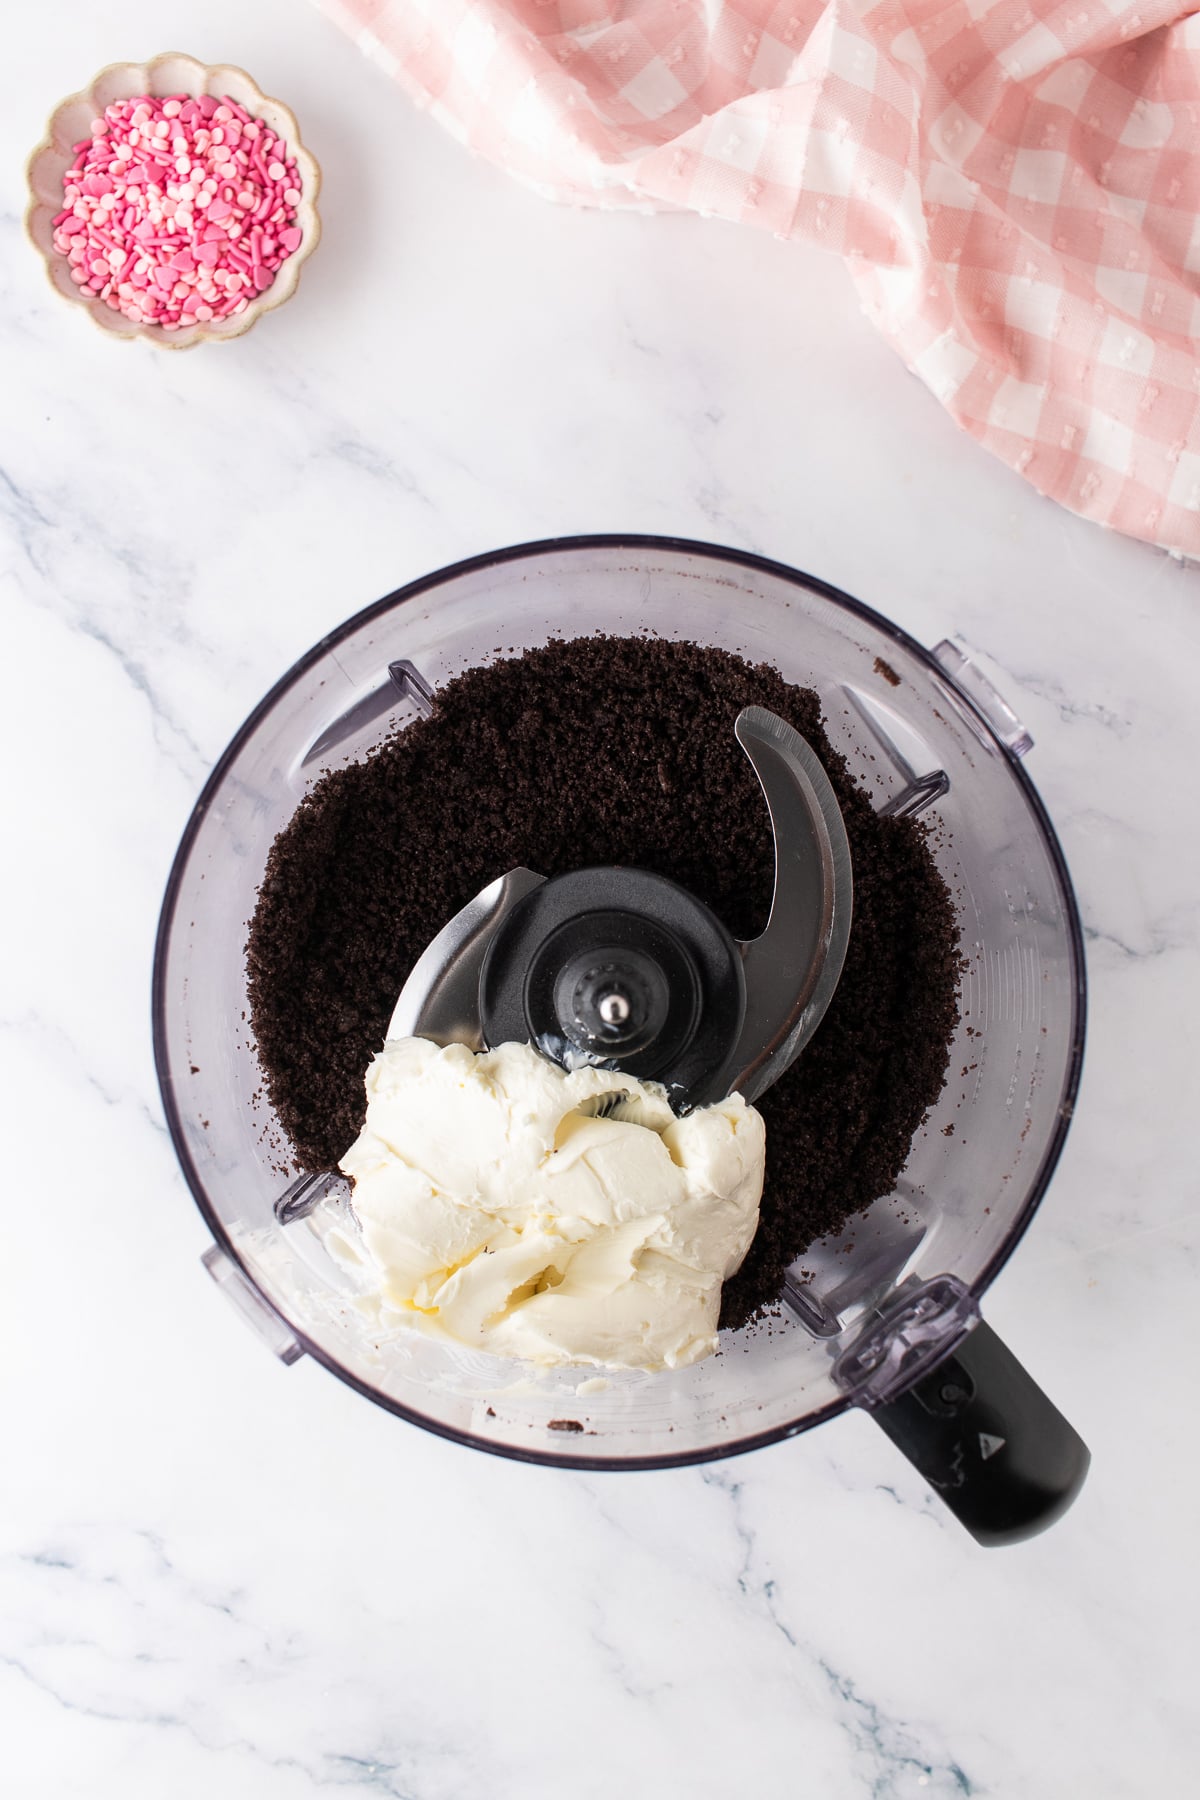
Step 1: Make the Oreo Mixture. Add the Oreo cookies to a food processor and pulse into fine crumbs. Add the softened cream cheese and vanilla, then pulse until completely combined and a thick dough forms.
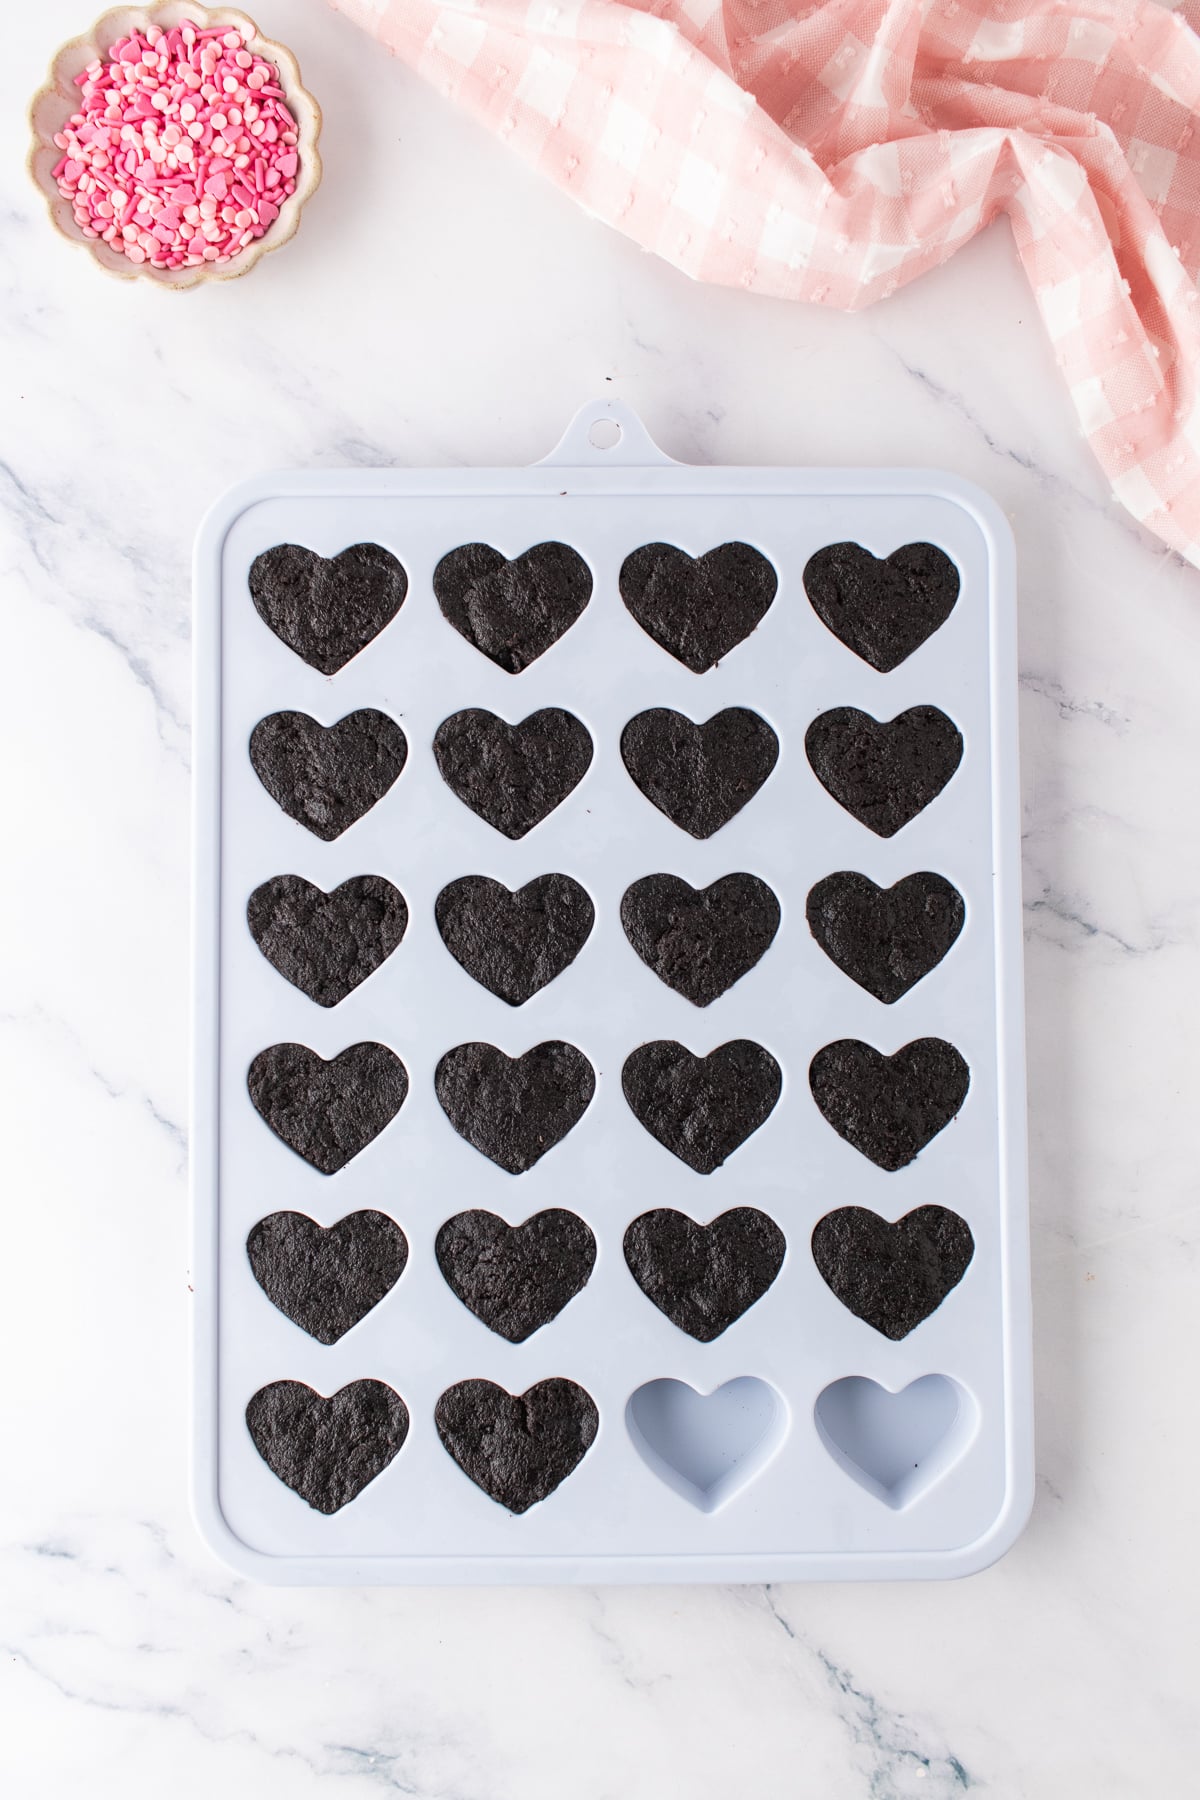
Step 2: Shape and Chill the Hearts. Firmly press 1 tablespoon of Oreo mixture into each cavity of a silicone heart mold, making sure it reaches the edges. Smooth the tops so the backs are flat. Freeze for 20-30 minutes, or until firm enough to remove easily. Gently pop the hearts from the mold and place them on a parchment-lined baking sheet.
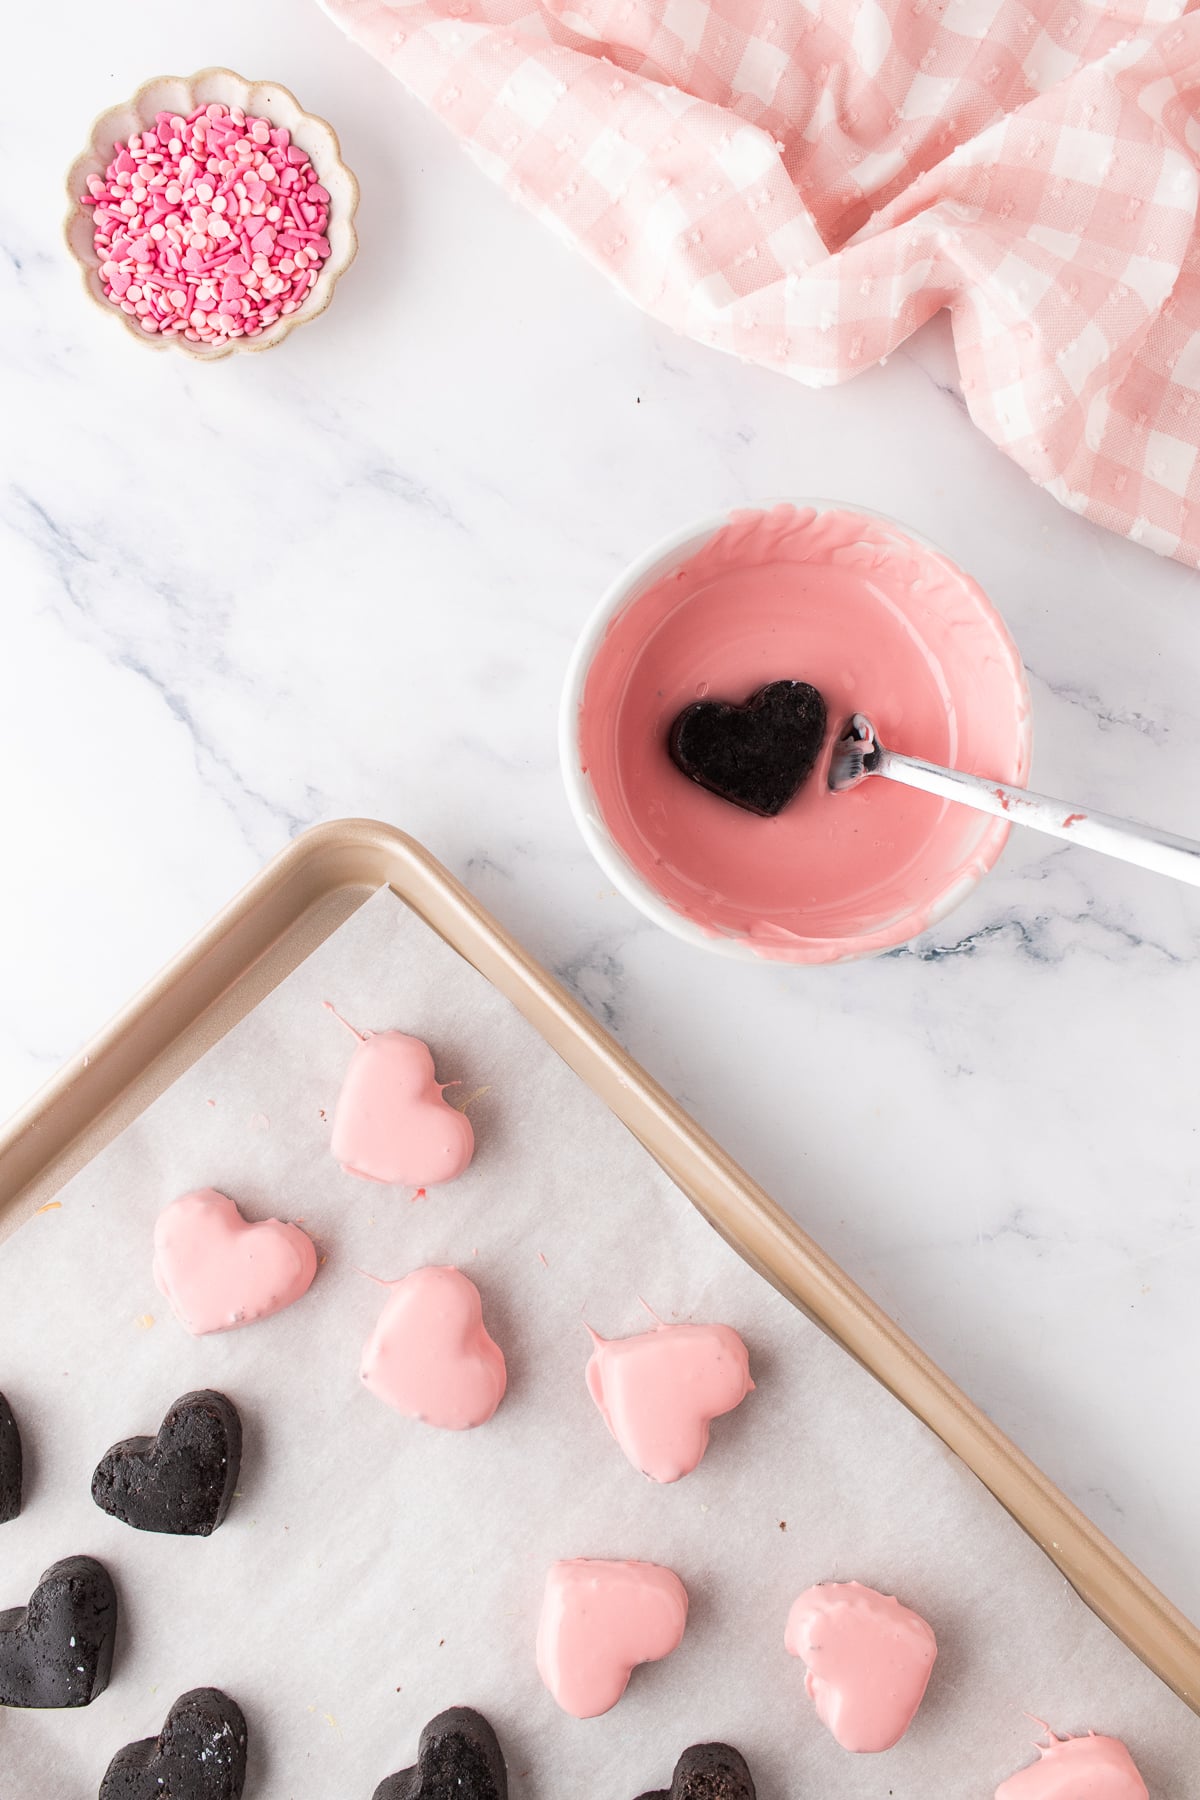
Step 3: Coat the Oreo Hearts. Melt the candy melts according to the package directions, stirring until smooth. Let the chilled hearts sit at room temperature for 2-3 minutes before dipping. Working with a few at a time, dip each heart into the coating and turn with a fork to cover completely. Lift it out, gently tap off the excess, and place on the parchment-lined baking sheet. Keep the remaining centers cold while you work. Let the coating set for 10-15 minutes at room temperature or 6-8 minutes in the refrigerator.
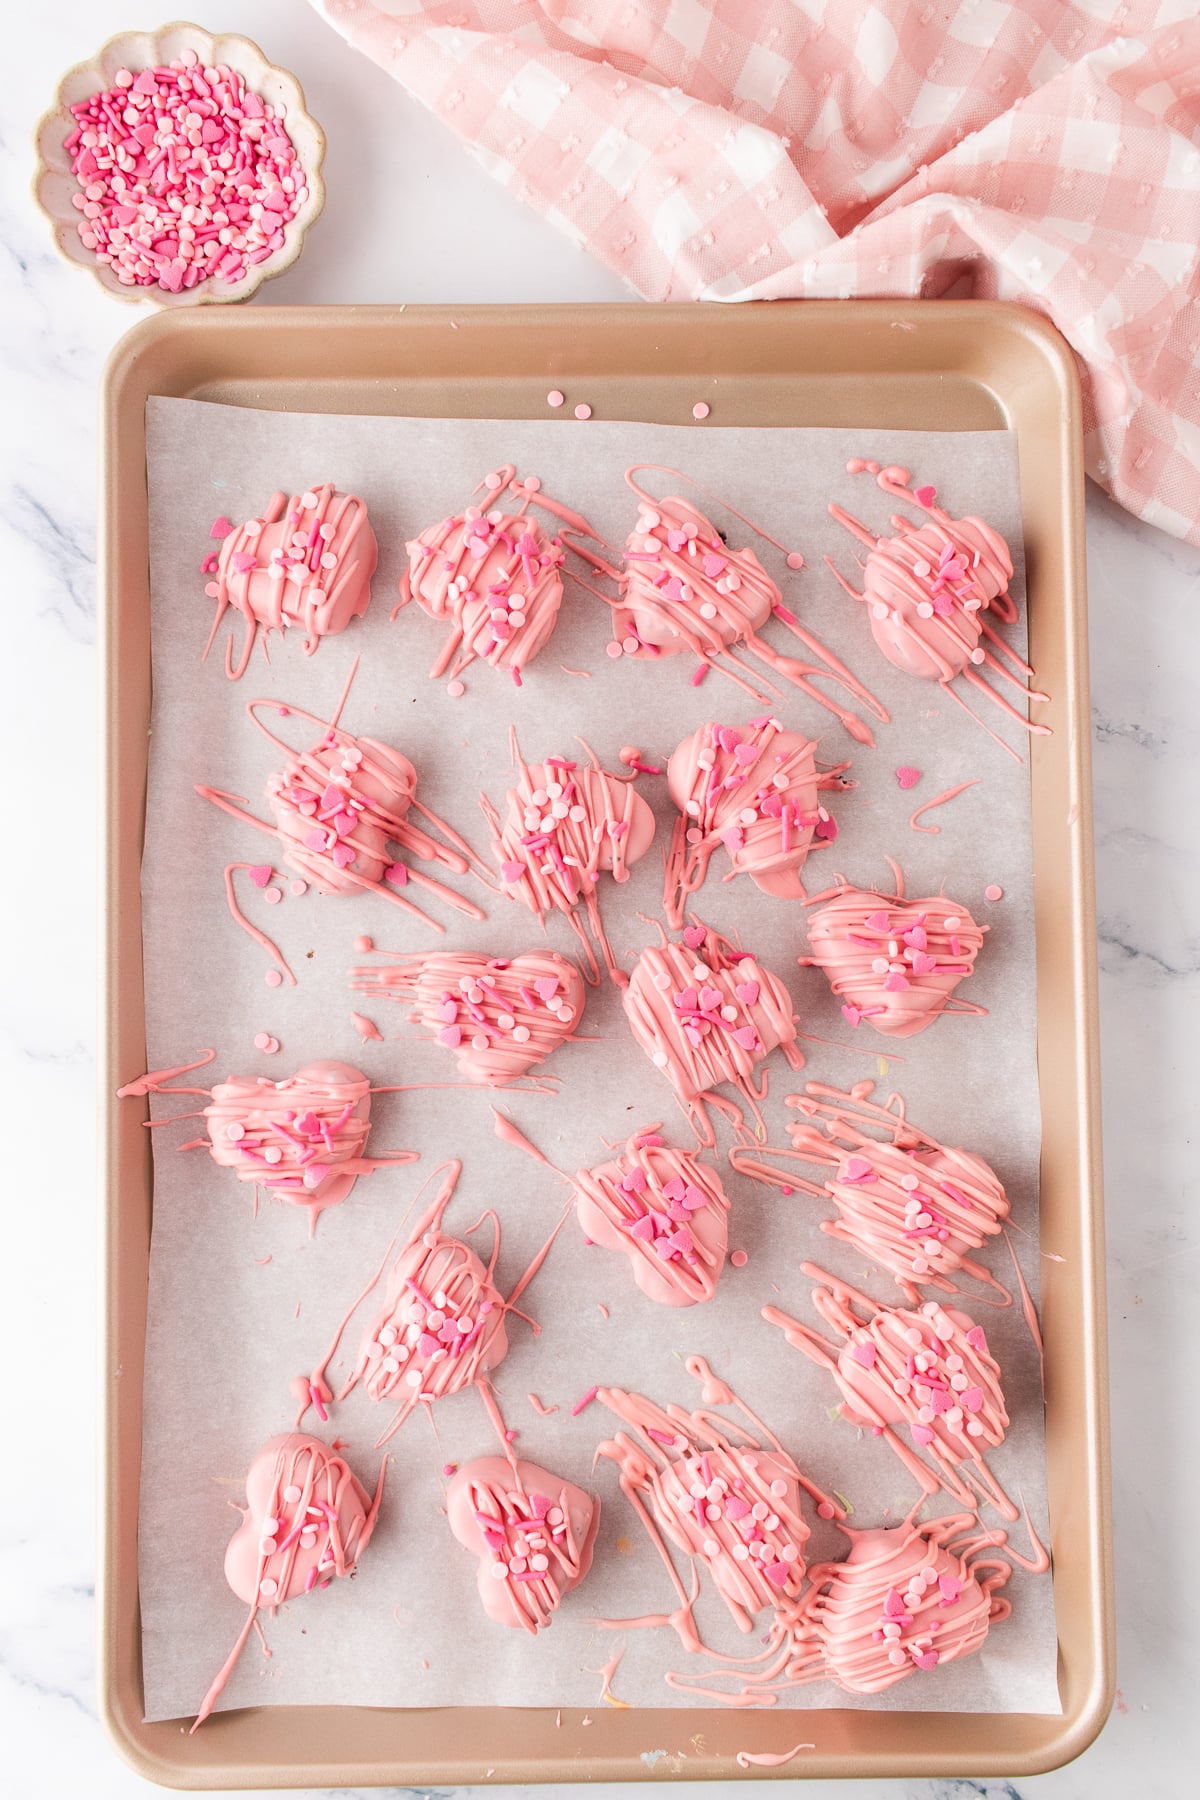
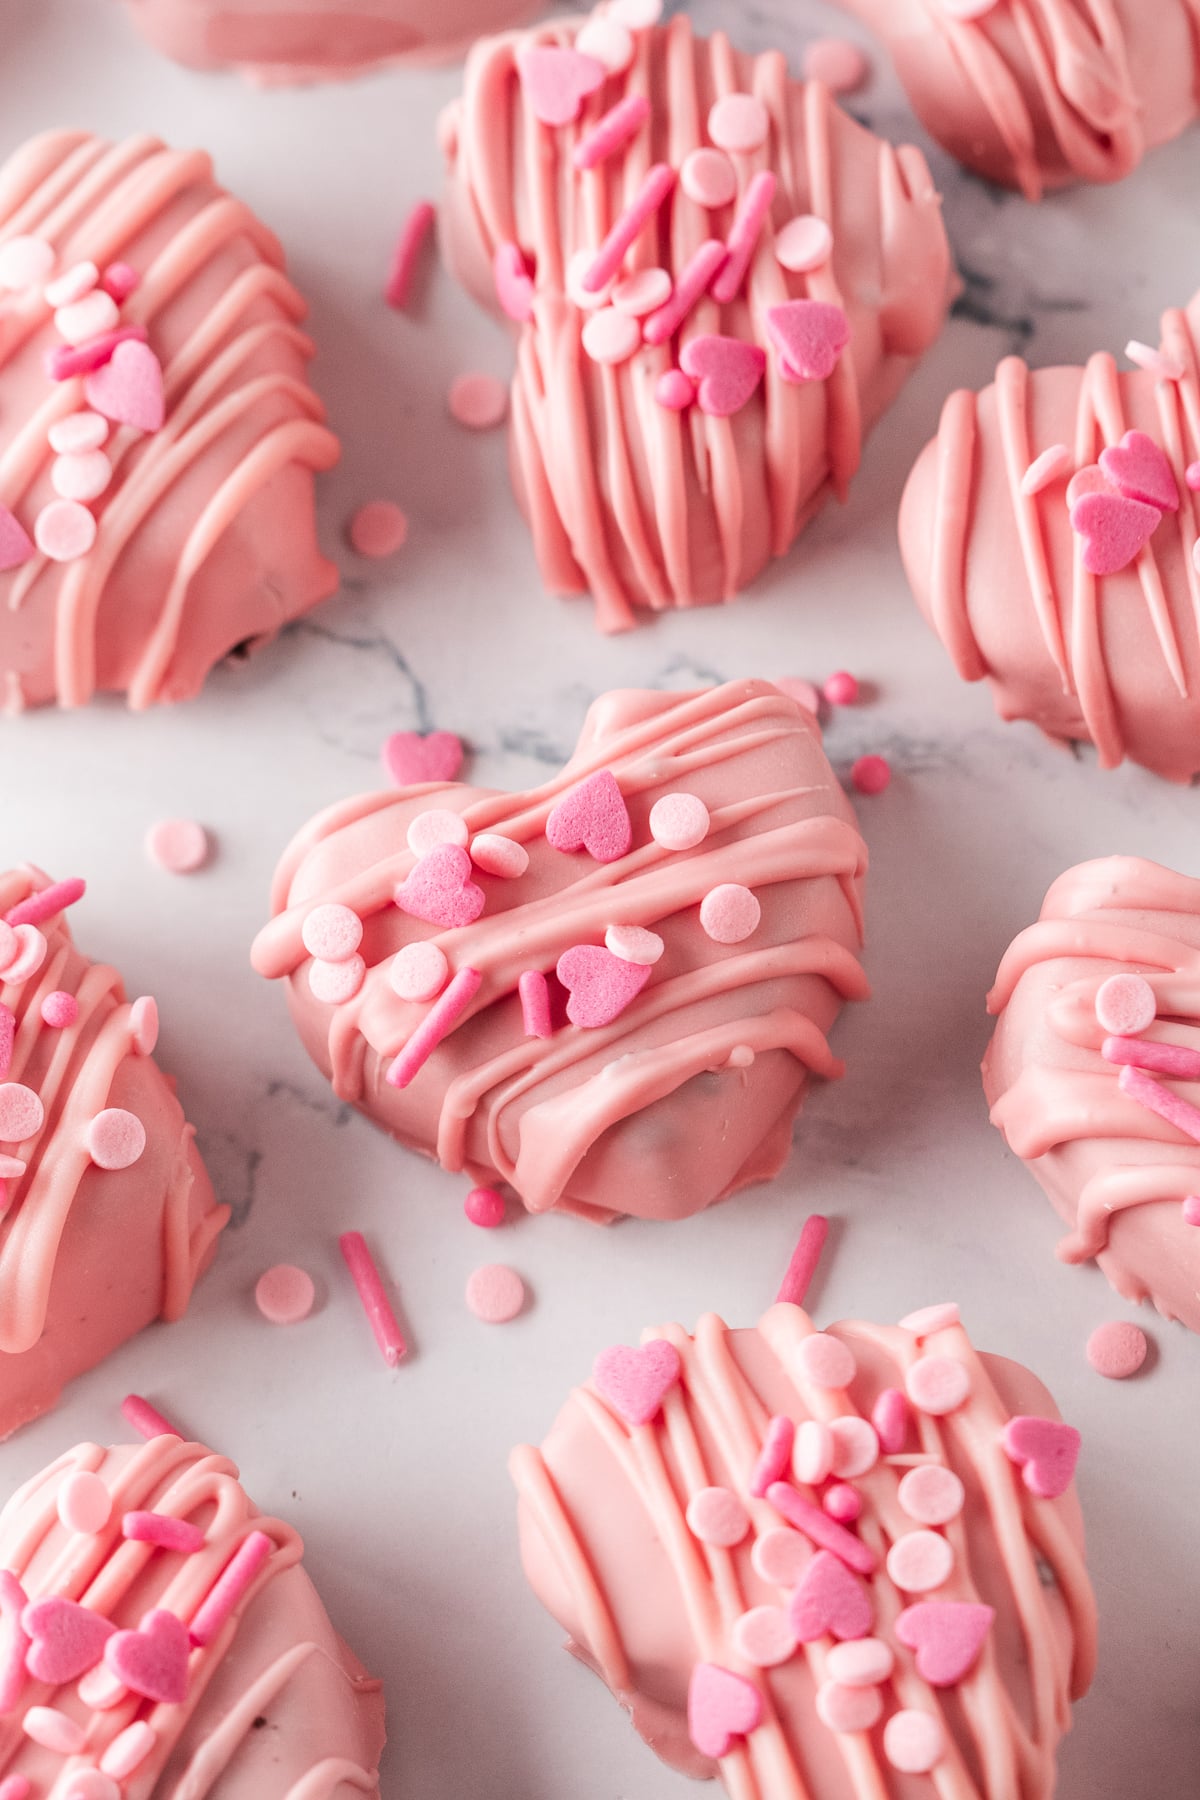
Step 4: Decorate and Set. Melt the remaining candy melts and drizzle them over the coated hearts. Immediately add Valentine's Day sprinkles before the drizzle begins to set. Let stand for 10-15 minutes, or until completely firm.
Expert Tips
- Measure the Centers: One tablespoon of mixture fit our mold cavities and most consistently produced 24 hearts. Depending on your mold and how firmly you pack the mixture, expect about 22-26.
- Use the Freezer: Freezing for 20-30 minutes gave us cleaner, sturdier hearts than refrigerating the filled mold.
- Work in Small Batches: Keep most of the hearts cold and dip only a few at a time so the centers stay firm.
- Choose the Right Coating: Wilton and Ghirardelli melting wafers worked smoothly for us without thinning. Other brands may need ½-1 teaspoon shortening or coconut oil.
- Stick With One Coat: We preferred a single dip because it gave the best ratio of creamy Oreo filling to crisp candy shell.
For another easy Oreo treat with a creamy center, try our Oreo mint balls recipe with chocolate and refreshing mint flavor.
How This Recipe Can Fail-and How to Fix It
We ran into plenty of little problems while testing these. Fortunately, each one has a simple fix.
- Hearts Stick or Tear: They probably aren't cold enough. Freeze for a full 25-30 minutes and make sure the mixture is pressed firmly into the corners of the mold.
- Hearts Break While Dipping: The centers have become too warm. Work with only a few at a time and keep the rest chilled.
- Candy Coating Is Too Thick: Some brands need thinning. Add ½-1 teaspoon shortening or coconut oil and stir until the coating flows smoothly from a spoon.
- Candy Coating Seizes: Avoid introducing water or steam into the melts and follow the package melting directions carefully. Rewarm gently as needed rather than overheating.
- Coating Cracks: The centers may have been too cold. Give them 2-3 minutes at room temperature after freezing before dipping.
- Sprinkles Fall Off: Add them immediately while the drizzle is still wet.
- Mixture Is Difficult to Mold: Make sure the cream cheese is fully softened and process the Oreos into very fine crumbs before combining them.
- Finished Hearts Sweat or Look Dull: Let the coating set completely before refrigerating and store the hearts in a tightly sealed airtight container.
Once we got the freezing time and dipping temperature right, the process became much easier. And yes-the second batch really was smoother than the first!
If you love homemade truffles, our strawberry truffles are another easy bite-sized treat with a colorful coating.
Oreo Hearts Recipe FAQs
Freeze the filled mold for 20-30 minutes. We found freezing produced firmer centers and cleaner releases than refrigerating.
You can make them several days ahead, but we found they looked and tasted best within 1-2 days. Store them in an airtight container in the refrigerator.
A heart-shaped silicone mold is the method we tested and recommend because it gives the truffles defined edges without rolling and cutting. We haven't tested this exact recipe with another shaping method, so I can't give a firsthand comparison.
Yes, but we prefer freezing the centers before dipping. Fully coated hearts can be frozen, but about one-third of ours developed condensation or lost some shine after thawing. For the best appearance, thaw the undipped centers and coat them afterward.
Serving Suggestions
- Valentine's Day Treat: Arrange the hearts in mini paper liners on a platter for parties, school celebrations, or a Valentine dessert table.
- Homemade Gift: Package completely set hearts in a treat box or container for an easy edible Valentine's Day gift.
- Dessert Platter: Pair them with cookies, brownies, chocolate-covered treats, or strawberries for a colorful Valentine's dessert spread.
For an extra-special Valentine's treat, serve them with our Valentine's Day strawberry hot cocoa bombs.
More Valentine's Day Treats
If you're planning a Valentine's Day dessert spread, serve these hearts alongside your favorite cookies, brownies, chocolate-covered treats, and other bite-sized desserts. They're especially useful for parties because they can be prepared ahead and served individually without plates or utensils. If you love making decorated Oreo treats for different holidays, don't miss our ghost Oreo truffles for Halloween.

If you try this recipe and love it please leave a star rating in the recipe card below or even better, drop a review in the comment section. I always appreciate your feedback. Be sure to follow along with me on Facebook, Pinterest, and YouTube for more easy recipes!

Oreo Hearts
Equipment
- heart silicone mold 15 ml or 1 tablespoon
Ingredients
Oreo Mixture
- 25 Oreo cookies
- 4 oz cream cheese softened
- 1 teaspoon vanilla extract
Candy Coating
- 16 oz candy melts or melting wafers (pink or white and red mix)
For Decorating
- 4 oz candy melts for drizzle
- Valentines themed sprinkles
Instructions
- Make the Oreo Mixture: Add the Oreo cookies to a food processor and pulse into fine crumbs. Add the softened cream cheese and vanilla, then pulse until completely combined and a thick dough forms.
- Shape and Chill the Hearts: Firmly press the Oreo mixture into a silicone heart-shaped mold, making sure it reaches the edges. Smooth the tops so the backs are flat. Freeze for 20-30 minutes, or until firm enough to remove easily. Gently pop the hearts from the mold, place on a parchment-lined baking sheet, and refrigerate while preparing the coating.
- Coat the Oreo Hearts: Melt the candy melts according to the package directions, stirring until smooth. For light pink, use pink candy melts or combine red and white. Dip each chilled heart into the coating, turn with a fork to cover completely, then lift and gently tap off the excess. Place on the parchment-lined baking sheet and let set for 10-15 minutes.
- Decorate and Set: Melt the remaining candy melts according to the package directions. Drizzle over the hearts and immediately add Valentine's Day sprinkles. Let sit for 10-15 minutes, or until the coating and drizzle are completely set.
Notes
- Yield: Our 1-tablespoon heart mold most consistently produced 24 hearts. Depending on the mold and how firmly the mixture is packed, expect about 22-26.
- Chilling: Freeze the molded centers for 20-30 minutes. Refrigerating them left the centers softer and more difficult to remove cleanly.
- Before Dipping: Let frozen hearts sit at room temperature for 2-3 minutes. Dipping them immediately from the freezer caused some coatings to crack as the centers warmed.
- Work in Batches: Keep most of the hearts cold and dip only a few at a time so the centers stay firm.
- Candy Melts: Wilton and Ghirardelli melting wafers worked well without thinning in our tests. If your coating is too thick, stir in ½-1 teaspoon shortening or coconut oil.
- One Coat Is Best: We preferred one dip to two because it gave a better balance of crisp candy shell to creamy Oreo center.
- Setting: The coating sets in about 10-15 minutes at room temperature or 6-8 minutes in the refrigerator.
- Storage: Refrigerate in an airtight container for 4-5 days. For the best appearance and texture, serve within 1-2 days.
- Freezing: We recommend freezing the undipped centers and coating them after thawing. About one-third of our fully coated frozen hearts developed condensation or lost some shine after thawing.
- Serving: Let refrigerated hearts stand at room temperature for about 10 minutes for a softer, creamier center.

Leave a Reply