
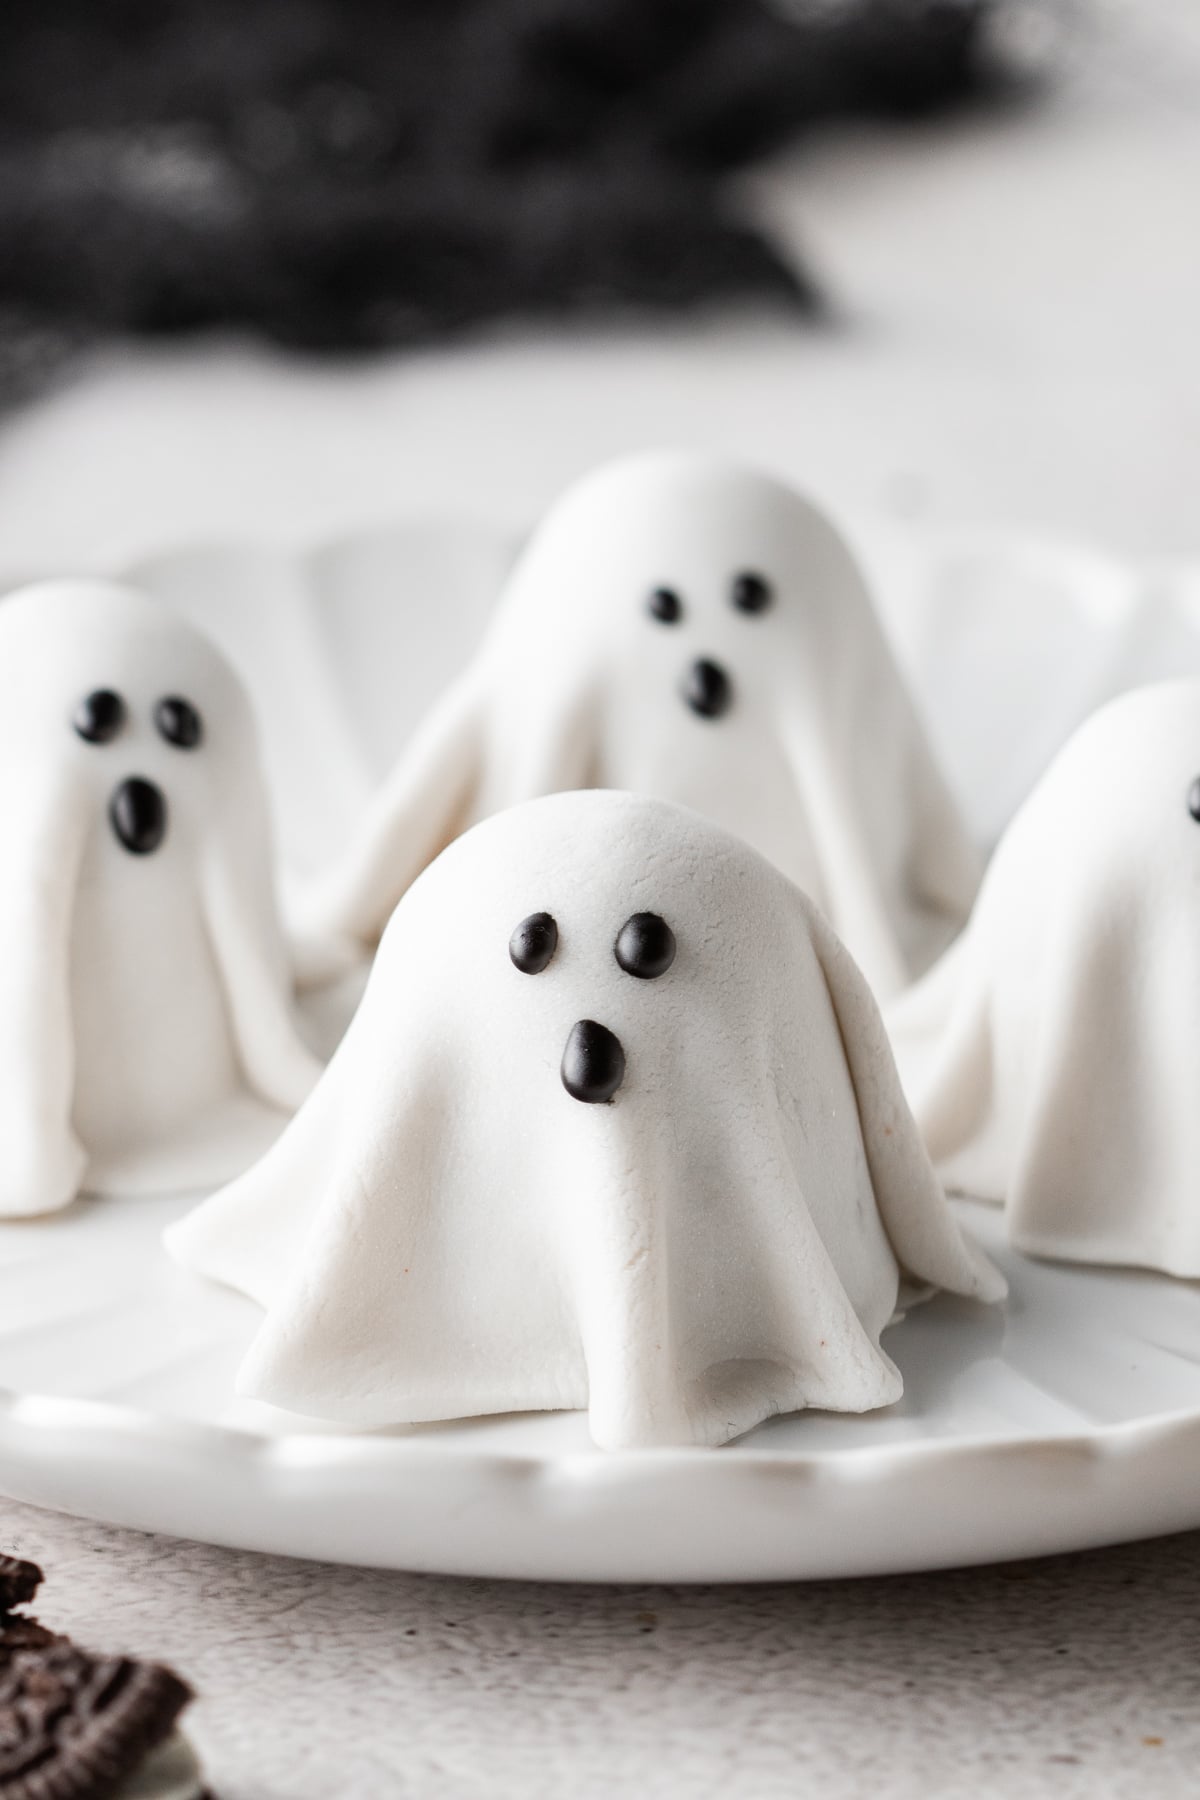
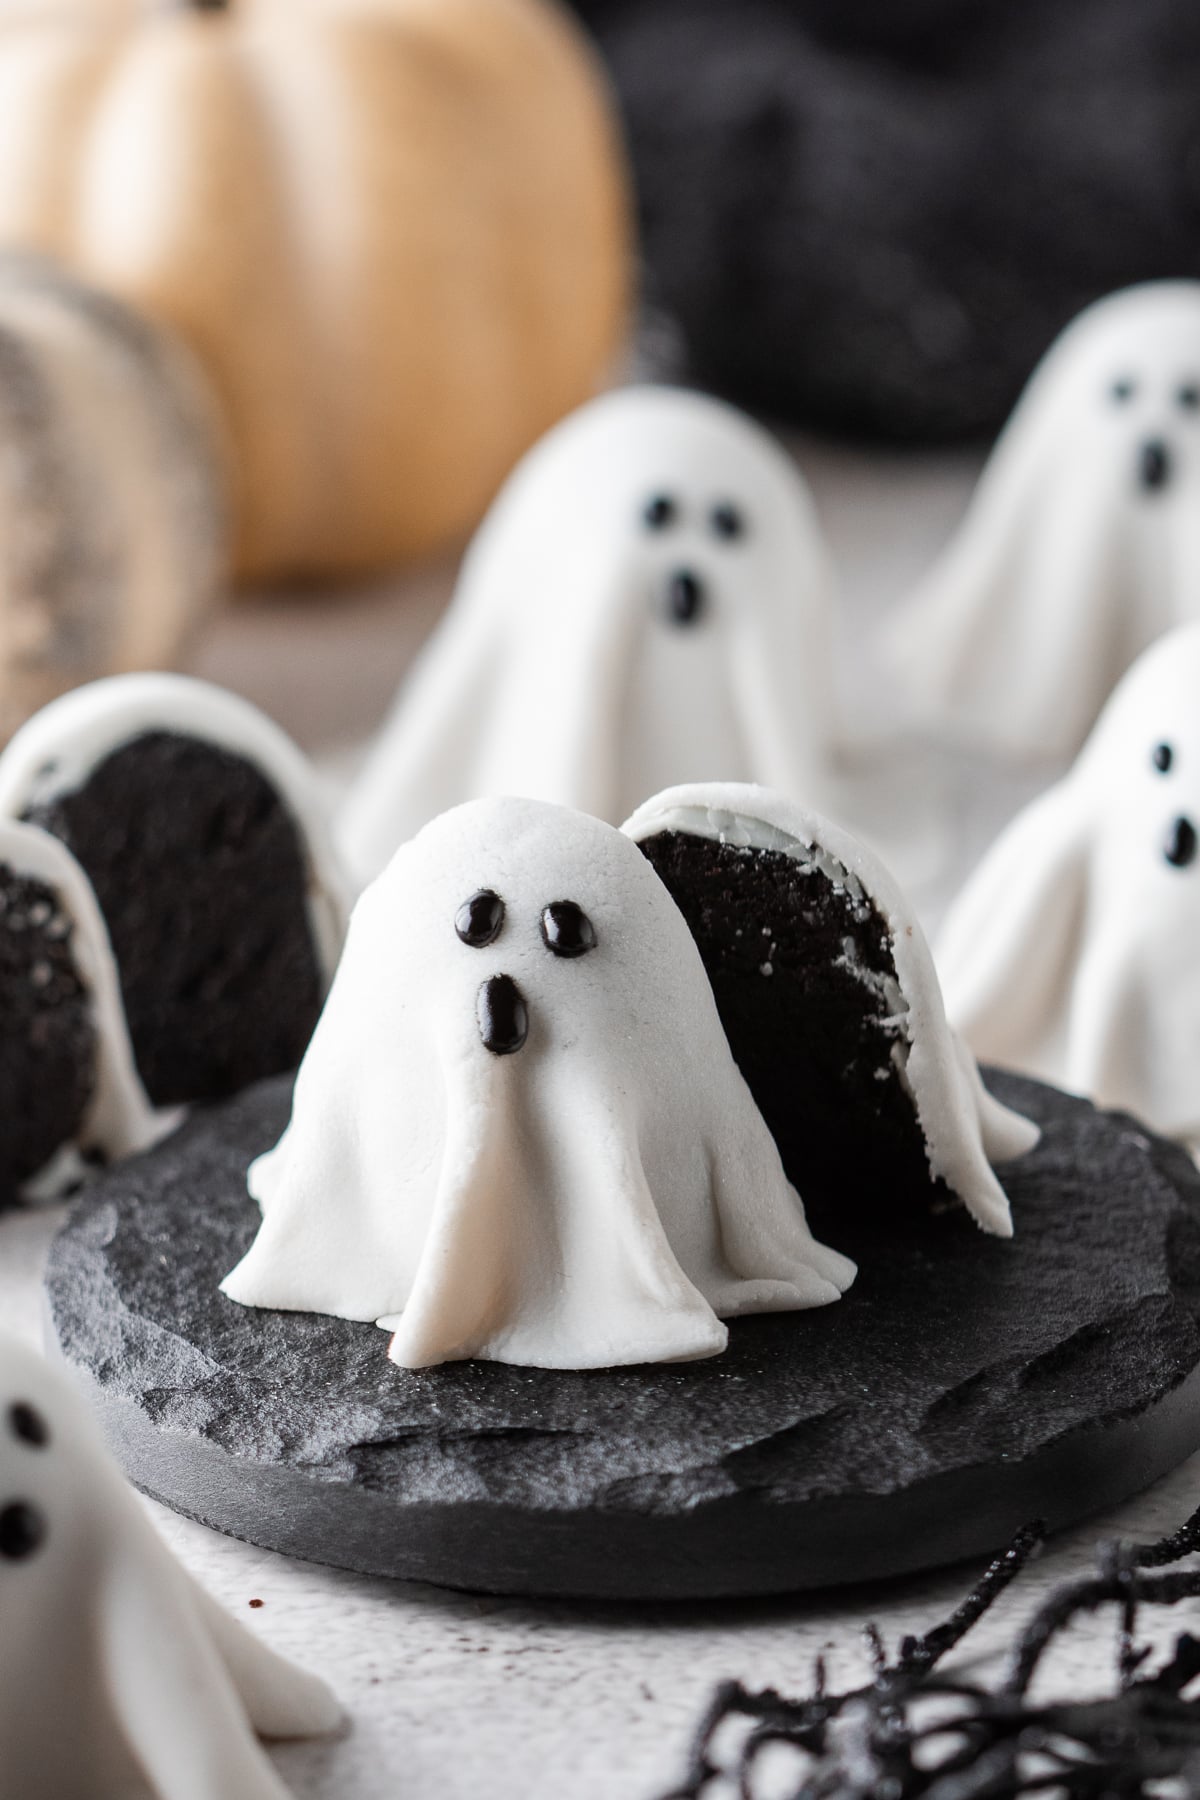
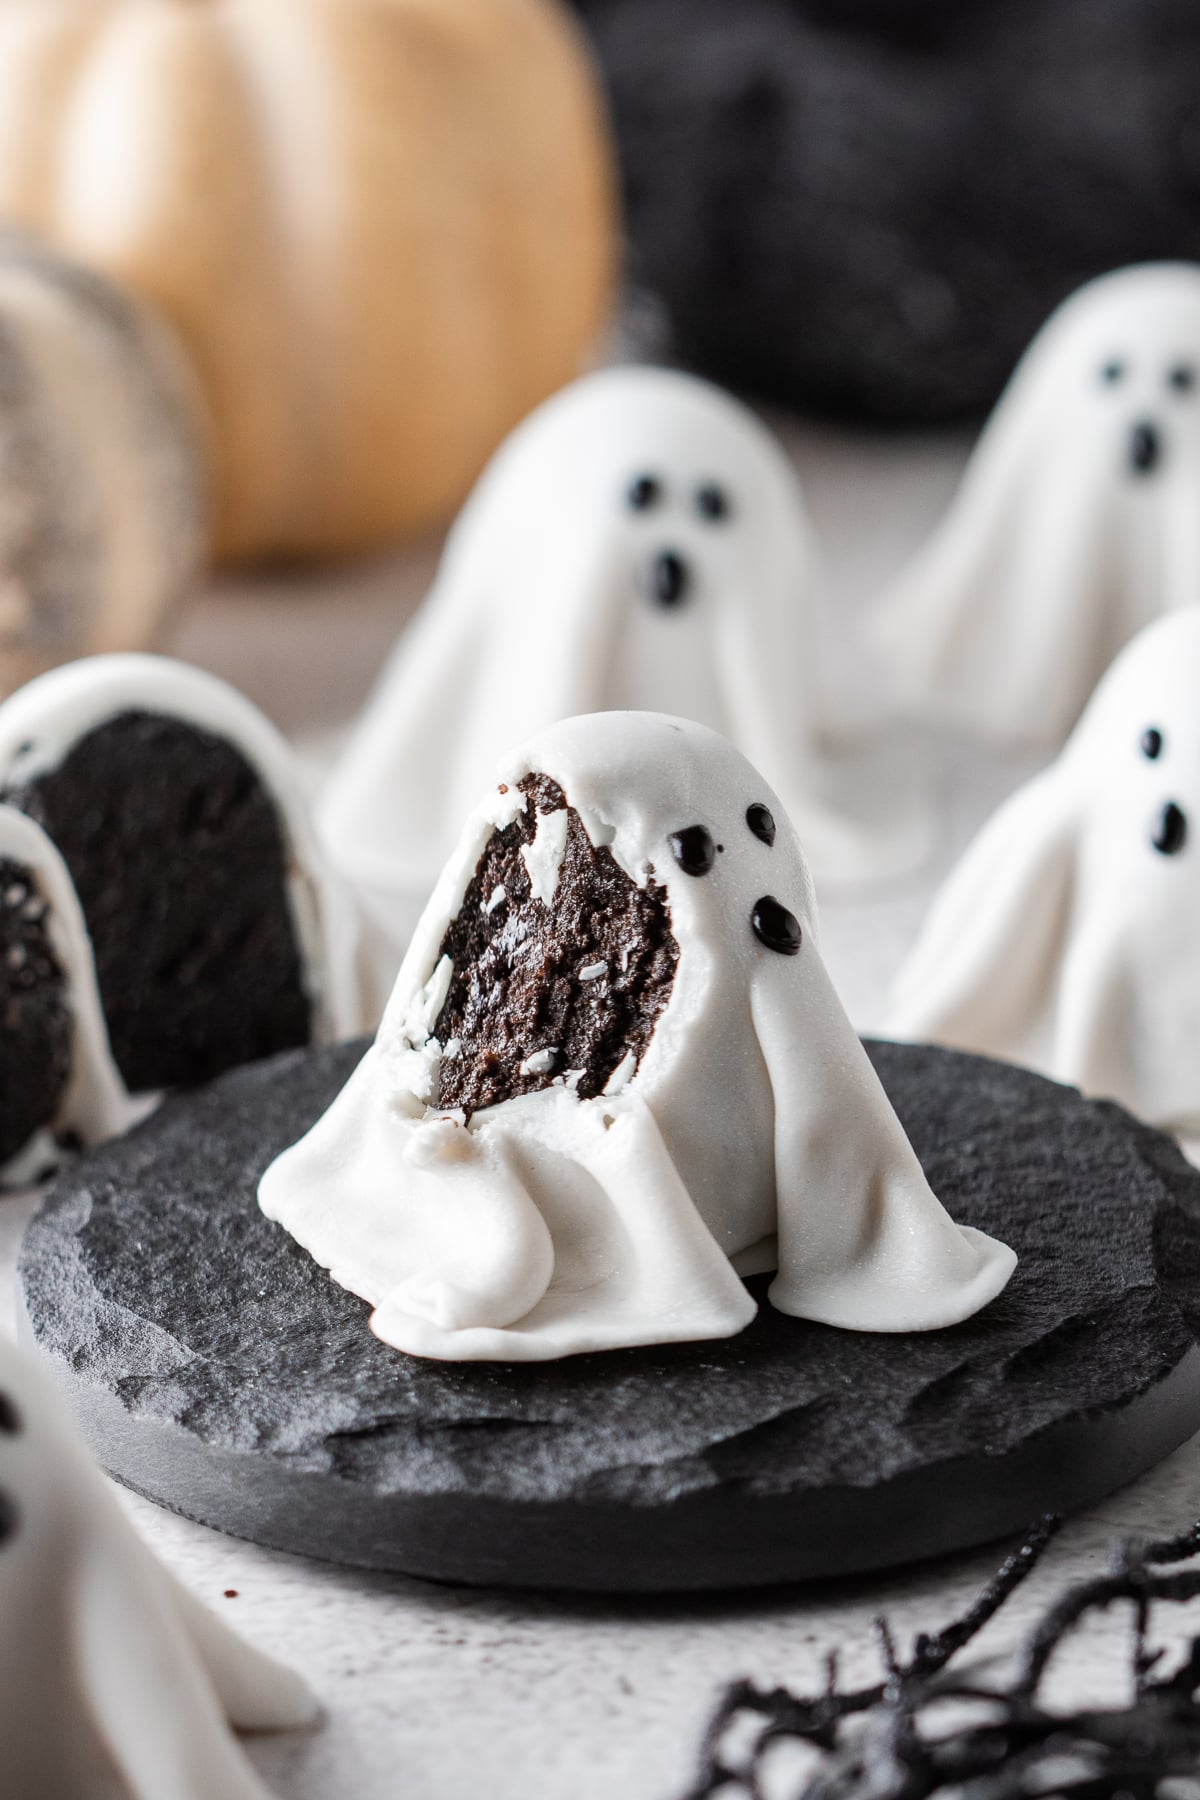
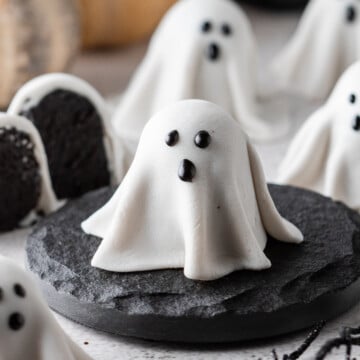
These Ghost Oreo Truffles turn classic Oreo cream cheese truffles into adorable Halloween ghosts with a white chocolate shell and flowing fondant cloak. They're rich and fudgy inside, sweet and creamy outside, and don't require a specialty ghost mold.
Ghost Oreo Truffles at a Glance
- 🍽️ Course: Dessert
- ⏱️ Time: Prep: 30 minutes | Chill: 45 minutes | Total: 1 hour 15 minutes
- 🍴 Yield: 18-20 truffles
- 🍫 Flavor Profile: Chocolatey Oreo, tangy cream cheese, sweet white coating, and vanilla fondant
- 🎃 Best Served With: Halloween desserts, party treats, or hot chocolate
- 🧊 Make Ahead?: Yes; see the storage directions below.
Summarize and Save This Content On
The gumdrop-shaped Oreo centers give the fondant enough height to fall naturally into loose folds, creating a much more recognizable ghost than a simple round truffle. Black icing eyes and mouths make each ghost a little different, which is part of their charm.
These are perfect alongside other spooky treats like these ghost cupcakes, Halloween spider donuts or easy vampire donuts on a Halloween dessert table.
Jump to:
Why You Will Love This Recipe
- No Ghost Mold: Shape the centers by hand and use fondant to create the ghost silhouette.
- Classic Oreo Center: Oreos and cream cheese make a rich, fudgy filling beneath the white coating.
- Fun to Decorate: The fondant naturally creates different folds, so the ghosts don't need to look identical.
How We Tested This Recipe
- Ghost Shape: We compared round and gumdrop-shaped centers, and everyone offered both preferred the gumdrop shape. Its taller, wider silhouette gave the fondant room to form a recognizable ghost cloak, while round centers looked more like ordinary truffles.
- Fondant Thickness and Size: About ⅛ inch thick or slightly thinner worked best. Thicker fondant was stiff, bulky, and more prone to cracking, while 3-inch circles provided enough material to fall below the widest part of the truffle and create loose, wavy edges.
- Chocolate Coating: Let the coating set completely before adding the fondant. When the coating was still tacky, the fondant adhered as soon as it touched the truffle, leaving little time to adjust the drape and folds and resulting in more uneven ghosts. We preferred melting wafers because they set firmly for decorating without becoming as hard to bite through as regular white chocolate.
- Chill Time: Thirty minutes made the centers firm enough to maintain their shape during dipping. Under-chilled centers softened in the warm coating and were more likely to deform or fall from the dipping tool.
- Storage: Refrigeration keeps the truffles fresh, but condensation can gradually make the fondant tacky and dull its smooth finish. For the prettiest presentation, serve the decorated ghosts as early in the storage period as possible.
Ingredients
You only need six simple ingredients to make these Halloween Oreo truffles, and most are easy to find in the baking aisle. Just like our Oreo hearts.
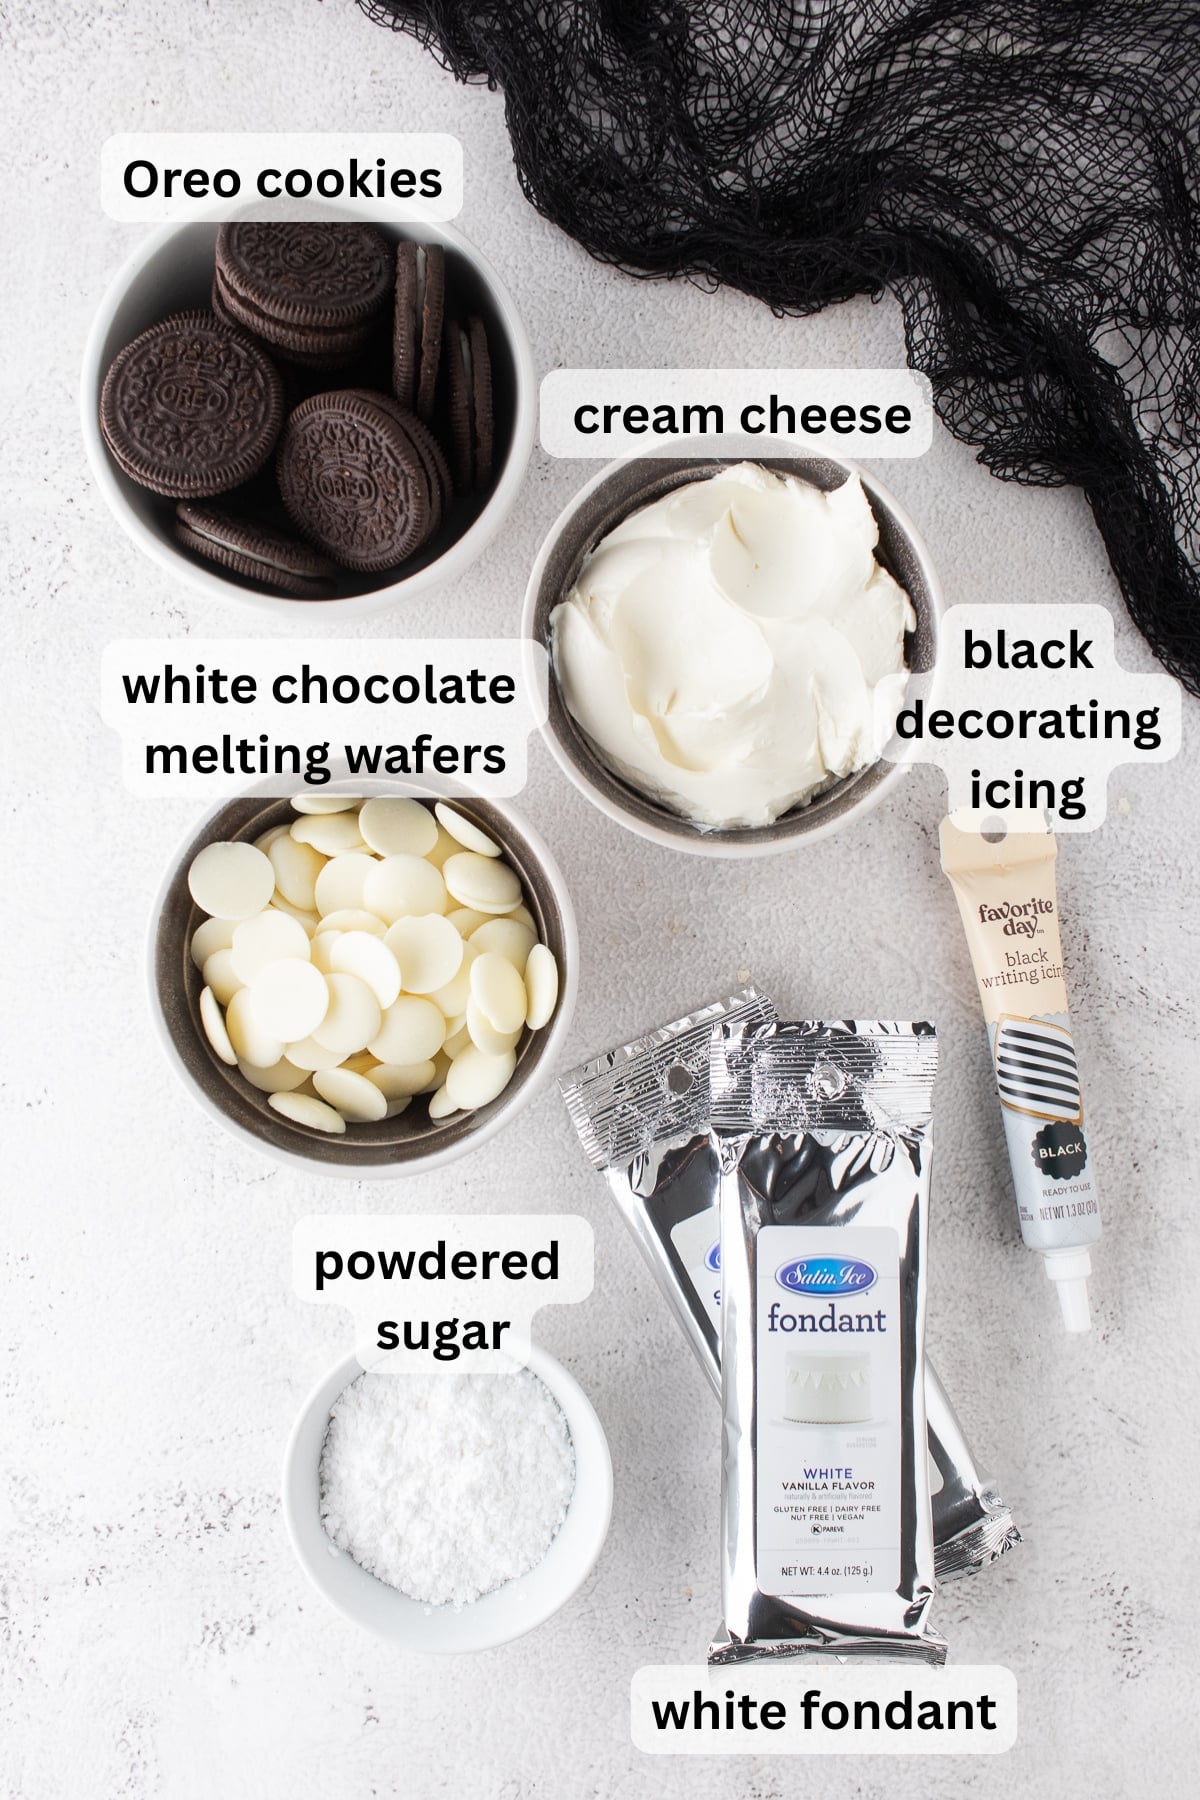
- Oreos & Cream Cheese: Combine to create the thick, fudgy truffle centers.
- White Melting Wafers: Create a smooth, firm shell beneath the fondant.
- White Fondant: Drapes over each truffle to create the flowing ghost cloak.
- Black Decorating Icing: Creates the eyes and oval-shaped mouths.
- Powdered Sugar: Prevents the fondant from sticking to the work surface while rolling.
See the recipe card below for exact ingredient amounts, nutritional information, and detailed instructions.
Variations
- Change the Cookies: Try Golden Oreos, mint Oreos, or another Oreo flavor for a different truffle center.
- Change the Faces: Use black icing, melted dark chocolate, candy eyes, or mini chocolate chips to create different expressions.
- Make Mummies: Leave some truffles uncovered with fondant and drizzle them with additional white coating for an easy mummy variation.
- Add Halloween Color: Tint portions of the fondant orange, purple, or green for a colorful assortment of Halloween truffles.
How to Make Ghost Oreo Truffles
These ghost Oreo balls take six straightforward steps. Most of the work is simply shaping, dipping, and decorating, and the 30-minute chill gives the centers time to firm before coating.
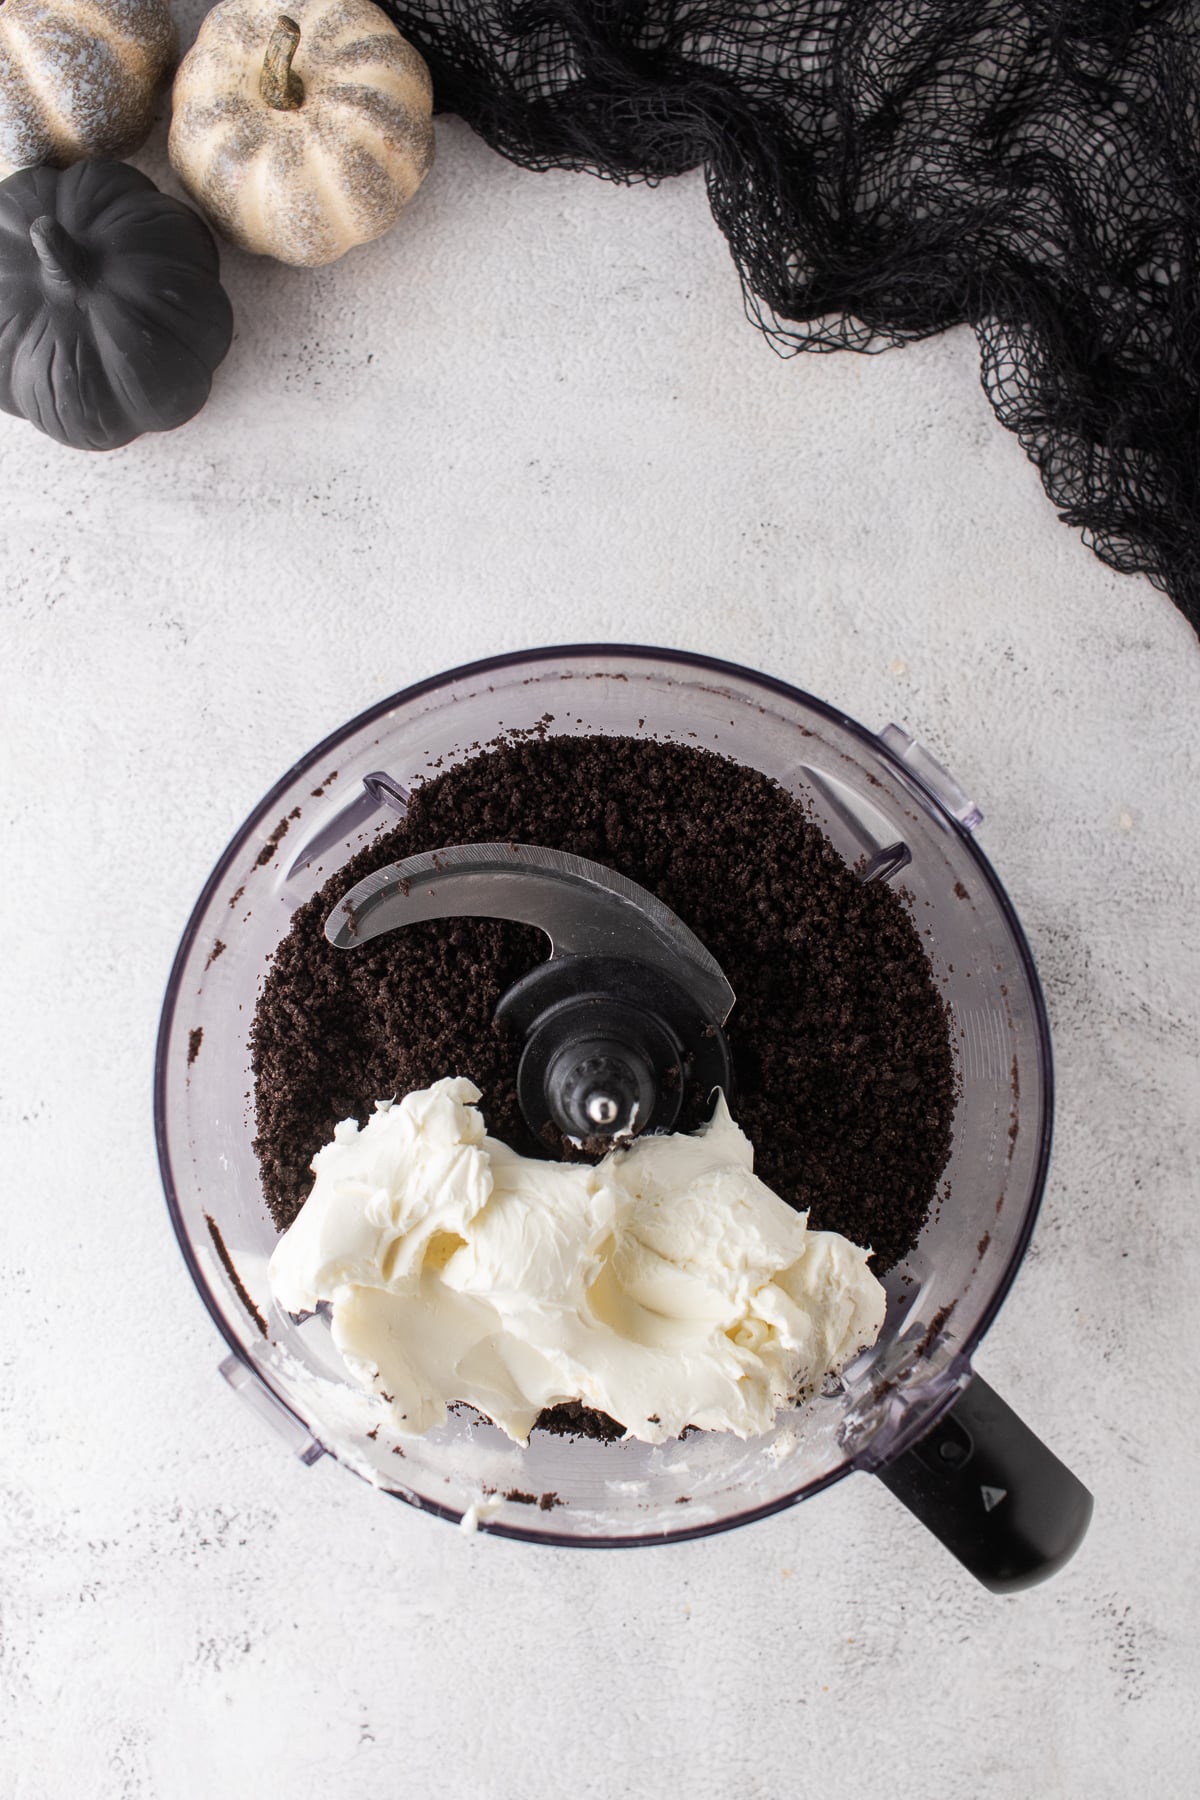
Step 1: Make the Oreo Filling. Line a large baking sheet with parchment paper. Process the Oreos into fine crumbs, then add the softened cream cheese and pulse until completely combined into a thick dough.
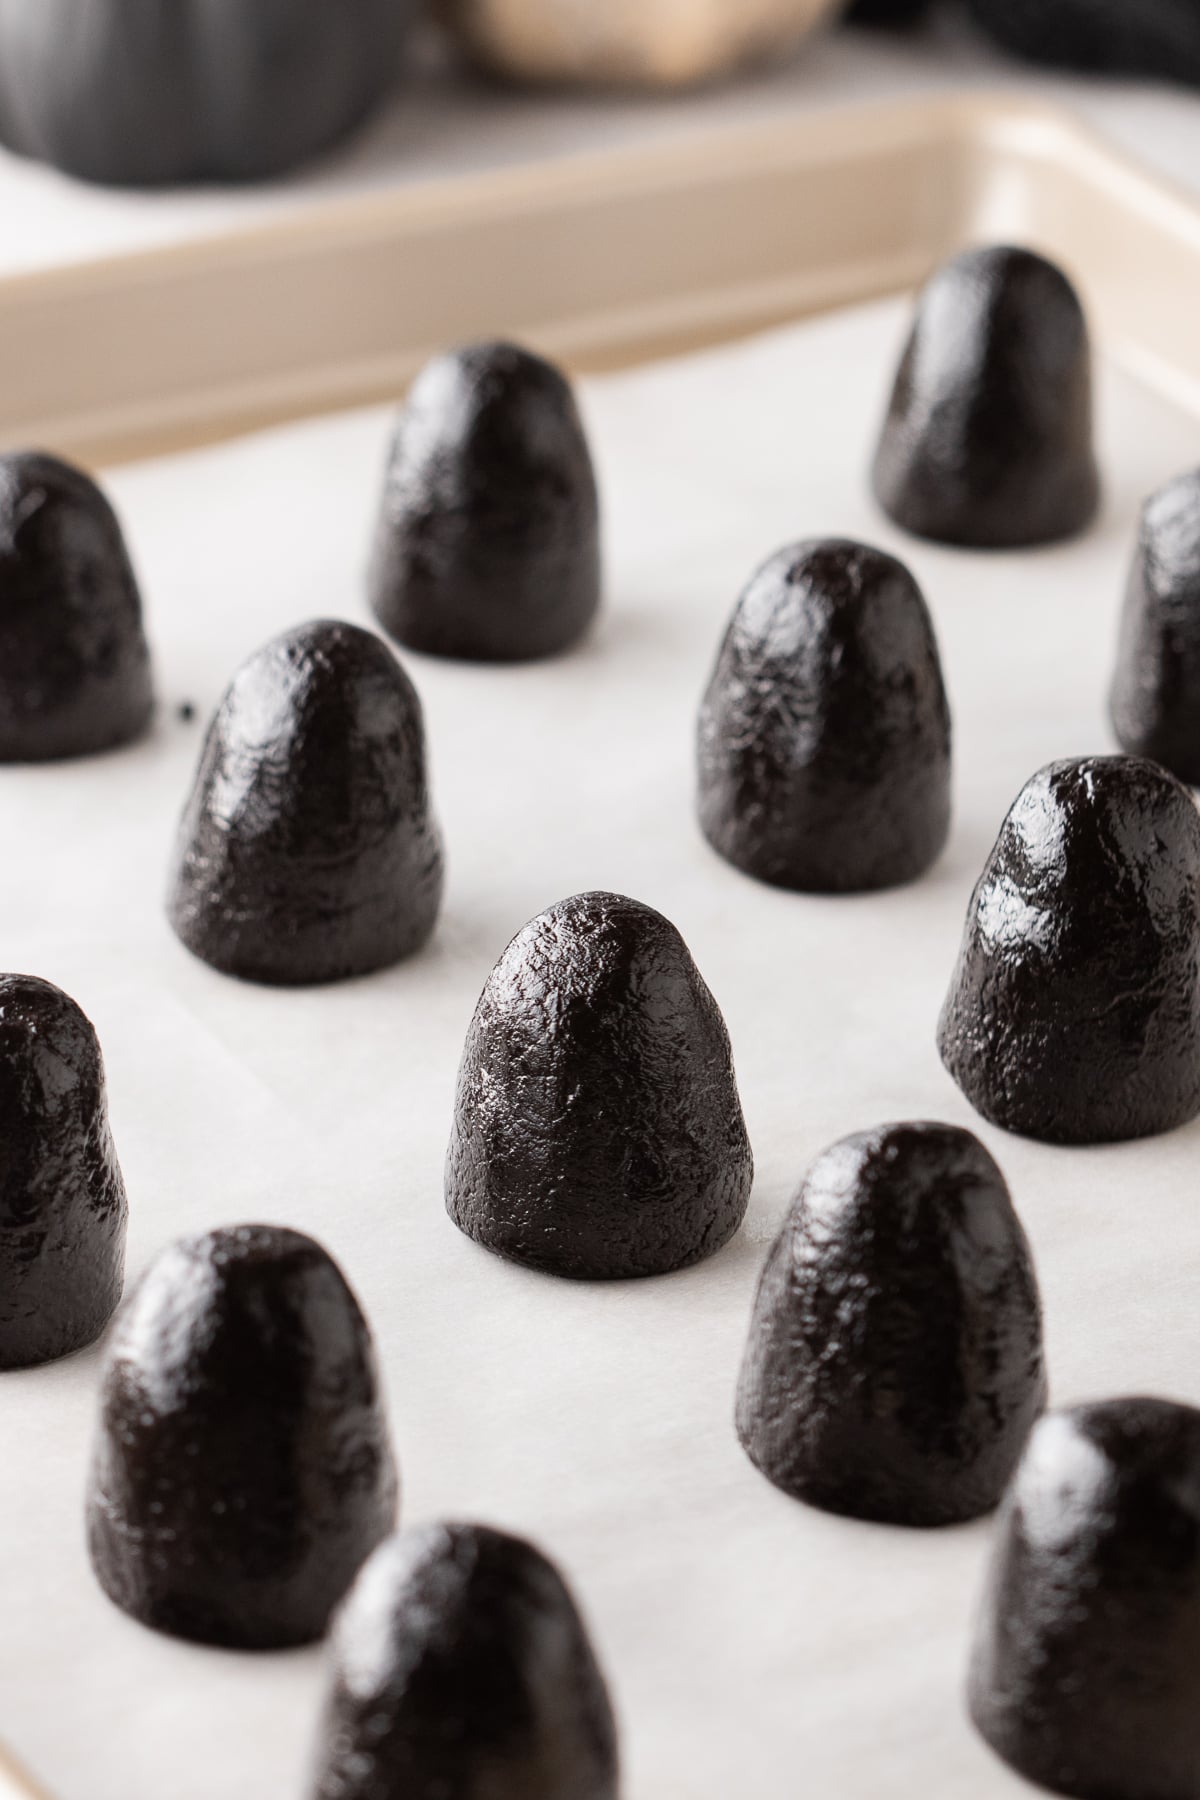
Step 2: Shape and Chill. Scoop about 1½ tablespoons of mixture per truffle. Roll into balls, then shape each into a rounded gumdrop with a narrower top and wider base. Arrange on the baking sheet and refrigerate for 30 minutes, or until firm.
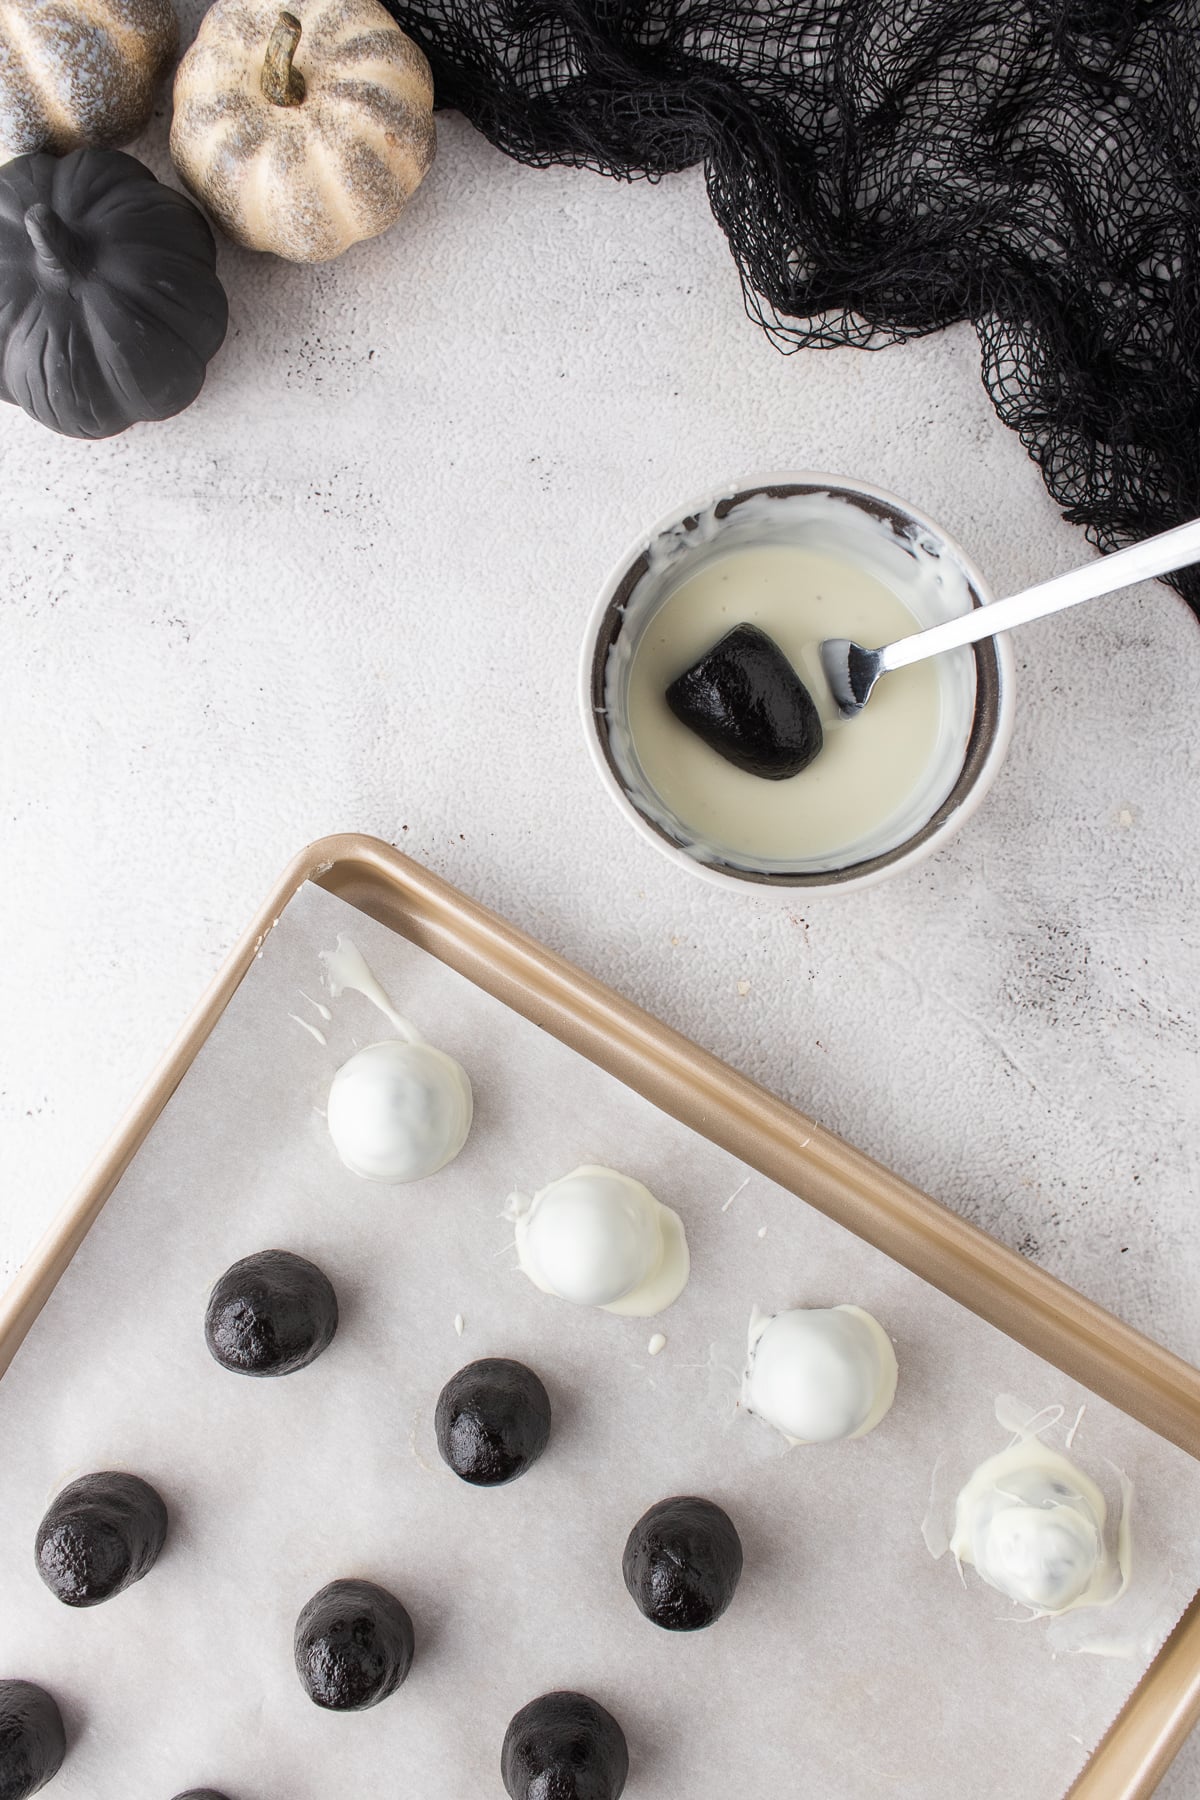
Step 3: Dip the Truffles. Melt the white wafers according to the package directions. Dip each chilled truffle using a fork or dipping tool, allow the excess coating to drip off, then return it to the baking sheet. Let the coating set completely.
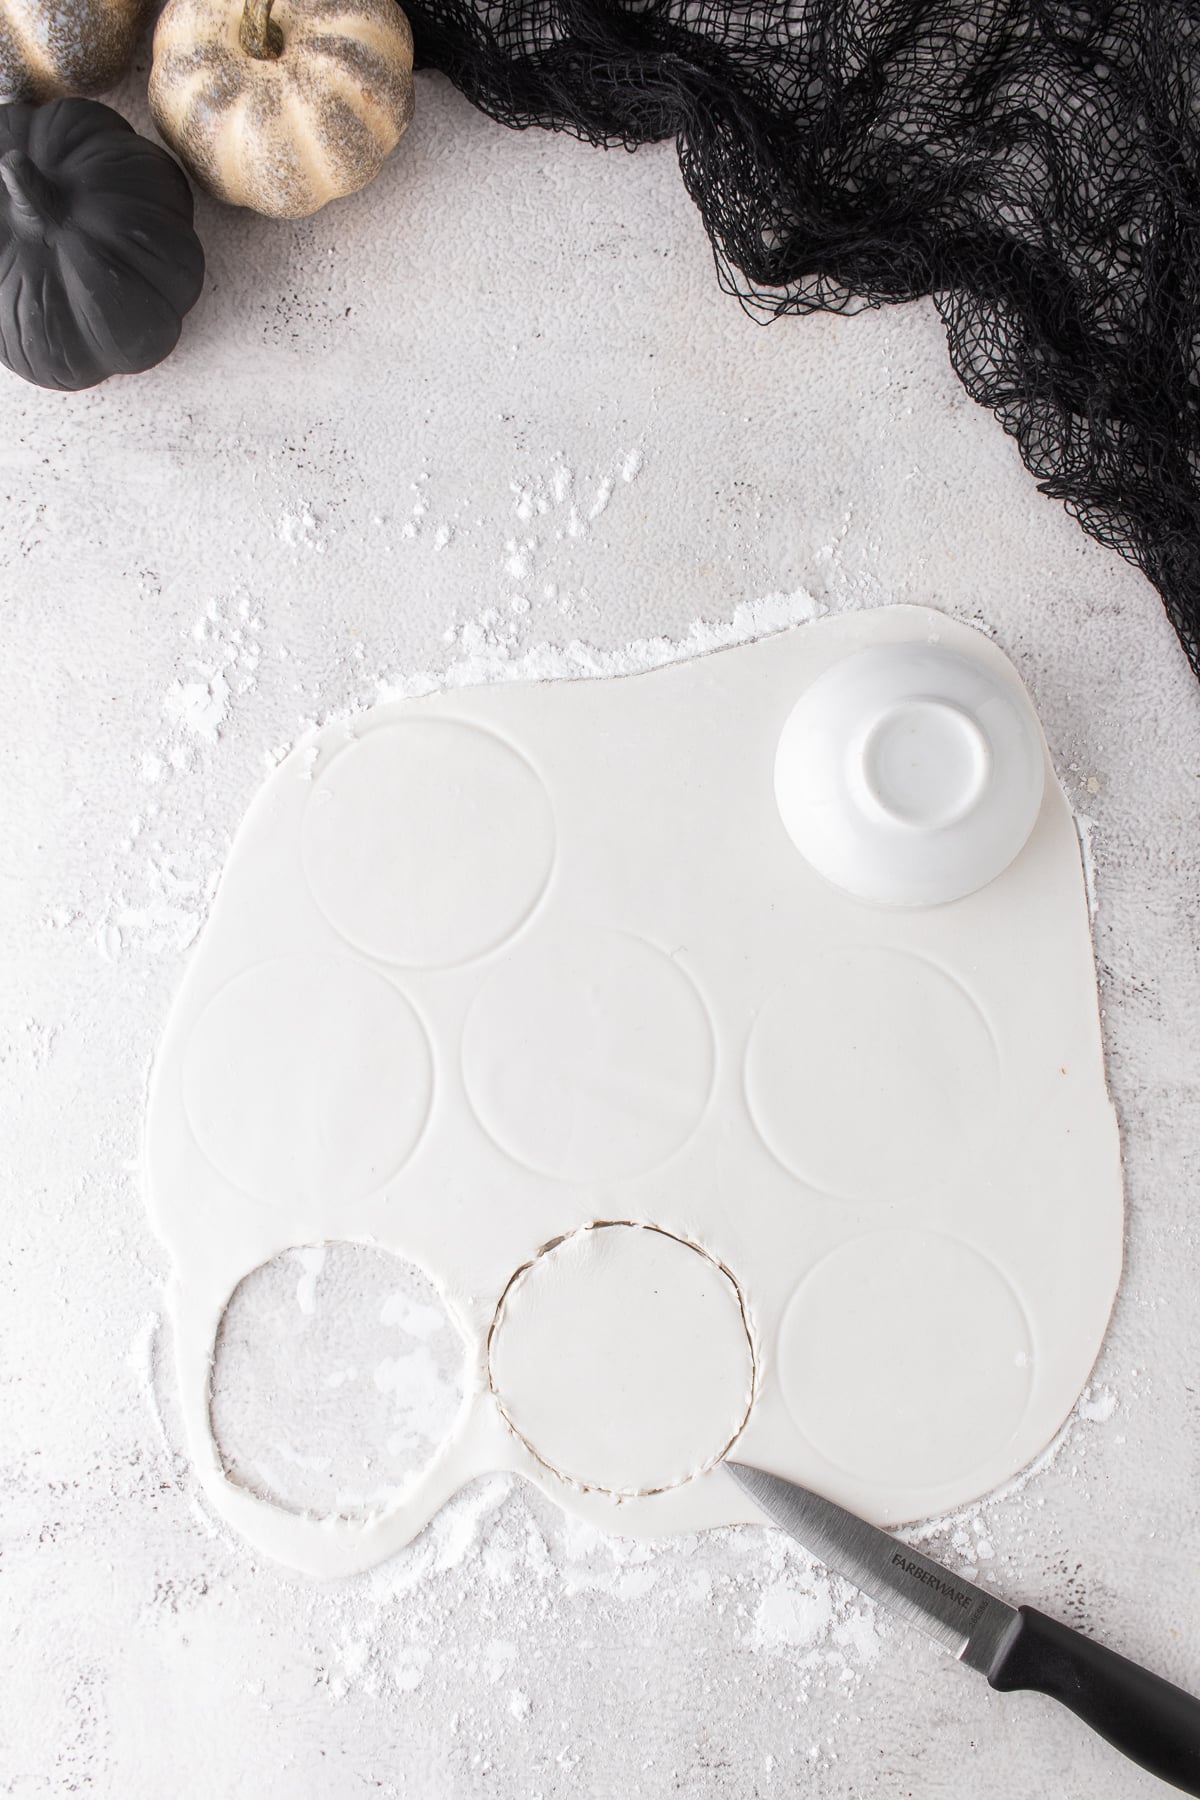
Step 4: Prepare the Fondant. Lightly dust a clean work surface with powdered sugar. Roll the fondant to about ⅛ inch thick or slightly thinner and cut it into 3-inch circles. Roll each circle slightly thinner until flexible enough to drape.
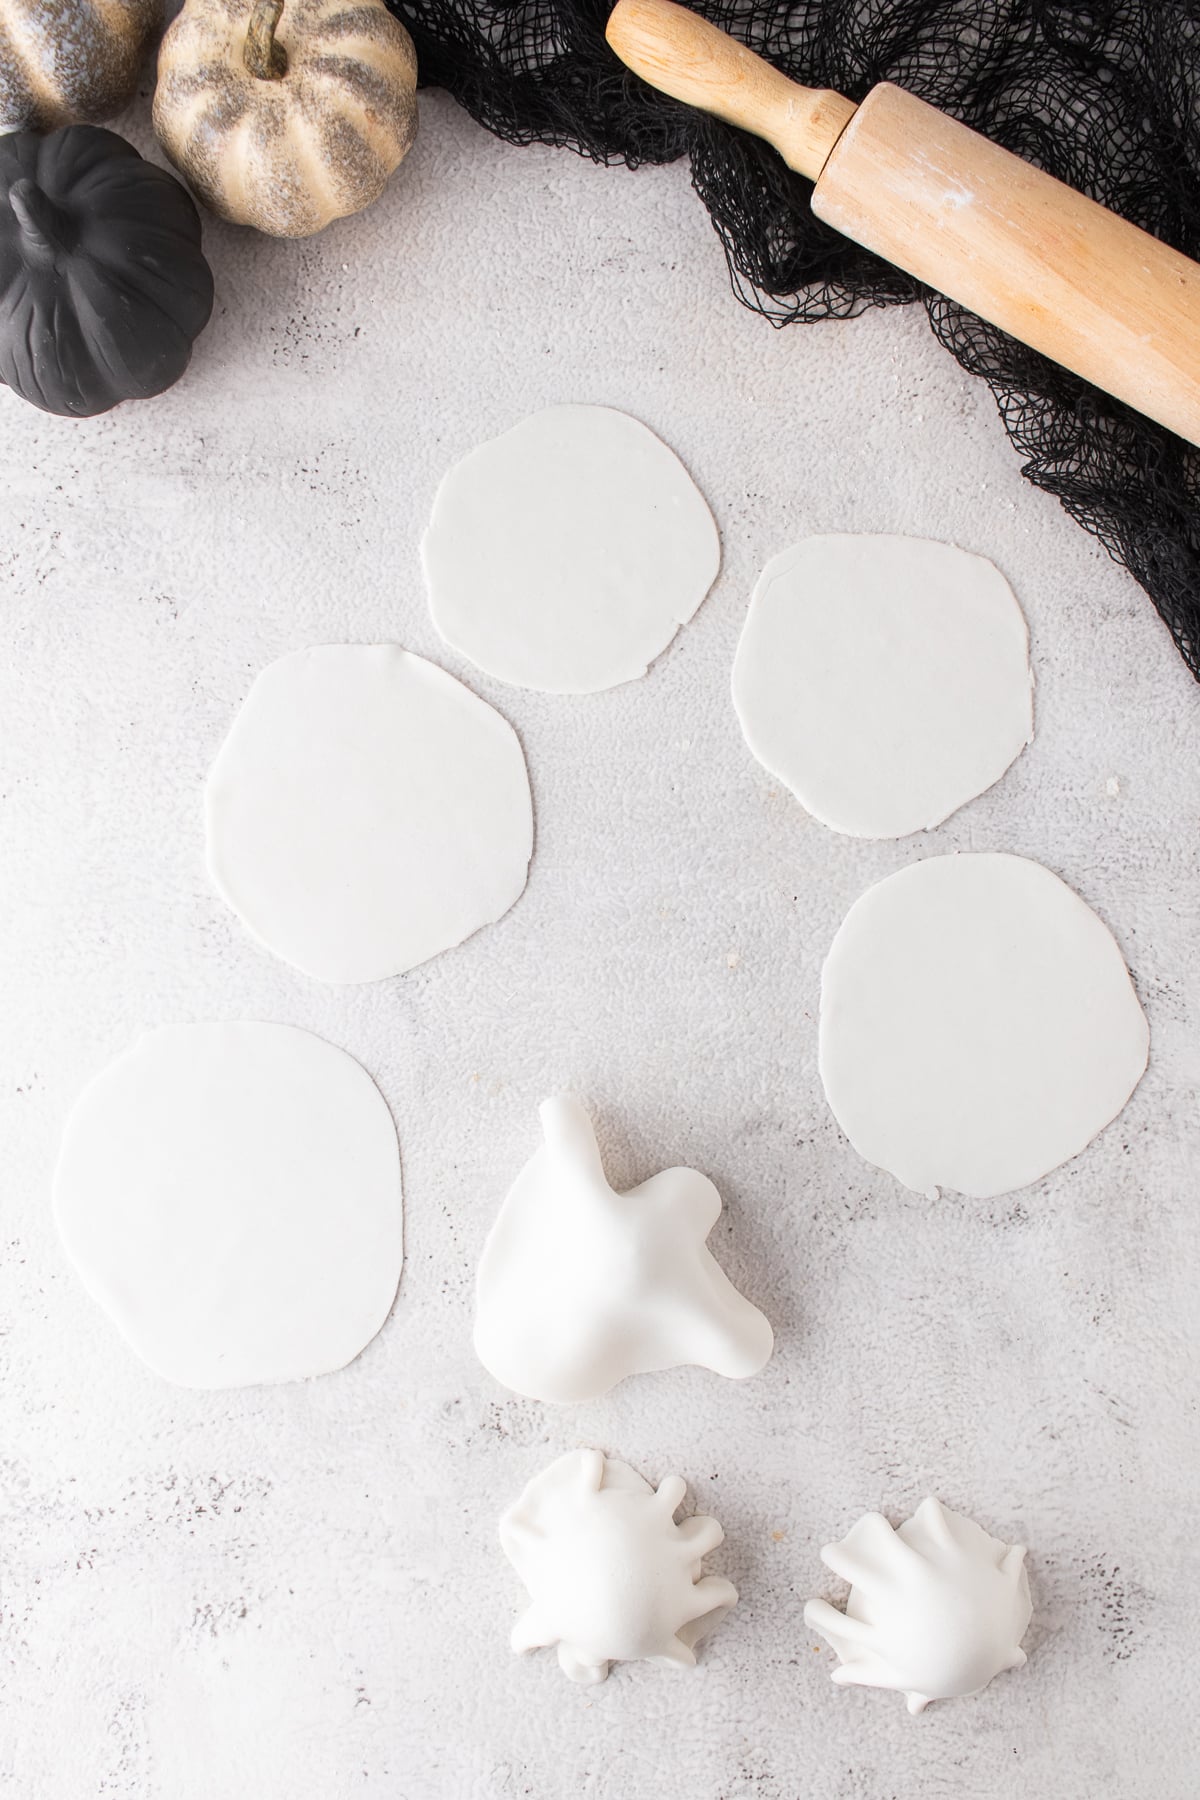
Step 5: Create the Ghost Cloaks. Drape one fondant circle over each coated truffle. Smooth it gently over the top, allowing the excess to fall naturally around the sides. Arrange two or three loose folds around the bottom without pressing the fondant tightly against the base.
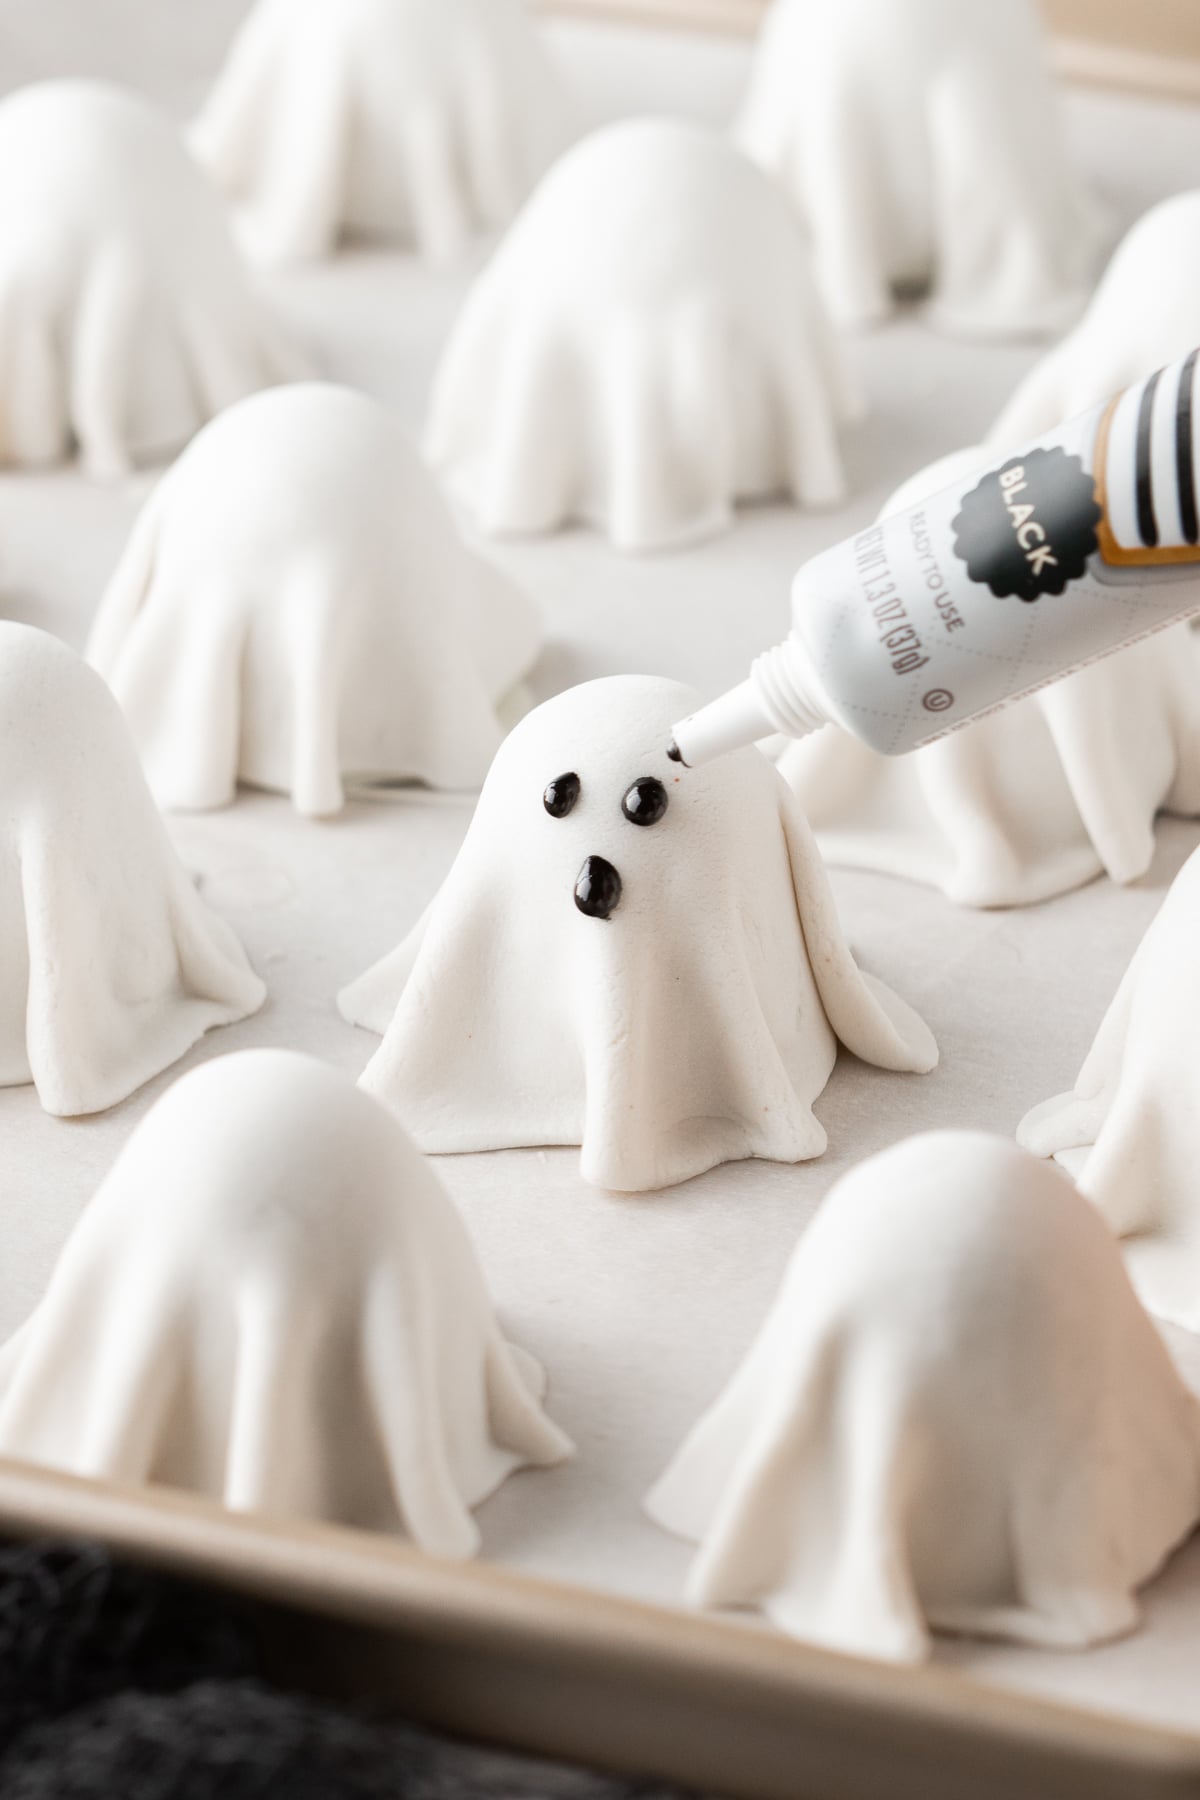
Step 6: Add the Ghost Faces. Use black decorating icing to add two small eyes and an oval mouth. Allow the decorations to set before serving or storing.
If you love spooky treats like these, try our Rice Krispie ghosts treats or Halloween Rice Krispies treats for another fun Halloween dessert.
Expert Tips
- Use Powdered Sugar Sparingly: Dust the work surface with just enough to prevent sticking. Too much can leave a powdery finish on the white fondant.
- Embrace Different Shapes: Gently arrange a few folds around each ghost rather than trying to make them identical. Slight differences give each ghost its own expression and character.
- Handle Carefully: Once decorated, move the truffles by their bases rather than the fondant to protect the cloaks and faces.
Storage Directions
Refrigerator: Store the finished truffles in an airtight container in a single layer for up to 5 days. Avoid stacking them so the fondant cloaks and faces aren't damaged.
Freezer: Freezing fully decorated ghosts isn't recommended because condensation during thawing may affect the fondant.
Make Ahead: Make and coat the Oreo centers up to a day ahead, refrigerate them, then add the fondant cloaks and faces closer to serving for the best appearance.
Serving Suggestions
- Halloween Dessert Table: Serve with cream cheese Halloween brownies, Halloween candy corn fudge, cupcakes, Halloween bat cookies, or Rice Krispie Halloween treats.
- Halloween Party: Arrange the ghosts on a dark serving platter or individual mini cupcake liners for an easy grab-and-go dessert.
- Movie Night: Pair with popcorn, donut hole cake pops, Halloween candy, mummy dogs, jalapeno popper mummies, and Halloween dip for a spooky movie-night spread.
Ghost Oreo Truffles FAQs
Yes. No mold is needed for this recipe. Shape each Oreo center into a small gumdrop, then drape thin fondant over it to create the ghost silhouette.
Yes, although they won't have the same flowing cloak. Shape the centers into ghosts, coat them in white melting wafers, and add black icing faces.
Video

More Halloween Recipes
Looking for more spooky treats? Try these Ghost Oreo Truffles with your favorite Halloween cookies, Rice Krispie treats, brownies, and other easy Halloween desserts.


If you try this recipe and love it please leave a star rating in the recipe card below or even better, drop a review in the comment section. I always appreciate your feedback. Be sure to follow along with me on Facebook, Pinterest, and YouTube for more easy recipes!
Ghost Oreo Truffles
Ingredients
- 25 Oreo cookies
- 4 oz cream cheese softened
- 16 oz white chocolate melting wafers or white candy melts
- 9 oz white fondant
- Black decorating icing or black icing pen
- Powdered sugar for rolling fondant
Instructions
- Step 1: Line a large baking sheet with parchment paper. Process the Oreos into fine crumbs. Add the softened cream cheese and pulse until completely combined into a thick dough.
- Step 2: Scoop about 1½ tablespoons per truffle. Roll into a ball, then shape into a rounded gumdrop with a slightly narrower top and wider base. Refrigerate for 30 minutes, or until firm.
- Step 3: Melt the white wafers according to package directions. Dip each chilled truffle, allow the excess coating to drip off, and return it to the baking sheet. Let the coating set completely.
- Step 4: Lightly dust a clean work surface with powdered sugar. Roll the fondant to about ⅛ inch thick or slightly thinner and cut into 3-inch circles. Roll each circle slightly thinner until drapeable.
- Step 5: Drape one fondant circle over each truffle. Smooth it gently over the top and arrange the excess into loose folds around the bottom.
- Step 6: Add two small eyes and an oval mouth with black decorating icing. Allow the decorations to set before serving.
Video
Notes
- Shape First: Form gumdrop-shaped rather than round centers to give the fondant enough height to create the ghost silhouette.
- Chill Before Dipping: Refrigerate the centers for the full 30 minutes so they're firm enough to hold their shape in the warm coating.
- Let the Coating Set: Let the white coating set completely before adding the fondant so you have time to position the cloak and arrange the folds.
- Keep Fondant Thin: Roll it to about ⅛ inch or slightly thinner for a light, flowing cloak.


Leave a Reply