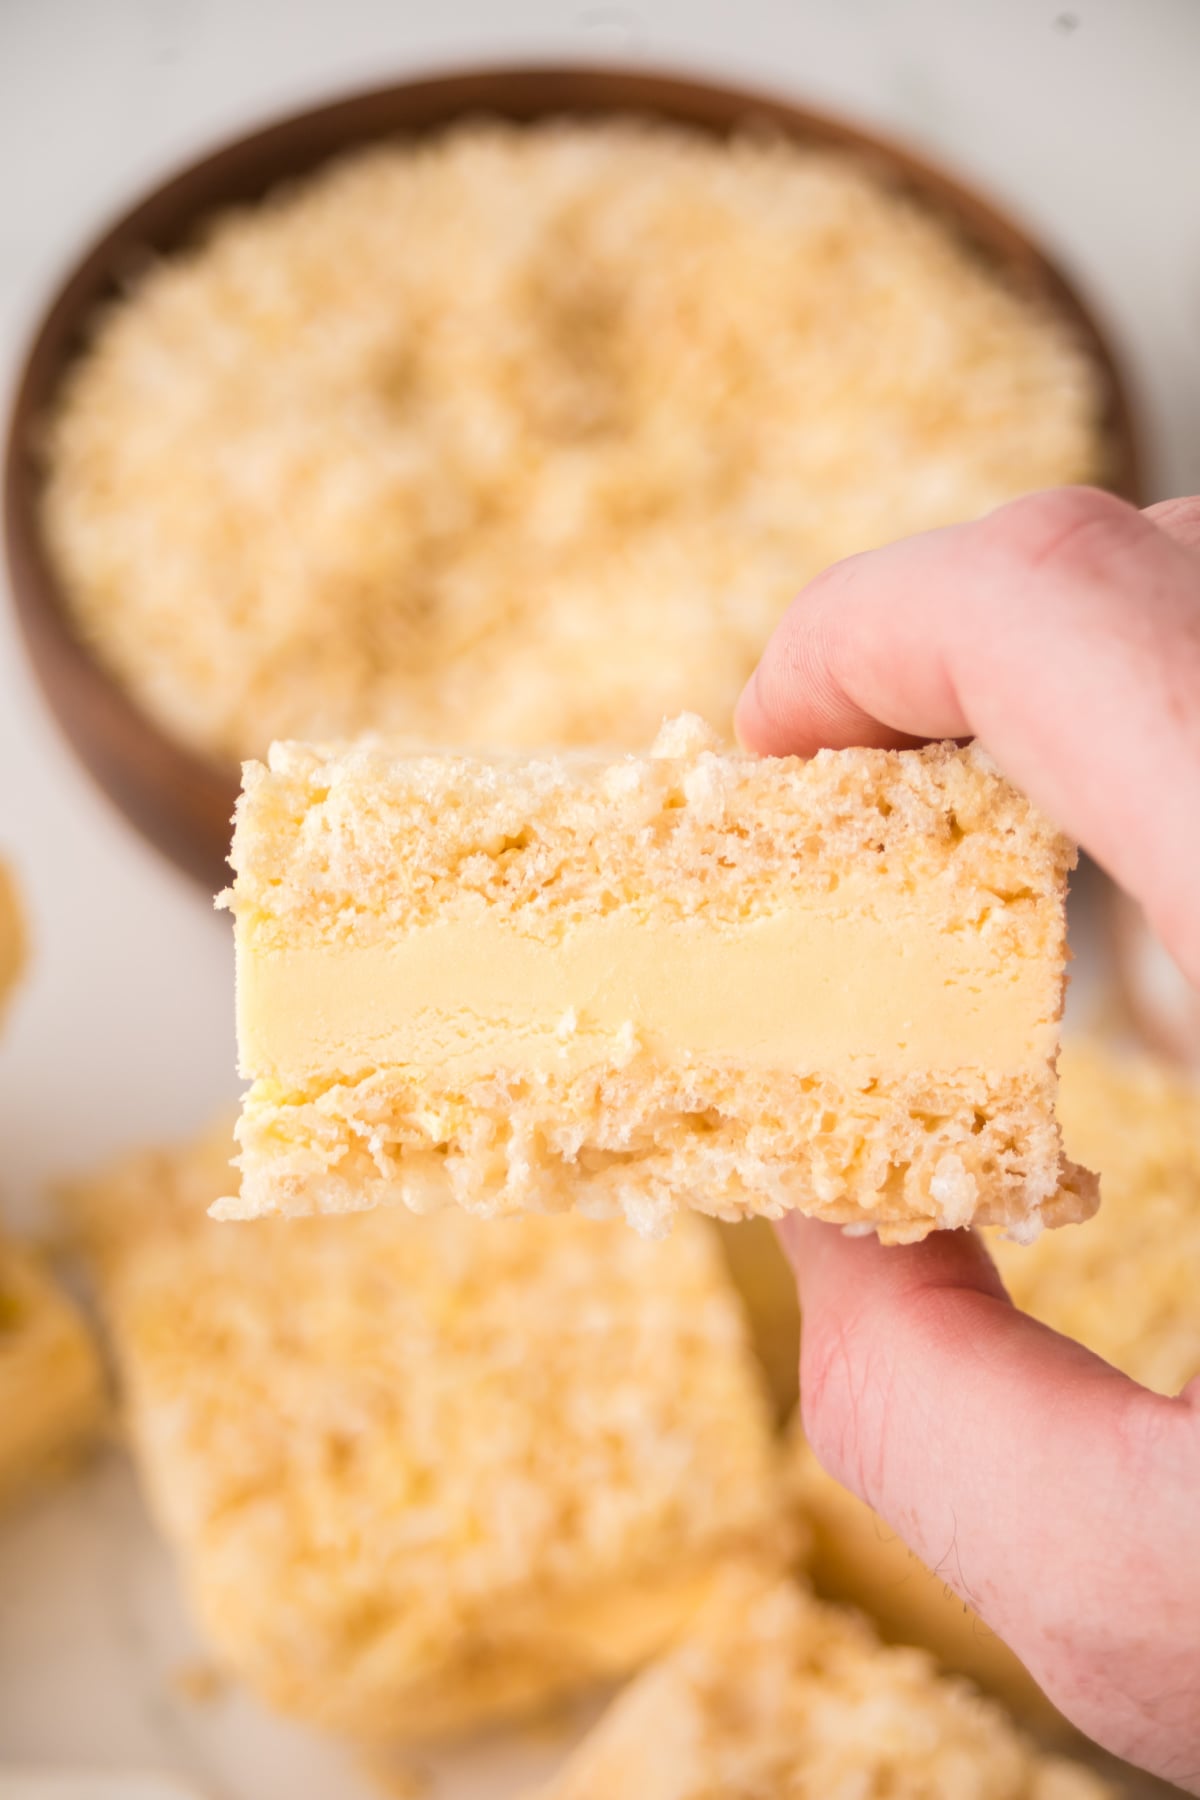
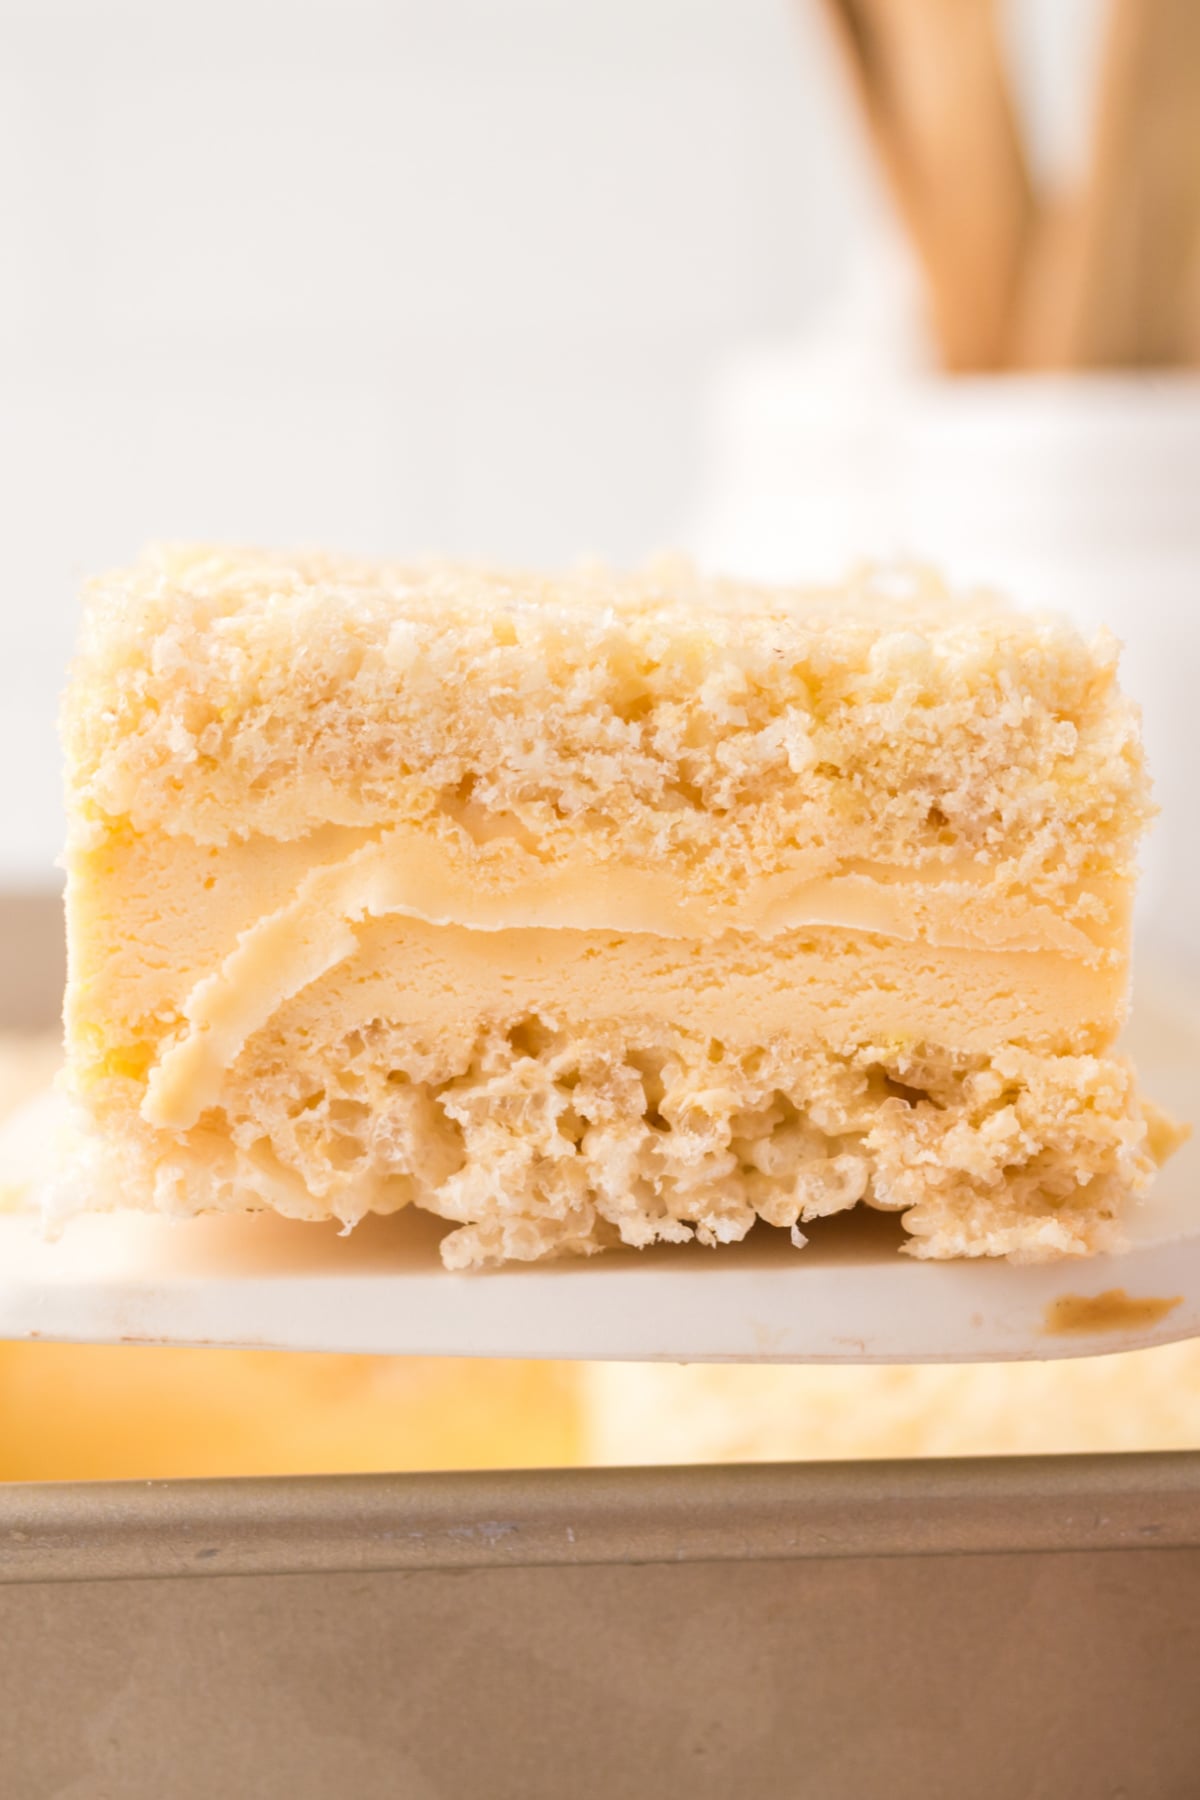
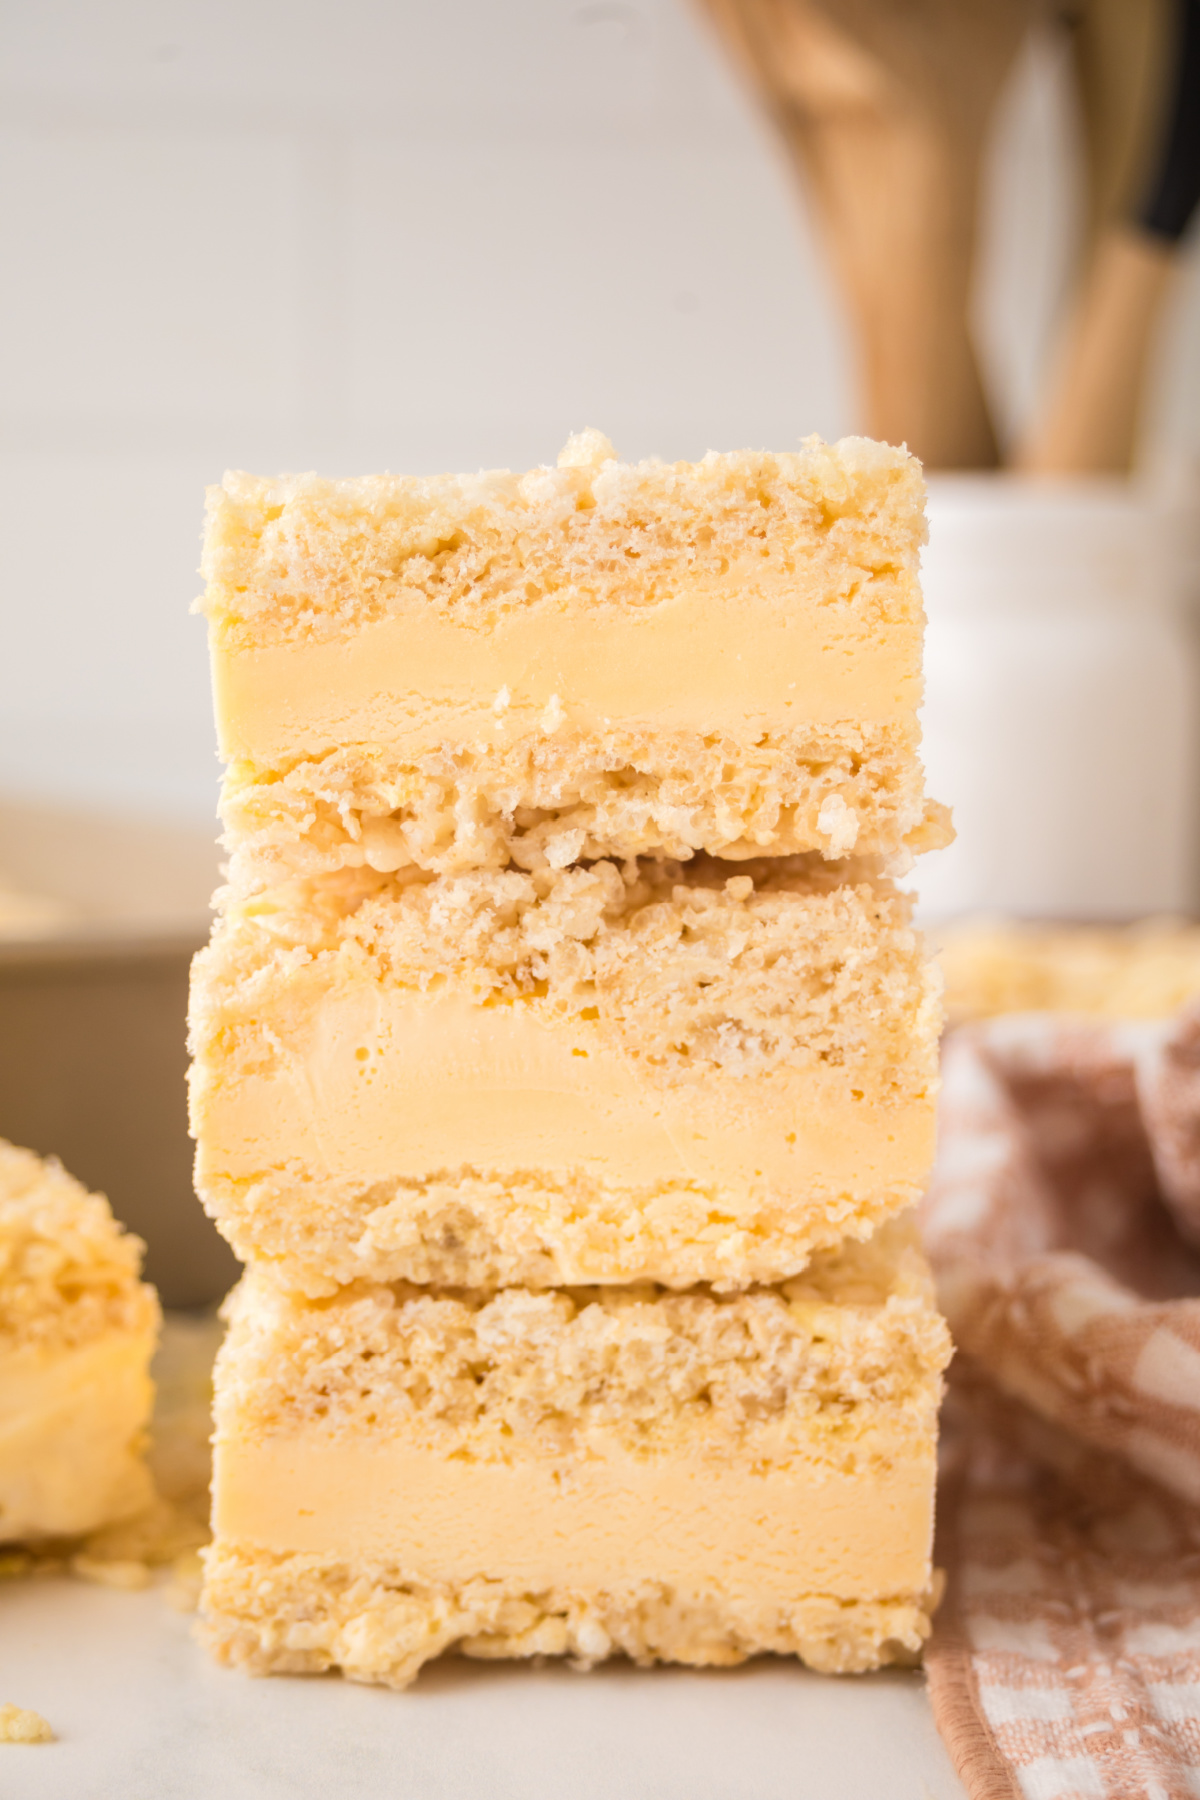
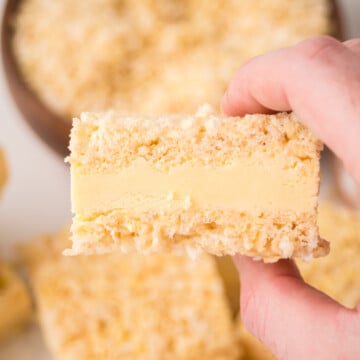
If you love nostalgic childhood treats and extraordinary summer desserts, these Rice Krispie Ice Cream Sandwiches are about to become your new obsession. Soft, chewy marshmallow cereal bars sandwich creamy vanilla ice cream for the ultimate frozen treat that's fun, easy, and wildly irresistible.
Rice Krispie Ice Cream Sandwiches Recipe Essentials
- 🍽️ Course: Dessert / Frozen Treat
- ⏱️ Cooking Time: 20 minutes prep + 1 hour cooling + 4 hours freezing
- 🍴 Servings: 12 sandwiches
- 🧄 Flavor Profile: Sweet, creamy, buttery, marshmallow-y, chewy, cold, nostalgic
- 🍚 Best Served With: Fresh berries, hot fudge, caramel milkshakes, summer party desserts, birthday treats
- 🧊 Make Ahead?: Yes
Summarize and Save This Content On
There's something magical about combining two classic favorites into one ridiculously good dessert. These oversized frozen sandwiches are perfect for hot summer afternoons, birthday parties, backyard BBQs, or anytime you want a dessert that makes everyone immediately ask for seconds.
This recipe was inspired by my Rice Krispie baskets and pie crusts which are perfect for ice cream, and tastes great with these peanut butter chocolate Rice Krispie balls.
Jump to:
- Rice Krispie Ice Cream Sandwiches Recipe Essentials
- Why You Will Love This Recipe
- Ingredients
- Variations
- How to Make Rice Krispie Ice Cream Sandwiches
- Rice Krispie Ice Cream Sandwiches Expert Tips
- Storage Directions
- Serving Suggestions
- Rice Krispie Ice Cream Sandwiches Recipe FAQs
- More Rice Krispie Recipes
- Rice Krispie Ice Cream Sandwiches
Why You Will Love This Recipe
- The ultimate fun summer dessert: Cool, creamy, and nostalgic, this frozen treat combines two childhood favorites into one irresistible dessert.
- Perfect for parties and make-ahead entertaining: Easy to slice, serve, and freeze in advance for birthdays, BBQs, and summer gatherings.
- Customizable crowd favorite: Made with simple ingredients, like our Rice Krispie treat cake, is fun to personalize with different ice cream flavors or toppings, and always a hit with kids and adults alike.
Ingredients
You only need a handful of familiar ingredients to create this incredible frozen dessert.
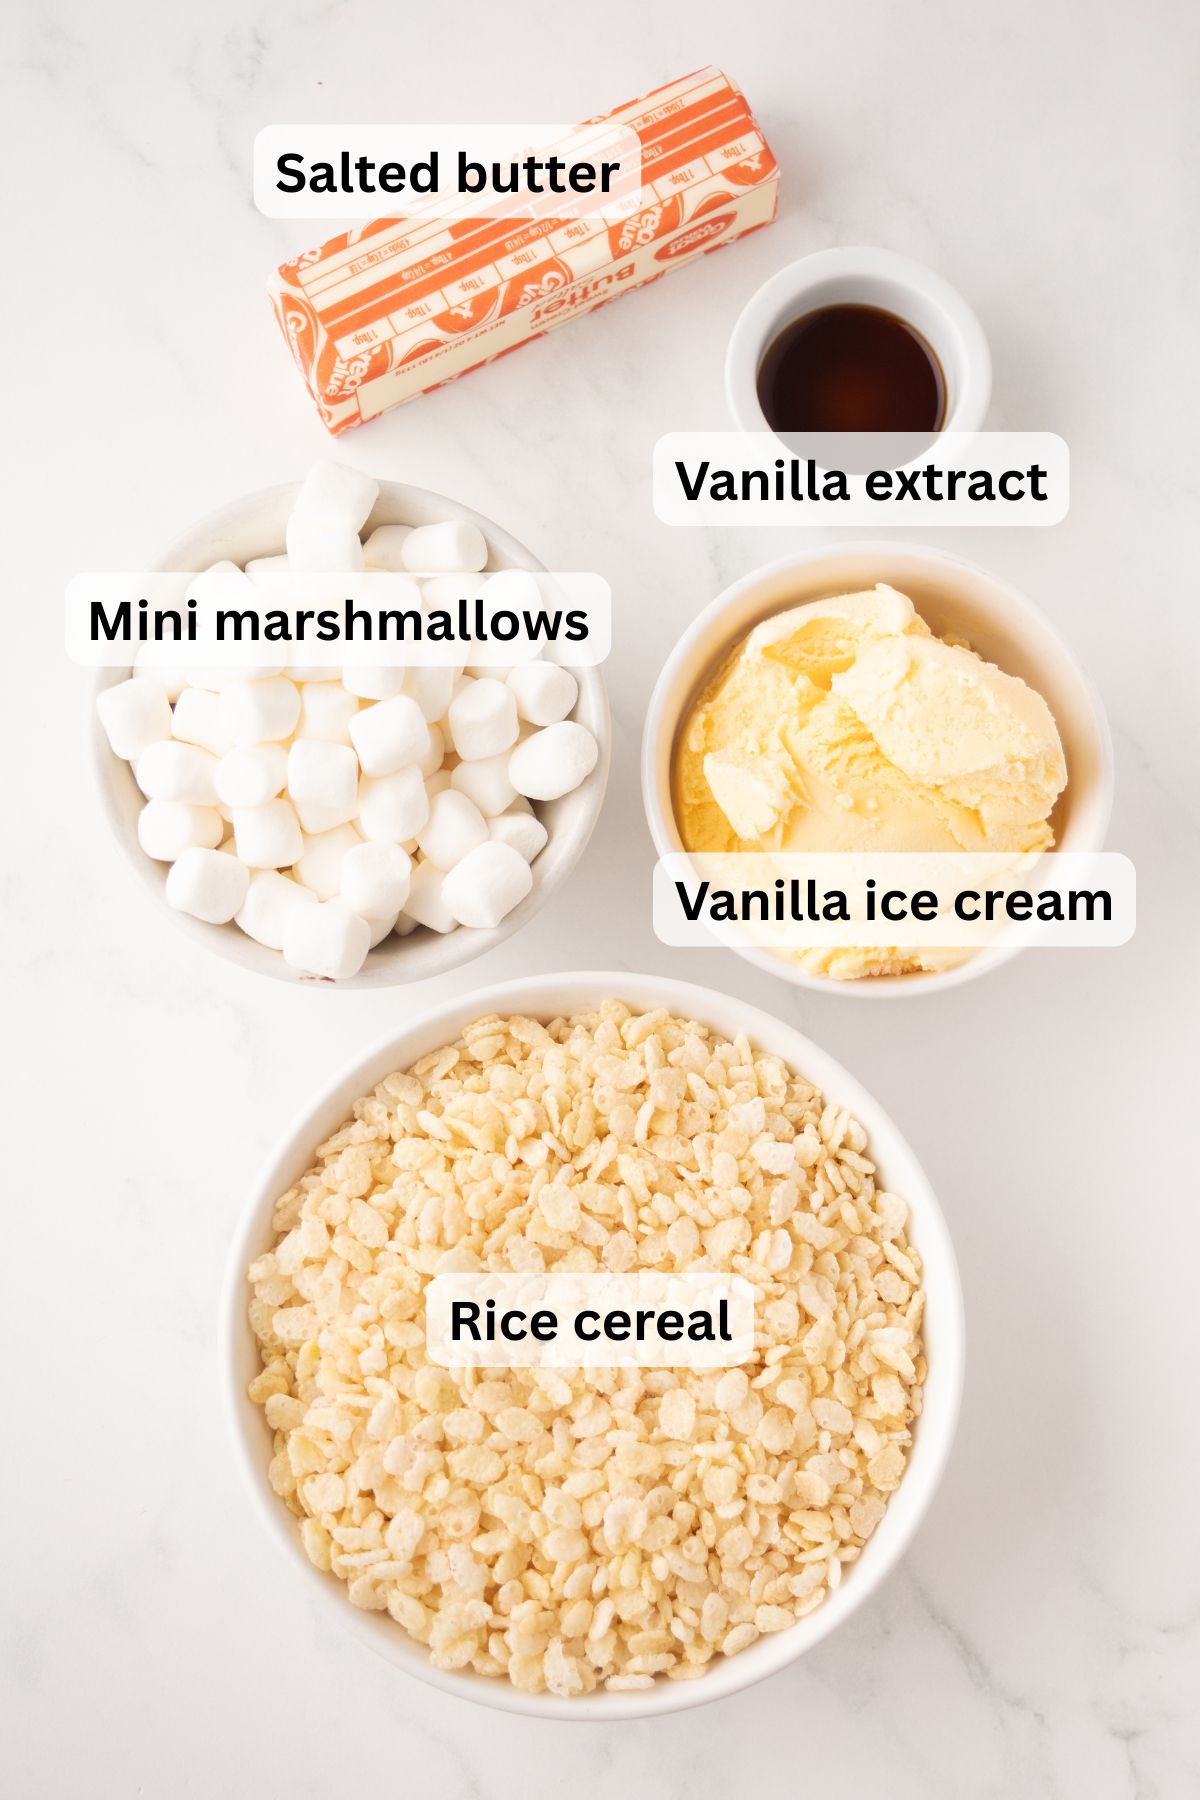
- Salted butter: Adds rich buttery flavor and helps create the marshmallow base.
- Mini marshmallows: Melt into the gooey binder that gives Rice Krispie treats their signature chewy texture.
- Vanilla extract: Adds warm bakery-style flavor and rounds out the sweetness.
- Rice cereal: Provides the crispy crunch and structure for the sandwich layers.
- Vanilla ice cream: The creamy frozen center that makes these extra indulgent.
See the recipe card below for the exact quantities of each ingredient.
Variations
- Chocolate-Dipped: Dip the edges of each sandwich in melted chocolate, then let the chocolate set before serving or returning to the freezer.
- Mini Sandwiches: Cut into smaller bite-sized frozen treats or use cookie cutters for fun shapes.
- Add Toppings or Mix-ins: Add a layer of mini chocolate chips, crushed cookies, sprinkles, chopped candy bars, toasted coconut, crushed pretzels or chopped nuts pressed into ice cream before adding top or pressed into sides of individual bars.
- Add a Drizzle: Add caramel, hot fudge, or peanut butter over the ice cream layer before adding the top Rice Krispie layer. Keep in mind that if you drizzle on too much when the top layer is added drizzle will run out the sides. I know because I've done it. lol
- Swap Flavors: Use any flavor of ice cream as long as you soften it. Chocolate, cookies and cream, strawberry, mint chocolate chip, birthday cake, peanut butter swirl, salted caramel, or coffee ice cream all make delicious variations depending on the flavor profile you want.
How to Make Rice Krispie Ice Cream Sandwiches
These Rice Krispie Ice Cream Sandwiches are surprisingly simple to make and guaranteed to impress.
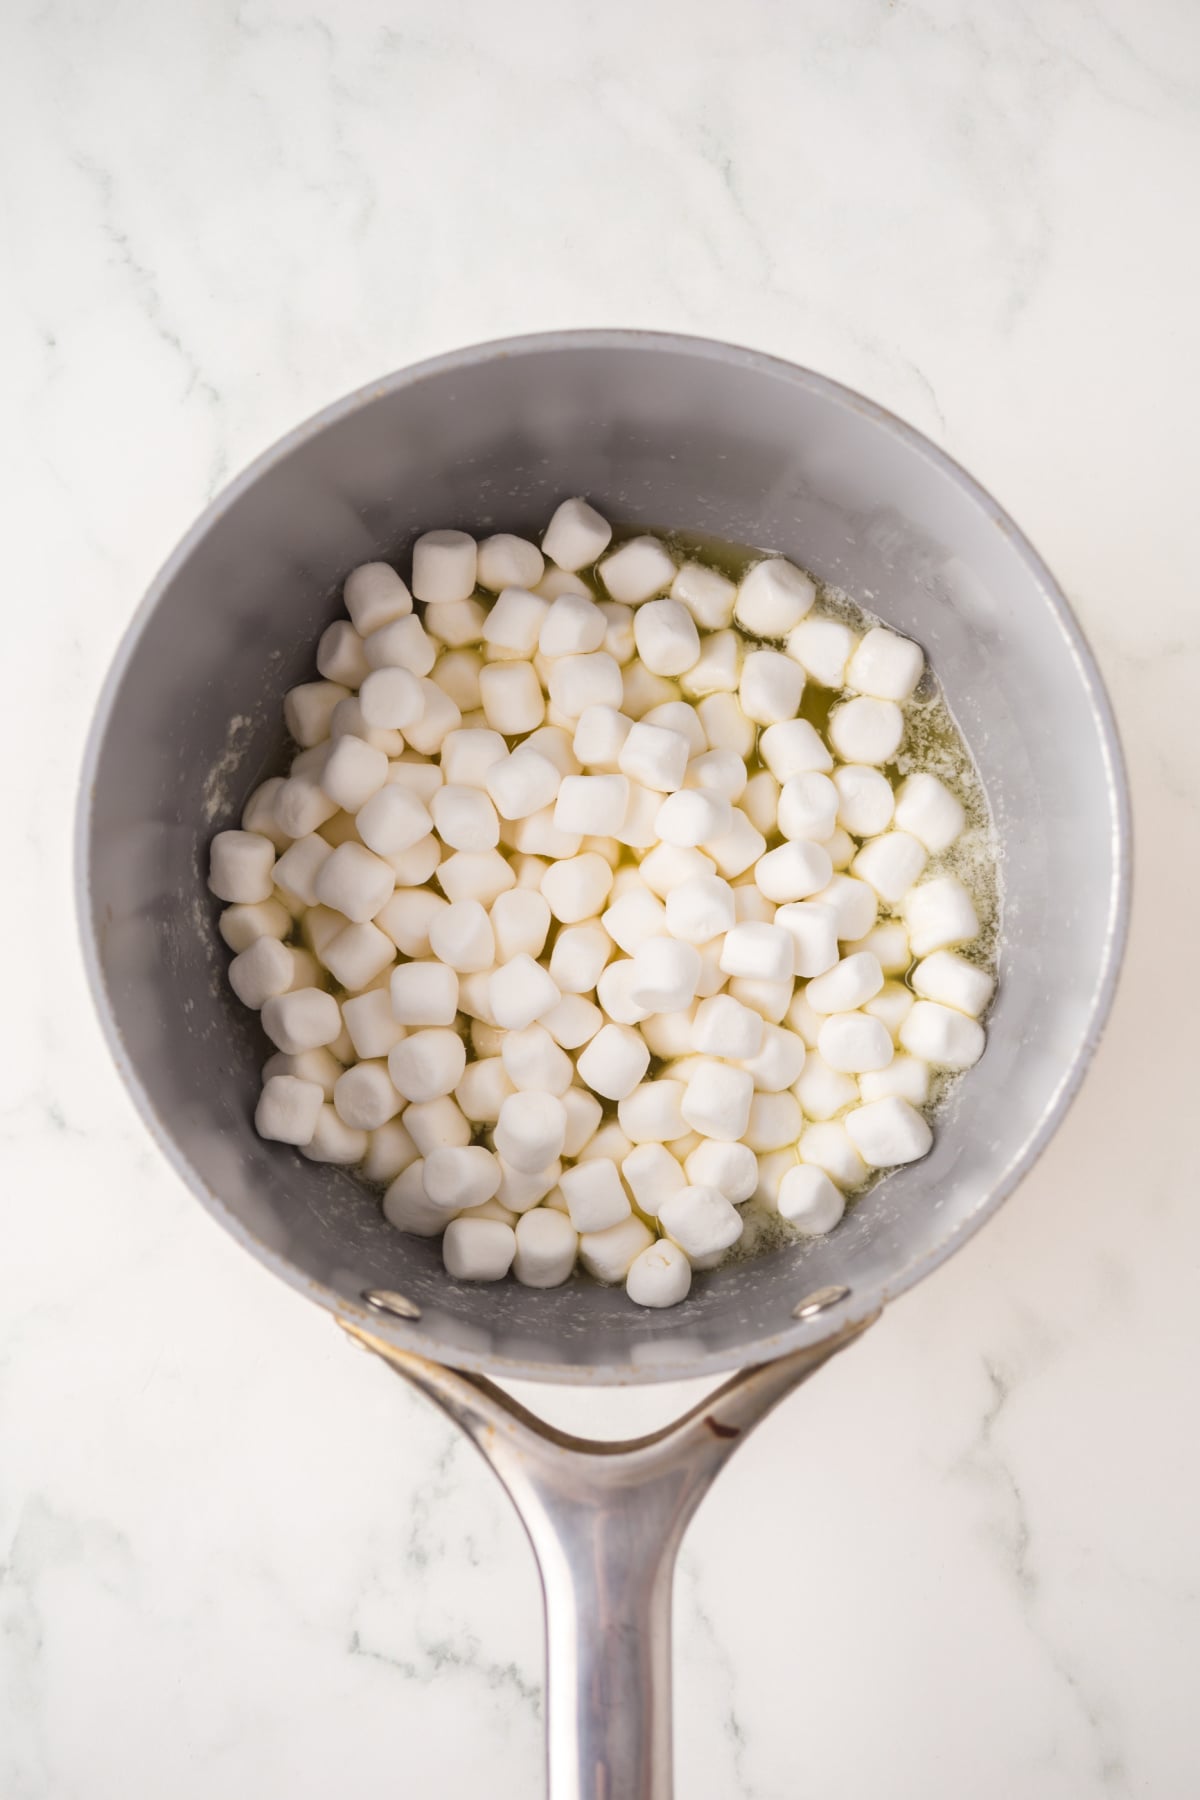
Step 1: Melt butter and marshmallows. Add the butter to a large pot. Melt the butter over medium-low heat. Once the butter is completely melted, add the marshmallows and vanilla. Stir until the marshmallows are completely melted.
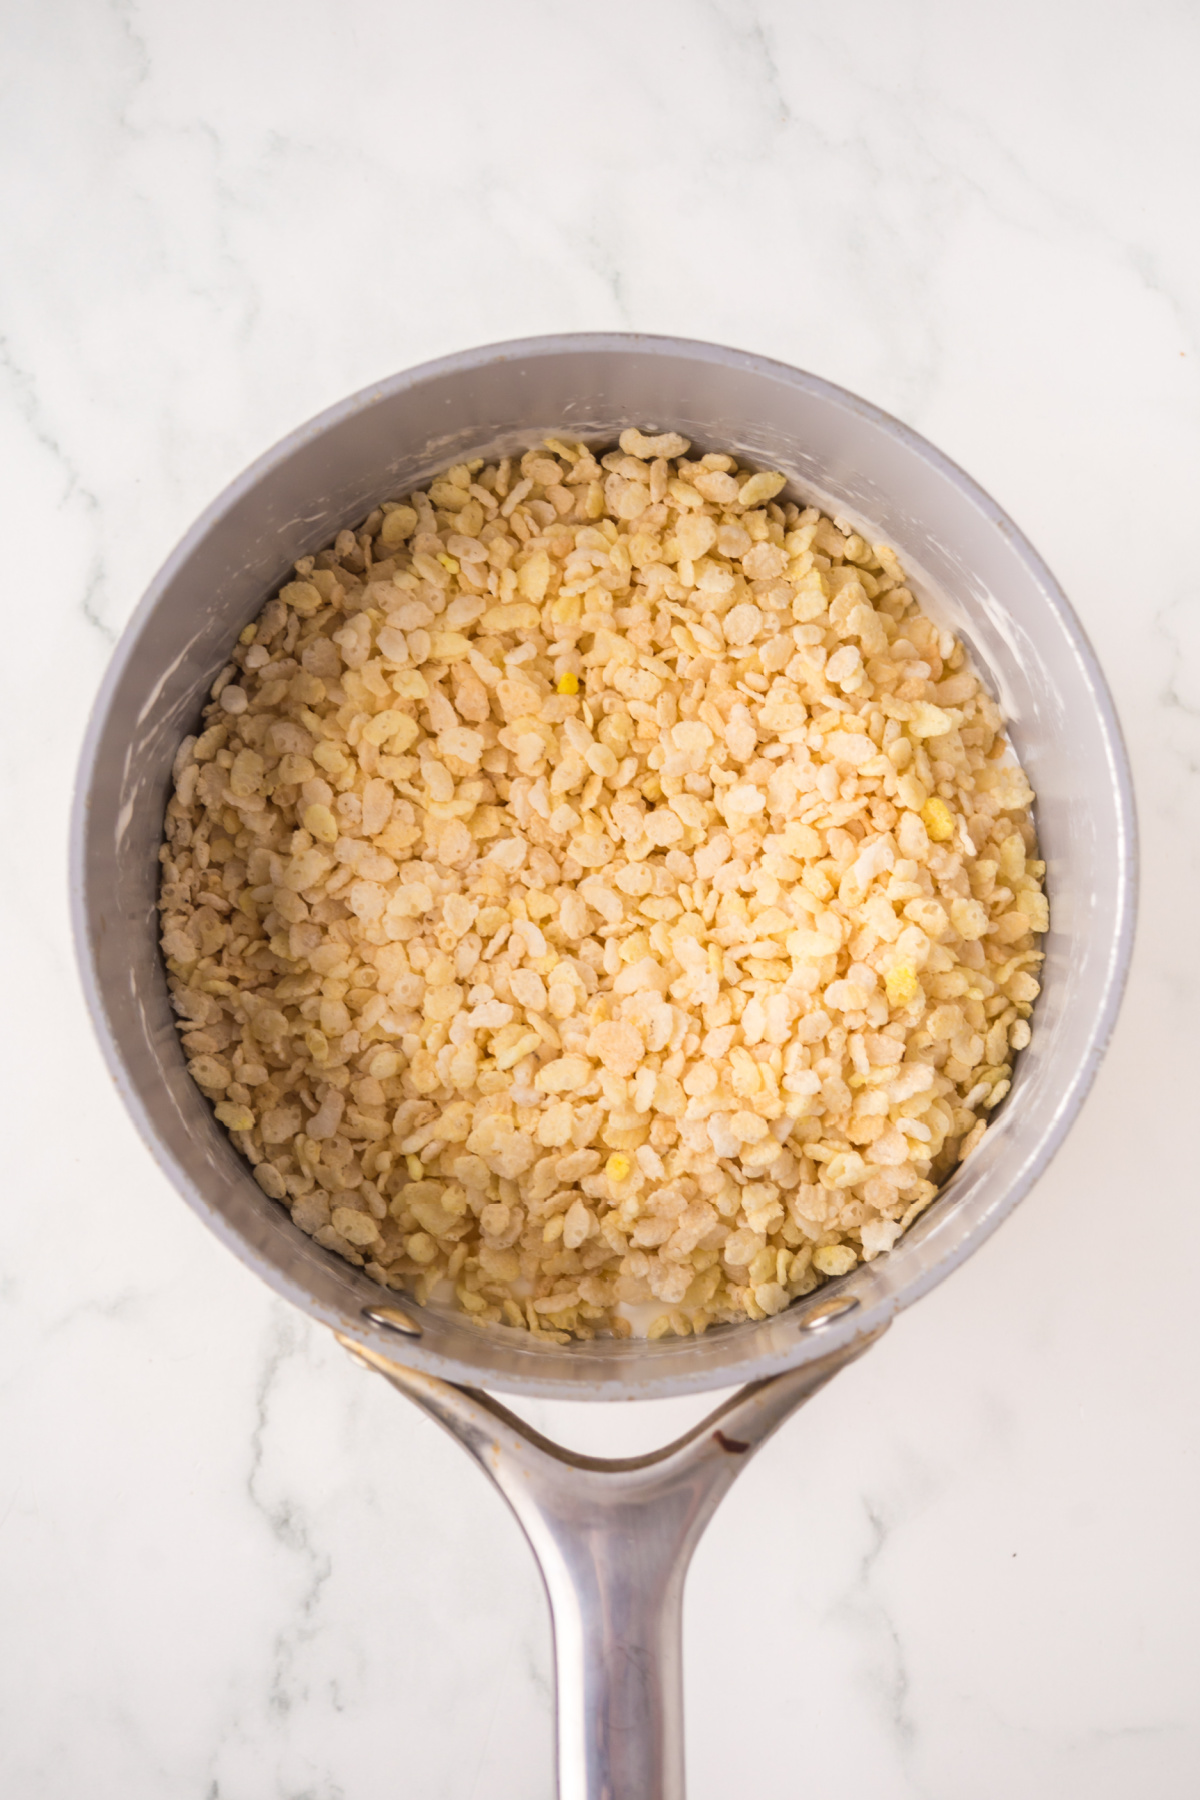
Step 2: Make Rice Krispie Layers. Remove from heat and fold in the rice cereal until it is evenly coated by the marshmallows mixture. Roughly divide mixture in half and press into 2 9x13 inch baking dishes. Let the rice krispies cool for at least 60 minutes.
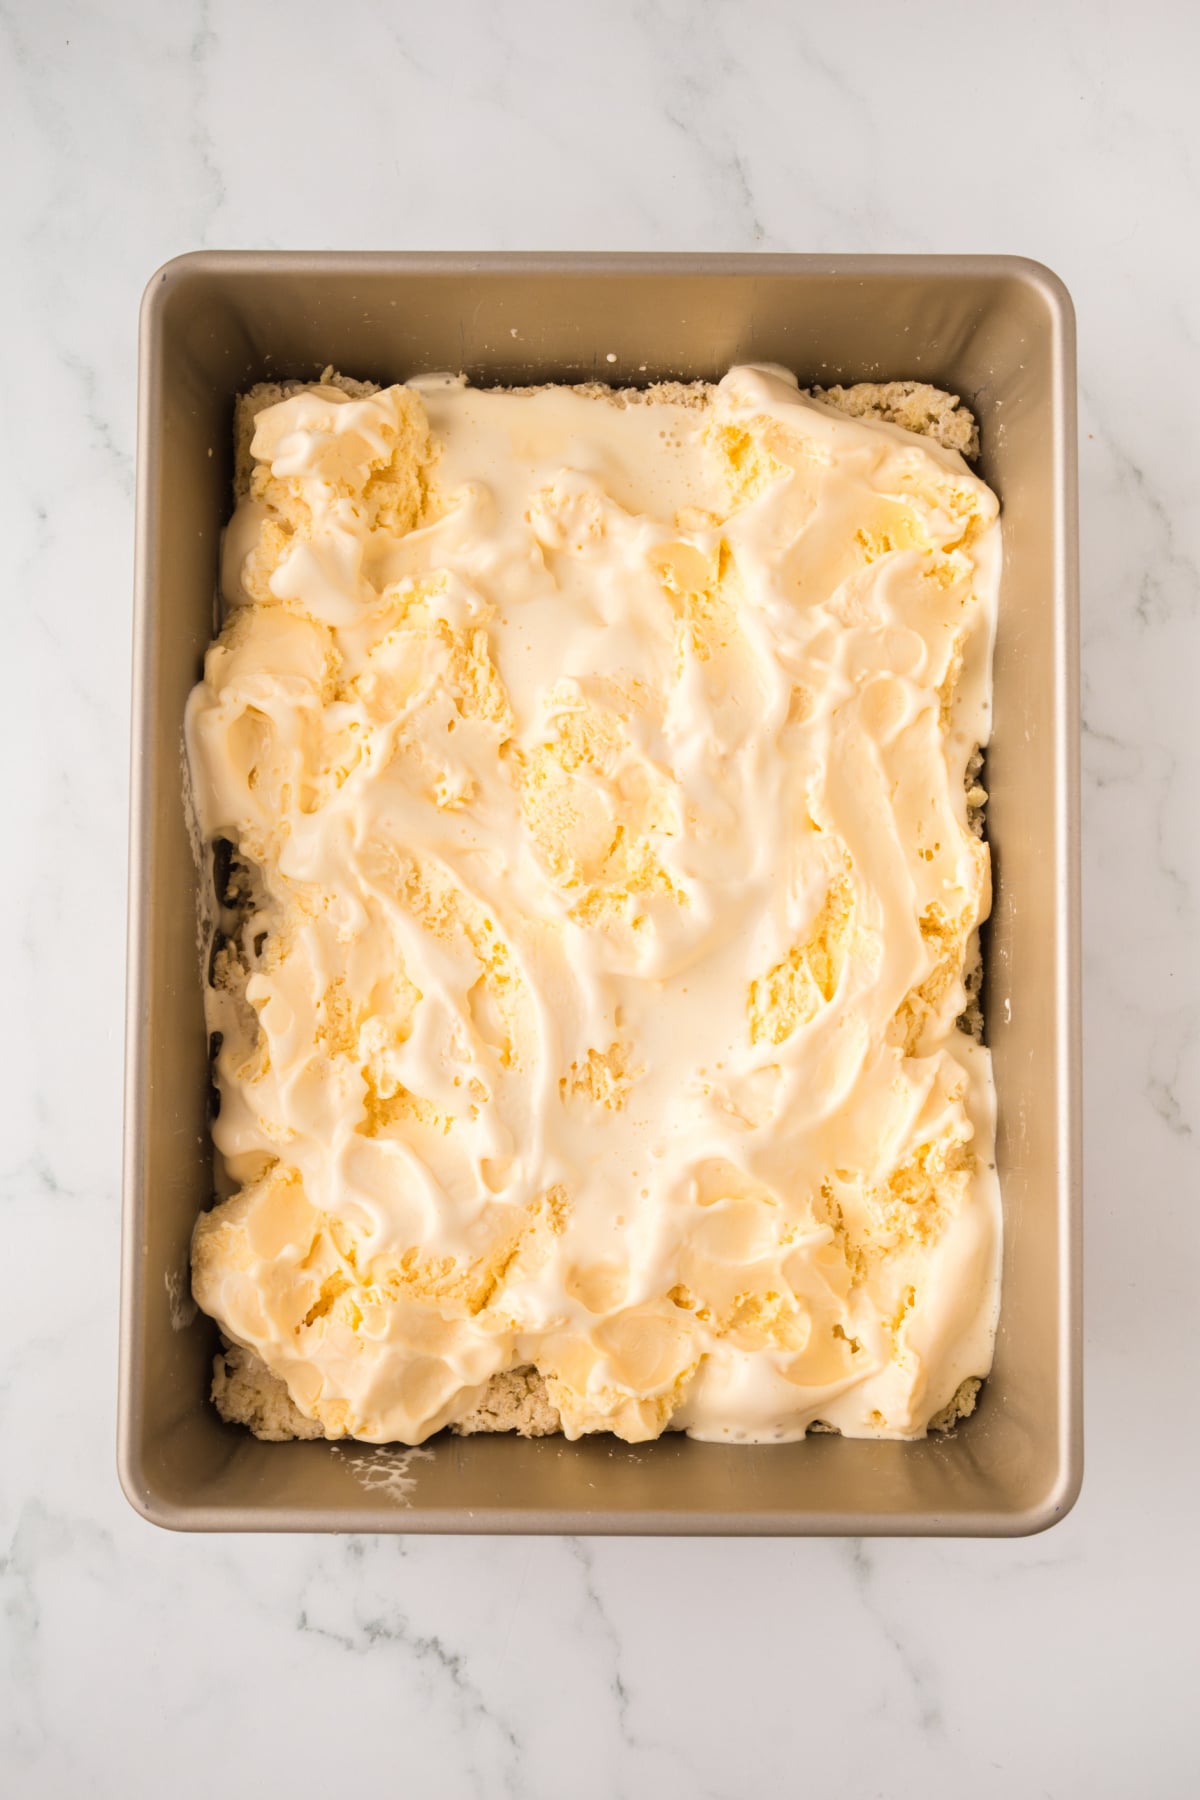
Step 3: Add ice cream layer. At about the 45 minute mark (or 15 minutes before you're ready to make bars) place your ice cream on the counter. Using a spatula, spread the ice cream over the top of one sheet of rice Krispie treats. Then loosen other sheet with a knife and carefully dump it on the ice cream. Freeze pan for 4 hours.
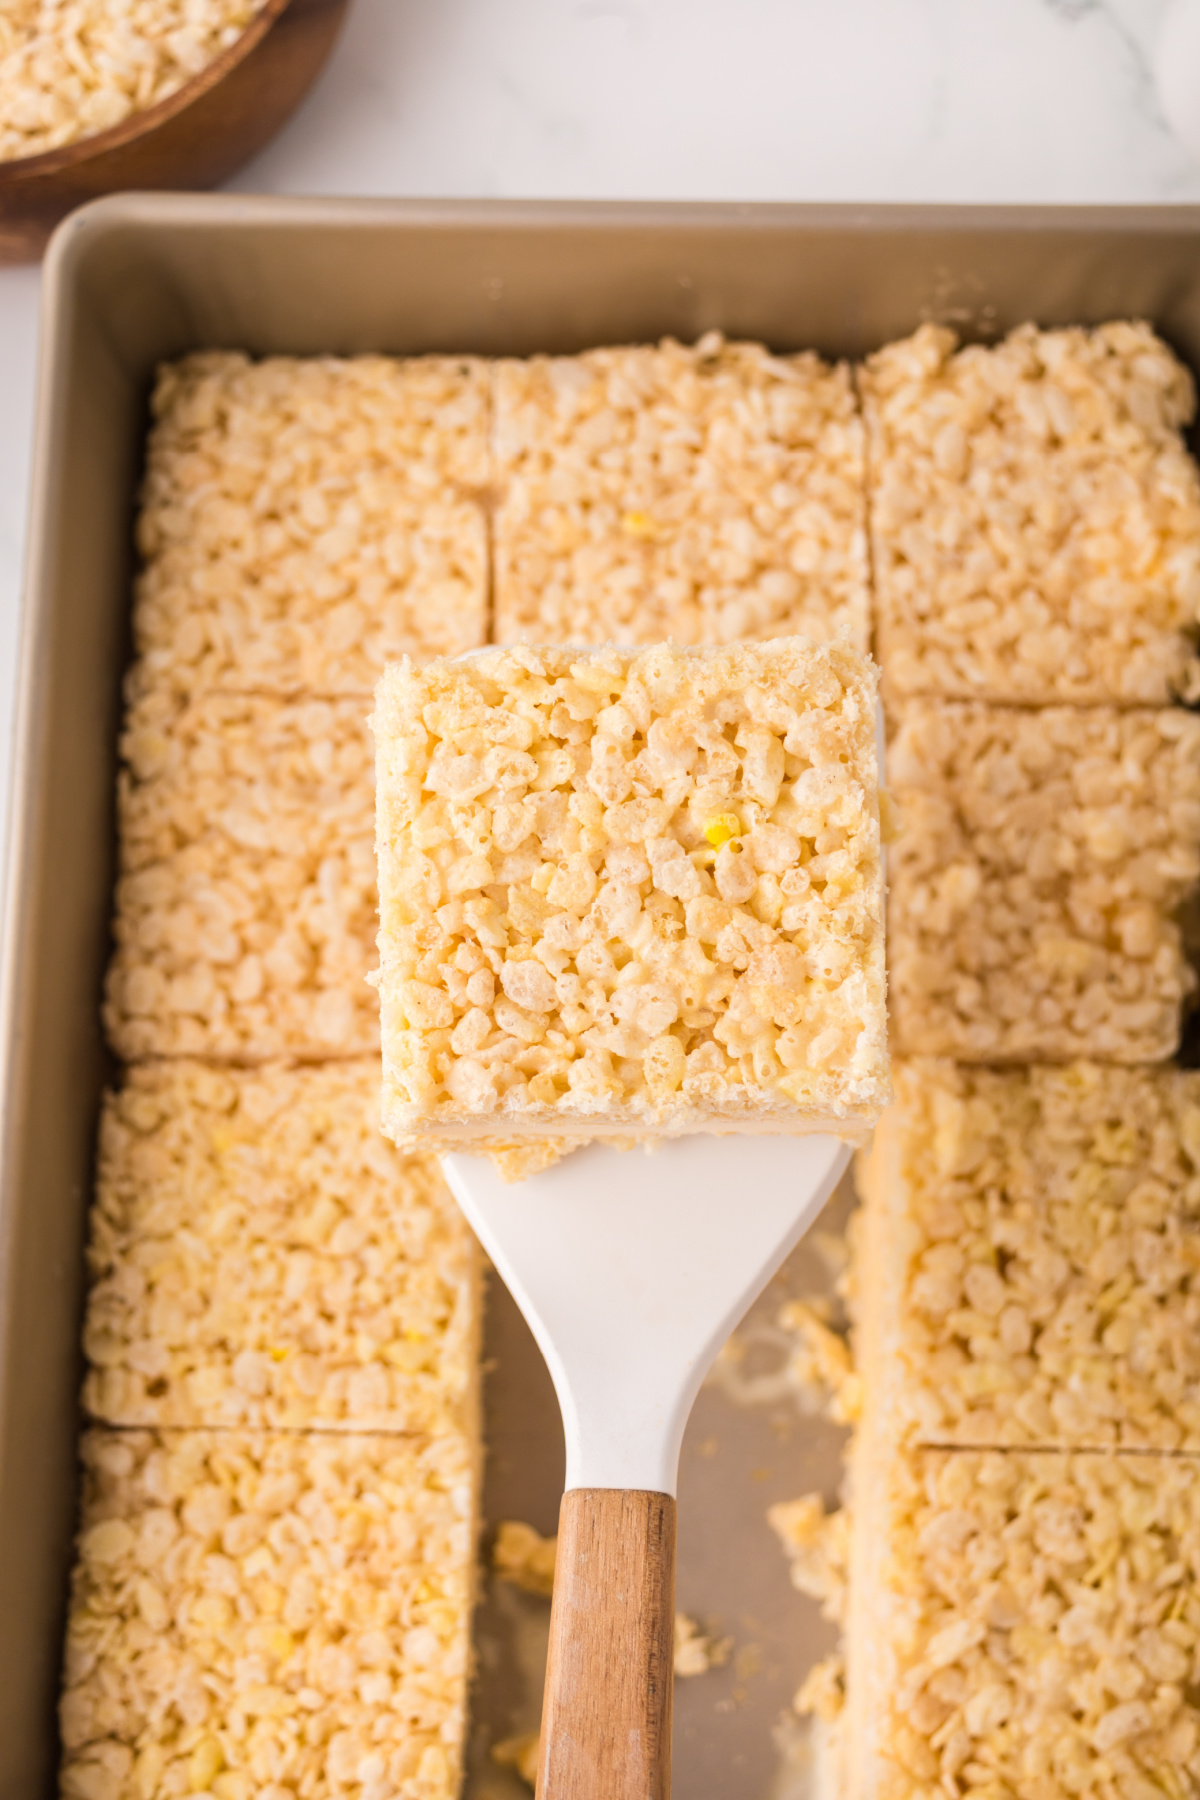
Step 4: Serve. Slice and share Rice Krispie ice cream sandwiches.
Rice Krispie Ice Cream Sandwiches Expert Tips
- Don't press too firmly: Light pressure keeps the treats soft instead of dense.
- Soften and assemble quickly: Let the ice cream soften just enough to spread easily or risk lifting rice Krispies, then work quickly during assembly so it doesn't melt too much.
- Slice like a pro: Freeze the sandwiches completely before cutting, then use a sharp knife warmed under hot water and dried between slices for clean, neat edges through the frozen layers.
- Wrap individually: Perfect for easy grab-and-go frozen treats.
- Use fresh mini marshmallows: Mini marshmallows melt faster, measure more accurately, and create softer, chewier Rice Krispie treats than older or larger marshmallows.
If you love recipes like this, you may also enjoy Rice Krispie hay bales and chocolate peanut butter Rice Krispie treats.
Storage Directions
Freezer: Store tightly wrapped individually and in resealable bags or in airtight freezer containers and/or covered well with plastic wrap for up to 2 weeks for best texture. Allow to sit at room temperature for 2-5 minutes before serving if they're extra firm.
Make Ahead: Make them several days in advance and keep frozen until ready to serve. Then, slice just before serving or wrap individual portions for easy grab-and-go entertaining.
Serving Suggestions
- Dip in hot fudge, caramel sauce or chocolate syrup
- Serve with fresh fruit, cheesecake fruit salad and grandma's old fashioned fruit salad
- Perfect for backyard BBQs
- Great for birthday parties
- Pair with milkshakes like strawberry banana milkshakes
- Fun for pool days
- Ideal for holiday cookouts
Rice Krispie Ice Cream Sandwiches Recipe FAQs
This usually happens when the marshmallow mixture gets overheated or the cereal is added while the pot stays over direct heat too long. Pressing the mixture too firmly into the pan can also make the bars dense and hard. For the softest texture, melt everything gently, remove from heat before adding the cereal, and press the mixture in lightly.
Because of the ice cream center, these should only sit out for about 10 to 15 minutes, depending on room temperature. On especially hot summer days, they'll soften much faster, so it's best to serve them straight from the freezer and return leftovers immediately.
The easiest trick is to soften the ice cream just enough to spread easily, not so much that it becomes runny. Work quickly, have your Rice Krispie layers fully cooled before assembly, and if your kitchen is warm, you can briefly return the partially assembled dessert to the freezer if needed before finishing.
Technically yes, but homemade works much better for this recipe. Store-bought Rice Krispie treats are usually thinner, firmer, and individually portioned, which makes assembling large ice cream sandwiches more difficult. Homemade treats stay softer, chewier, and easier to work with, giving you that thick bakery-style sandwich texture that holds the ice cream beautifully.
More Rice Krispie Recipes
Do you like Rice Krispies? Here are some recipes you may also like to try.


If you try this recipe and love it please leave a star rating in the recipe card below or even better, drop a review in the comment section. I always appreciate your feedback. Be sure to follow along with me on Facebook, Pinterest, and YouTube for more easy recipes!
Rice Krispie Ice Cream Sandwiches
Equipment
Ingredients
- ½ cup salted butter
- 4 cups mini marshmallows
- 1 teaspoon vanilla extract
- 6 cups rice cereal
- 1 ½ quarts vanilla ice cream
Instructions
- Add the butter to a large pot and melt it over medium-low heat. Once fully melted, stir in the marshmallows and vanilla extract. Continue stirring until the marshmallows are completely melted and the mixture is smooth.
- Remove the pot from the heat and fold in the Rice Krispies cereal until evenly coated with the marshmallow mixture.
- Divide the mixture evenly between two 9x13-inch baking dishes and gently press into an even layer. Let the Rice Krispie layers cool at room temperature for at least 60 minutes before assembling the cake.
- About 45 minutes into the cooling time (or 15 minutes before you're ready to assemble the cake), place the ice cream on the counter to soften slightly.
- Using a spatula, spread the softened ice cream evenly over the top of one Rice Krispie layer. Carefully loosen the second layer with a knife and place it on top of the ice cream.
- Cover and freeze for at least 4 hours before slicing and serving.
Notes
- Don't press too firmly: Light pressure keeps the treats soft instead of dense.
- Soften and assemble quickly: Let the ice cream soften just enough to spread easily or risk lifting rice Krispies, then work quickly during assembly so it doesn't melt too much.
- Slice like a pro: Freeze the sandwiches completely before cutting, then use a sharp knife warmed under hot water and dried between slices for clean, neat edges through the frozen layers.
- Wrap individually: Perfect for easy grab-and-go frozen treats.
- Use fresh mini marshmallows: Mini marshmallows melt faster, measure more accurately, and create softer, chewier Rice Krispie treats than older or larger marshmallows.


Leave a Reply