Checkerboard Cookies are a truly impressive treat that will wow friends and family every time you make them. Even though it seems intimidating, I provide all the steps you need to achieve a successful dessert you'll be proud of and excited to devour. If you adore this adorable pattern, these turtle sugar cookies are just as cute.

Recipe Essentials
- 🍽️ Course: Dessert
- ⏱️ Cooking Time: 8 minutes
- 🍴 Servings: 36
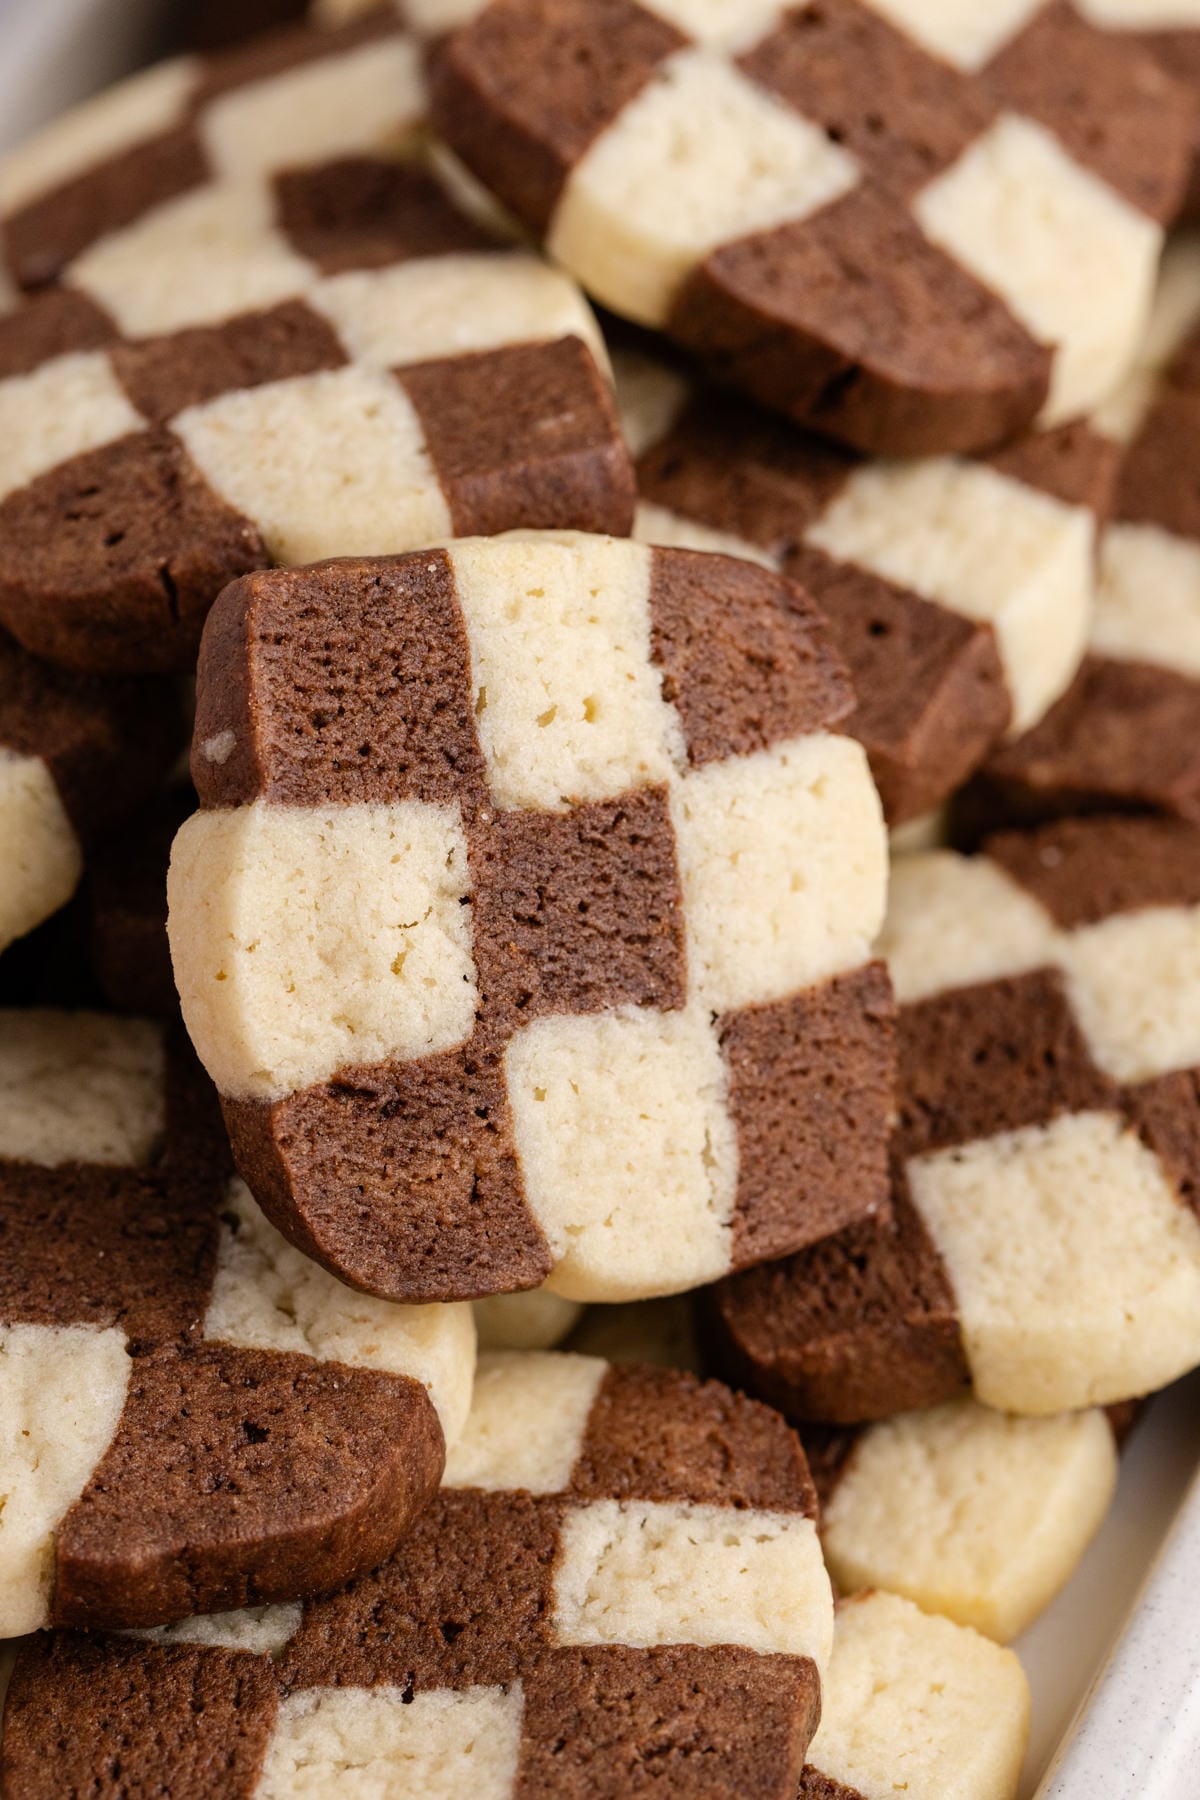
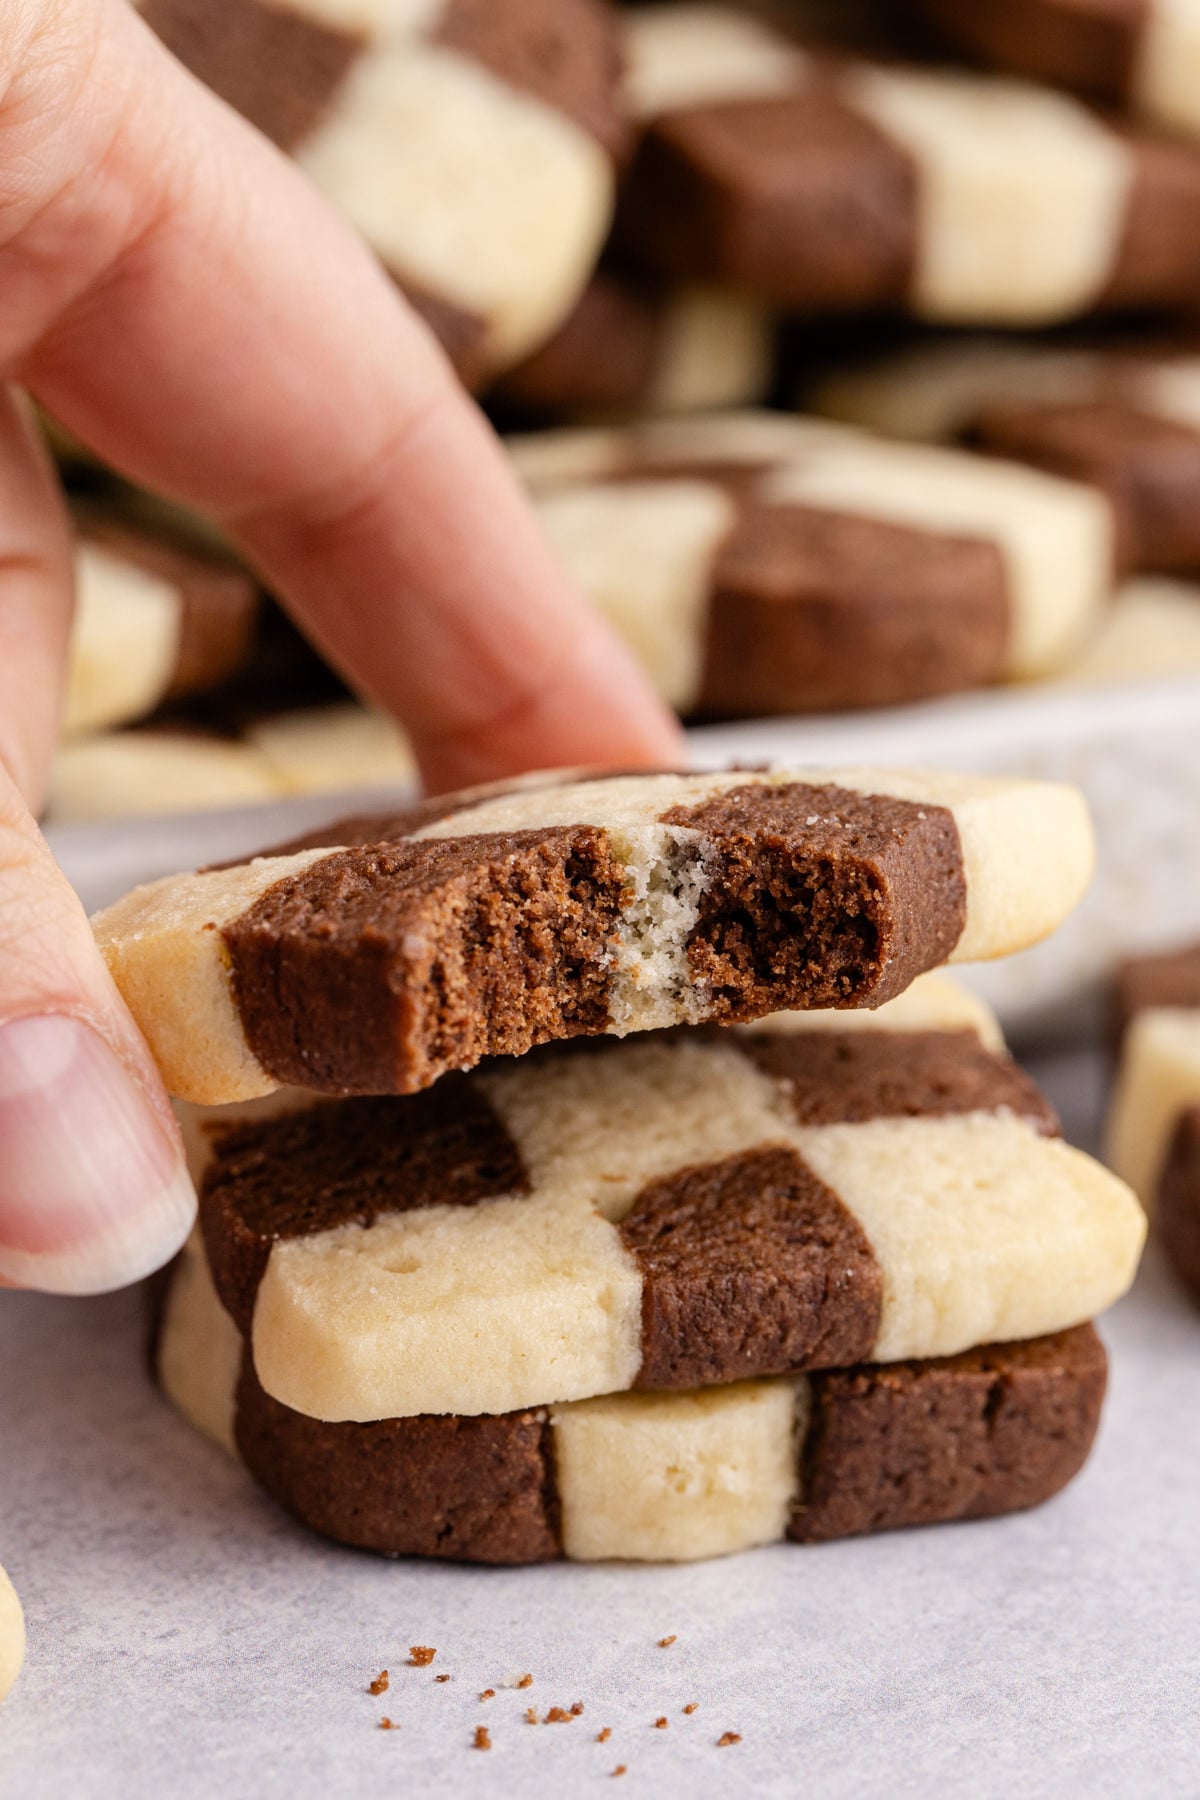
- 🧄 Flavor Profile: Buttery and lightly sweet with a classic vanilla-and-chocolate contrast in every bite.
- 🍚 Best Served With: Hot tea, coffee, or as an eye-catching addition to a cookie platter with potato chip cookies.
- 🧊 Make Ahead?: Yes, the dough can be prepared and chilled or frozen ahead, then sliced and baked when needed.
Summarize and Save This Content On
You don't need a special occasion or reason to make these cookies, but I do enjoy making them during the holidays or for events like birthday parties. The checkerboard pattern can be colored to your liking to make it extra special, too. They are soft and chewy and just perfect in every way!
I highly recommend espresso brownies and tiramisu cookies if you enjoy the combination of coffee and chocolate.
Why You'll Love This Recipe
- It's easier than it looks: The intricate checkerboard design looks complicated, but I promise it's pretty easy once both flavors of cookie dough are made.
- It's customizable: You can change the flavors and colors of either dough to make this recipe your own.
- It's great to make ahead: This recipe needs time to chill in the fridge, making it perfect to prepare in advance.
Jump to:
Checkerboard Cookies Ingredients
The most important ingredients for this checkerboard cookies recipe are listed below. These intricate cookies call for simple baking staples!
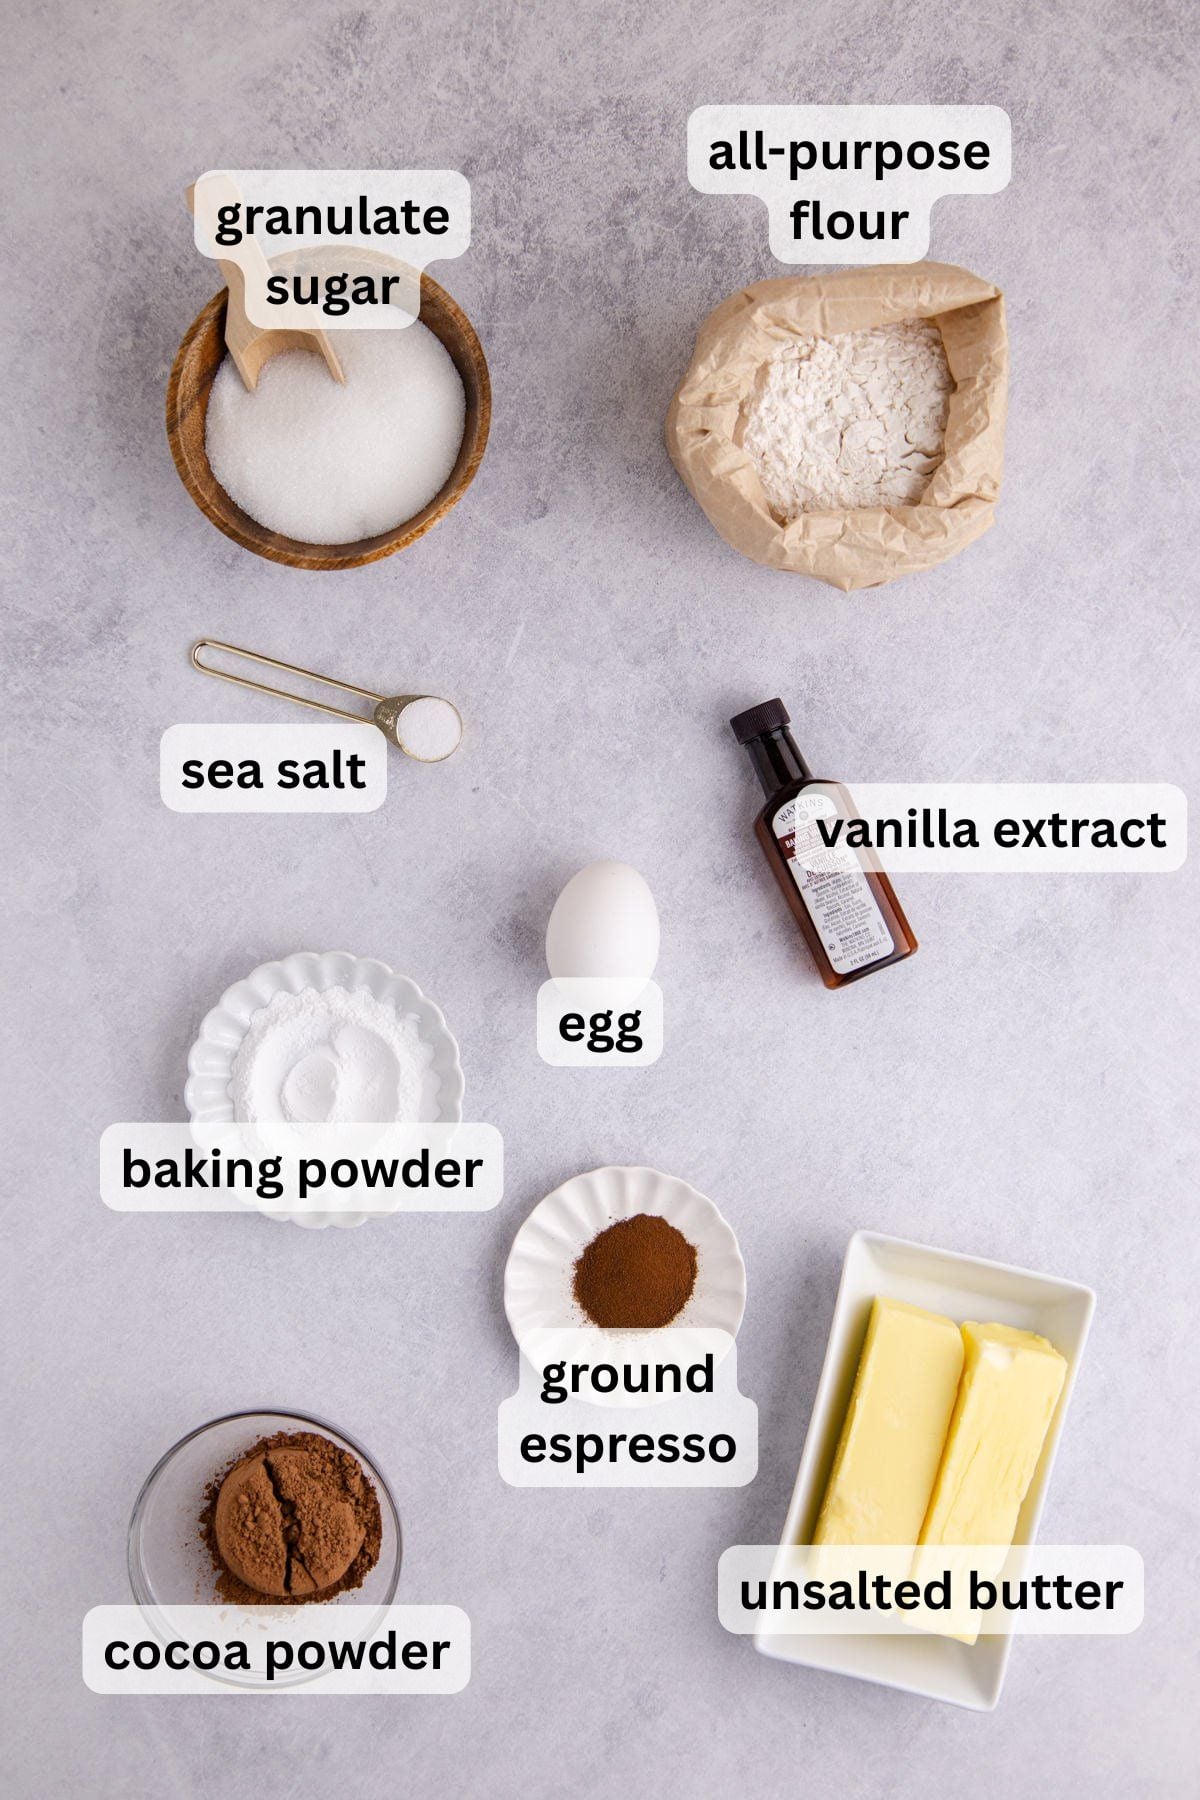
- Sea salt: I like to use sea salt for these cookies, but if you only have table salt, that's fine. Just use a tiny pinch less!
- Butter: You'll need unsalted, softened butter so it mixes well with the sugar. If you only have salted butter, only use a ¼ teaspoon of sea salt.
- Cocoa powder: Natural unsweetened or Dutch-process cocoa powder works in this checkerboard cookie recipe.
- Espresso: I love the subtle coffee flavor that you get from the espresso. It also enhances the chocolate flavor!
- Egg: I brush the cookie dough logs with egg wash to help them stick together and form the checkerboard pattern. You'll add one egg to the dough, too.
See the recipe card below for exact ingredient amounts, nutritional information, and detailed instructions.
Variations
- Maple: Add a teaspoon of maple extract to either or both varieties of cookie dough to add warm flavors.
- Nutty: Stir in some chopped peanuts into the chocolate dough or chopped pistachios into the white for a nutty version. Feel free to swap with other nuts you like!
- Add Citrus: Stir in a tablespoon of orange zest into the chocolate or lemon zest into the vanilla for brighter flavors.
How to Make Checkerboard Cookies
Below are the instructions you'll need for these checkerboard shortbread cookies. Preheat your oven to 350° F before you slice the cookies, and line a baking sheet with parchment paper.
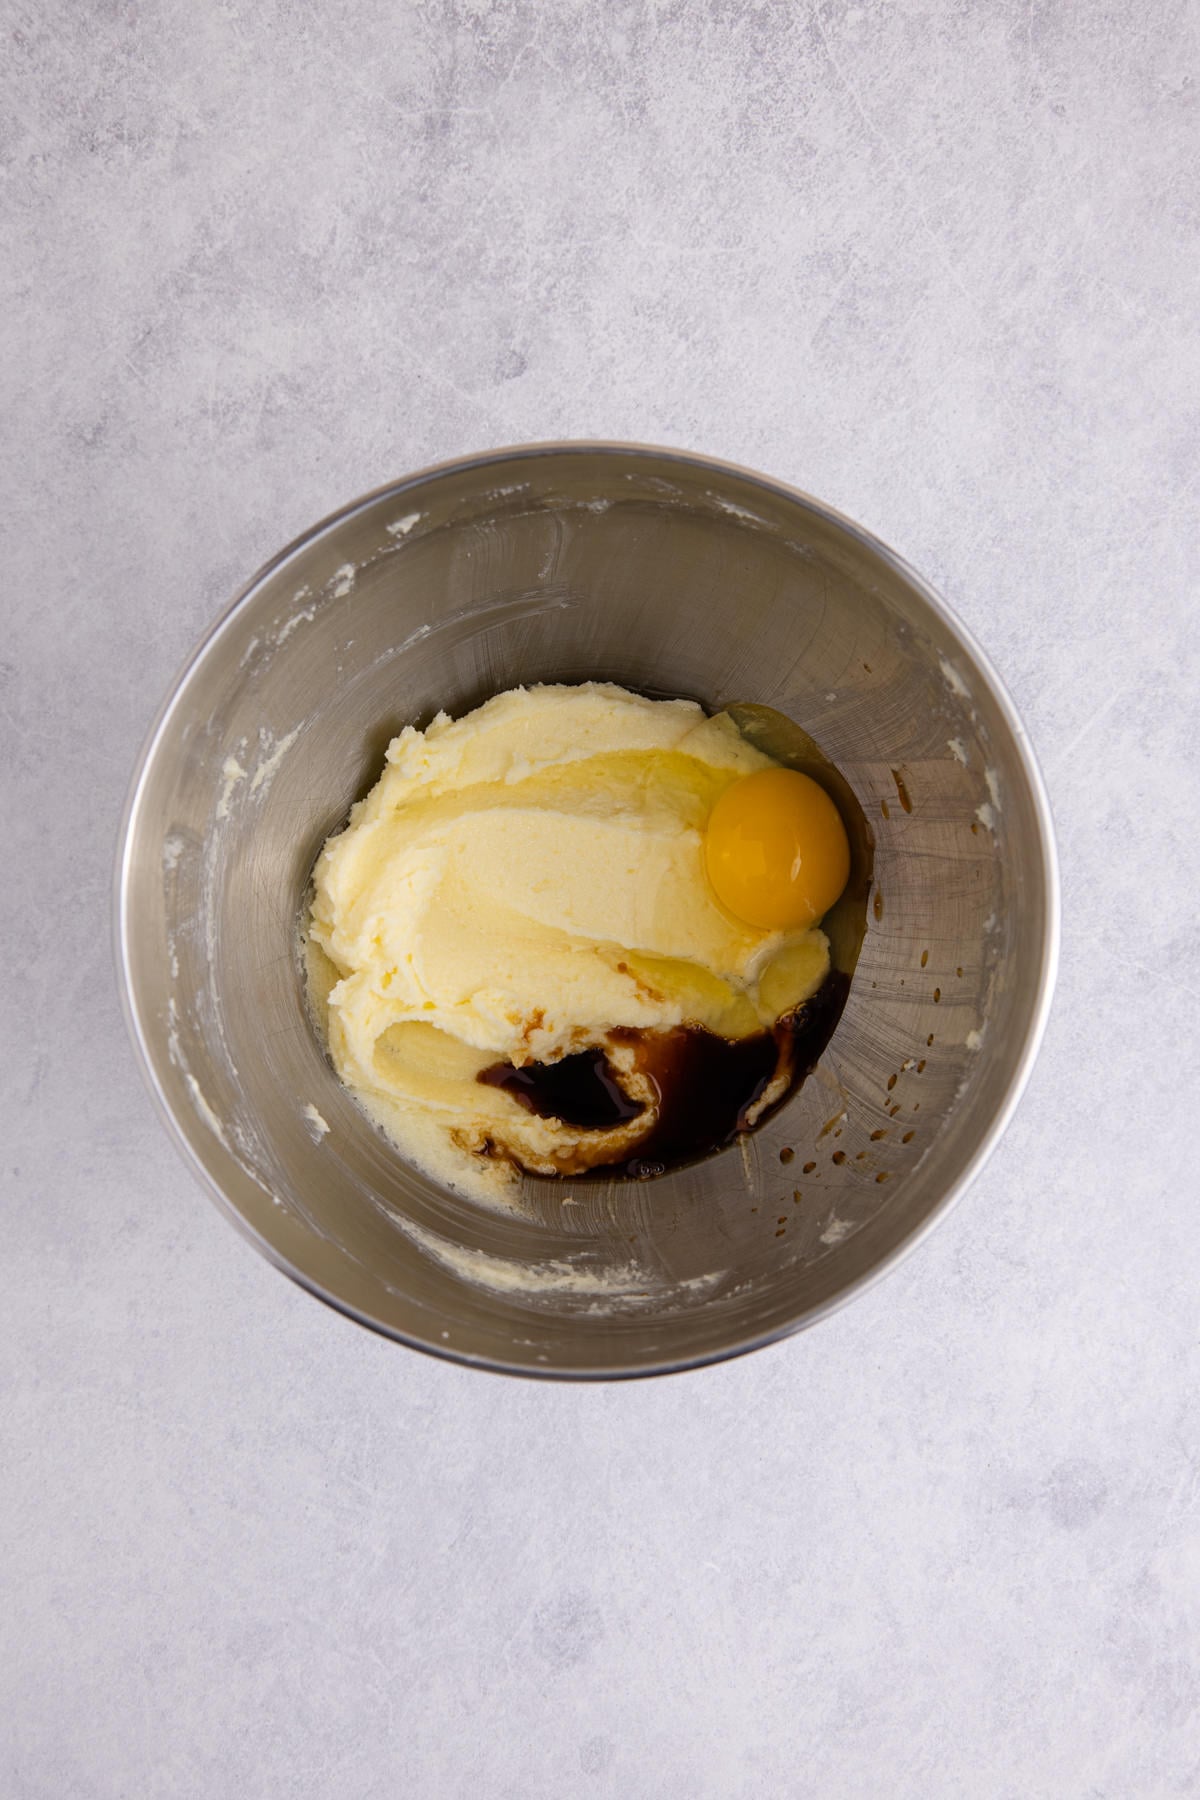
Step 1: Combine the wet ingredients. Add the butter and sugar to the bowl of a stand mixer, and beat them on medium-low until fluffy. Then, beat in egg and vanilla.

Step 2: Add the dry ingredients. Add the dry ingredients to the bowl and beat until just combined, and the dough will form.
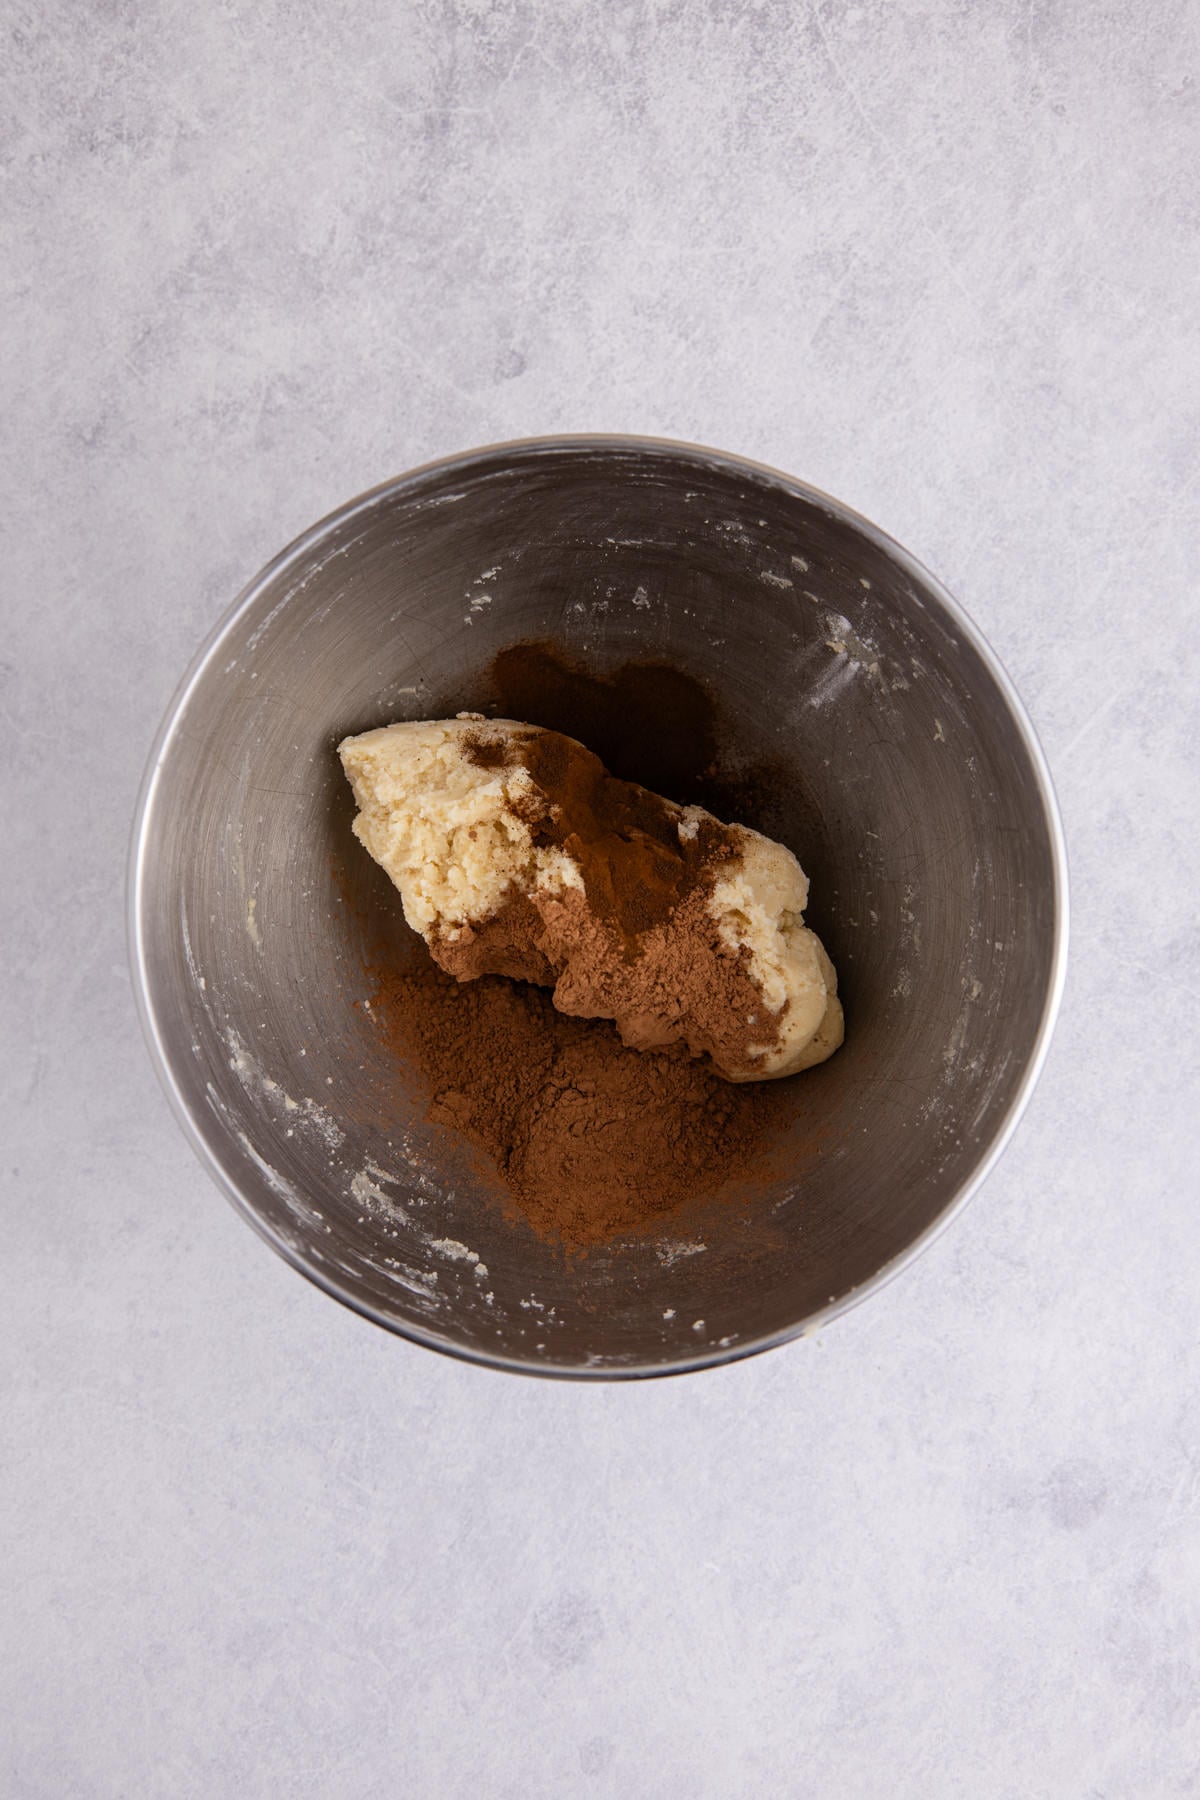
Step 3: Separate and add cocoa. Divide the dough in half and mix cocoa powder and espresso into one bowl.
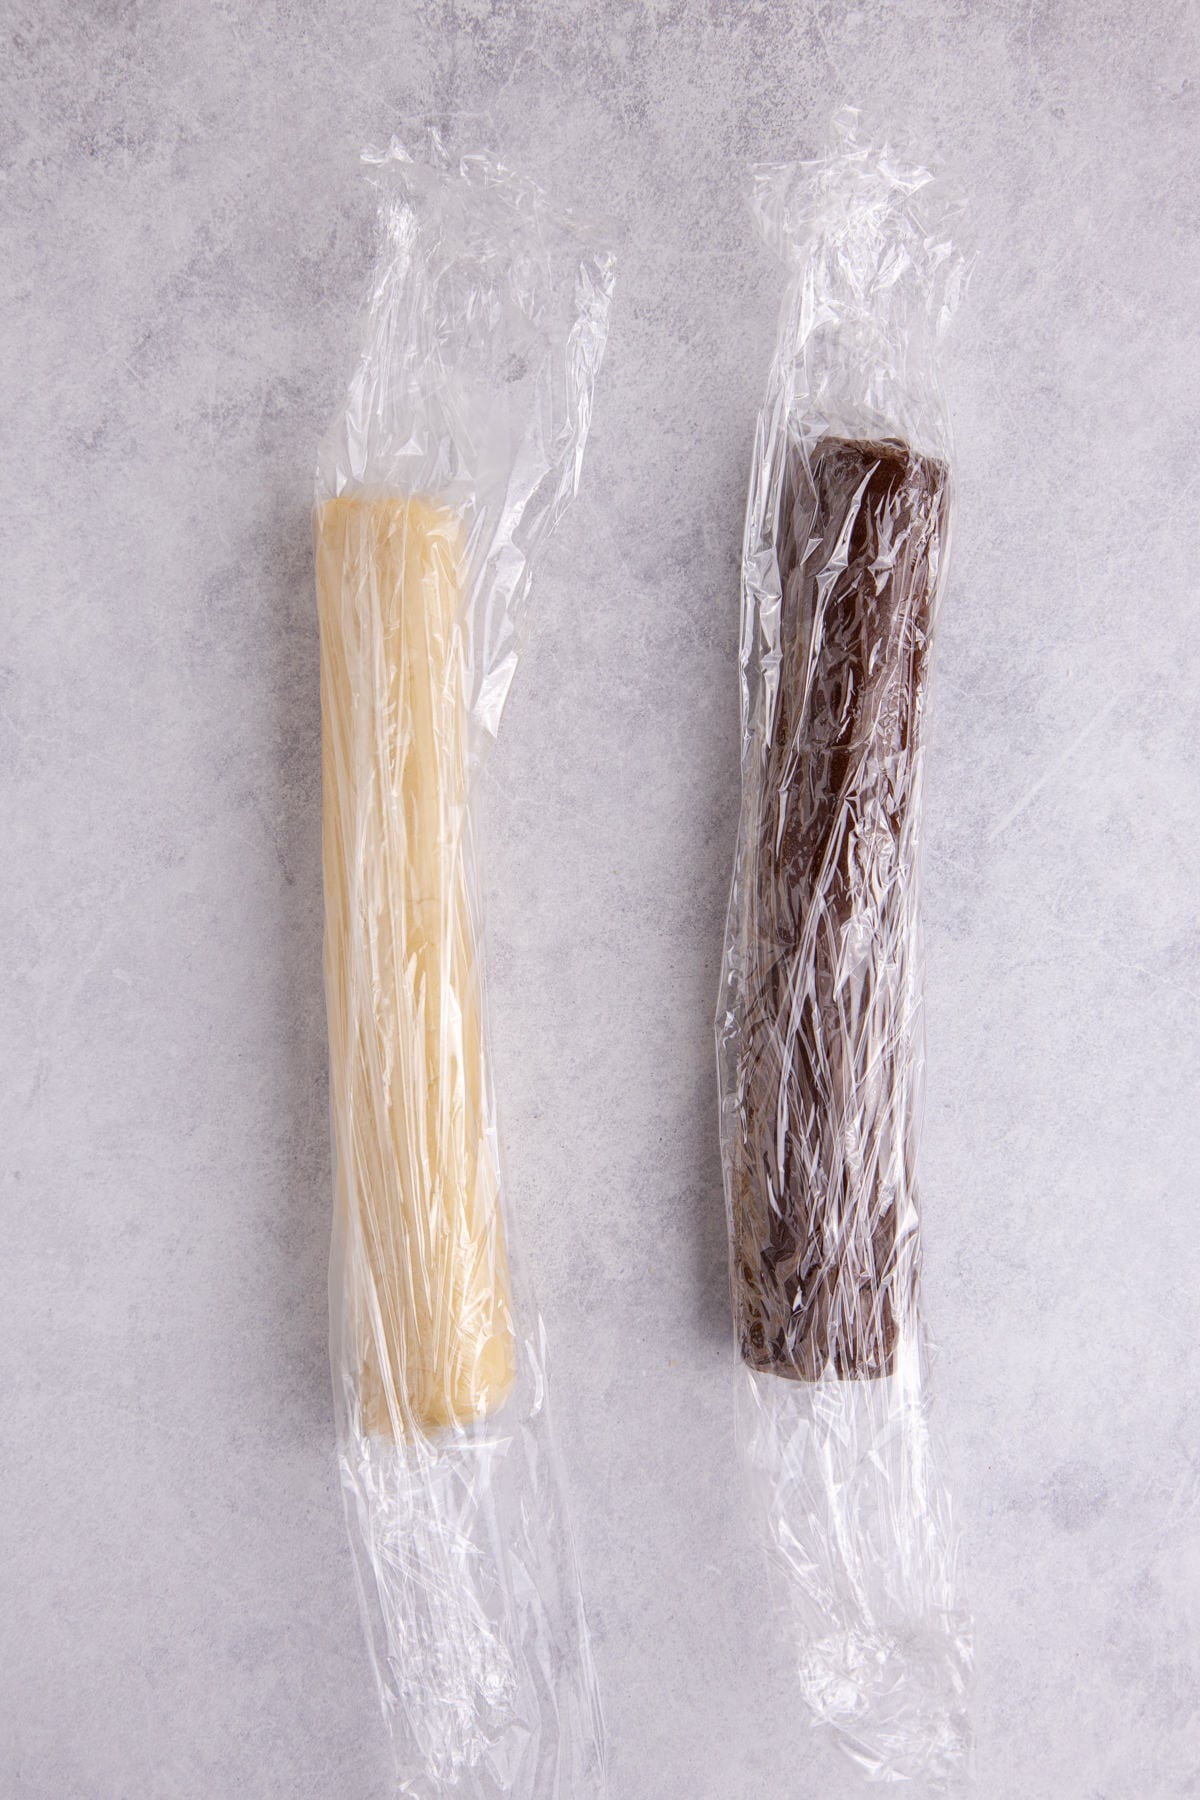
Step 4: Make logs and chill. Roll the dough into 12-inch logs and flatten the sides to create a long, rectangular shape. Wrap each log tightly with plastic wrap and pop it in the fridge for about 30 minutes.
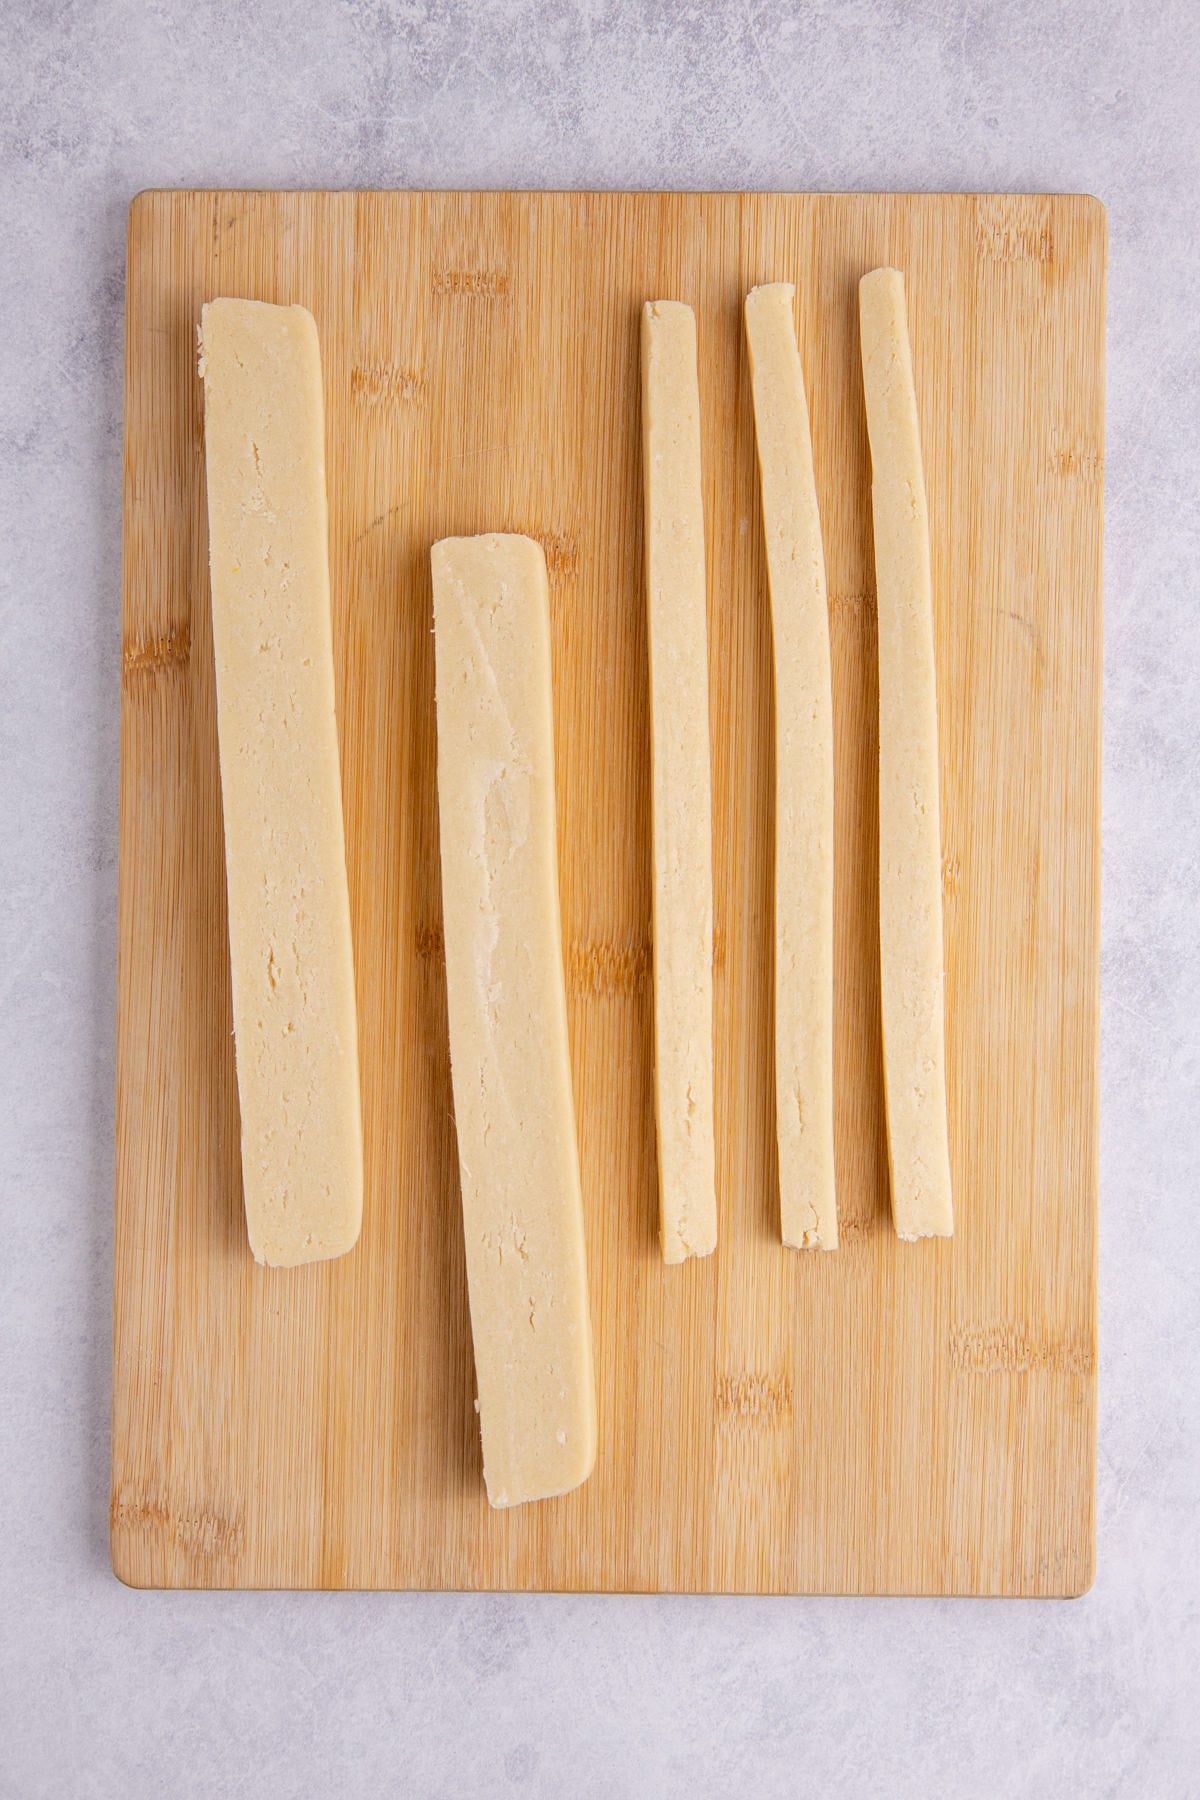
Step 5: Slice the dough. Start by taking one of the logs and slicing it into three equal strips. Then, take each strip, lay it flat, and cut it into three, so each log has now been turned into nine strips.
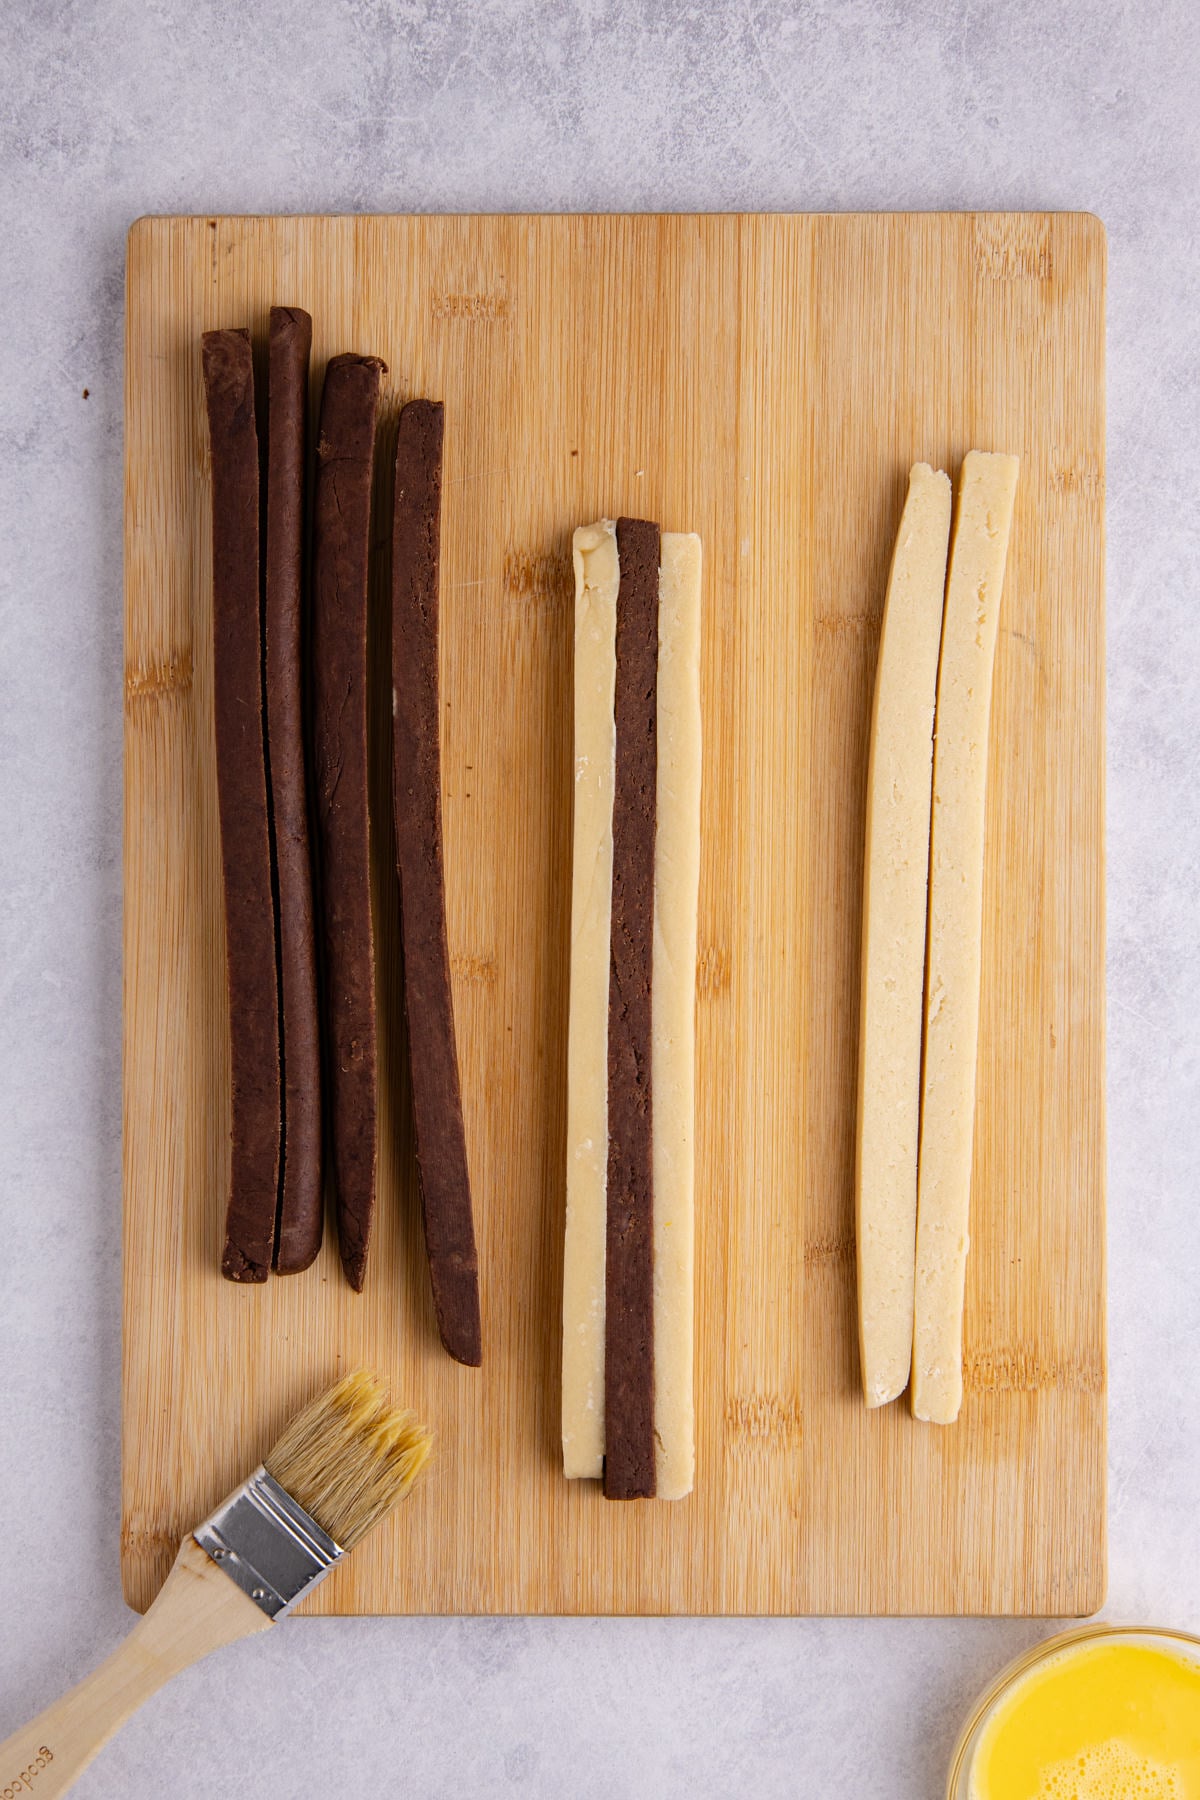
Step 6: Start the pattern. Alternate the dough strips and brush them with egg wash. Do this until you have a 3x3 square.
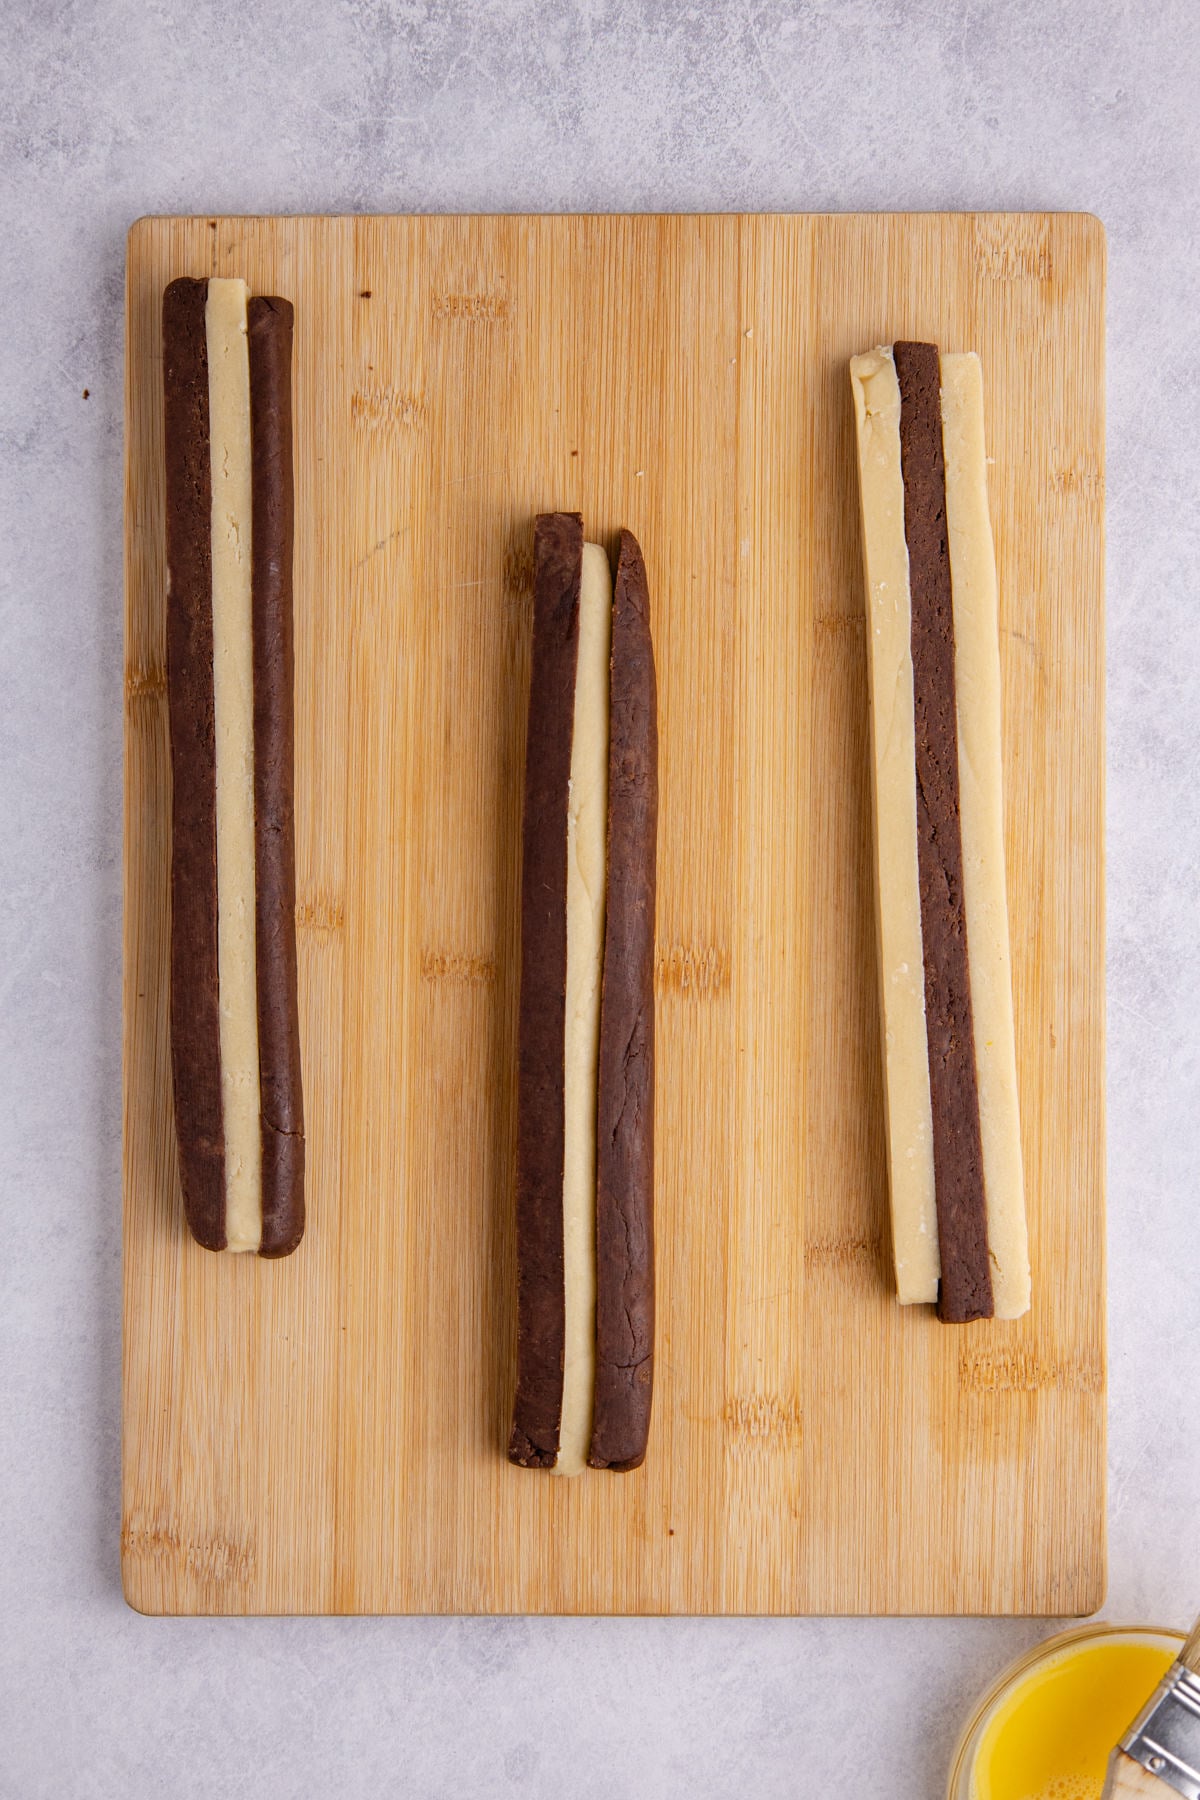
Step 7: Repeat with the remaining strips. Do this with the remaining strips until you have two logs. Then wrap them again and chill them in the fridge for another 30 minutes.
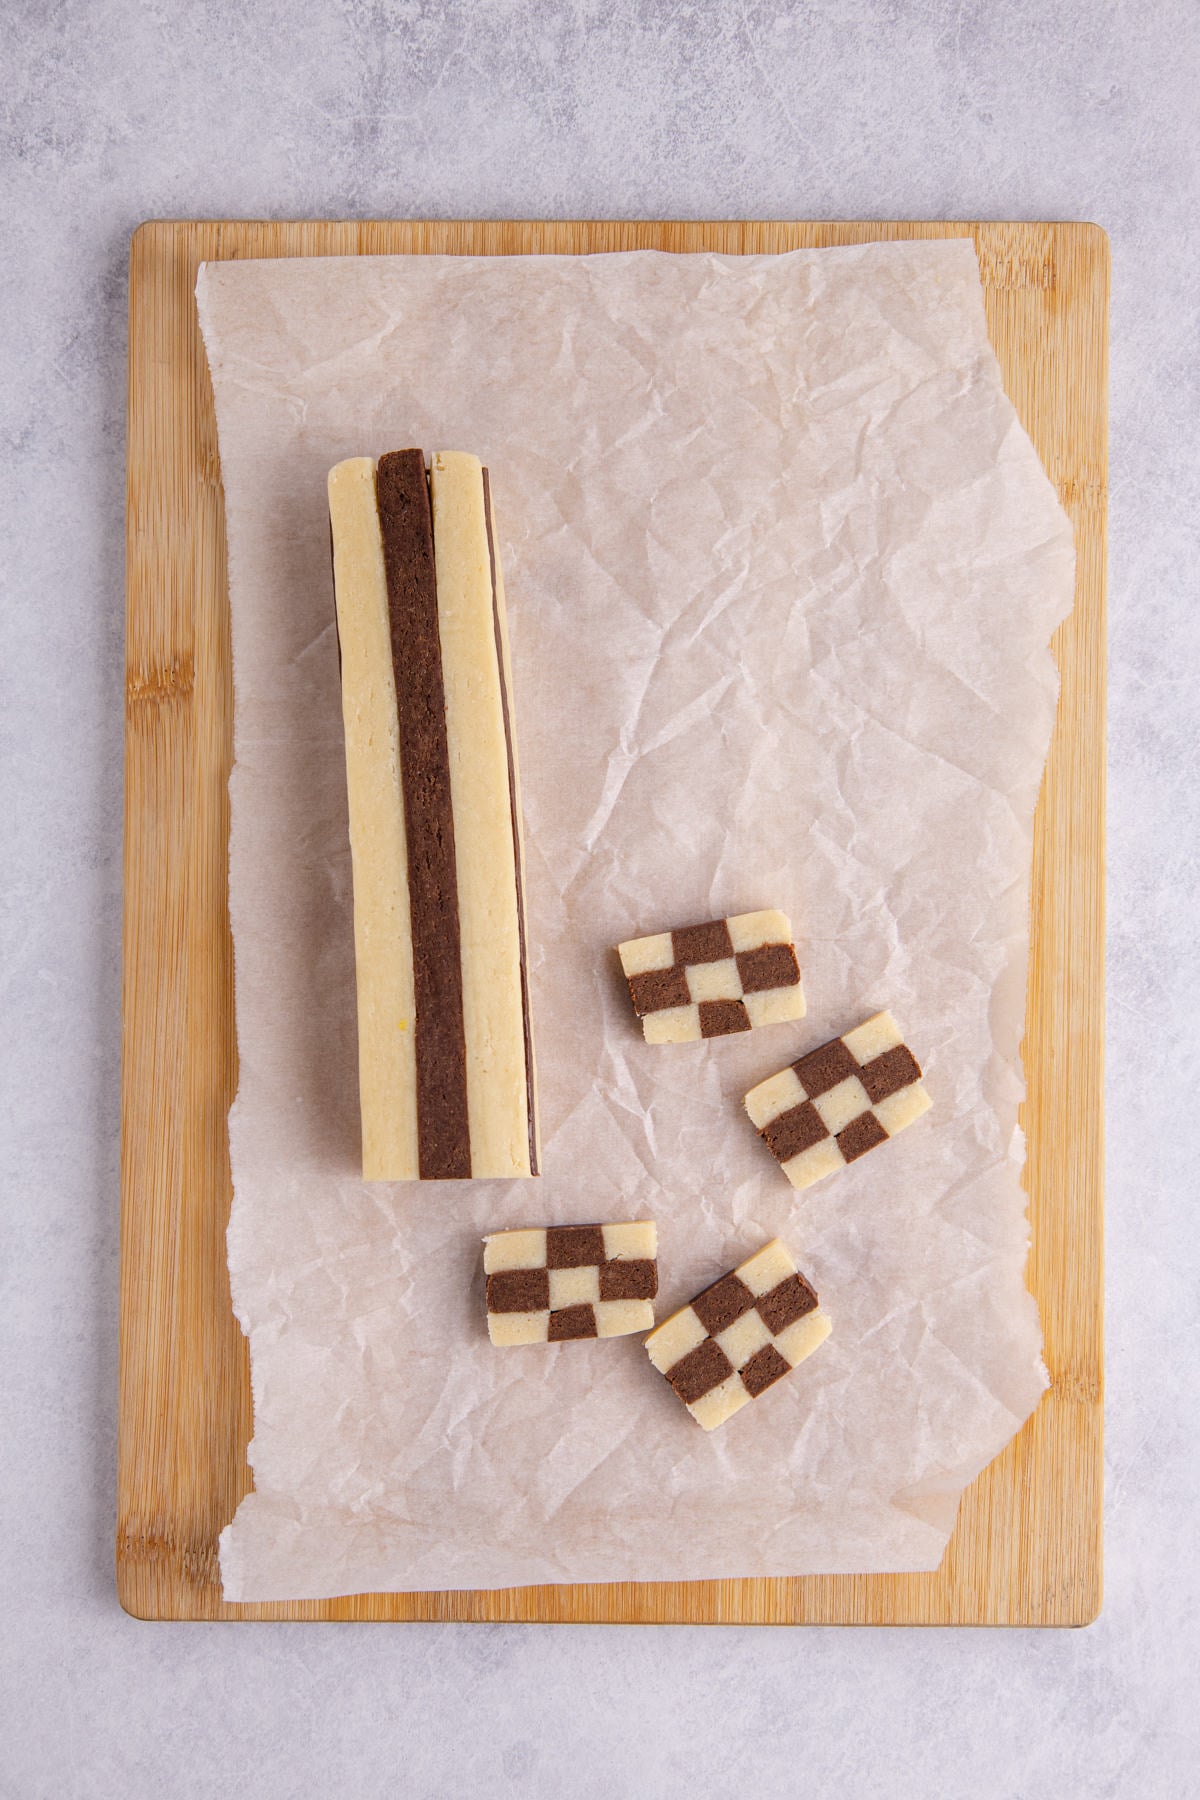
Step 8: Slice it into cookies. Now you can slice the logs into ½-inch-wide cookies.
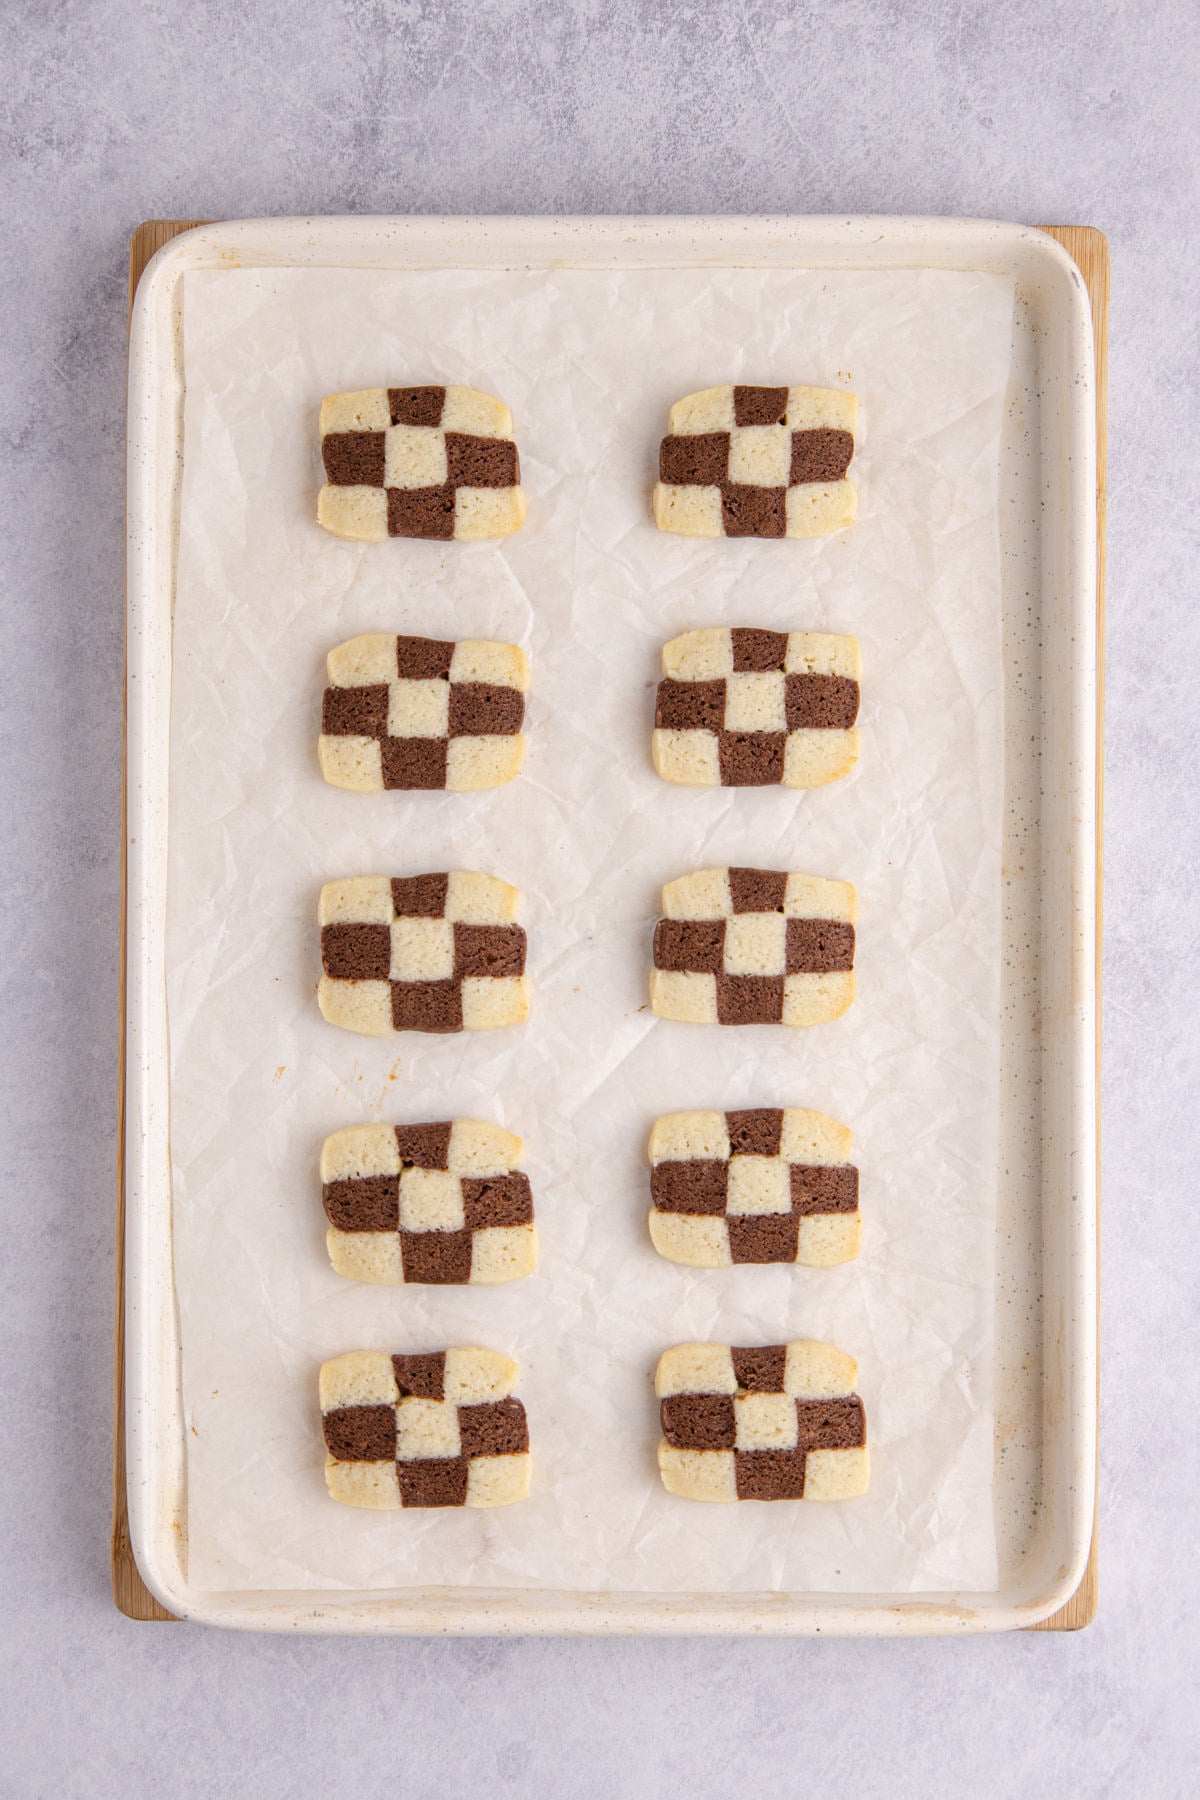
Step 9: Bake. Leave about an inch between each checkerboard cookie, then stick the pan in the oven for about 8 minutes, until the edges just start to turn golden.
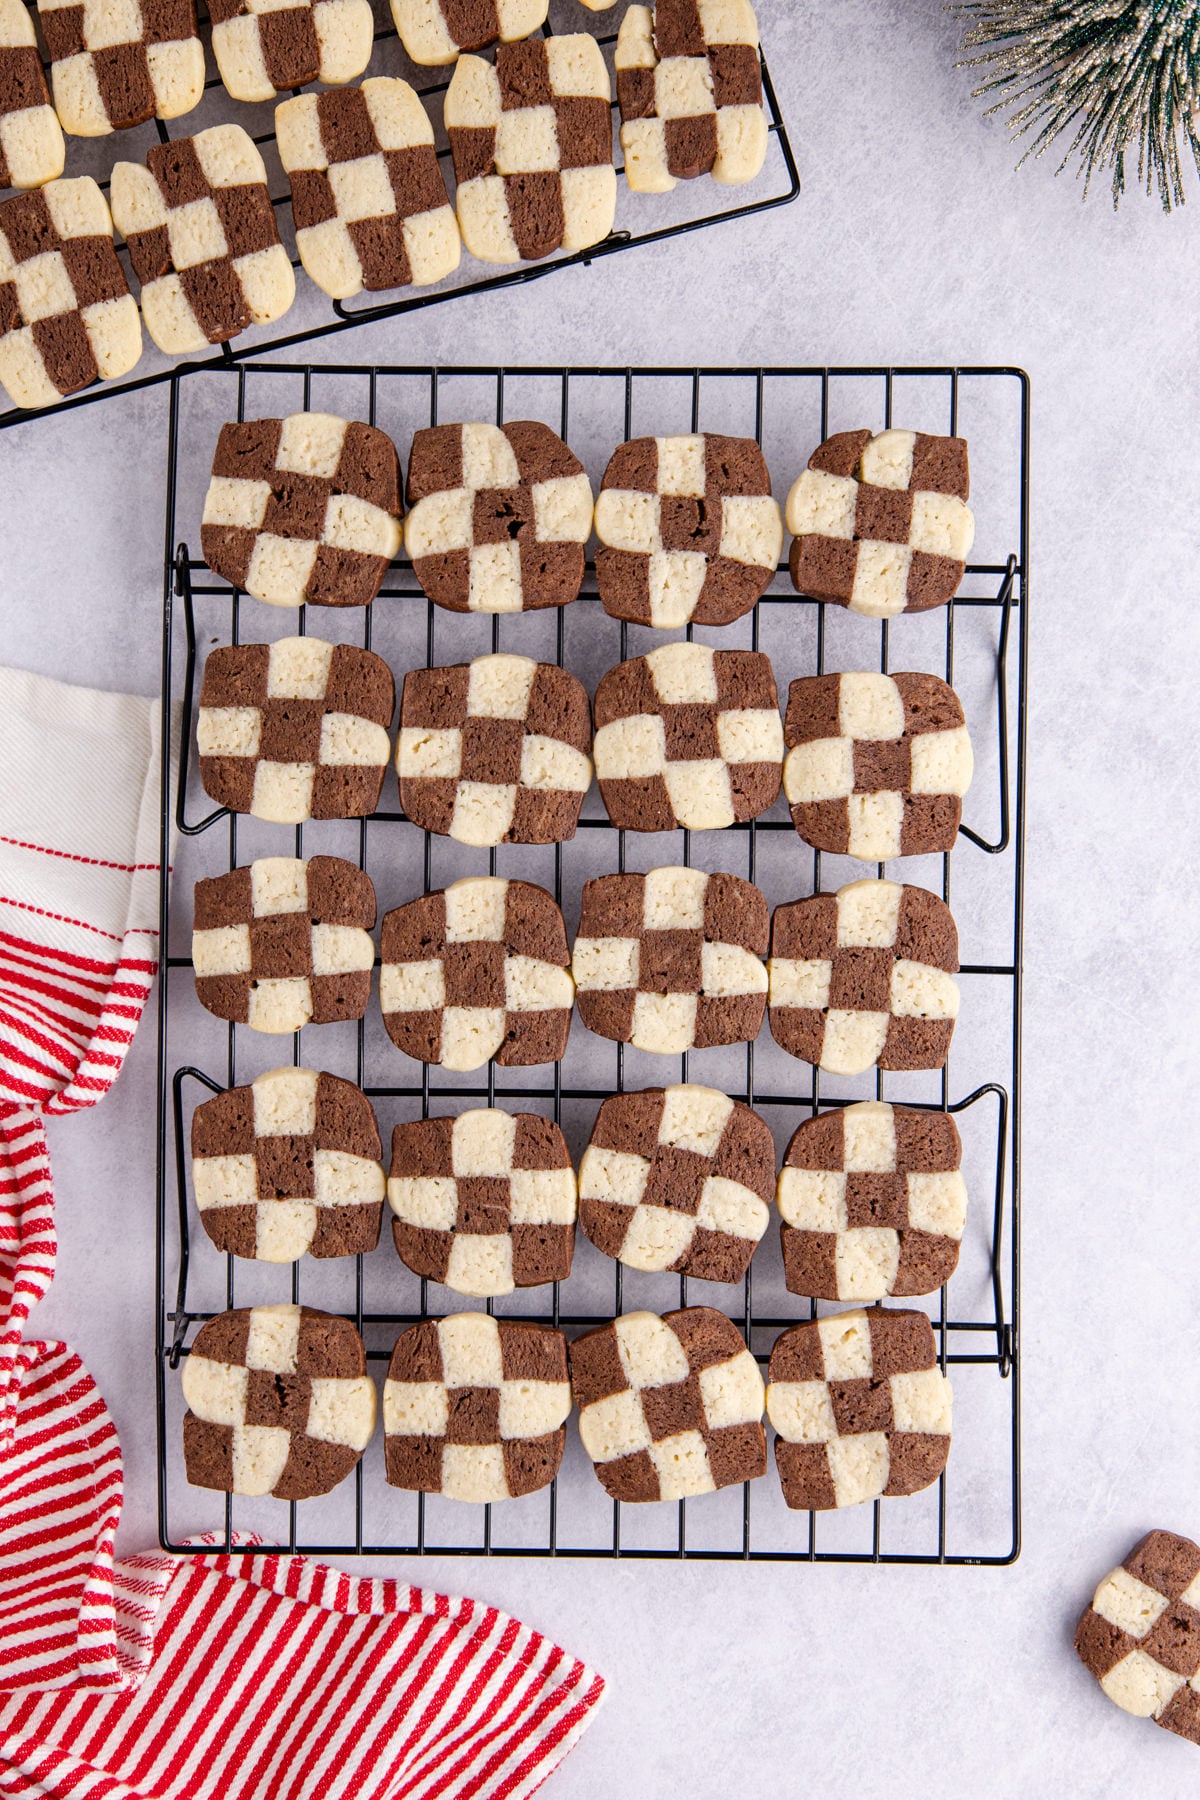
Step 10: Cool. Allow them to cool for about 10 minutes on the baking sheet, then transfer them to a wire rack. Enjoy one after they cool completely, dipped in Christmas fluff!
Recipe Tips
- Stack the dough gently: Be gentle when working with the dough logs so they keep their shape and don't crack or break.
- Slice with a sharp knife: Ensure your knife is sharp. A dull knife will squish the cookie dough rather than make clean and even slices.
- Don't overbake the cookies: Watch the oven and avoid overbaking the cookies. As soon as the edges are light brown and the center is no longer wet, they're done. Overbaking them will make them very dry.
- Storing: Store your checkerboard cookies in an airtight container and keep them on the counter or in the fridge for up to 5 days. You may freeze the cookies for up to 2 months or the unbaked dough logs for up to 3 months.
If you enjoy the buttery shortbread side of these checker cookies, you'll love toffee shortbread cookies.
Serving Suggestions
- Enjoy a scoop of ice cream on the side of one of these cookies or make a fun ice cream sandwich. Choose your favorite store-bought variety or try chocolate crunch ice cream or homemade dark chocolate ice cream.
- Spread some homemade rhubarb jam on your cookies for fruity flavor and fun texture.
- A hot beverage like a pumpkin spice latte is a great pairing.
- Enjoy an adult beverage like a salted nut roll shot with your cookie.
Checkerboard Cookies Recipe FAQs
If you don't allow the cookie dough to chill long enough, it will be warm, sticky, and difficult to work with. Both chilling steps are very important!
An uneven checkerboard pattern usually happens when the dough strips aren't cut evenly or when one dough is softer than the other. Make sure both doughs are well chilled and equally firm before assembling. Slice the logs into uniform strips and stack them gently without pressing too hard. Using a sharp knife also helps prevent dragging or squishing the dough. If the pattern starts to lose definition, chilling the assembled logs for an extra 10-15 minutes before slicing can make a big difference.
Checkerboard cookies are naturally lighter in color because they're made with a shortbread-style dough and baked just until set. If the cookies are firm around the edges and no longer look wet in the center, they're done; even if they're pale. Using too much flour when rolling or removing them too early can also contribute to a lighter color.
Absolutely! You can store the cookie dough logs in the refrigerator for up to 2-3 days before slicing and baking. Just make sure they are wrapped well to keep the dough from drying out. You can also freeze the cookie dough after shaping it into logs for up to 1 month. Allow it to thaw out and then slice for baking.
More Delicious Cookie Recipes
Do you like cookie recipes? Here are some recipes you may also like to try.


If you try this recipe and love it please leave a star rating in the recipe card below or even better, drop a review in the comment section. I always appreciate your feedback. Be sure to follow along with me on Facebook, Pinterest, and YouTube for more easy recipes!

Checkerboard Cookies
Ingredients
- 375 grams all-purpose flour about 3 cups
- 2 teaspoons baking powder
- ½ teaspoon sea salt
- 2 sticks butter unsalted and softened
- 200 grams granulated sugar about 1 cup
- 1 egg large
- 1 tablespoon pure vanilla extract
- 30 grams cocoa powder about ¼ cup
- 4 grams ground espresso about 2 tsp
EGG WASH:
- 1 egg
- 1 tablespoon water
Instructions
- In a medium bowl whisk together all-purpose flour, baking powder and sea salt, then set aside.
- Using a stand mixer cream together softened butter and sugar for about 3 minutes, scraping down the sides of the bowl as needed, on medium low speed.
- Add in the egg and vanilla and beat for about 30 seconds.
- Slowly add in flour mixture just until combined.
- Divide the dough in half, leaving one ball in the mixer bowl, then add cocoa powder and ground espresso and mix until fully incorporated (note: if there is any on the bottom of the mixer that is not blending add ½ teaspoon of milk or water and run again).
- Shape each dough ball into a log on top of plastic wrap then wrap loosely.
- Gently roll it back and forth until it is about 12 inches long, then flatten all 4 sides with a flat surface like a baking sheet to create a long rectangle (note: I like to do both at the same time, so they are the same sizes).
- Tighten the plastic wrap and chill for at least 30 minutes.
- Working with 1 at a time, slice each square log into three equal strips of dough, then lay each strip flat and cut into three more each, making nine total.
- Repeat for the other color, then alternate dough strips to create a checkered pattern (vanilla, chocolate, vanilla) using a pastry brush, lightly coat joining edges with the egg wash and carefully press the 3 together.
- Repeat once more with the same pattern, then alternate chocolate, vanilla chocolate.
- Once you have those 3 done, brush them with the egg wash and stack them on top to create a square.
- Repeat for the other 9 strips. Cover in plastic wrap and chill again for at least another 30 minutes.
- Preheat oven to 350F degrees and line a cookie sheet with parchment paper.
- Remove the dough from the fridge and cut ½ inch wide cookies with an inch or so space between; they will puff a little, but they will not spread too much.
- Bake cookies for about 8 minutes, the edges should just start to be turn gold. Allow them to cool for 10 minutes on the cookie sheet and then transfer to a wire rack.
Notes
- Slice the checkerboard logs with a sharp knife to ensure that the cookies have clean edges.
- Chill the dough both times and long enough so that the dough is firm and not sticky.
- Avoid overbaking the chocolate checkerboard cookies so they aren't dry and crumbly.


Leave a Reply