
This Potato Stacks recipe gives you golden, crispy edges, tender, buttery centers, and plenty of garlic-Parmesan flavor. Thinly sliced russet potatoes are layered into a muffin tin and baked until golden, making an impressive side dish that is surprisingly easy, taking just 15 minutes of hands-on time to prepare.
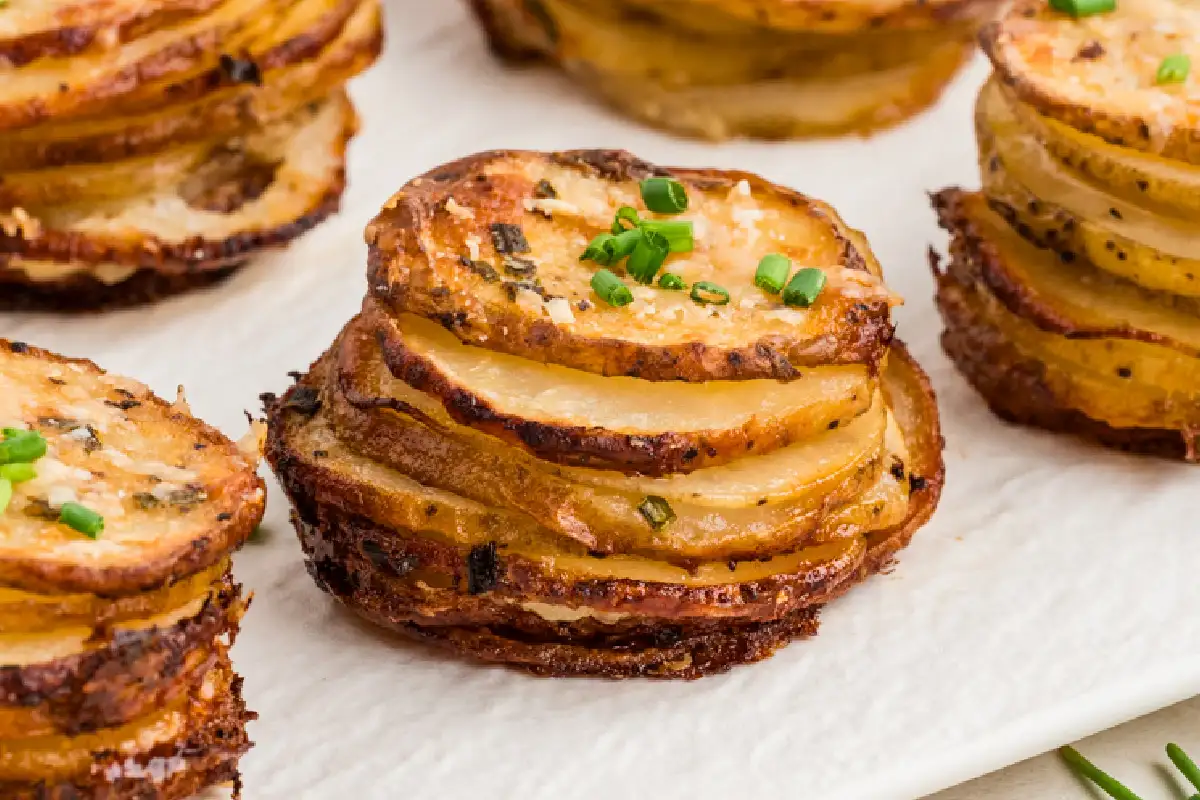
Potato Stacks Recipe at a Glance
- 🧄 Flavor & Texture: Buttery, garlicky, and cheesy, with crispy edges and tender centers.
- 🛒 Main Ingredients: Russet potatoes, butter, heavy cream, Parmesan, garlic, and chives.
- ⏱️ Total Time: 1 hour 8 minutes (15 minutes of prep and 53 minutes of baking).
- 🍴 Servings: 12 potato stacks.
- 🥗 Dietary Info: Gluten-free as written; contains dairy. Vegetarian if made with vegetarian Parmesan-style cheese.
- 🍽️ Best Served With: Roast beef, chicken, pork chops, ham, or holiday dinners.
- 🧊 Make Ahead: Yes, assemble a few hours ahead.
- ❤️ Why You Will Love It: Elegant individual portions that look impressive on any table.
Summarize and Save This Content On
These little muffin tin potato stacks look fancy enough for Christmas or Thanksgiving dinner, but they are just as welcome beside an everyday roast.
My grandson and granddaughter had so much fun stacking these potato slices in the muffin tin, counting them as they went, and counting the layers again at dinner. They asked for days when we could make them again, and they are now as big a family favorite as our air fryer baby potatoes.
Why You Will Love This Recipe
- Perfect for Holidays and Weeknights: The muffin tin creates neat, individual portions that look impressive on a holiday table but are easy enough for everyday dinners.
- Crispy edges with tender centers: Russet potatoes plus the covered-then-uncovered bake give you golden, crisp edges while the centers stay soft and buttery.
- Only 15 minutes of hands-on work: Most of the time is hands-off baking, so these are easy to make even on a busy day.
Jump to:
- Potato Stacks Recipe at a Glance
- Why You Will Love This Recipe
- How We Tested This Recipe For Potato Stacks
- Ingredients
- Variations
- How To Make Potato Stacks in a Muffin Tin
- Expert Tips
- How to Store Potato Stacks
- Potato Stacks FAQs
- What to Serve with Potato Stacks
- More Potato Side Dish Recipes
- Crispy Potato Stacks
How We Tested This Recipe For Potato Stacks
| What We Tested | What Worked Best | Why |
|---|---|---|
| Potato Variety | Russet potatoes | Russets gave us crispier edges and fluffier centers than Yukon Golds. |
| Slice Thickness | ⅛-inch slices | Thinner slices dried out and thicker slices were too soft. |
| Butter and Heavy Cream | Using both butter and heavy cream | Butter adds rich flavor and helps the edges brown. Heavy cream keeps the centers tender. Together they make stacks that are crisp outside and creamy inside, never greasy or dry. |
| Baking Time | Covered for 30 minutes, then uncovered for 18-23 minutes at 400°F | This produced tender centers and golden edges. |
| Pan | Muffin tin | The muffin tin made neater stacks with crispier sides. Baking-sheet stacks were less uniform and more likely to slide apart. |
Russets were the clear winner here. For another recipe that shows off their fluffy texture, try our cheesy twice-baked potato boats.
Ingredients
You only need potatoes, a few dairy ingredients, and simple seasonings. If you enjoy crispy potato edges, you will also like our crispy smashed red potatoes.
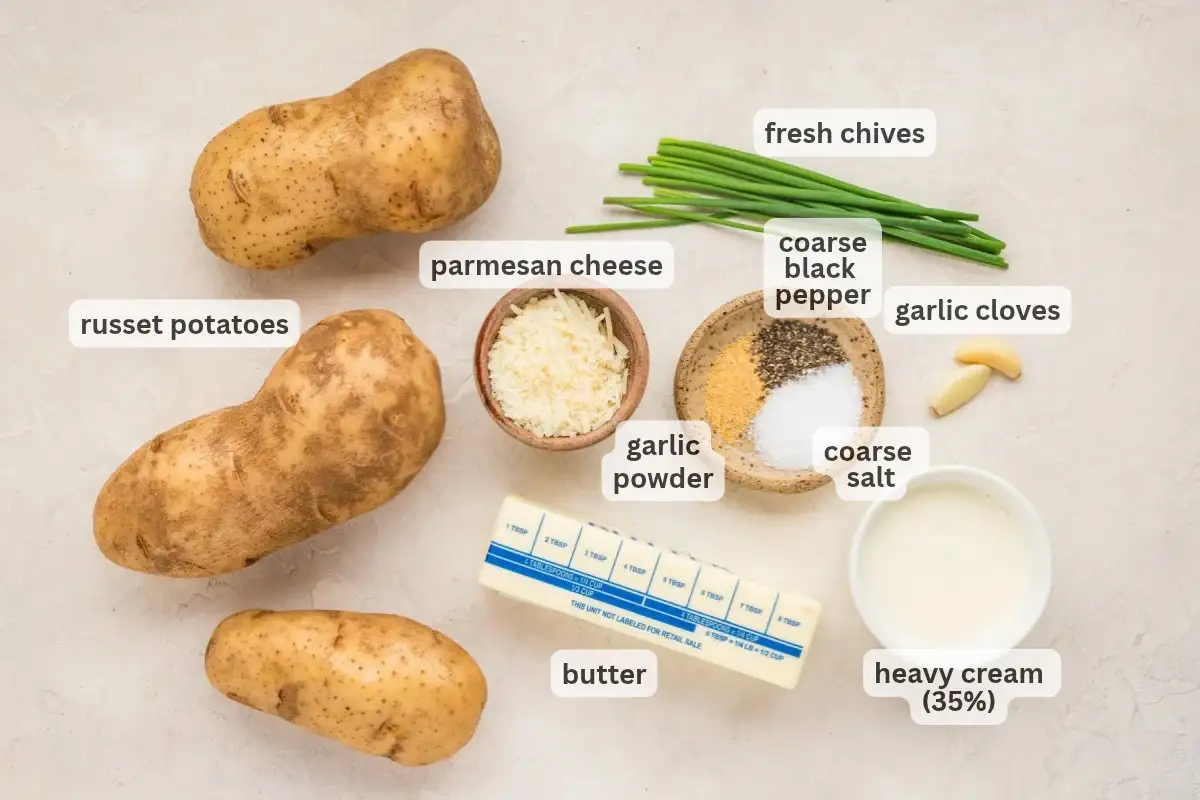
- Russet Potatoes: Their starchy texture creates fluffy centers and crisp, golden edges. You can substitute Yukon Golds for creamier centers and slightly less crispy edges.
- Salted Butter and Heavy Cream: Add richness and help keep the layers tender as the edges brown.
- Garlic and Garlic Powder: Season the layers with savory garlic flavor.
- Fresh Chives: Add a mild onion note and fresh finish.
- Freshly Shredded Parmesan: Adds salty, nutty flavor and browns around the edges.
See the recipe card below for exact ingredient amounts, nutritional information, and detailed instructions.
Variations
- Extra Cheesy: Increase the Parmesan to ½ cup or substitute some freshly shredded sharp cheddar or Gruyère. For more cheesy Parmesan potatoes, try our baked Parmesan potato halves.
- Herbs and Spice: Swap chives for finely chopped rosemary, or add a pinch of smoked paprika, cayenne, or red pepper flakes.
- Sweet Potato Stacks: Use thinly sliced sweet potatoes, reduce the cream to 1 tablespoon and the salt to 1 teaspoon, and try rosemary or thyme. Sweet potatoes brown faster, so start checking earlier.
- Air Fryer Potato Stacks: We often make these at home in the air fryer. Arrange the stacks in greased, air-fryer-safe muffin cups and air fry at 370°F for 20 to 25 minutes, until tender and golden. Start checking a few minutes early, as air fryers vary.
How To Make Potato Stacks in a Muffin Tin
These potato stacks take four easy steps: season, stack, bake, and serve. Nothing here is tricky, because making potato stacks in muffin tin cups does the shaping for you. For another quick potato side, try our sliced potatoes in the air fryer.
Preheat the oven and generously grease a standard 12-cup metal muffin tin. Choose potatoes narrow enough to fit inside the cups.
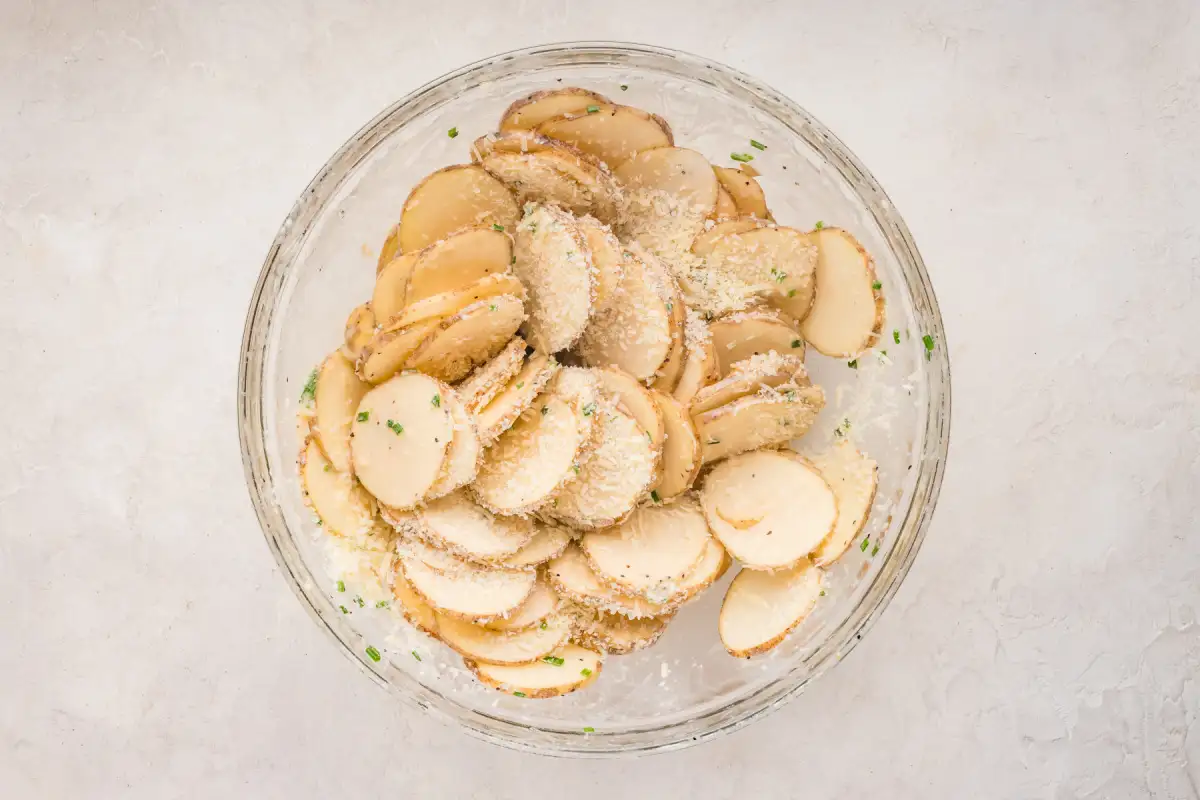
Step 1: Prepare and Season the Potatoes. Slice the potatoes ⅛ inch thick so they cook evenly and stack neatly. Whisk the melted butter, chives, minced garlic, warmed cream, salt, pepper, and garlic powder together, then toss with the potato slices, separating any that stick. Add the Parmesan last so it spreads through the layers instead of clumping.
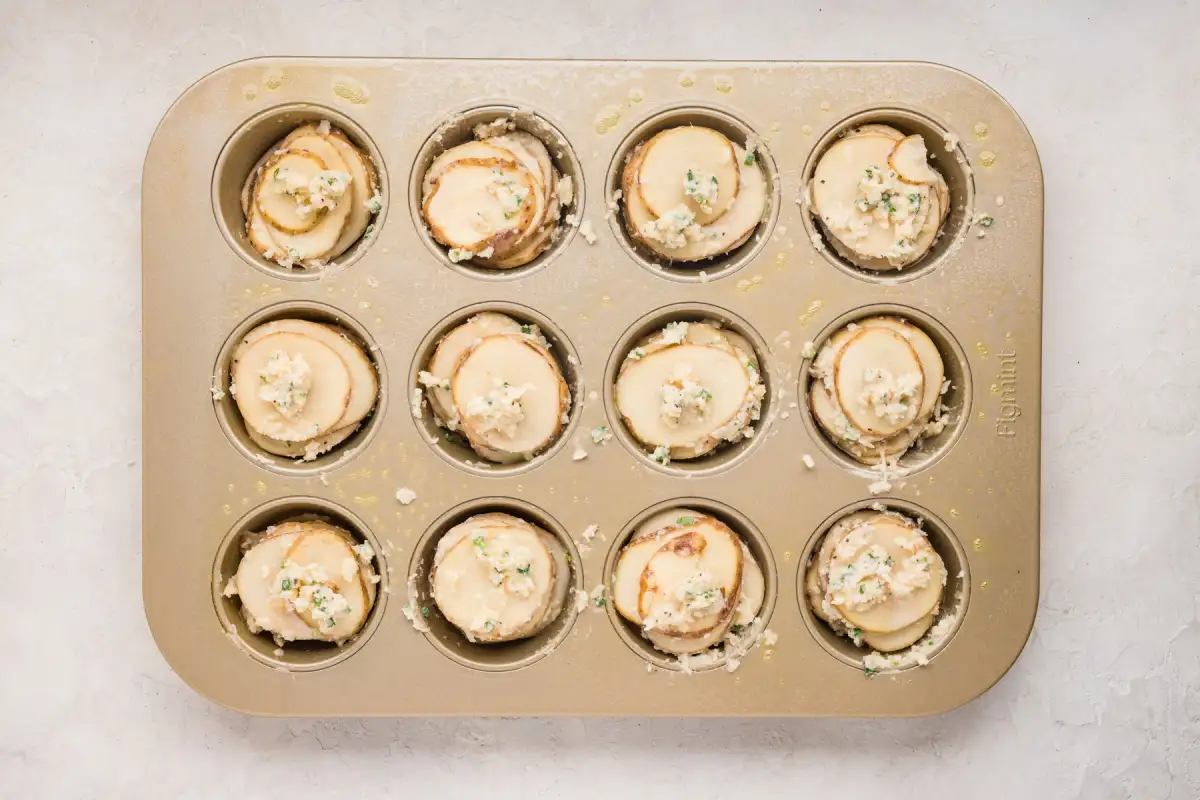
Step 2: Stack the Potatoes. Divide the seasoned slices among the muffin cups, filling each about ¾ to ⅞ full. Keep the stacks level rather than packing them tightly, because overfilled cups make the edges harder to crisp and the stacks more likely to stick. Sprinkle any remaining Parmesan from the bowl over the tops.
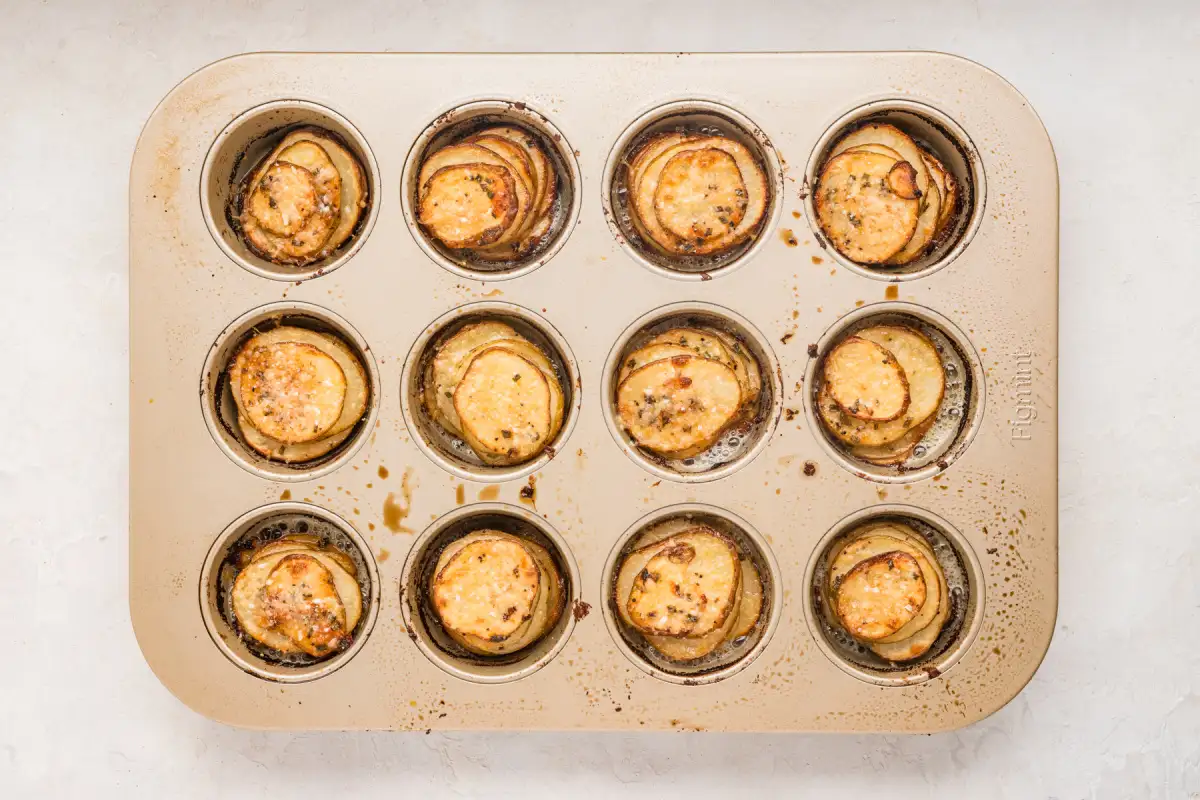
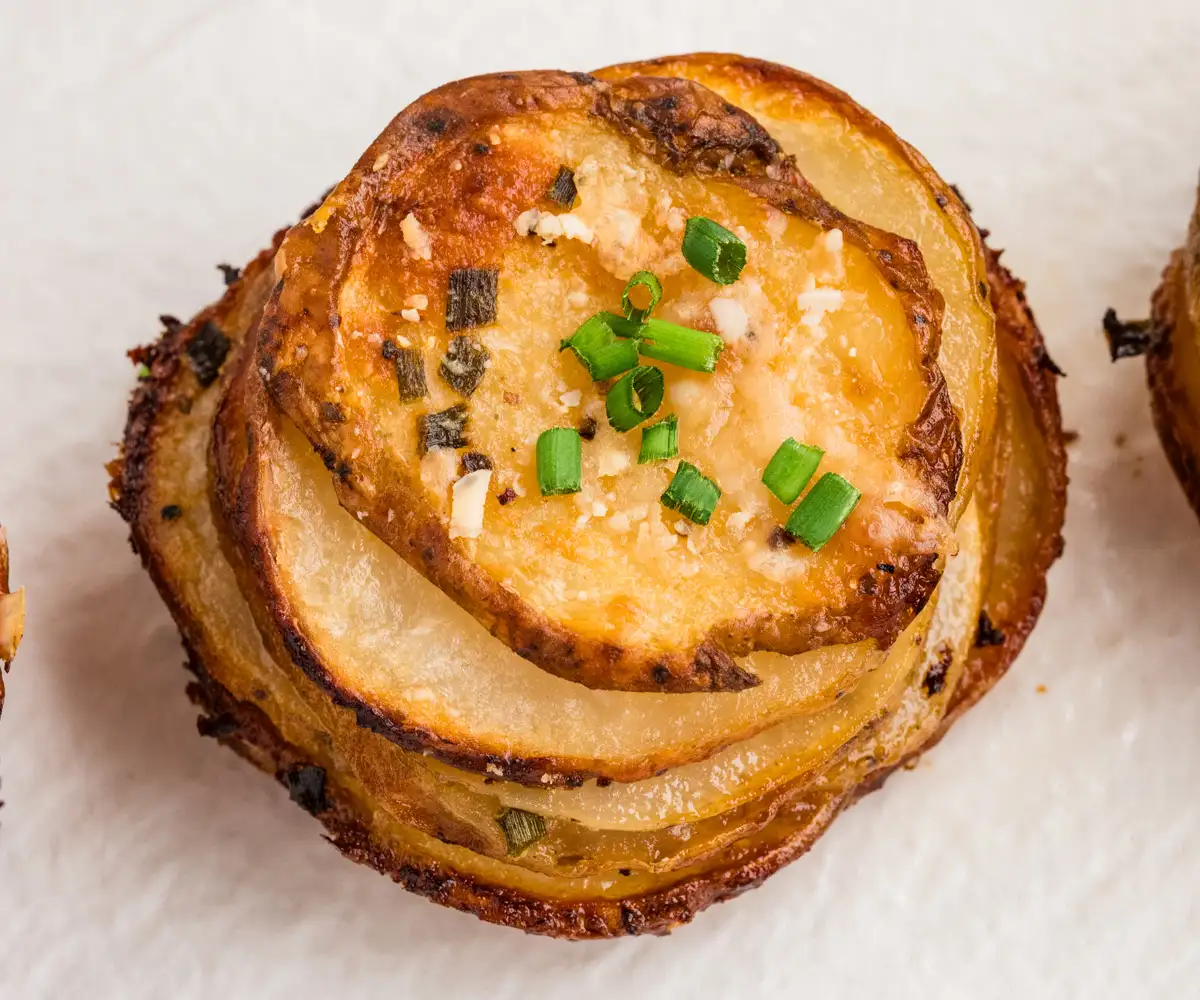
Step 3: Bake Until Tender and Golden. Set the muffin tin on a baking sheet and cover with foil greased underneath. Bake for 30 minutes to soften the centers, then uncover and bake another 18-23 minutes until the edges are deep golden and a toothpick slides easily through the center. Covering keeps the centers tender, while uncovering crisps the edges. For extra color, broil for 1-2 minutes, watching closely.
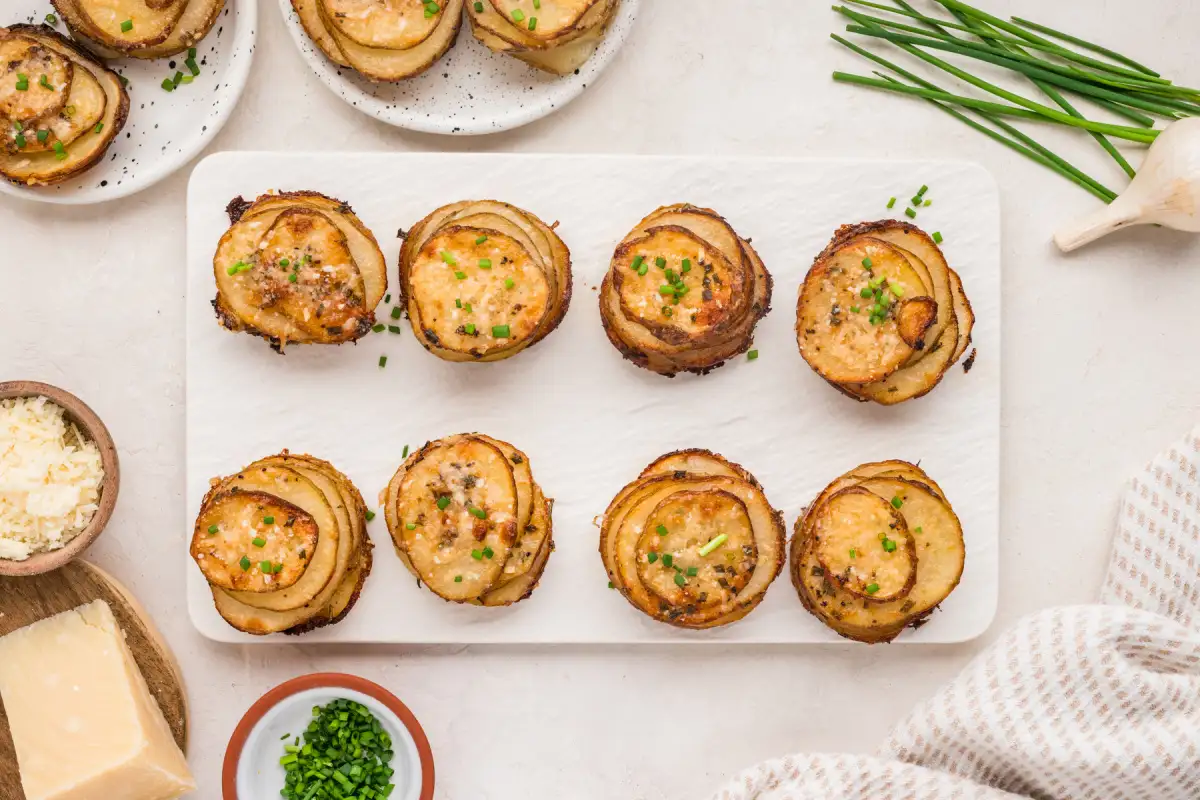
Step 4: Loosen and Serve. While the stacks are still hot, run a butter knife around each cup so the cheesy edges don't stick, then carefully lift them out. Garnish with fresh chives and serve right away for the crispiest edges with our spatchcock chicken.
Expert Tips
- Slice Thickness: Slice the potatoes ⅛ inch thick. Thinner slices dry out and fall apart, while thicker slices stay too soft in the center and don't crisp. A mandoline slicer gives the most consistent results.
- Work Promptly: Assemble soon after slicing to prevent discoloration.
- Check Your Salt: We used coarse kosher salt. If you only have fine salt, start with about half the amount.
If you love crispy-edged potato sides like this, you may also enjoy our mashed potato fries.
How to Store Potato Stacks
- Make Ahead: Assemble a few hours ahead, cover tightly, and refrigerate. Bake when ready, adding a little extra time if needed. It is a handy side for busy dinners with our stove-top pot roast.
- Refrigerator: Store cooled stacks in an airtight container for 3 to 4 days. Reheat in a 375°F oven for 10 to 15 minutes or a 350°F air fryer for 5 to 8 minutes.
- Freezer: Freeze fully baked, cooled stacks in a single layer on a baking sheet until solid, then transfer to a freezer bag or airtight container for up to 1 month. Reheat from frozen in a 375°F oven for 15 to 20 minutes or a 350°F air fryer for 8 to 12 minutes. They will be less crisp than fresh, and freezing unbaked stacks is not recommended.
Potato Stacks FAQs
They may need more uncovered baking time, or the muffin cups may be overfilled. Continue baking until the edges are golden, and the centers are tender.
This usually happens when the slices are too thick or uneven, the muffin cups are overfilled, or the stacks cool in the tin and stick. Follow the slice thickness and fill level in the recipe, and run a knife around each cup and lift the stacks out right after baking.
No. Peeling is optional. When we tested, everyone preferred the stacks with the skin on because russet skins get crisp and add texture to the edges. Just scrub the potatoes well. If you prefer a softer texture or a cleaner look, you can peel them, as both ways work.
They pair well with roasts and other hearty mains, such as our poor man's prime rib. See the serving ideas below for more.
Yes. Arrange the potato slices into small stacks on a greased, foil-lined baking sheet and secure each with a toothpick. For the neatest, crispiest results, though, we recommend the potato stacks muffin tin method.
What to Serve with Potato Stacks
- Special Occasions: Serve with our oven-roasted turkey for Thanksgiving, Christmas or Easter dinner, or pair with glazed ham.
- Everyday Dinners: Serve with ranch chicken, pork chops, or meatloaf for an easy weeknight meal.
- Fresh Greens: Add a green salad or crock pot green beans to balance the rich, buttery potatoes.
More Potato Side Dish Recipes
For more comforting potato ideas, explore our potato recipes collection, including crispy, cheesy, baked, and air-fried favorites.




If you try this recipe and love it please leave a star rating in the recipe card below or even better, drop a review in the comment section. I always appreciate your feedback. Be sure to follow along with me on Facebook, Pinterest, and YouTube for more easy recipes!
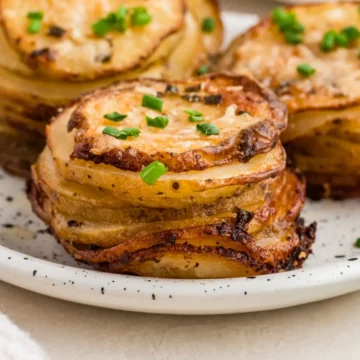
Crispy Potato Stacks
Ingredients
- 1¾ pounds medium russet potatoes (about 4 to 5), sliced ⅛ inch thick
- 6 tablespoons salted butter melted
- 3 tablespoons fresh chives chopped, plus more for garnish
- 2 cloves garlic very finely minced
- 2 tablespoons heavy cream warmed
- 1½ teaspoons coarse kosher sea salt or ¾ teaspoon fine salt
- ¼ teaspoon coarsely ground black pepper
- ¼ teaspoon garlic powder
- ⅓ cup freshly shredded Parmesan cheese
- cooking spray for greasing
Instructions
- Prepare and Season the Potatoes. Preheat the oven to 400°F. Generously grease a standard 12-cup metal muffin tin with cooking spray. In a large bowl, whisk together the melted butter, chives, finely minced garlic, warmed heavy cream, salt, pepper, and garlic powder. Add the ⅛-inch-thick potato slices, separating any that stick together, and toss until evenly coated. Add the Parmesan and toss again.
- Stack the Potatoes. Divide the seasoned potato slices evenly among the muffin cups, filling each about ¾ to ⅞ full. Sprinkle any remaining Parmesan from the bowl over the stacks.
- Bake Until Golden and Crispy. Place the muffin tin on a baking sheet and cover with foil sprayed on the underside with cooking spray. Bake for 30 minutes. Remove the foil and bake for another 18 to 23 minutes, until the edges are golden and crispy and a toothpick slides easily through the centers.
- Remove and Serve. Immediately run a butter knife around each muffin cup and carefully lift out the potato stacks. Transfer to a serving dish and garnish with additional fresh chives, if desired.
Notes
- Potatoes: Use medium russets (about 1¾ pounds) sliced evenly to ⅛ inch. A mandoline works best. Russets gave crispier edges than Yukon Golds.
- Salt: We used 365 by Whole Foods Market coarse kosher sea salt. If using fine salt, start with about half the amount.
- Parmesan: Freshly shredded works best. Increase to ½ cup for extra cheesy stacks.
- Extra Crispy: If the potatoes are tender but pale, sprinkle with Parmesan and broil for 1 to 2 minutes, watching carefully.
- Air Fryer: Arrange in greased, air-fryer-safe muffin cups and air fry at 370°F for 20 to 25 minutes, until tender and golden.


Leave a Reply