
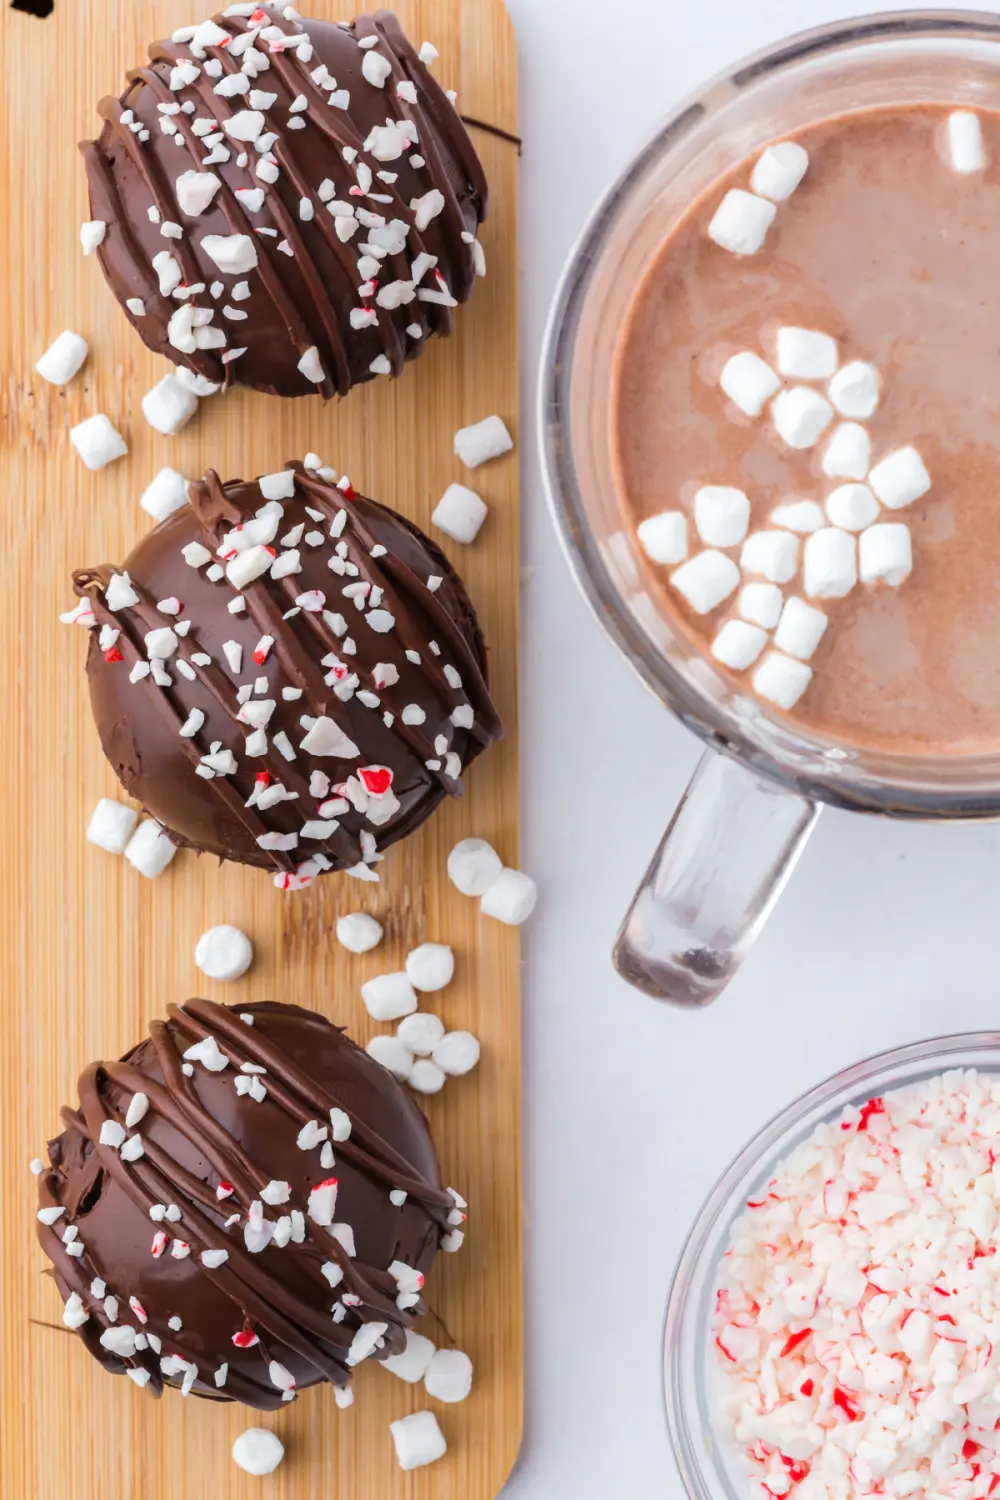
This Hot Chocolate Bombs Recipe turns melted chocolate, hot cocoa mix, and mini marshmallows into chocolate spheres that burst open in a mug of steaming milk. All you need is a 2-inch silicone sphere mold and about 25 minutes. They're a fun holiday project to make with the kids and an easy homemade gift, too.
Hot Chocolate bombs Recipe at a Glance
- 🧄 Flavor & Texture: Rich, creamy hot chocolate with a burst of melty marshmallows. The shell melts into the milk for an extra-chocolatey cup.
- 🛒 Main Ingredients: 65% chocolate, hot cocoa mix, and dehydrated marshmallows
- ⏱️ Total Time: 25 minutes
- 🍴 Servings: Makes 6 hot cocoa bombs
- 🥗 Dietary Info: Vegetarian, contains dairy
- 🍚 Best Served With: Hot chocolate truffles, whipped cream, a candy cane stirrer, or hot chocolate dip.
- 🧊 Make Ahead?: Yes, make them in advance and store in the freezer for up to 2 months
- ❤️ Why You Will Love It: A fun and unique way to enjoy hot chocolate! Plus, they make a fun holiday gift or addition to a hot cocoa bar.
Summarize and Save This Content On
We first made hot chocolate bombs back in 2020, when everyone was dropping them into mugs online. We'll admit the first batch was a mess. Some shells cracked, some wouldn't seal, and a few left more chocolate on our fingers than in the mold.
After more batches than I can count, we worked out what makes them reliable. Two thin coats of chocolate beat one thick one, and a warm plate seals the halves better than anything else.
Now they're one of our favorite holiday traditions. We handle the melted chocolate, and the grandkids take over filling the shells and decorating. Every year we pack a few dozen into boxes for friends and family, and they're always the gift people ask about first, along with a plate of our hot chocolate cookies or a tin of chocolate pistachio honeycomb.
Why This Recipe Works
- Two thin coats make a sturdy shell. A second layer of chocolate gives each half enough strength to hold its filling without cracking. The shell is still thin enough to melt fast in hot milk.
- Good chocolate melts better. Chocolate with at least 65% cocoa and real cocoa butter melts smoothly and tastes richer than candy melts.
- A warm plate gives a clean seal. Melting the rim of each half on a warm plate fuses the two halves without messy seams or fingerprints.
- They keep well. Store them for up to two weeks at room temperature or two months in the freezer. That makes them easy to make ahead for gifts or holiday get-togethers.
If you love chocolate, try our layered candy bark, stuffed chocolate cookie cups, and chocolate peanut butter cheesecake next.
Jump to:
- Hot Chocolate bombs Recipe at a Glance
- Why This Recipe Works
- Ingredients
- Hot Cocoa Bombs Variations
- How to Make Hot Chocolate Bombs
- Expert Tips
- Homemade Hot Chocolate bombs Recipe FAQs
- Storing & Make ahead
- How to Make Boozy Hot Chocolate Bombs (Adults Only)
- making Hot cocoa bombs Video
- More Hot Chocolate Recipes
- Hot Chocolate Bombs Recipe
Ingredients
All you need to make basic hot chocolate bombs are two simple ingredients.
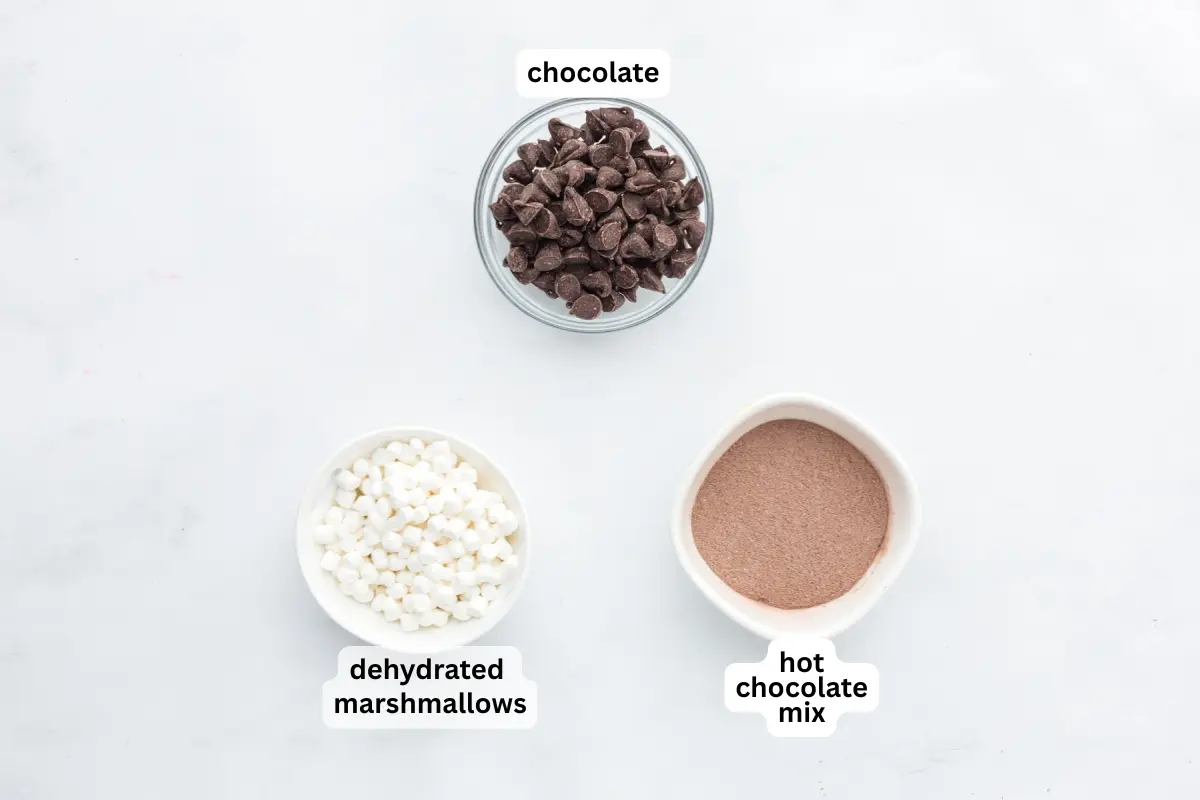
- Chocolate: We like dark chocolate with at least 65% cocoa, because it melts smoothly and makes a sturdy shell. You don't need fancy chocolate, but skip the cheapest brands and choose something in the middle range. Chips will work too, though they're made to hold their shape, so they don't melt quite as smoothly.
- Hot cocoa mix: Use your favorite store-bought or homemade mix.
- Marshmallows: Mini marshmallows or dehydrated marshmallow bits fit best inside the shell. Feel free to add as many as you like as long as they will fit.
- Milk: Whole milk makes the creamiest hot chocolate, but any milk works, including dairy-free options. Heat it until it's steaming so the shell melts open.
Special Equipment Needed: A sphere silicone hot chocolate bomb mold is key to making these hot chocolate drink bombs, and you can find them at baking stores or online. For this demonstration, I used a hot cocoa bomb mold exactly like this large 6 Cavity Sphere Silicone Mold, and it worked splendidly! Check the FAQs below for how to make them without a mold!
See the recipe card for the full list of ingredients with quantities.
Hot Cocoa Bombs Variations
- Chocolate Swaps: Milk chocolate makes a sweeter cup that kids love. White chocolate is milder but trickier to work with, so buy a good-quality one. Candy melts are easy to handle for beginners but taste a little waxy in the mug, so they aren't my favorite.
- Hot Cocoa Mix Swaps: Experiment with strawberry, salted caramel, or peppermint cocoa for an easy flavor change. Or use a mix that already has marshmallows, so you don't have to buy them separately.
- Seasonal Colors: Use white chocolate and add a few drops of food coloring to make colored hot cocoa bombs for each season. This Christmas hot chocolate is another fun way to enjoy hot cocoa during the holidays.
- Love Coffee? Add a spoonful of instant coffee along with the hot cocoa mix.
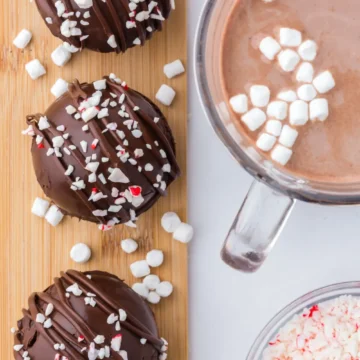
- Decorate the Outside: Add sea salt, nuts, crushed peppermints, or sprinkles to the outside of your chocolate bombs. Drizzle melted chocolate over the bomb first, then sprinkle the toppings on while the drizzle is still wet. You can also add them to the sealed seam as long as you add it right after sealing while the chocolate is still wet.
- Add Different Flavors: Add a drop of flavor extracts like almond, vanilla, orange, peppermint, and banana to the inside of the chocolate bombs to change the flavor.
For more ways to enjoy hot cocoa, try our French hot chocolate and cinnamon hot chocolate!
How to Make Hot Chocolate Bombs
You can make your own homemade chocolate bombs in just 15 minutes! Before getting started, read through the instructions a couple of times and have everything ready and close to you so your chocolate doesn't harden too quickly.
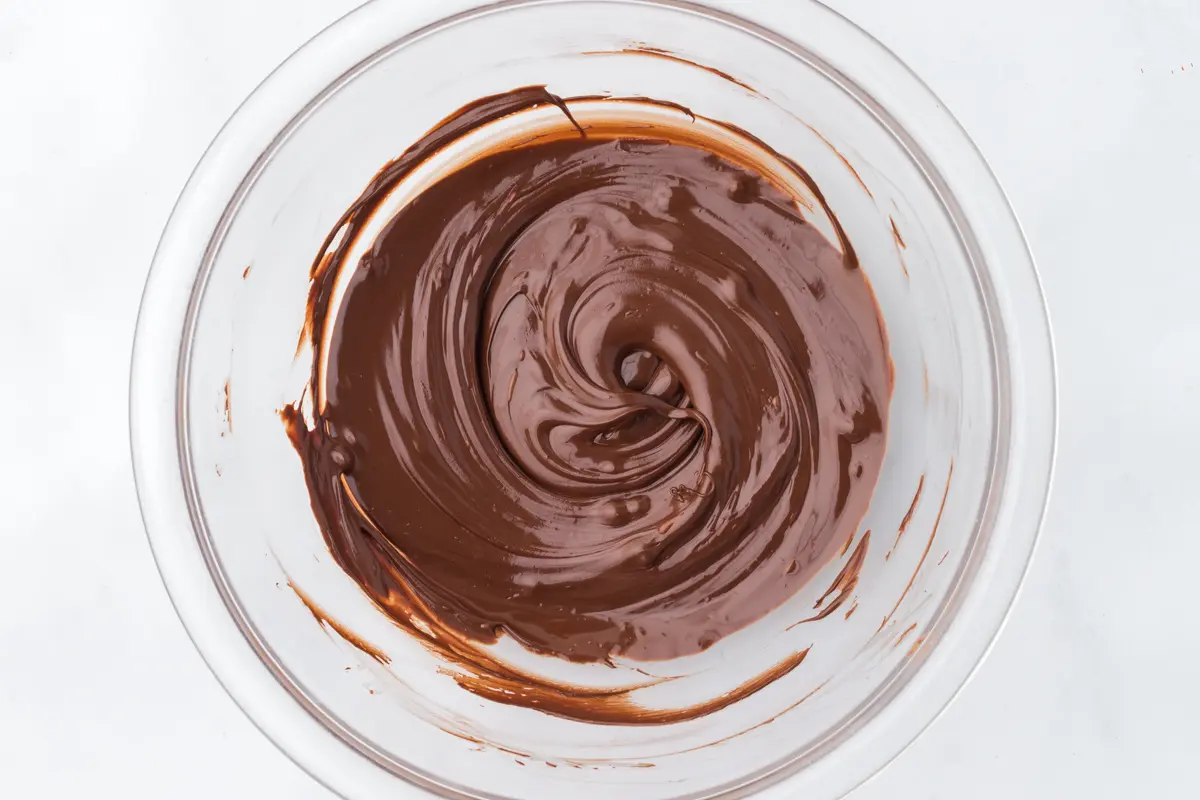
Step 1: Prep the Chocolate. Place the chocolate in a medium-sized microwave-safe bowl and microwave for 30 seconds. Remove and stir the chocolate for at least one minute. The residual heat from the warm chocolate will melt most of the other chocolate in the bowl. If not, microwave again in 15-second intervals, stirring between each one.
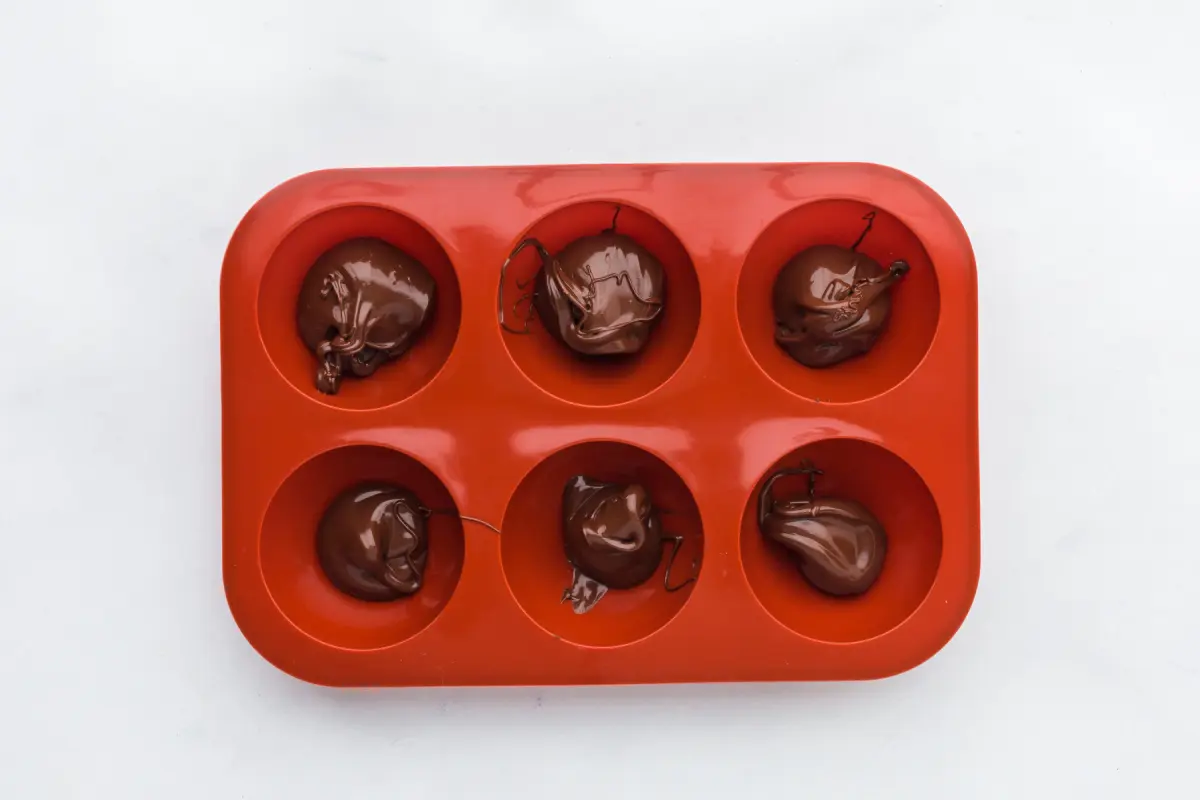
Step 2: Make the Chocolate Shell. Pour approximately one teaspoon of melted chocolate into the mold and use the back of a spoon to cover the entire half circle with chocolate. Make sure the chocolate goes all the way up the sides of the mold. Place in the fridge or freezer to harden. The bark hardens fairly quickly, so it should be ready for the second coat in less than five minutes.
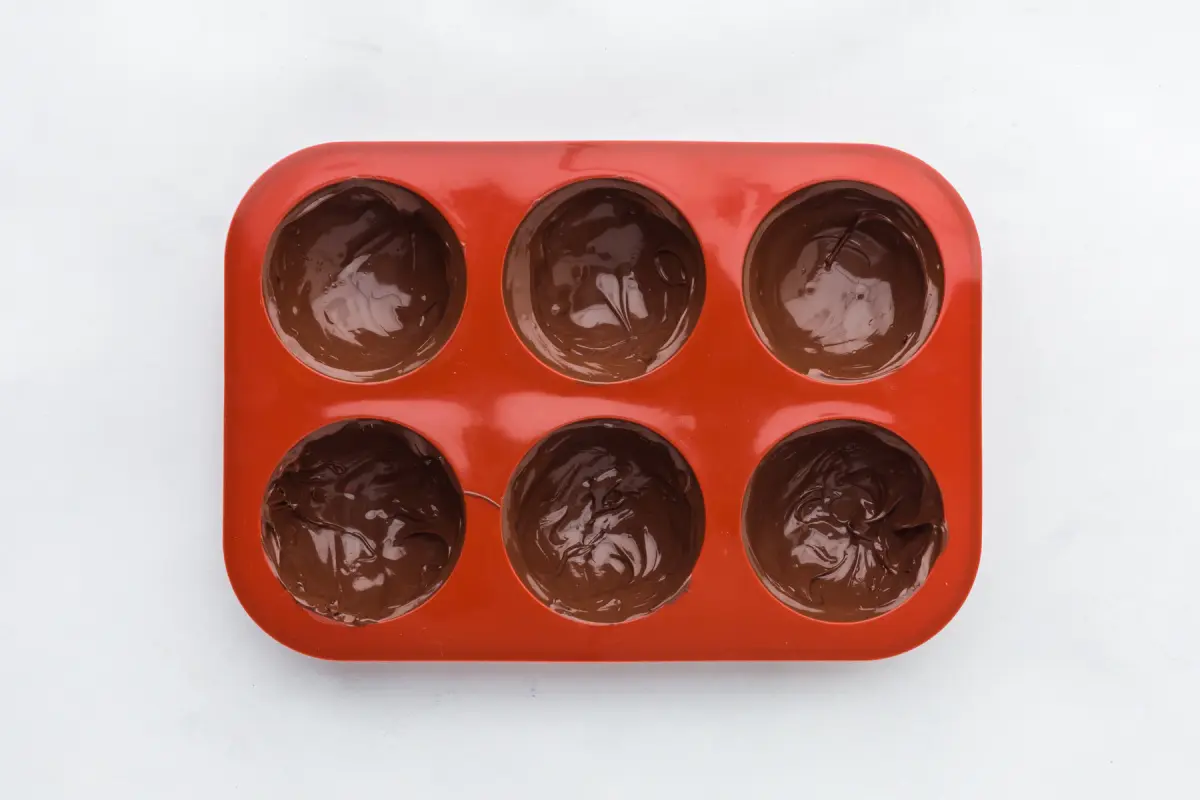
Step 3: Add a Second Layer. Remove and add a second layer of chocolate and place back in the fridge or freezer.
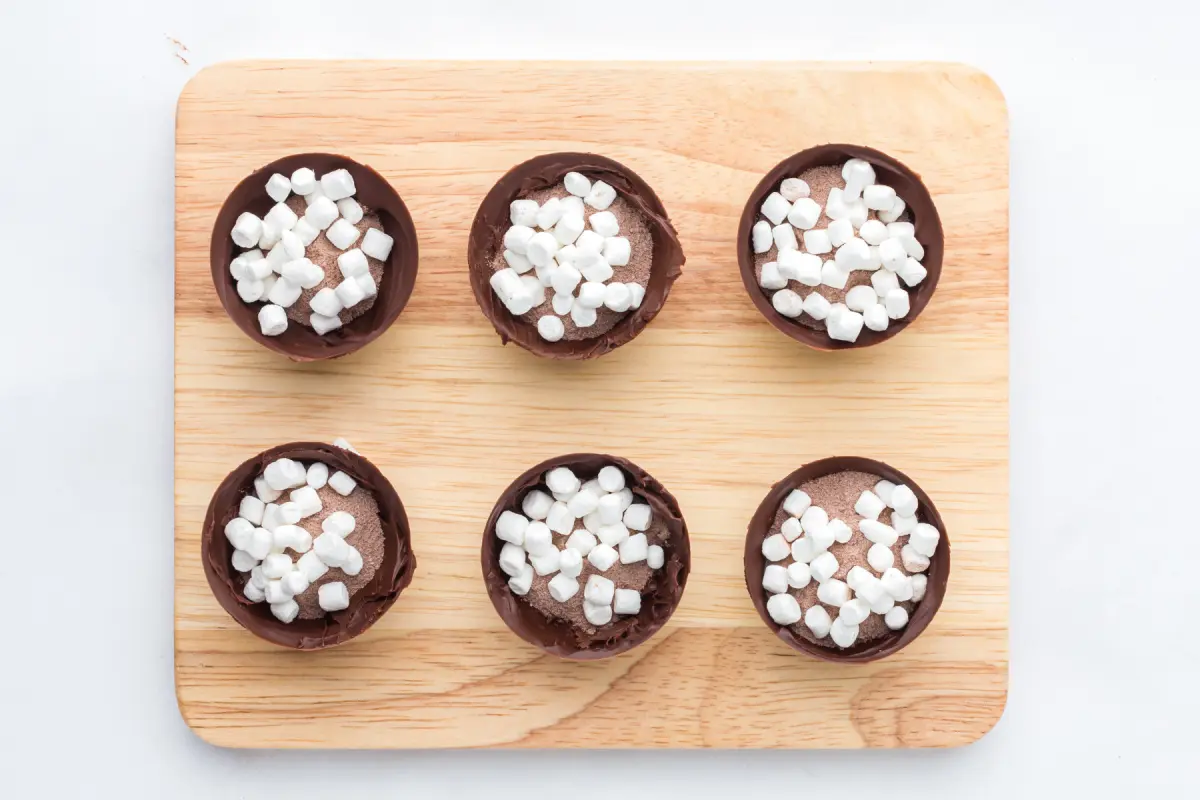
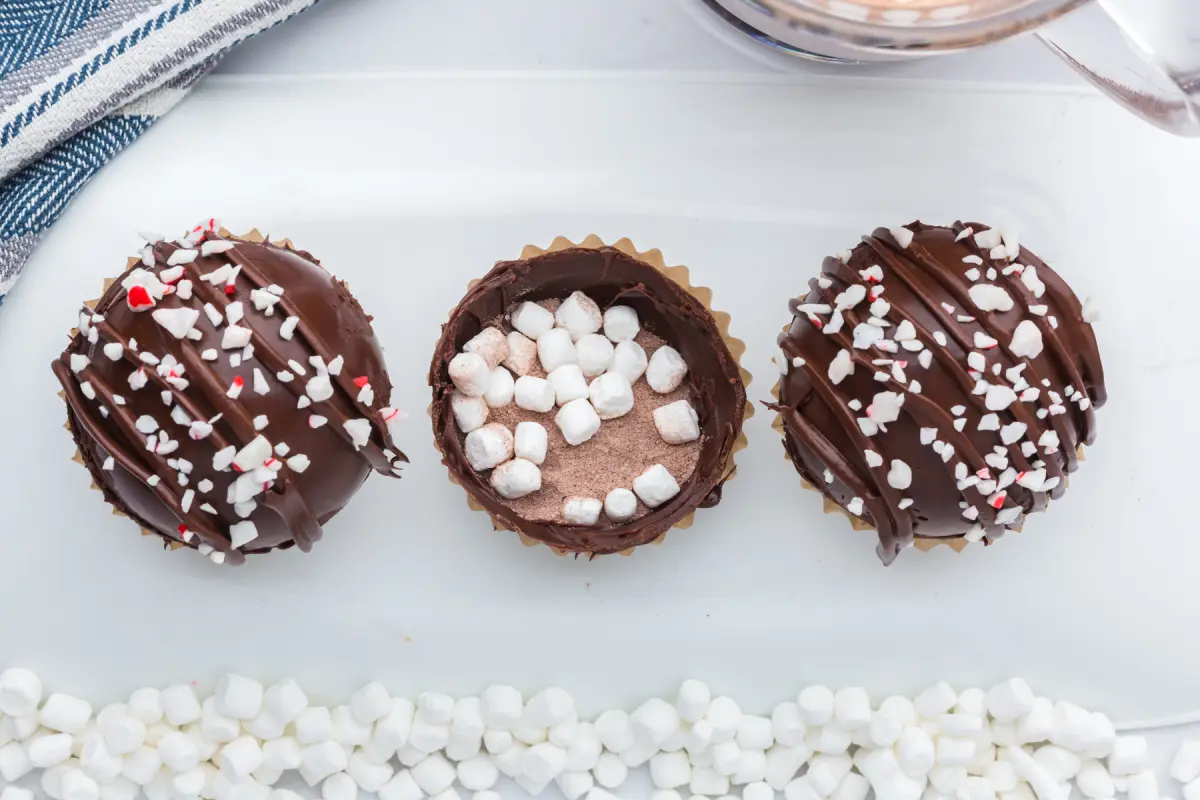
Step 4: Fill the Molds. Once the shell is fully hardened, place a teaspoon (or two) of hot cocoa mix on each side of the mold and any additional flavors you want to add.
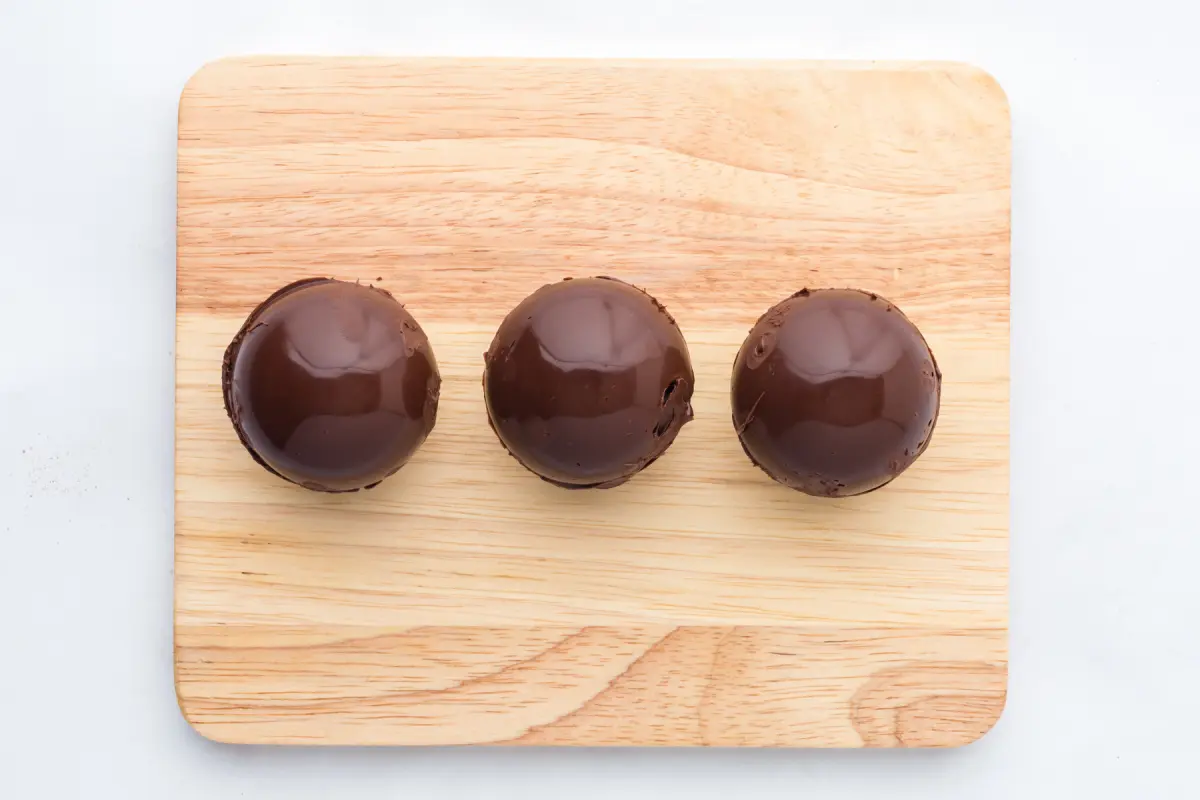
Step 5: Seal the Chocolate Bombs. Run a small plate under hot water for a minute or two, then dry it well. It should feel very warm but not too hot to hold. Pick up an empty half-shell and set its rim on the plate for 2 to 3 seconds, just until the edge melts. Press it gently onto a filled half and line up the edges. If you see any gaps, brush or spoon a little melted chocolate over the seam. Let the bombs set for about 5 minutes in the fridge before handling. Rewarm the plate every few bombs as it cools, and wipe off any chocolate that builds up on it.
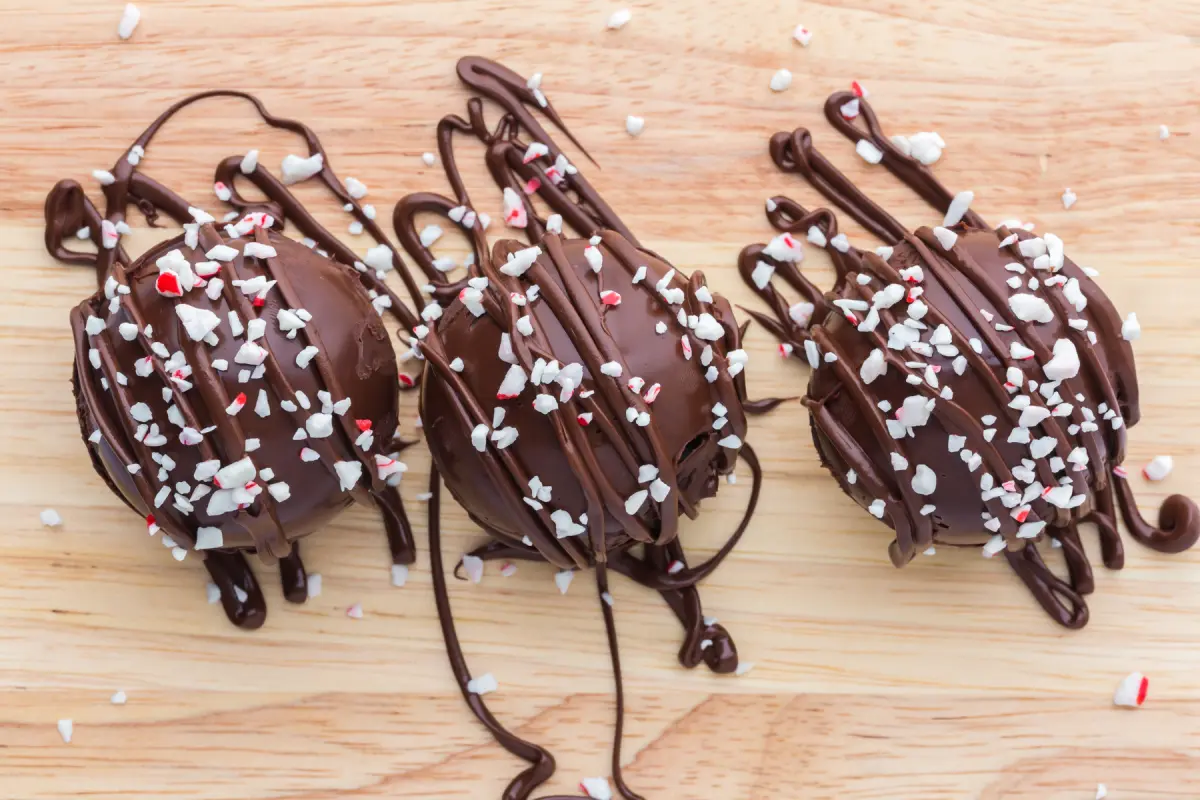
Step 6: Decorate. Once the chocolate hardens, they're ready to decorate, or you can go straight to serving them. Lay the bombs on a tray or piece of parchment and drizzle with extra chocolate. Sprinkle any toppings you want to add over the chocolate while it's wet so it sticks.
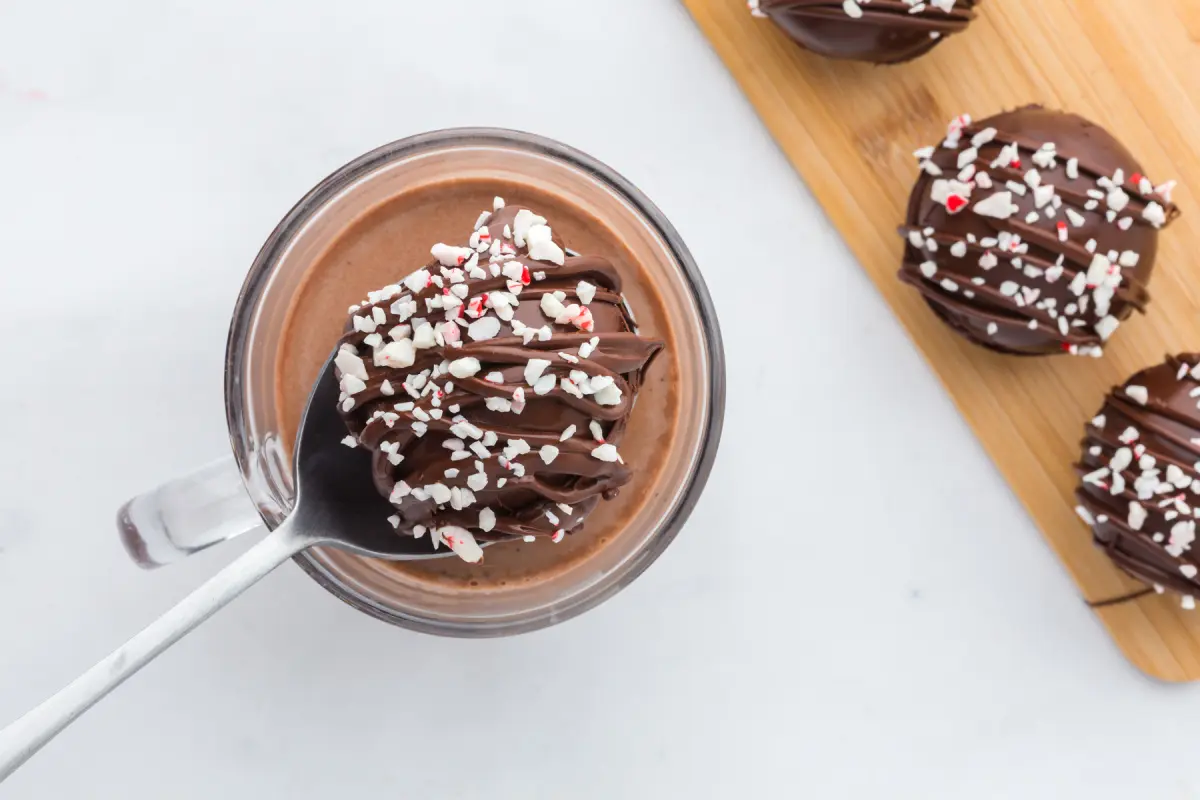
Step 7: Serve Hot Cocoa Bombs. Warm up milk in the microwave or on the stovetop so that it's hot, but not boiling. Place the hot chocolate bomb in the glass and stir. The hot milk will make your bomb open up and release the hot cocoa mix. Continue to mix until it's fully combined. You can add another bomb or some extra hot cocoa mix if you want a more intense chocolate flavor. Serve with a tray of your favorite holiday desserts, like these Christmas sugar cookie cups and Christmas crack cookies.
Expert Tips
- Don't overheat the chocolate. Melt it in short bursts and stir between each one. Overheated chocolate turns thick and grainy, and the shells come out dull and streaky.
- Work with cool hands. Warm fingers melt chocolate and leave prints. Run your hands under cold water first, or wear food-safe gloves when you assemble the bombs.
- Handle the shells by the rim. That's the thickest, sturdiest part. Pressing on the thin middle is how most cracks happen.
- Use one bomb per cup of milk. One bomb flavors about 1 cup of milk. For a big mug, use two.
- Pick a wide mug. Set the bomb in the mug first, then pour the steaming milk over it so it melts evenly and bursts open.
Homemade Hot Chocolate bombs Recipe FAQs
Most cracks come from a shell that's too thin. That's why we brush on a second coat of chocolate and make the rim the thickest part. Shells also crack when they're popped out before they're fully set, or when you press on the thin middle instead of the rim. If a shell cracks, patch it with a little melted chocolate and chill it again.
Yes. Here are two easy ways:
1. Egg method: Wrap the eggs and the egg carton in plastic wrap. Dip each wrapped egg in melted chocolate, let it set on parchment paper, then dip it again for a thicker shell. Run a butter knife under hot water and use it to melt a seam around the middle, which splits the shell into two halves. Slide out the egg, peel away the plastic, fill the halves, and press them back together. If kids are helping, hard-boil the eggs first in case one breaks.
2. Cupcake liner method: Set paper cupcake liners in a muffin tin and brush the insides with two coats of melted chocolate. Once they've set, peel off the paper. Fill half of the cups, then seal an empty cup on top using a warm plate. They come out shaped like little flying saucers instead of spheres, but they melt the same way.
Yes, but the hot chocolate will be thinner and less rich. If your cocoa mix is made for water, it works fine. For something in between, use hot water with a splash of whole milk or cream.
Storing & Make ahead
- Storage: Keep them in an airtight container at room temperature, out of the sun and below 70°F, for up to 2 weeks. Store them in the fridge if your kitchen runs warm, or wrap them well and freeze for up to 2 months. A clean egg carton keeps each bomb from getting crushed.
- Make ahead: Make them up to 2 weeks before you need them, or freeze them for up to 2 months. Frozen bombs can go straight into hot milk with no thawing.
- Gifting: Nestle each bomb in a cupcake liner inside a tin, or wrap them one at a time in cellophane bags tied with ribbon. Add a tag that says "Place in a mug and pour 1 cup steaming milk over the top."
- Using liquid ingredients: If yours have moist fillings like nut butter, caramel, or a boozy paste, make them closer to the day as they won't last as long.
How to Make Boozy Hot Chocolate Bombs (Adults Only)
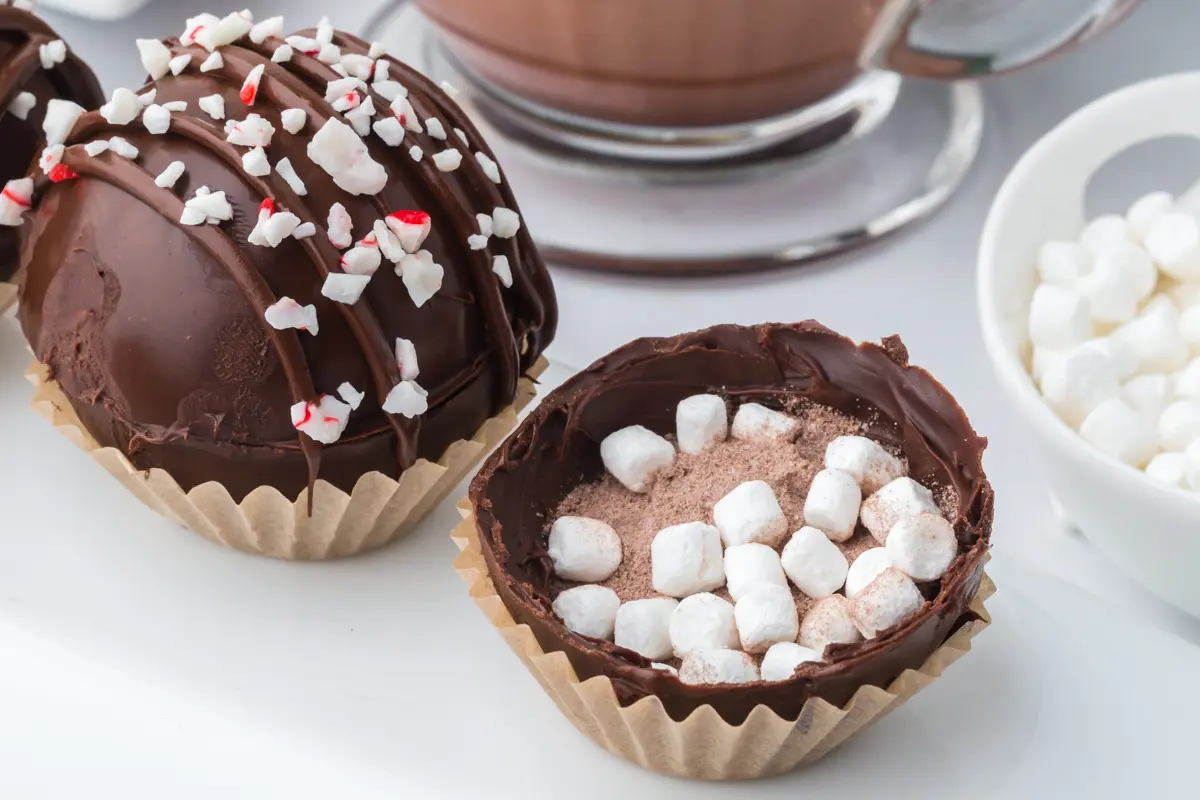
For a grown-up version, swap the dry cocoa filling for a thick liqueur paste. Liquid alcohol softens the shell, so we stir it into cocoa mix first so the chocolate holds up better.
- Our ratio: Mix ⅔ cup hot cocoa mix to ½ cup chilled liqueur to make enough for about 8 bombs. Stir until the paste is as thick as ganache, adding a little more cocoa if it's runny. Divide it up evenly among the shells and seal quickly, because the paste firms up as it sits.
- Skip the marshmallows inside boozy bombs. Add them to the mug after the bomb melts.
- Liqueurs we love: Baileys, Grand Marnier, Kahlúa, Frangelico, and RumChata.
- Store boozy bombs in the fridge or freezer, well wrapped, until you're ready to use them.
These are a great addition to a hot chocolate bar if you're having a party.
making Hot cocoa bombs Video



Hot Chocolate Bombs Recipe
Equipment
Ingredients
- 4 ounces chocolate at least 65% cocoa + extra if you want to drizzle the outside of the chocolate bombs
- 3-4 tablespoons hot cocoa mix minimum, depending on the size of your bombs up to 2 teaspoon per bomb
- 1 cup marshmallows optional, white or color version
Optional Decorations
Serving
- 6 cups milk
Instructions
- Place chocolate in a medium sized microwave safe bowl for 30 seconds. Remove and stir the chocolate for at least 1 minute. The residual heat from the warm chocolate will melt most of the other chocolate in the bowl. If needed, put back in microwave for 15 second intervals, stirring between each one.
- Pour about a teaspoon of melted chocolate into the mold. Assuming your mold is 2 inches. You'll need more chocolate if using larger molds. Use the back of the spoon to cover the entire half circle with chocolate, making sure to go all the way up the mold with chocolate. Place in fridge or freezer to harden. The chocolate hardens fairly quickly, so it should be ready for the second coat in less than 5 minutes.
- Repeat the process with a second coat of chocolate.
- Pull the mold out of freezer again and make sure it is fully hardened. Place 1 ½ to 2 teaspoons of hot cocoa mix in each side of the mold. It may be easier to place hot cocoa mix in one side and extra marshmallows in the other.
- Run a small plate under hot water for 1 to 2 minutes, then dry it well. It should be very warm but still comfortable to hold. Set an empty half rim-down on the plate for 2 to 3 seconds, just until the edge melts. Press it gently onto a filled half and line up the edges. Patch any gaps with a little extra melted chocolate, using the same melting method as above. Rewarm the plate every few bombs as it cools.
- Once the chocolate is fully hardened, you can decorate the outside as desired. Place the chocolate bombs on parchment or a pan and drizzle with chocolate. Immediately add flaky sea salt or sprinkles while the chocolate is still wet.
- To serve, warm 1 cup of milk in the microwave or on the stovetop. You want it hot, but not boiling. Place hot chocolate bomb in the glass and stir. The hot milk will make your bomb open up and release the hot cocoa mix. Stir to combine the loose hot cocoa and marshmallows. Allow to cool slightly and enjoy!
Video
Notes
- Make the shells sturdy. Brush on two thin coats of chocolate, and make the rim the thickest part. Handle the shells by the rim so they don't crack.
- Use steaming milk. Pour about 1 cup of steaming hot milk over each bomb in a wide mug, then stir. Warm milk won't open the shell.
- Storage: Keep them airtight at room temperature (below 70°F) for up to 2 weeks, or freeze for up to 2 months.
- Boozy version: For an adults-only version, see the boozy section in the post. Leave out the marshmallows and use cocoa and liqueur mixed to form a paste.
Paris says
We made bombs with alcohol and this is the best recipe. So easy and we drank them all The paste works great Thx for this terrific recipe it’s a keeper We’re making more tonight. Your the best KD keep up the good work
Karin and Ken says
You’re welcome! I’m so happy you’re enjoying this recipe! Thank you for your kind words. You honestly made my day! Take care and all the best. Karin
Karen says
How do you make the paste with the Baileys? I didn’t see that explained. Thanks!
Karin and Ken says
We use about 2/3 cup of cocoa, sometimes a little more depending on the alcohol we’re using, to 1/2 cup of Bailey’s or Grand Marnier usually. We always make more than 4 boozy hot cocoa bombs at a time. If you’re only making four hot cocoa bombs half the recipe and use 1/3 cup cocoa and 1/4 cup of alcohol to make your boozy hot cocoa bombs!
Then we fill each half of the cocoa bombs with the paste which is thick enough, similar to a ganache, that you have time to close and totally seal each bomb. Work as quickly as possible because the paste will harden somewhat.
Then, we serve our boozy hot cocoa bombs in hot chocolate milk.
Add marshmallows or whipped cream. Serve and enjoy! Hopefully you love these as much as we do! All the best. Karin
Charlene LaBonte says
Can you legally sell the ones with alcohol in them?
Karin and Ken says
I would think not. Definitely more for recreational use but you never know. Perhaps a lawyer would know better! All the best. Karin
Lea says
Hi, how long do the bombs last with alcohol in them?
Karin and Ken says
If I’m not using them right away I always store them inside the freezer until needed. Enjoy! These are definitely delicious! All the best. Karin
Lisa says
Do you have to make a paste or can I put a scoop of hot Cocoa and pour some Baileys over the powder?
Karin and Ken says
You can definitely pour baileys over the top of the powder before you seal up your hot cocoa bomb. Enjoy! Karin
Tanya says
Made these and filled them with all kinds of different treats. No one knew what they were getting. We had a lot of fun. We will definitely do again once we finish all from our freezer.great recipe love your site.
Karin and Ken says
Brilliant idea for both kids and adults! Thank you. I’ll be trying that myself! Take care and enjoy your day. Karin
Mac says
We made these and they were so good. Made them with paste and filled them with just alcohol and both we loved.I tell ya I couldn’t say which way we liked better.Both floated melted and tasted so good. I can’t wait to make again thx
Karin and Ken says
Thank you for sharing your experience with all of us! We appreciate it. Glad you enjoyed the recipe! Take care and be well. Karin
Bobbi says
Thank you for all the info. These bombs worked out great and well be trying them a different way again.Love your site.Cheers
Karin and Ken says
Glad to hear all went well. Thank you for your kind words I try my best. Take care. Karin
Angie says
Thank you for making this post. It was very detailed and helpful! I was having issues with alcohol inside. I didn't think to make a paste. I was thinking of a ganache filling, but it would be very rich.
Karin and Ken says
The paste works great too! Please let me know what you think after you try it. I would love to hear! Glad to be of help. Enjoy! All the best. Karin
CM says
I mixed the hot cocoa powder with the Baileys liquor creating a semi paste like filling, then. added it to my bottom half of chocolate bomb, then infused the top half of the bomb to the bottom. It worked great!
Karin and Ken says
Glad to hear it worked well for you. Creating a paste is a great idea! Migh t just try that myself! All the best. Karin
Nathalie Manzano says
Thank you for explaining this in such a simple way! have a question, can I fill them with cognac or Bailey’s? Caramel syrup?
Please and thank you!
Karin and Ken says
You basically have a few options. First you can easily add some caramel chips (or peanut butter or butterscotch chips for that matter) to the inside of your bomb. Second, simply add a squeeze of caramel or spoonful into the middle of the bomb as you're building it. As for alcohol I have done this with success but liqueurs and alcohols need to be treated a little differently in my experience. First, I make sure the alcohol is cold before I add it to the chocolate bomb. Second, I add the alcohol last, after the hot chocolate mix or cocoa powder or whatever else I am going to add, EXCEPT marshmallows. You have to add the marshmallows to the hot chocolate after the bomb has dissolved. The marshmallows will not work the same once you add any kind of alcohol to the bomb. Let me tell you that these are still worth making even if you have to add marshmallows after the bomb has started to melt or is almost meted. Please let me know what you think after you try it if you do. I would love to hear. All the best and happy holidays. Karin